Posts: 496
Threads: 22
Joined: Dec 2008
I recently acquired a Stella Scale Models Martins Creek station/yard office. It is such a nice kit, and so easy to build, I thought I'd try to write a review for it. The building walls are cast as one piece, as is the roof, and they are incredibly detailed. Assembling the kit for the most part is a matter of painting. Here are pics of the wall unit, the first shows one side as it comes, the other shows the other side, and you can see I removed material below the window in order to build a loading door there.
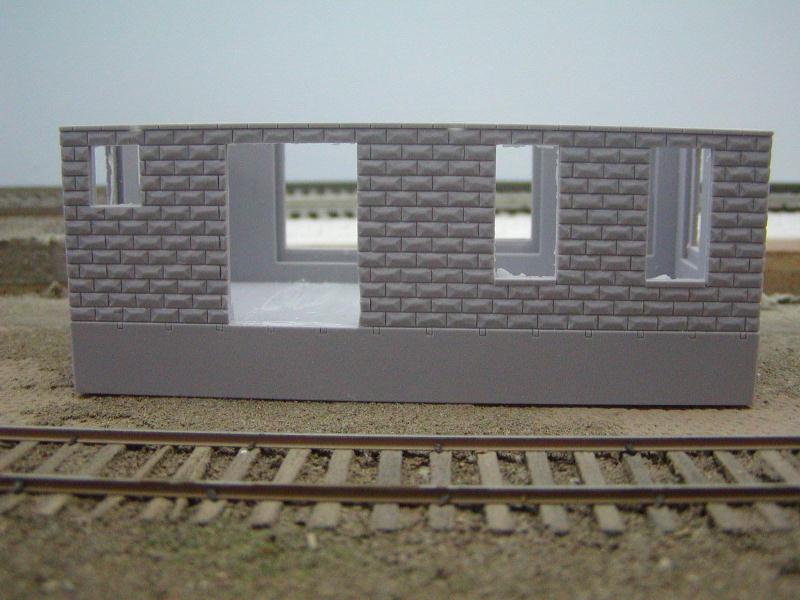
I wound up also doing this on the other side. The very informative instruction sheet mentions that there is evidence that a wood platform surrounded the structure, but that there are no photographs of it. One of the indicators that such a platform existed was that what were once loading doors were converted to windows, as the model comes. Also, there were 2x6 timbers around the structure which could have supported a platform, this detail is on the wall unit, you can see them just below the first course of stone. Actually, the bldg is not built of stone, but prefab concrete block cast to look like stone. They were a concrete color. The building was apparently used as a yard office on the prototype, but since my layout is freelanced, and I needed a freight house, I elected to scratchbuild the wood platform, and loading dock doors.
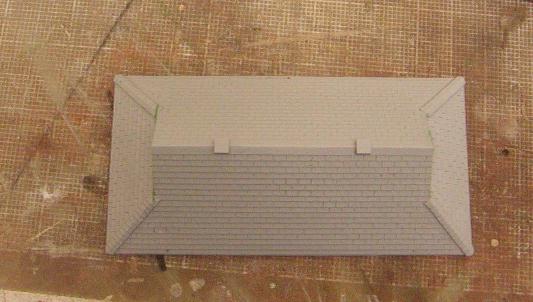
Here is a pic of the roof

Posts: 496
Threads: 22
Joined: Dec 2008
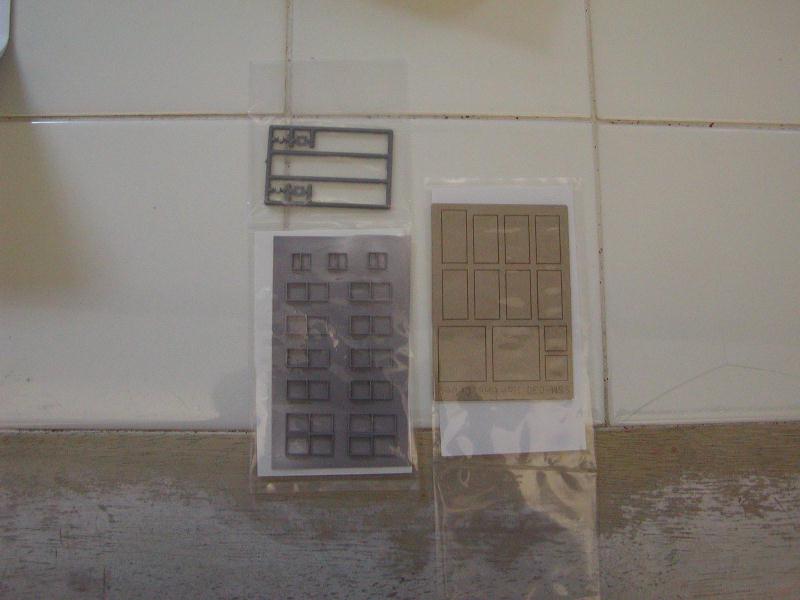
Here is a pic of some of the other parts, clockwise from top left are Tichy parts for smokestacks, laser cut acylic windows (with protective paper still attached) and the window frames, and door. Lightly rubbing the window frames on fine sandpaper freed them from the resin matrix with little flash remaining.
Here I've added the styrene strip used to model the concrete courses at the bottom of the wall, and I've painted the wall.

Window installation is a bit different than usual, and very easy. The acrylic window glass is glued in place from the rear, the rear of the walls have indentations cast into them to accept the glazing. Then the window frame castings are glued to the acrylic. You can see what I mean in the first photo, look at the inside of the rear wall though the front windows. Here, I've installed the windows, have started the wood platform, and built a loading door.
Posts: 496
Threads: 22
Joined: Dec 2008
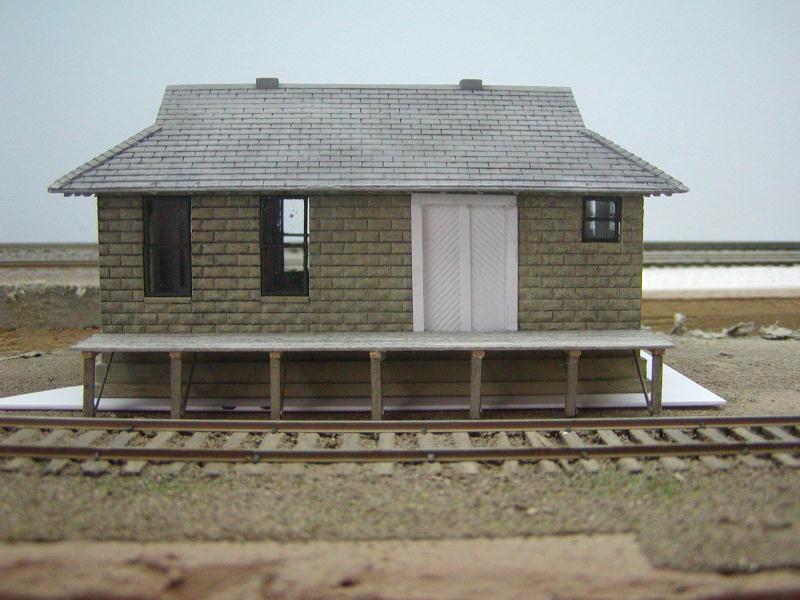
I've built the remaining platforms, painted the door, and better lighting in this photo shows off the nicely detailed walls.
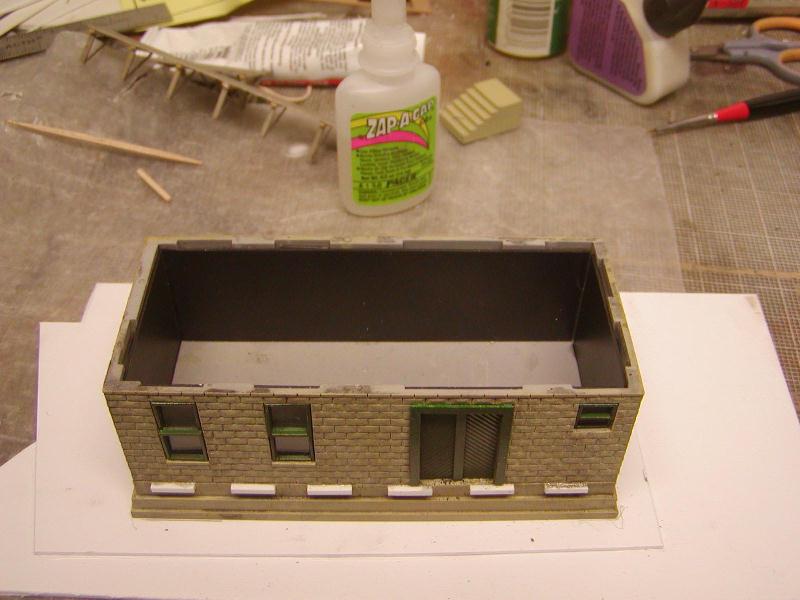
Here you can see how I glued styrene bits to the wall to fasten the platforms to. I've also added black styrene to the inside to prevent seeing thru the interior.
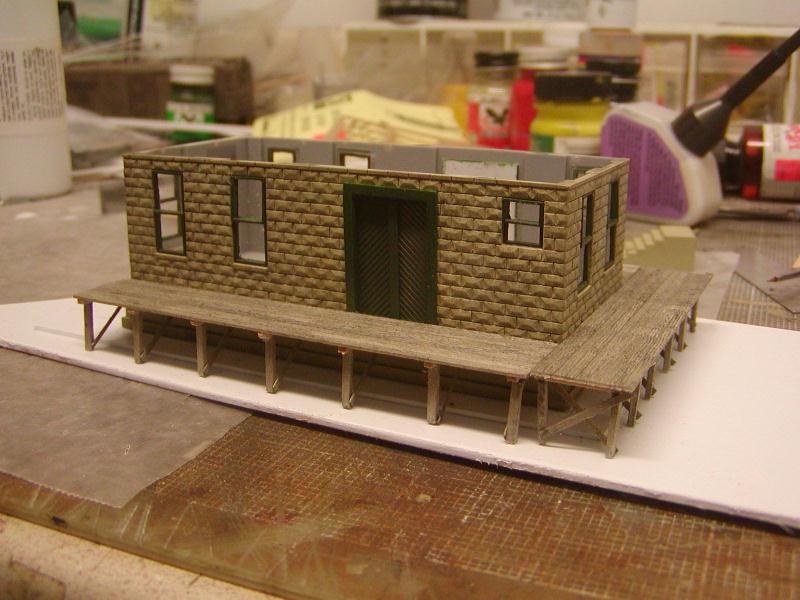
Posts: 1,215
Threads: 89
Joined: Dec 2008
jglfan Wrote:The very informative instruction sheet mentions that there is evidence that a wood platform surrounded the structure, but that there are no photographs of it. One of the indicators that such a platform existed was that what were once loading doors were converted to windows, as the model comes. Also, there were 2x6 timbers around the structure which could have supported a platform, this detail is on the wall unit, you can see them just below the first course of stone. Here you go:
![[Image: MartinsCreekYardOffice.jpg]](http://i21.photobucket.com/albums/b267/tomustang/MartinsCreekYardOffice.jpg)
Nice work so far, didn't know such a kit existed, and the wood for the rails look great 
Tom
Model Conrail
PM me to get a hold of me.
Posts: 496
Threads: 22
Joined: Dec 2008
The only difficulty I had in assembling the kit was the handrails. .020 brass wire is supplied to make the railings, and a template for cutting the parts. Here you see my first attempt.
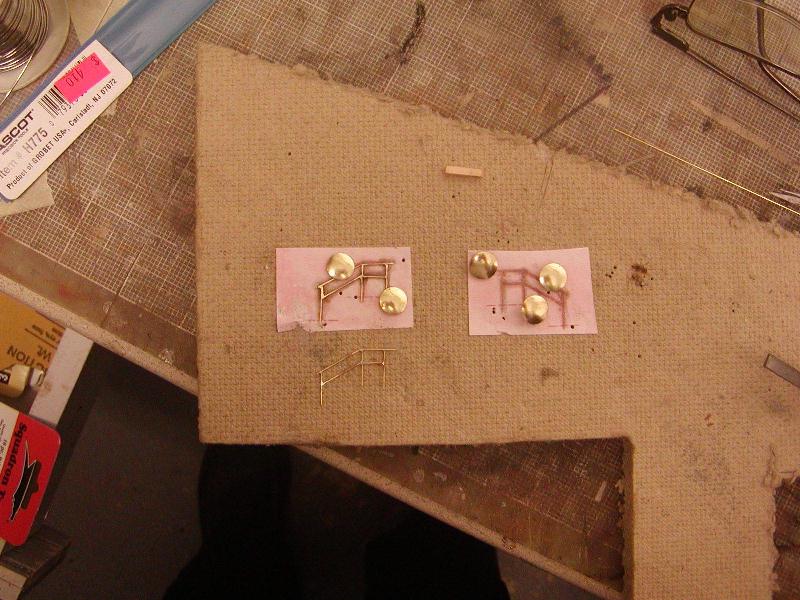
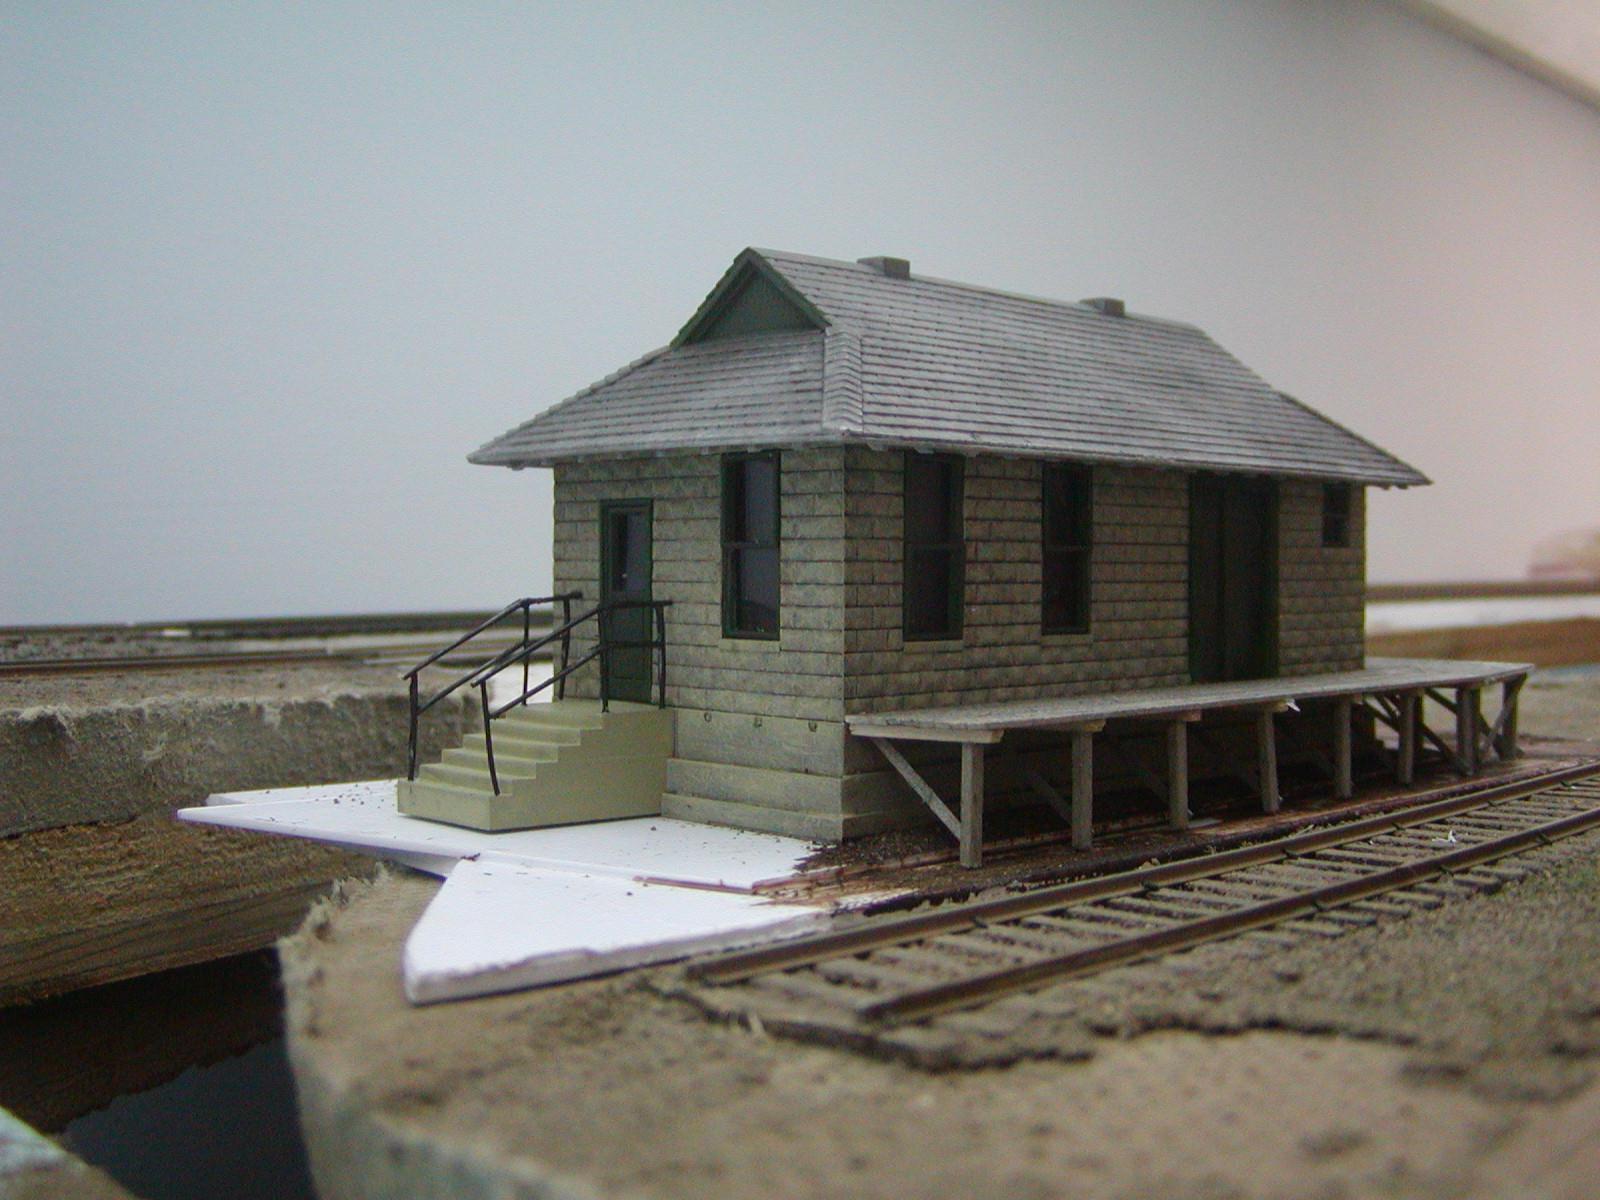
I decided to opt for using CA rather than solder. I laid out the pieces on wax paper over teh template, and glued. I thought they looked reasonably good. However, when I took them off teh wax paper, I had quite a bit of nasty looking excess glue. When I tried to clean them up, they fell apart. I decided to use .020 styrene rod instead, and not to worry about the small bend in the right hand side railing, meant to accomodate the mailbox. Particularly since I was not modeling the prototype. I built three pairs before I had two I felt were acceptable. I painted and installed them, but they warped a bit and while they looked ok from a 90 degree angle, you can see they didn't look too good at this angle.
So I printed new templates, glued them to some Homasote, and tried soldering brass. This actually worked pretty well.

Posts: 496
Threads: 22
Joined: Dec 2008
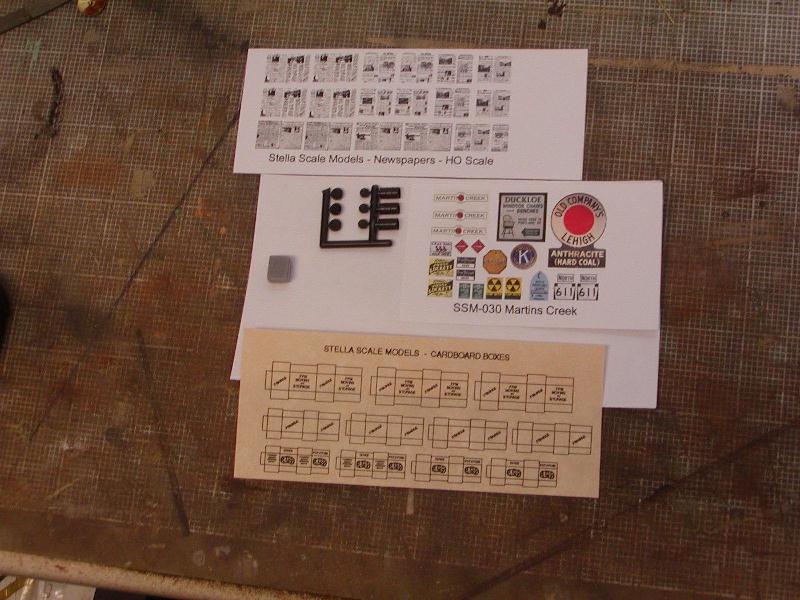
Here is some of the other detail items included with the kit. Signs, printouts of carton boxes you fold and glue over a wood or styrene core, newspapers, and three drums with seperate tops. Very nice touch. Oh, also a relay cabinet I elected not to use but save for future use.
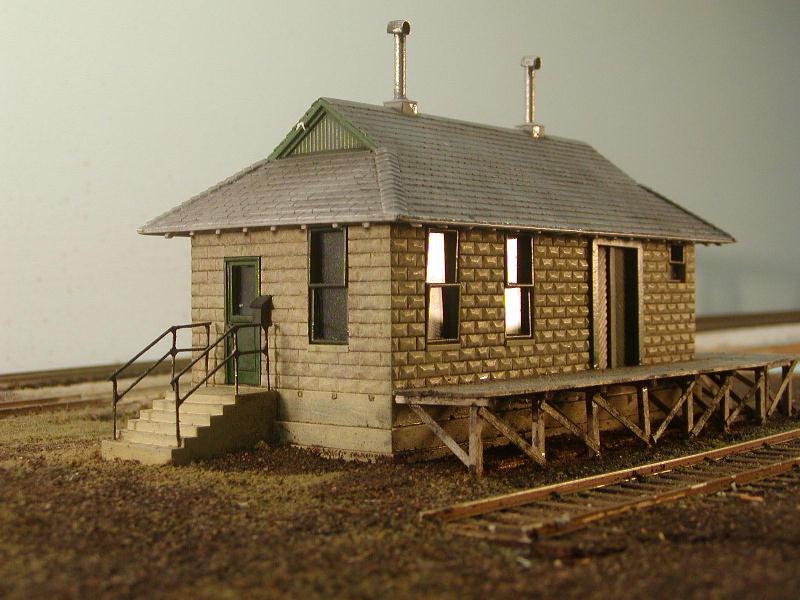
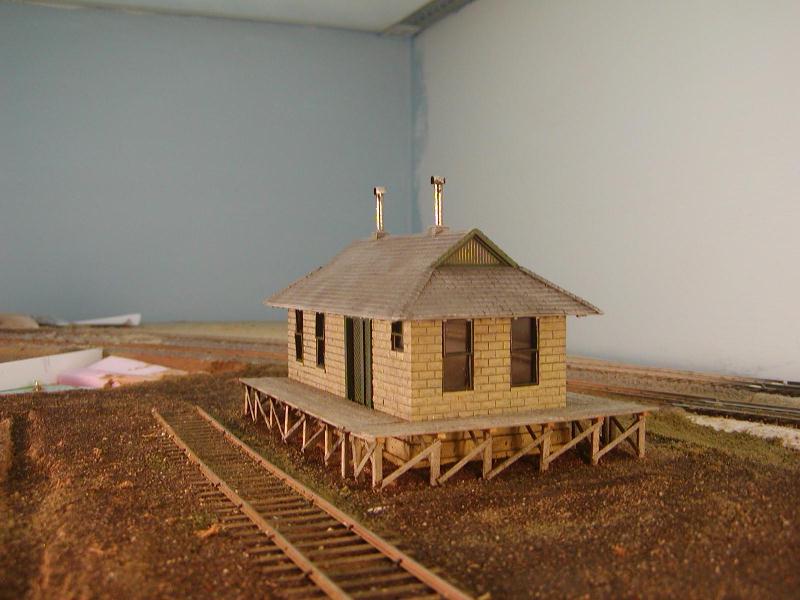
As you can see, with the exception of the handrails, whose challenge will differ from modeller to modeller based on their skills, this is an easy to build kit, in fact the painting takes longer than assembly. Once painted, the windows and door glue in place in minutes, the roof in seconds. The smokestacks just require a couple holes to be drilled. And you wind up with a very interesting model, I love the rooflines. You have no problems with getting roof panels or wall corners aligned. And you get some nice details. I recommend this kit highly to anyone looking for a masonry station/yard office. Her are some final shots, with a minimum of scenery put in place.
Posts: 496
Threads: 22
Joined: Dec 2008
Thanks for posting that proto picture Tom. The model appears to be dead on.
Posts: 50
Threads: 0
Joined: Aug 2009
....except for the upside down window. Very nice job otherwise!
I was a contest judge years ago and things like this happen more often than you think....like the time a contest entrant mounted the front coupler upside-down on his scratchbuilt steam locomotive. 
Posts: 2,724
Threads: 160
Joined: Dec 2008
Nice work JGL. That kits come a long way since I last saw it.
My other car is a locomotive, ARHS restoration crew
Posts: 992
Threads: 81
Joined: Dec 2008
Thanks for taking the time to write that up. That would be a nice addition to nearly anyones layout.
Posts: 496
Threads: 22
Joined: Dec 2008
Trolleyfan Wrote:....except for the upside down window. Very nice job otherwise!
I was a contest judge years ago and things like this happen more often than you think....like the time a contest entrant mounted the front coupler upside-down on his scratchbuilt steam locomotive. 
He. I noticed the upside down window a short while after posting the photos. OMG!! It has since been corrected.
Seeing the building, which is located in the middle of a rather large unscenicked portion of the layout, makes me want to do more work there. But, this structure was just something to do while waiting for replacement parts for a Jordan steam crane kit I'm working on, and I received them, so back to work on the yard scene! Link here for any who have not been there and may be interested. <!-- l --><a class="postlink-local" href="http://www.the-gauge.net/forum/viewtopic.php?f=17&t=561">viewtopic.php?f=17&t=561</a><!-- l -->
Posts: 2,458
Threads: 57
Joined: Dec 2008
Thanks for the correction on Stella Models....I took a peek at it and it looks very nice. I'll have to save my pennies to get me one..!! 
Gus (LC&P).
Posts: 496
Threads: 22
Joined: Dec 2008
Strange, it seems Steamtrains first post about not being able to locate Stella Scale Models, and my reply with a link, have disappeared. Here it is again:
<!-- m --><a class="postlink" href="http://www.stellascalemodels.com/">http://www.stellascalemodels.com/</a><!-- m -->
|


![[Image: MartinsCreekYardOffice.jpg]](http://i21.photobucket.com/albums/b267/tomustang/MartinsCreekYardOffice.jpg)


