Charlie b's layout
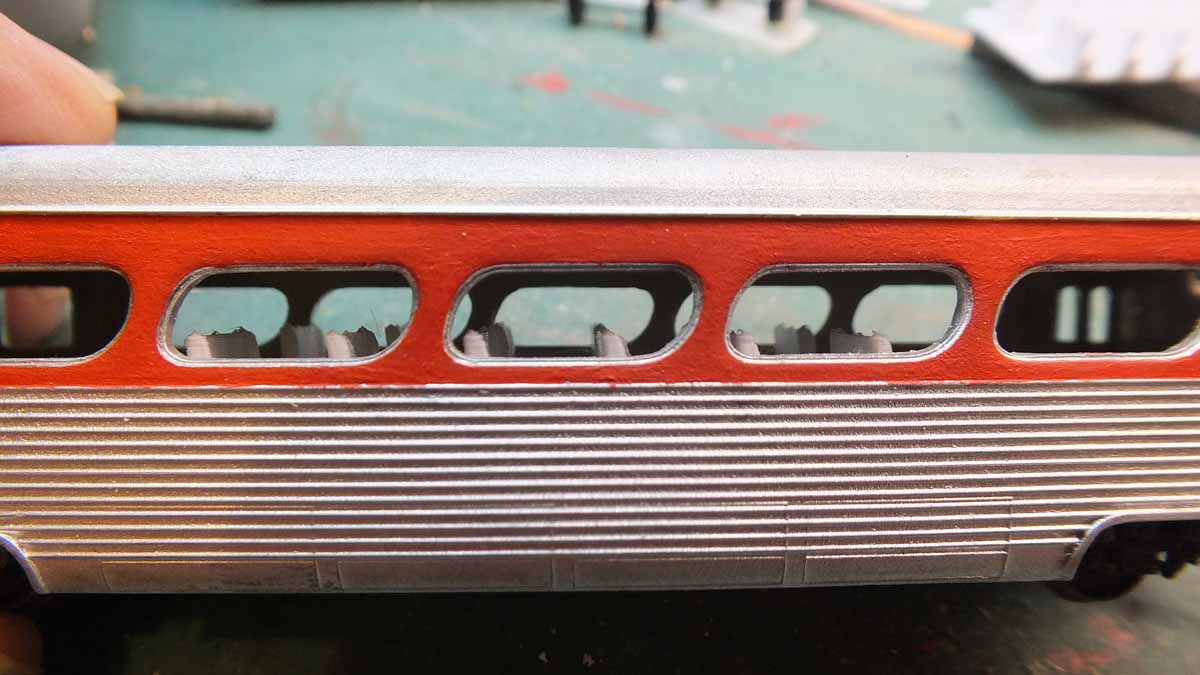
With some links from DoctorWayne I got enough information that I can start my Aerotrain project.  I have an unpowered locomotive and 9 cars that have no interiors or lighting. 
I have the needed decals, a locomotive that can be a donor for the power source, and one (1) interior from Gold Rush Bay that I purchased on Ebay . 
I started with the  HO Train 50' Palace Pullman Passenger Car White Interior Roundhouse MDC , Item# 173941886754 from Gold Rush Bay. https://www.goldrushbay.com/     
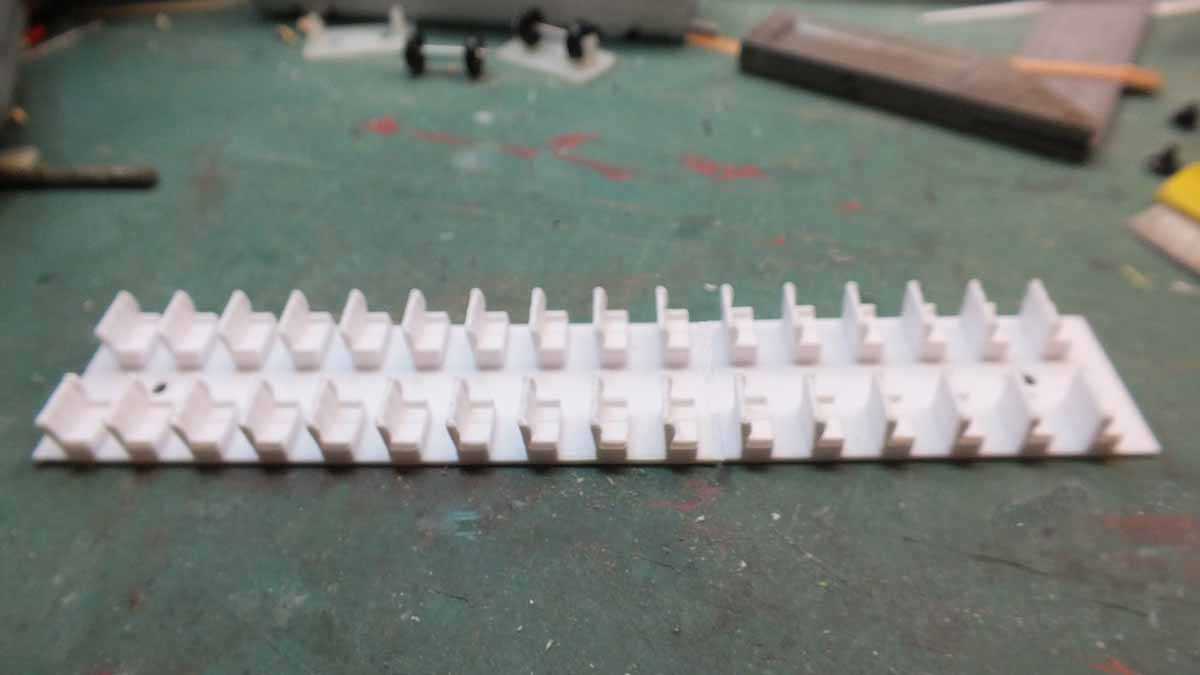
I made a cut that left me 10 rows of seats.     
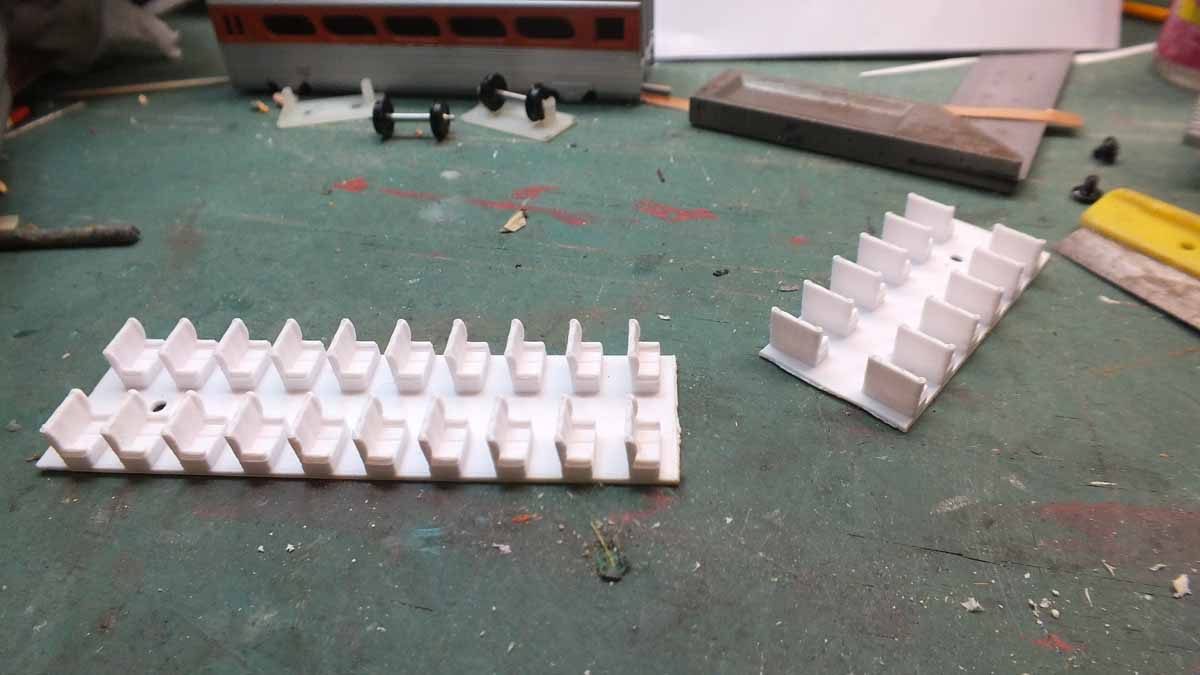
I scribed and broke them apart (and now know I should use a razor saw for a better edge.)
The front row of seats needs to be reversed so I cut them apart to re-glue them so the end seats are facing. If a 1/4 inch was added to the floor on each end they would be
perfect.  
   
I used the set of 6 rows to test for the height inside and it works out fine.  (The picture also shows the cars need a good paint job. Wink )
   
There is a bulkhead at the end of the seating with doors to the vestibule. I found one picture that shows this.    
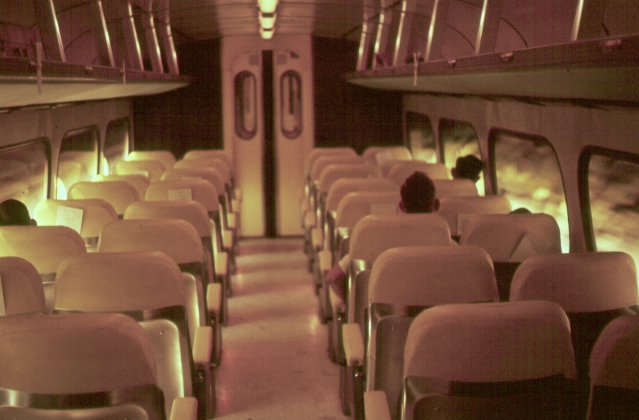
I have sent these pictures to Christian to see if he can make the seating I need to eliminate the cutting and gluing.  The bulkheads to the vestibules won't be too hard because they are not all that visible. 


At least I have a start. 
Charlie
Reply
No pictures tonight but I wanted to post this. Sometimes things just work out. I went to the train barn tonight and got the aerotrain locomotive down and thought about a donor power train. I remembered I had bought a trainman BN GP9m on sale 10 or 15 years ago and after 15 minutes work the frame and motors are a perfect fit.. I will have to add a decoder but there is lots of room and there are red lights as well as the headlights which will wire right to the decoder. The cars will be more work than the locomotive.  If I recall the locomotive was 9 bucks.  2285_ 2285_
Charlie
Reply
Here is a little more information on the Aerotrain project. It starts with an unpowered Bowser (Varney) set consisting of the locomotive and 3 cars (one is the end observation car.
I have the trainman that is a perfect donor. I got this quite a few years ago on sale for $9.99 I believe and it would have been a donor for something later or later still because there is no place in my time period for a Burlington Northern GP9M         I had to do a little fileing on the rear corners, as well as the two pins by the fuel tanks.         
I may have to file the slot in the rear of the locomotive another 64th or so to allow the shell to drop a tad more for the shell to better align with the first car. I had to cut the couple pocket off and move it back 3/8 of an inch so the gap is more realistic, The height is right on.  The powered frame fits perfectly.      , and the wheel base is so close that it works fine.  Other repowers I read about they removed the front axle and wheel from the rear truck. It isn't noticeable so I think I will leave it complete.    
Next step is the lighting and the decoder. I don't think I will add sound because I will just figure these were supposed to be quiet
Charlie
Reply
It's nice to see that you've finally got it powered, Charlie.

Wayne
Reply
Wow, that is so cool Charlie. Nice job..... Applause Applause Applause Applause
Don (ezdays) Day
Board administrator and
founder of the CANYON STATE RAILROAD
Reply
Very nice work Charlie!
Mike

Sent from my pocket calculator using two tin cans and a string
Reply
I have spent a week (at a very slow pace) cleaning the layout (which wasn't bad considering it is almost 10 years old) and one of the things that sidetracked me was the cattle loading area. My cattle were all lazy, continually falling over. 
Like all modelers we have things accumulated that we have no use for but someday, it just might come in handy.  Well, I have a lot of these and I had no idea where they came from, nor what they were.      but when I got them I remember thinking they might work for fiber optics, and still may. Anyhow, I took some of these apart and it dawned on me these were the tags they use in stores to hold pairs of items together and some stores use different colored ones to denote sale items so that mystery was solved. 
Getting back to the lazy cattle, they needed some thing to support them that wasn't very obvious so I drilled the bellies and took the stems of these tags and super glued them in the holes.      Another hole in the loading platform and my cattle are all in a row.      and the supports are not very visible.      .
Of course the corral looked ok until I took the pictures and notice the post bottoms that are missing...Oh well  Goldth. Next time. 
Charlie
Reply
Should be easy enough to cut some shims out of sheet stock. In the mean time when do we fire up the grill and throw the burgers on?
Mike

Sent from my pocket calculator using two tin cans and a string
Reply
(09-18-2019, 04:43 AM)Tyson Rayles Wrote: Should be easy enough to cut some shims out  of sheet stock. In the mean time when do we fire up the grill and throw the burgers on?

Burgers? I'm looking for a nice steak.

Speaking of nice, that's a nice job there Charlie, maybe just add someone working on the posts will explain why they're not there.
Don (ezdays) Day
Board administrator and
founder of the CANYON STATE RAILROAD
Reply
(09-18-2019, 09:41 AM)ezdays Wrote:
(09-18-2019, 04:43 AM)Tyson Rayles Wrote: Should be easy enough to cut some shims out  of sheet stock. In the mean time when do we fire up the grill and throw the burgers on?

Burgers? I'm looking for a nice steak.

Speaking of nice, that's a nice job there Charlie, maybe just add someone working on the posts will explain why they're not there.

We buy a full bubble pack of New York Strips when they are on sale. Usually 3.68 a pound and we go on Monday or Wednesday when we get an additional 5% off because we're old, then we seal the steaks 2 to a pack with our food saver. 
Charlie
Reply
Well, at last I have started to finish the last major corner on the layout. Hopefully I can make a good looking stone quarry in this location. I have many pictures from the East Liverpool Historical society to use to make it look real. I am impressed with the tools and the cranes they had. This picture shows the main section     
Here is another that is a close up of the mechanism that worked these hand operated cranes. There just happened to be laying around.     
there are many interesting items laying around.  Here is a link to a tool catalog that will keep many a modeler occupied for hours. https://quarriesandbeyond.org/articles_a...ol_cat.pdf
And this is what I have to show for my work today....(have to work slow, foam is hard to cut.... Icon_e_biggrin          
Charlie
Reply
Working on Christmas Eve. first coat of Durabond applied and setting. working with 45 gives me time to apply it, take a picture and see the globs that should be smoothed before it sets.  Icon_e_biggrin 
                   
Charlie
Reply
Slow progress but I am getting there.      . I will put a smoother coat on in the morning and test fit it before I start building and installing the jib cranes. 
This is the road that the finished stones will be moved down to the railroad siding for loading.    
Charlie
Reply
I decided a test fit was in order before I did any more. It is going to work OK.      

I will do some smoothing on the pit walls and add another couple inches on the top today and study the pictures some more. I am not trying for an exact duplicate, but enough that my East Liverpool relatives can see what it is. 

Charlie
Reply
Nice work Charlie, I find doing landscaping creative and rewarding.
Don (ezdays) Day
Board administrator and
founder of the CANYON STATE RAILROAD
Reply


Forum Jump:


Users browsing this thread: 3 Guest(s)