59th and Rust
#31
faraway Wrote:Ray, you created a wonderful atmosphere on your layout Thumbsup

Cheers

:jawdrop: great work Ray Thumbsup
greeting from the blade city Solingen / gruß aus der Klingenstadt Solingen

Harry

Scale Z and N
Reply
#32
The cobbled areas are made of a mixture of plastic and fillers,first thing i did was cut some Wills cobble plastic sheet in to random shapes they where then glue down with contact adhesive (making sure the cobbles all face the same way),then i added my mix of filler,PVA and grey emulsion paint (what you use on the walls in your house),this was spread around the peices of cobble.

   
Once it had set i carved around the edges to make them look like areas where the asphalt have wore away,this was then given a coat of mid grey paint.

   
This was followed by a coat of dark brown,when this was nearly dry the tops were wiped with a cloth leaveing the brown between the cobbles.

   
When all this was dry they had a wash of brown and black,when this was dry i did a bit of dry brushing here and there to finish it off.

   
All the cobbled areas where given a coat of PVA,this was then wiped of and a grass mixture was sprinkled over them and left to dry,all that was left to do was to hoover those areas with my mini-vac.

   
ALLthat was left was to make it look rundown with rubbish etc.

Rust St was done the same way,but i used full sheets of cobbleing with asphalt ramp either side of the tracks.

Hope this is of some use to you??

Ray
Reply
#33
Ray,

Very nice job on the detail.
Reply
#34
Brilliant details! Very well done!
Cheers, Bernd

Please visit also my website www.us-modelsof1900.de.
You can read some more about my model projects and interests in my chronicle of facebook.
Reply
#35
The streets of Newark, NJ were still cobblestone in the 1950s, when I would drive through with my father. He called them "Belgian blocks".
Reply
#36
jwb Wrote:The streets of Newark, NJ were still cobblestone in the 1950s, when I would drive through with my father. He called them "Belgian blocks".

We call them "cat head stones" - and we use them still in historic streets of old urban districts.
Cheers, Bernd

Please visit also my website www.us-modelsof1900.de.
You can read some more about my model projects and interests in my chronicle of facebook.
Reply
#37
Ray!

A very good work you have done. Thumbsup
I am still studying carefully the numerous details on your last photos, still hoping to catch the essence of industrial areas in the US and also hope to be able to redo this neclected and somewhat shabby look when completing my layout.

Lutz
Reply
#38
Lutz
I personally think its the small details that makes a layout,it's sometimes over looked, but everyone has there own ideas,and at the end of the day "it's there layout".

i've taken a few more photo's around the track to give you some more ideas,if anyone has any question ,ask away Welcome


Ray
Reply
#39
I have to agree that your details really catch my eye. Along with everything else, the leaking oil drums are a nice touch. Thumbsup Makes me want to litter up some of my yard areas a bit!
Reply
#40
Really great work Thumbsup
Reply
#41
Ray!

How do you made the carton boxes?

Lutz
Reply
#42
Ray, I see you have adopted "Dashing Dan" as your Avatar.. Thumbsup Thumbsup Thumbsup
Yup !, that's the logo that should have been on the C-420
We always learn far more from our own mistakes, than we will ever learn from another's advice.
The greatest place to live life, is on the sharp leading edge of a learning curve.
Lead me not into temptation.....I can find it myself!
Reply
#43
Fantastic layout Ray, it's great to see it again. I appreciate the extra photos of the 'debris' and details, I hope to emulate your success on my own run down industrial area.

Cheers,

Kev
Such is life
Reply
#44
Lutz
Cardboard boxes mm!!,first i tried using thin card it was ok,but wasn't really happy with them, so i had to think of something else,them the idea hit me while i was building some spot lights for my other layout HELM.
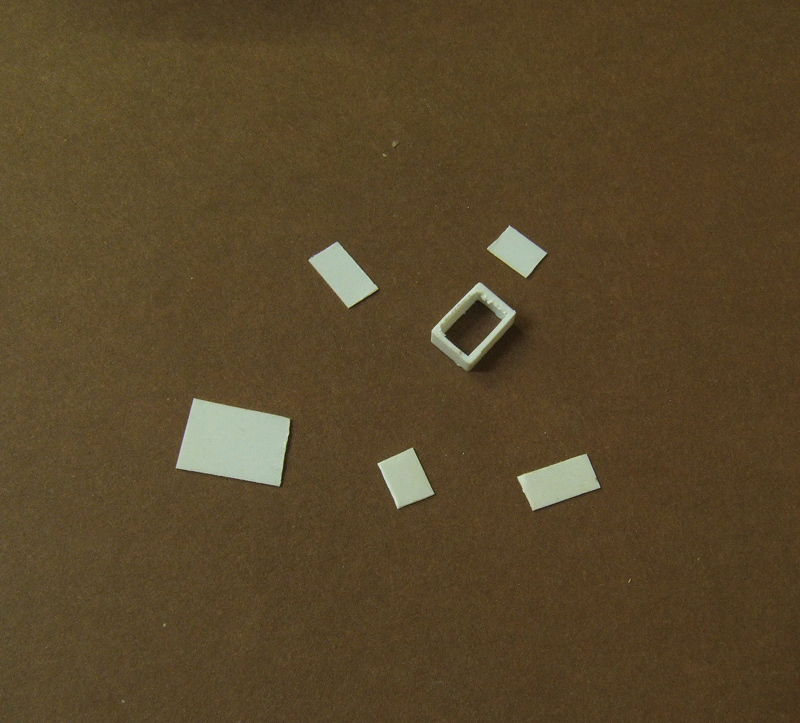
Plastic tube,well squares/rectangles ones and 10-20thou plasticard.
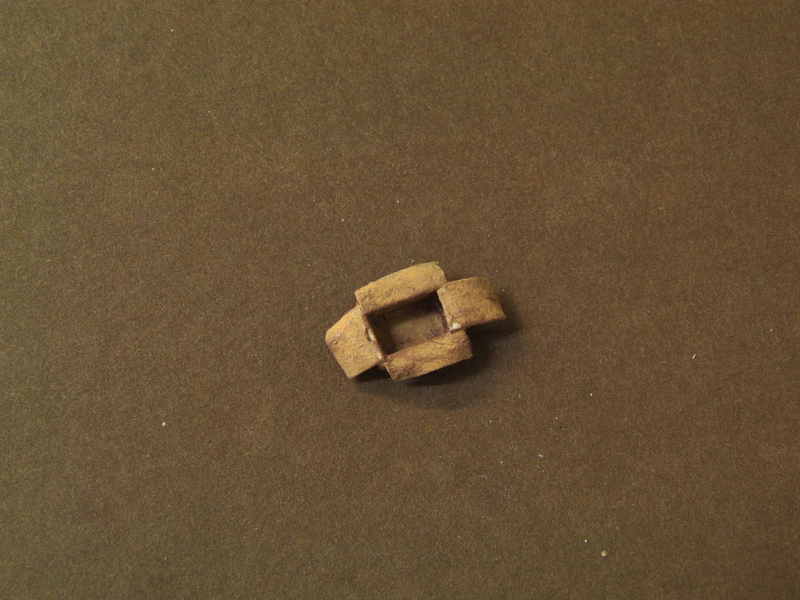
   

first up decide what size box you want,cut a peice of tube,then cut four lids out of the plasticard and a bit for the bottom.


Then glue the base on


Next trim the base,you could miss the base out to have a box without a base.
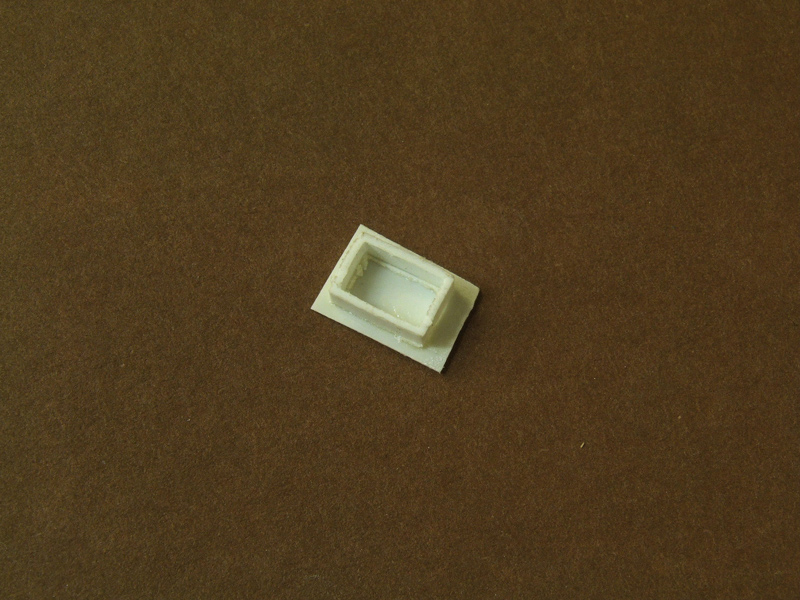
   

This is follow by the four peices which are the lids,you can glue some inside the box if you wish.
   

When all this is dry,i gave them a coat of paint (cardboard colour) and a dusting of womens make up.

And there rest they say is history.

It took me about 10 minutes a box,when you dry the paint using a hairdryer it softens the lids, you can bend them into different shapes,so they all don't look the same.

it a quick and easy way to make boxes,and i'm pleased how they worked out.

Clad you all like them.
Ray
Reply
#45
Ray have you seen this? (Scroll down some) <!-- l --><a class="postlink-local" href="http://www.the-gauge.net/forum/viewtopic.php?f=46&t=169&start=240">viewtopic.php?f=46&t=169&start=240</a><!-- l -->


ratled
Modleing the Jefferson Branch in HO  on the Southern Pacific
Reply


Forum Jump:


Users browsing this thread: 1 Guest(s)