Posts: 2,724
Threads: 160
Joined: Dec 2008
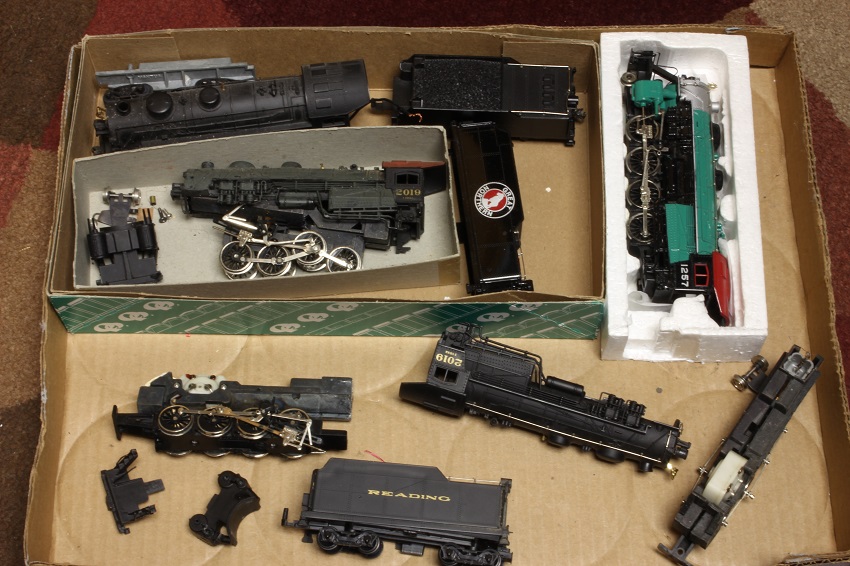
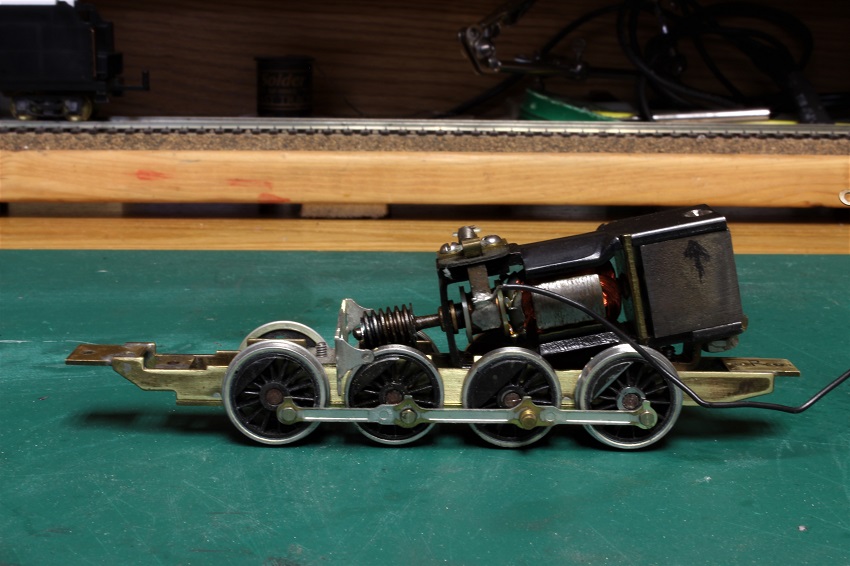
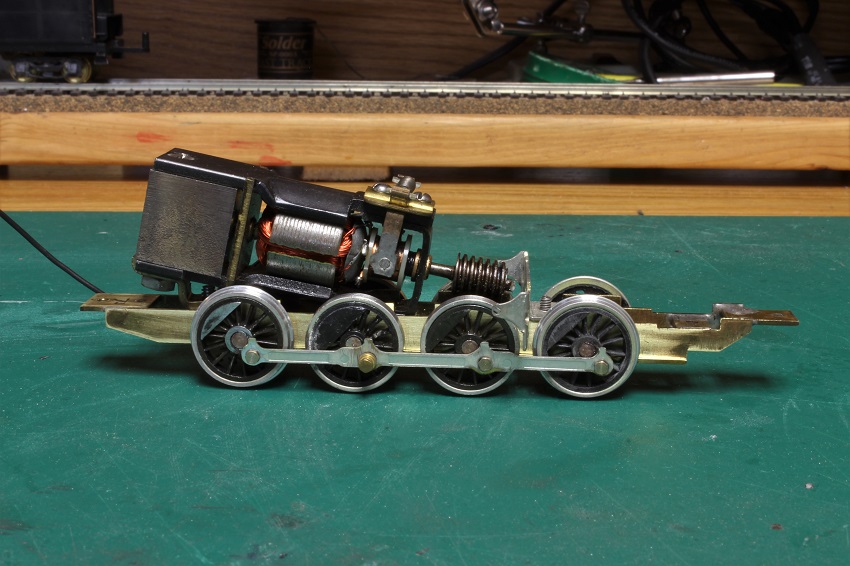
I started working on a discontinued Bowser repower kit for the Bachmann Rdg 2-8-0. It was a used kit that someone else had started, and didn't do a very good job on. I managed to pick it up on fleabay for a good price after about two years of searching for one. After correcting A few mistakes such as reversed drivers, lost of grime, an odd attempt to use the old Bachmann valve gear, and a bind in the side rods, I got the drive to this point in a few hours. I have already got the tender up to the point where it is ready for primer and paint. That build is here, starting on page #3 ---->>>> <!-- l --><a class="postlink-local" href="http://www.bigbluetrains.com/forum/viewtopic.php?f=35&t=9294">viewtopic.php?f=35&t=9294</a><!-- l -->
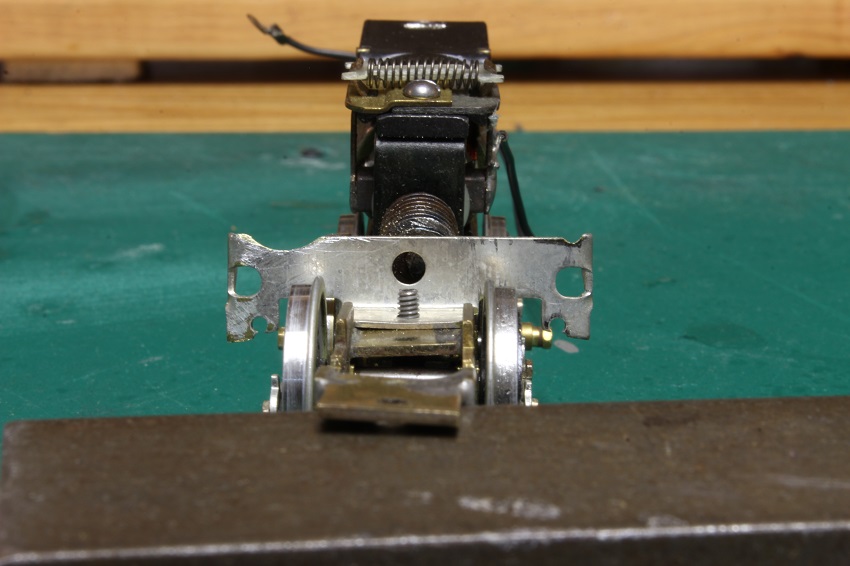
The frame has a slight bend to it that will have to be addressed. It shows up well in this pic. Luckily it's only the very front of the frame and not where the drivers mount.
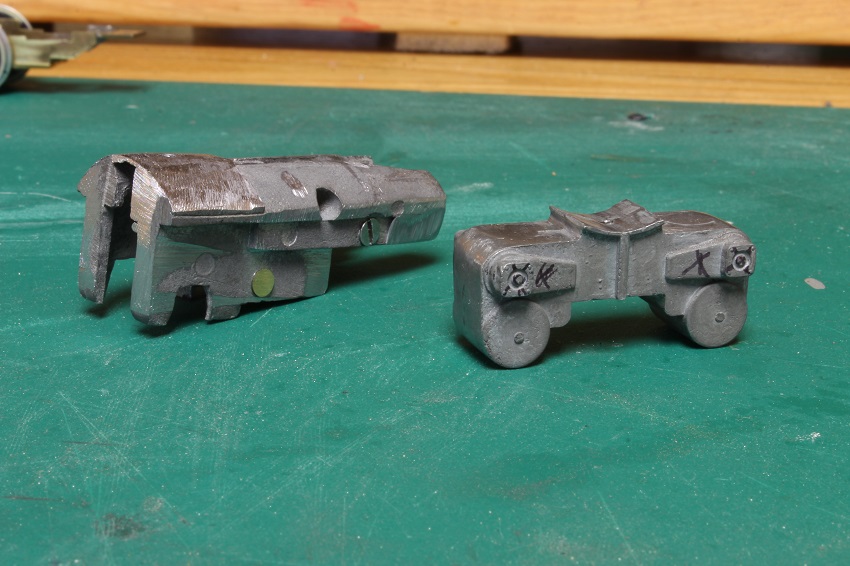
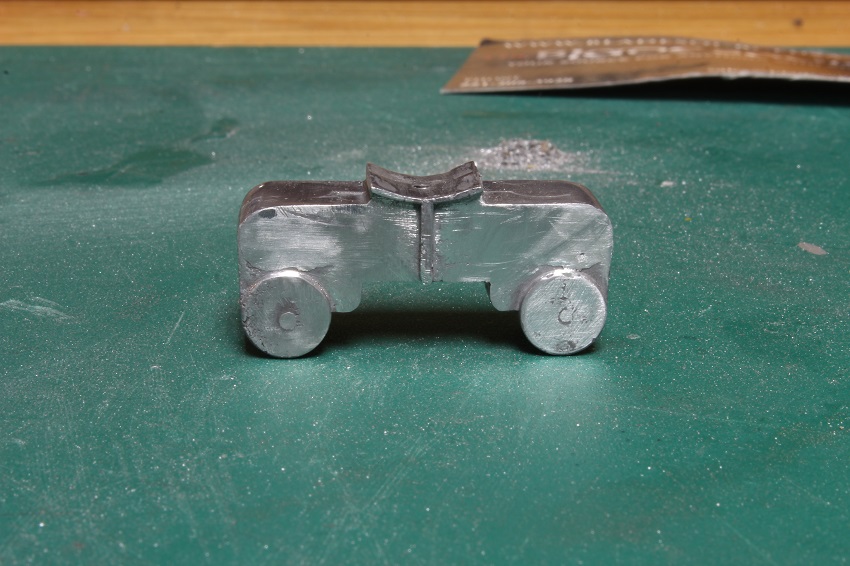
The Bowser kit supplies you with this weight and set of cast cylinders. I'm not entirely convinced that these are the correct cylinders for this kit, as they look much to Pennsy and do not match the prototype pics of this engine that I have. I ground down the weight to get it to fit correctly and removed the steam delivery pipes from the cylinders. I have also marked the incorrect details to be removed.
Speaking of the prototype pics, here's two that I am using as reference.
<!-- m --><a class="postlink" href="http://www.northeast.railfan.net/images/rdg2018sa.jpg">http://www.northeast.railfan.net/images/rdg2018sa.jpg</a><!-- m -->
<!-- m --><a class="postlink" href="http://www.northeast.railfan.net/images/tr_rdg2016.jpg">http://www.northeast.railfan.net/images/tr_rdg2016.jpg</a><!-- m -->
When it comes time for the addition of the boiler I have plenty to chose from. I have picked up several victims for this build in the time it took me to find one of the kits.
My other car is a locomotive, ARHS restoration crew
Posts: 446
Threads: 23
Joined: Mar 2009
* Good luck with the Reading I-10. A good choice for your layout. To bad no one ever made a cast boiler for that loco.
PoP
" It's a Heck of a Day " !!!!
Posts: 248
Threads: 52
Joined: Oct 2012
Great to see this build getting underway  . I remember doing some research on this Bowser kit at one time and if I remember correctly, this drive is the same drive under Bowser's H-9. So yes, the cylinder chest is of Pennsy vintage. And Steve, the H-9 I had been working on in the "challenge" originally had the brass frame. For some reason after a period of time I noticed the frame had failed solder joint. Which is why when I began the rebuild of the H-9, I tracked down a Zamac frame. Although I've seen from your other builds that you have the equipment to go over those joints. But, believe it or not, Bowser still has them on they're website, part 1-820, for 7 bucks. I'm just throwing that out there for your consideration.
Mark
Oh, and BTW I also have a small collection of those Bachmann I-10's, too.
Posts: 103
Threads: 1
Joined: Aug 2009
I bought a Bowser remotor kit but never got around to building it. It is basically a Pennsy H class mechanism that you put a RDG boiler on so that's why you have to remove so many details. If you can get the Bowser mechanism running smooth, they are tanks.
Posts: 888
Threads: 56
Joined: Mar 2015
I remember these being advertised in Model Railroader for many years. It's interesting to watch one being assembled into an engine.
Posts: 2,724
Threads: 160
Joined: Dec 2008
Thanks Gents.
I did check my brass frame for bad solder joints after reading your post Twilight, and all seems good. It was able to withstand the force of me twisting the front portion back into alignment with out any failures. Thanks for the heads up  . I also checked the h-9 frame against my brass one and they are extremely similar. The main difference between the two is in the drive, and that lies in the crosshead and guides.
Now some more work on the cylinders. I removed the cylinder and valve covers from B-man plastic castings and attached to the Bowser castings.
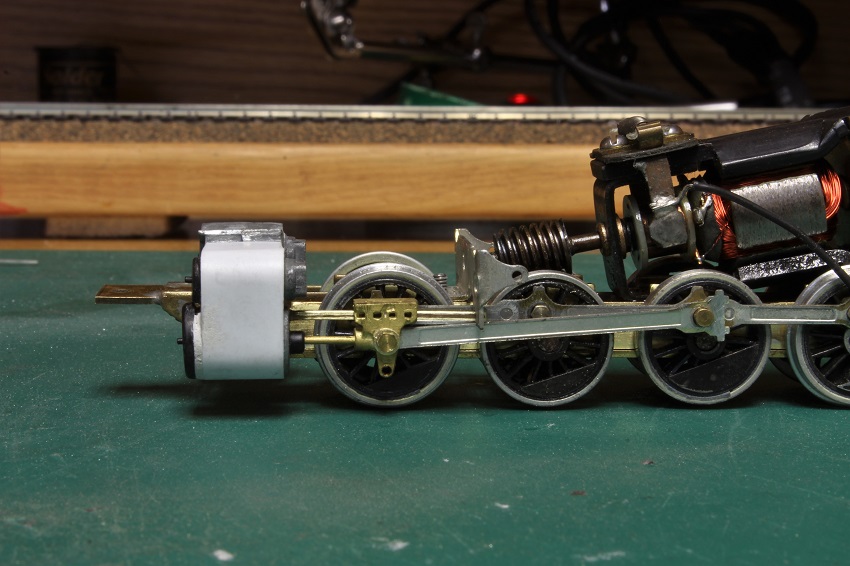
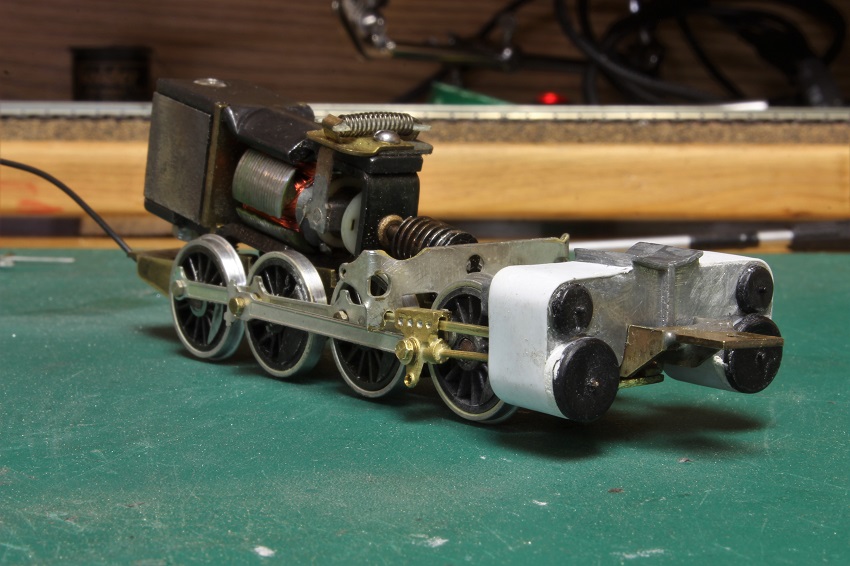
A wrapper was also added around the outer edge to give them a closer profile to the Reading cylinders. I did notice the Bowser cylinder casting should be just a touch wider than it is. I may have to do some creative bending to the valve gear to keep them from binding against the side rods.
This crosshead is not lining up on the guide as nice as it should on this side. This will need some work.
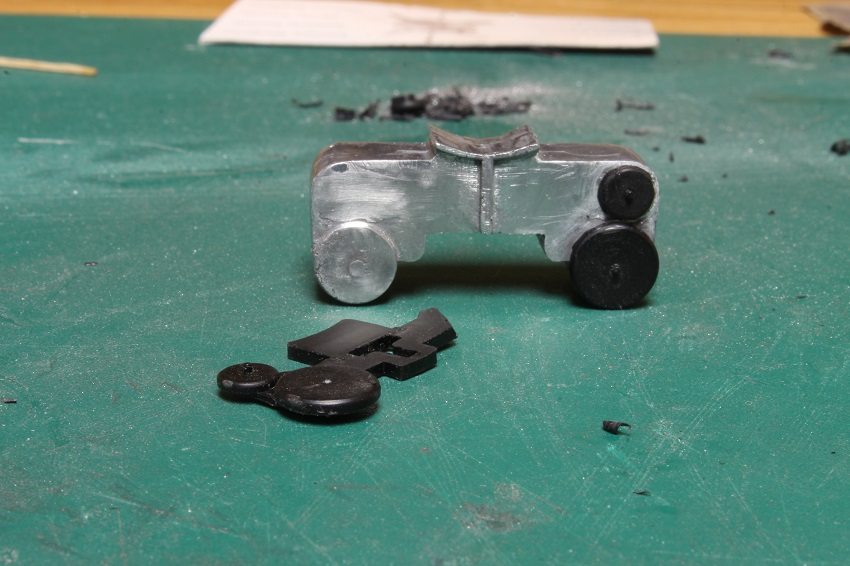
You will also notice that I added another feature from the plastic castings. It's a small tube that extends out from where the piston enters the cylinder. I added this as the pistons are just a tad bit too short. Every few revolutions it will pop out of the hole in the cylinder when the main rods are at far end of their stroke.
My other car is a locomotive, ARHS restoration crew
Posts: 2,724
Threads: 160
Joined: Dec 2008
With the addition of the valve gear, the cross head issue on this side has gotten worse. It will be time for some careful file work. I am also not happy with the way the cross head link ( the short rod of the valve gear that attaches to the bottom of the cross head ) droops down near the cylinder. This should be level with the rail head. The radius rod ( the longer rod that runs vertically from the link up to the rest of the gear just behind the cylinders' ) is too long . I will shorten it, but it will have to wait until I get more rivets as I am out.

The fireman's side. When I put this side together I found out that I was short one link. I cut one out of brass and riveted it in place. I have the same trouble here with the radius rod being too long.
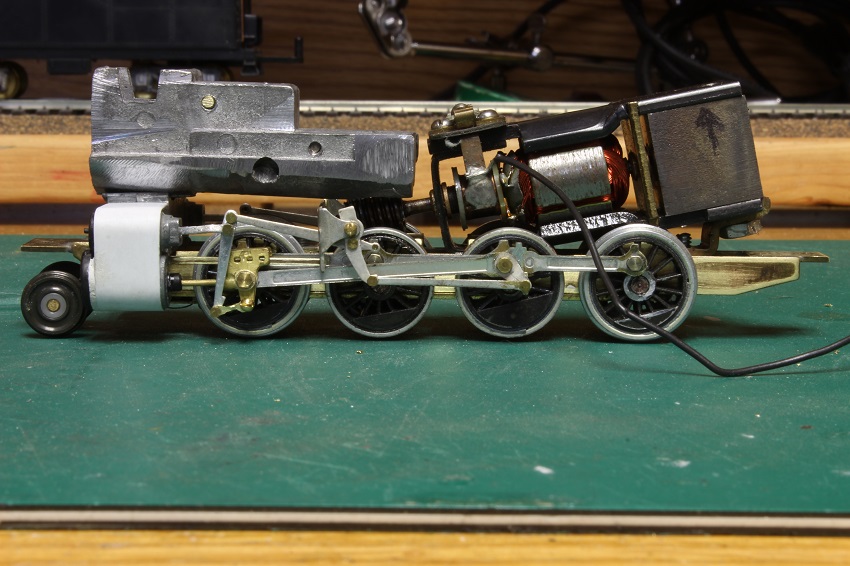
A close up of the link.
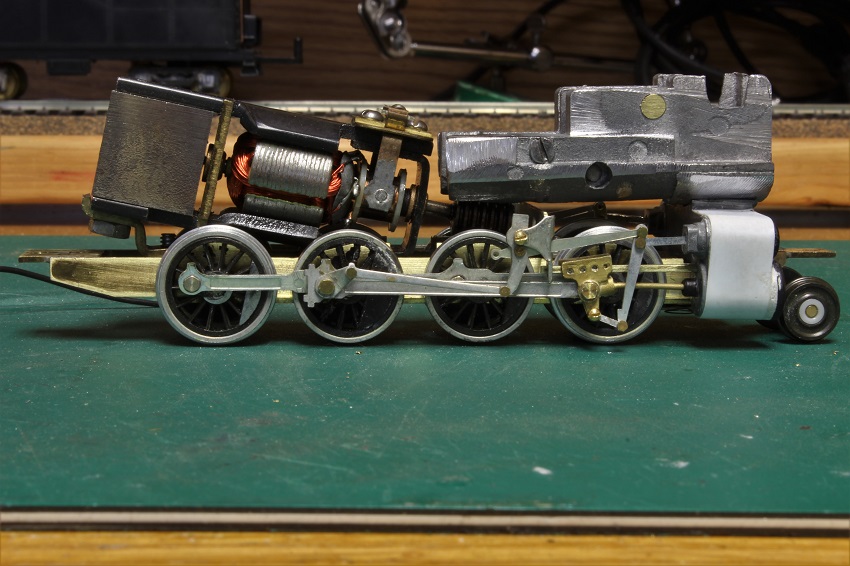
At least it's running smooth in both directions. I think I will add some extra pick up to the insulated side of the drive, but I'll start striping details from the boiler first. Although the B-man boiler is nicely detailed , a lot of them are wrong or I know I can make them look better.
My other car is a locomotive, ARHS restoration crew
Posts: 2,724
Threads: 160
Joined: Dec 2008
After a slight intermission from this thread I have a bit of catching up to do. But before I get into the meat and potatoes of this build, I want to talk about a little side project that this project caused.
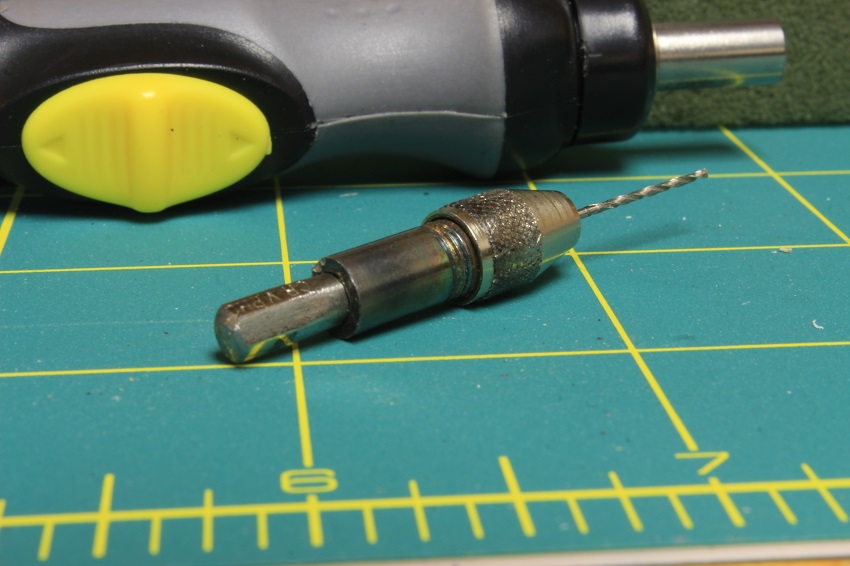
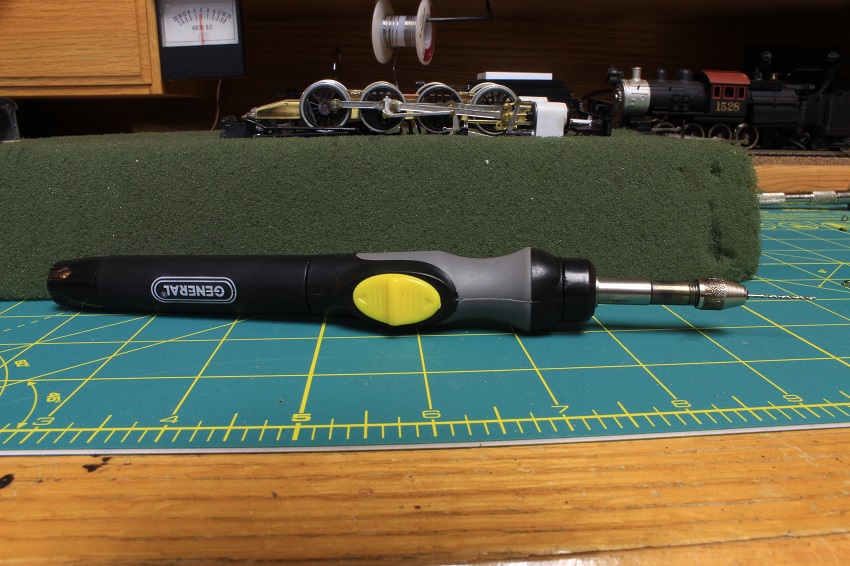
For years and years a used a Black and Decker electric screwdriver for drilling small holes. It was big and bulky with a rechargeable battery that just would not take a charge any more. It was time for a new one. I picked up one of these little pencil drivers. It's a nice little tool with enough guts to drill through brass and plastic, and very light weight. You can pick them up from Micro Mark, but Harbor freight sells the exact same one for less. The only difference is that Harbor Freight does not offer the drill chuck. You can pick it up from Micro Mark or do what I did , and make your own.
I took an old pin vice that I was never happy with the feel of and cut the chuck end off ( the chuck works just fine ). I drilled out the back of the chuck to a hair under the diameter of one of the bits that they give you with the driver. The chuck was heated with a torch and the bit was jammed in the hole. This worked perfectly, everything lined up right on center. Now I have a very useful tool.
Now onto the 2-8-0......
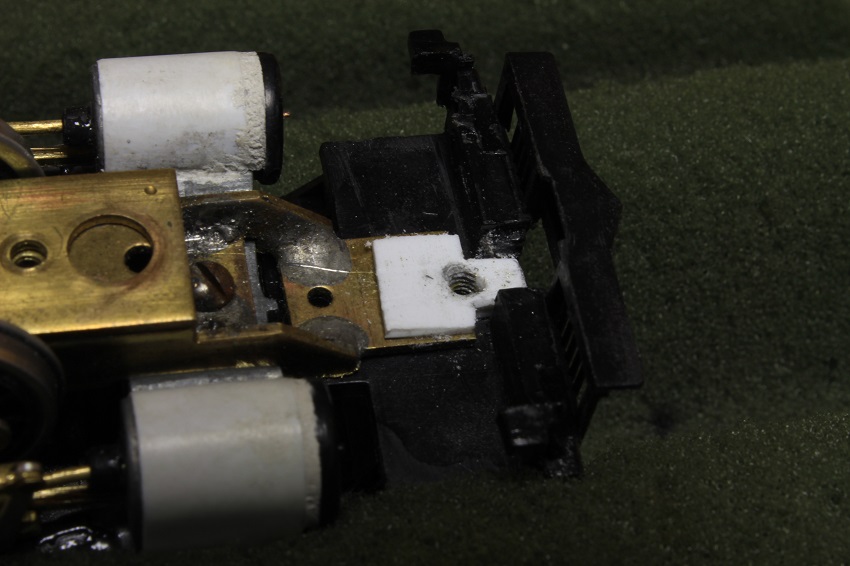
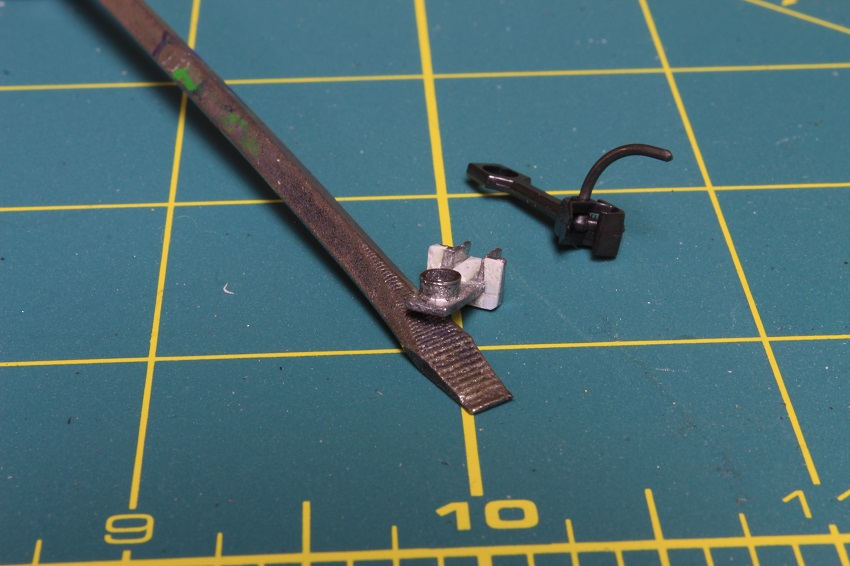
I'll get to the boiler work latter, but here is the way I mounted the pilot. I completely forgot to take any in progress pics of this part so here is one of the extra unmodified pilots that I have for reference.
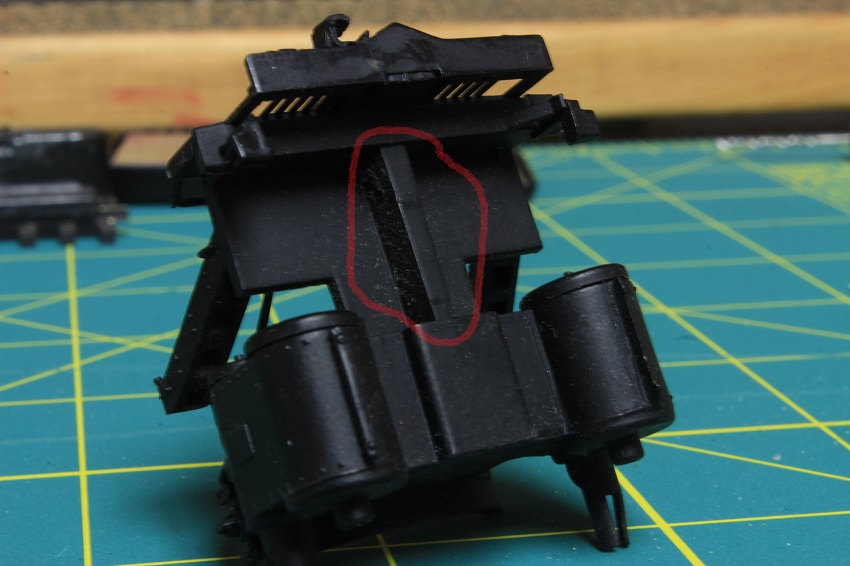
The fake coupler and pocket need to be removed and so does a large plastic brace.
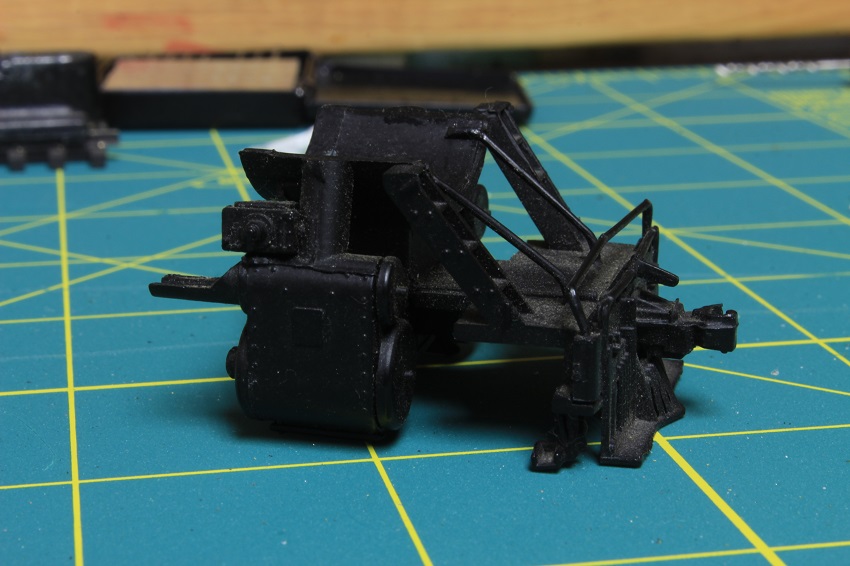
A view of the new (modified) one looks like this...
It took a lot of cutting, shaping, shimming, and swearing to get it to fit properly,,, but now it does. I tapped a hole out to mount a coupler in the correct place to mount a new coupler box that I will get to later. For now the wife is taking me out to dinner for my birthday so ,,, Got to go.
My other car is a locomotive, ARHS restoration crew
Posts: 9,734
Threads: 233
Joined: Dec 2008
Nifty tool build.I may have to have one myself. Thanks for the lesson
Charlie
Posts: 1,123
Threads: 85
Joined: Nov 2010
e-paw,
this little drill is just what i haved searched a long time. I presume the rpm's are pretty low and the drill has enough torque in this low rpm area? Then it is the right tool to drill into plastics.
Posts: 2,724
Threads: 160
Joined: Dec 2008
Yes sir, That little drill is a winner. It's geared low and slow, but as I said I was still able to drill through the brass frame to mount the front coupler with it. I should clarify that I only used it to drill a pilot hole, the final hole that I drilled before I taped the 6-32 threads was done by hand. My pilot hole was about two thirds the finished size.
Here is a link to the Micro Mark tool.
<!-- m --><a class="postlink" href="https://www.micromark.com/Ultra-Tech-Precision-Power-Screwdriver">https://www.micromark.com/Ultra-Tech-Pr ... crewdriver</a><!-- m -->
And the chuck,,,,I built my own.
<!-- m --><a class="postlink" href="https://www.micromark.com/product/26126">https://www.micromark.com/product/26126</a><!-- m -->
I can't seem to find a link for the Harbor freight version that I have. But it is listed at Lowe's
<!-- m --><a class="postlink" href="https://www.lowes.com/pd/General-Tools-Instruments-Power-Precision-Screwdriver/3138079?cm_mmc=SCE_PLA-_-ToolsAndHardware-_-SpecialtyHandTools-_-3138079:General_Tools_&_Instruments&CAWELAID=&kpid=3138079&CAGPSPN=pla&store_code=2252&k_clickID=9fa6f42f-11d3-4916-bf61-702565daf345&gclid=EAIaIQobChMIzv2kzpGz2QIVxIizCh1yLgydEAYYAiABEgL94_D_BwE">https://www.lowes.com/pd/General-Tools- ... gL94_D_BwE</a><!-- m -->
My other car is a locomotive, ARHS restoration crew
Posts: 2,724
Threads: 160
Joined: Dec 2008
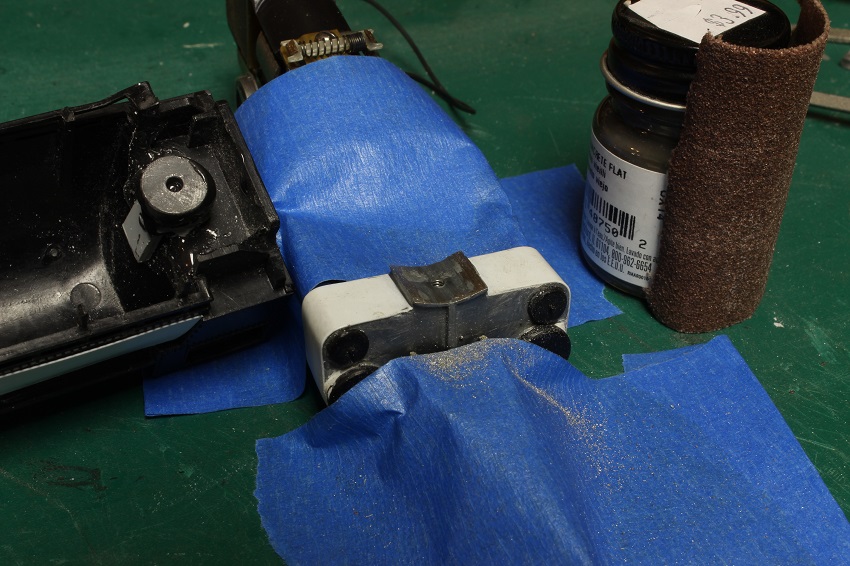
Evening gents,, I am still catching up with my photos. I noticed one or two that I forgot to post. I had a rough time getting the boiler to mount correctly to the drive. I removed the bottom section of the smokebox from the Bachman's cylinders casting and attached it to the boiler like how most other manufactures do. this will help later on when I start adding details to the boiler. This led to another problem, the Bowser cylinders have a different diameter to there saddle. I used a bottle of Polly Scale paint wrapped with some sand paper to get a closer fit. I covered the valve gear with tape to keep all the chips out. The attachment point at the rear of the engine also needed to be moved forward. I built it up with plastic and J-B weld and re-tapped the hole to make it all work.
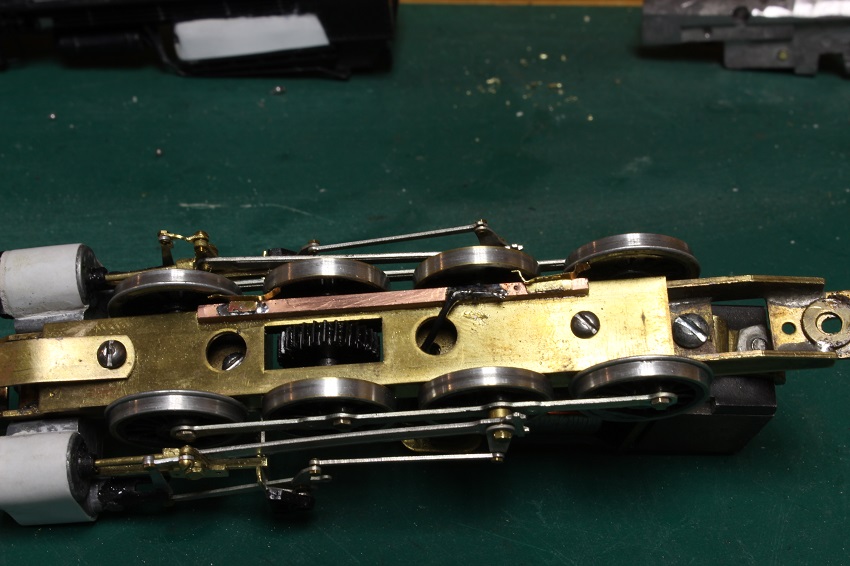
I added all wheel pickup to the drivers.
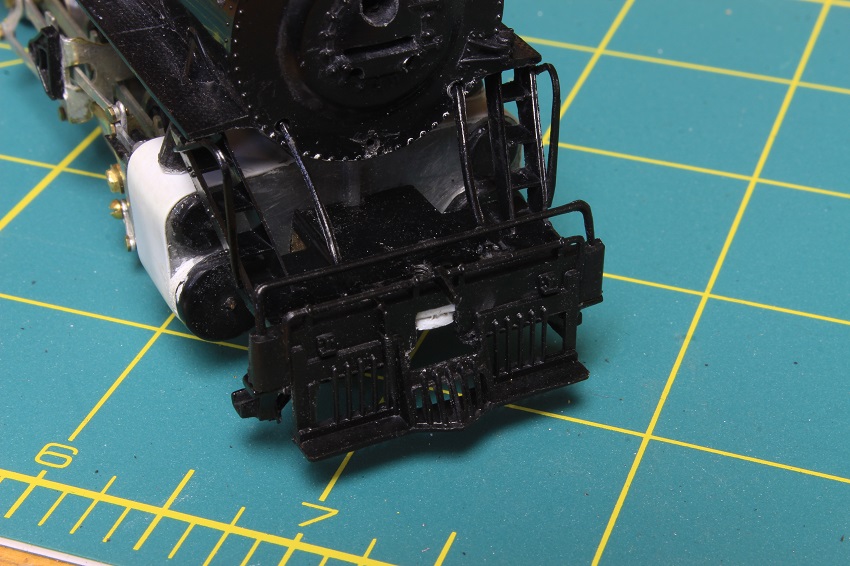
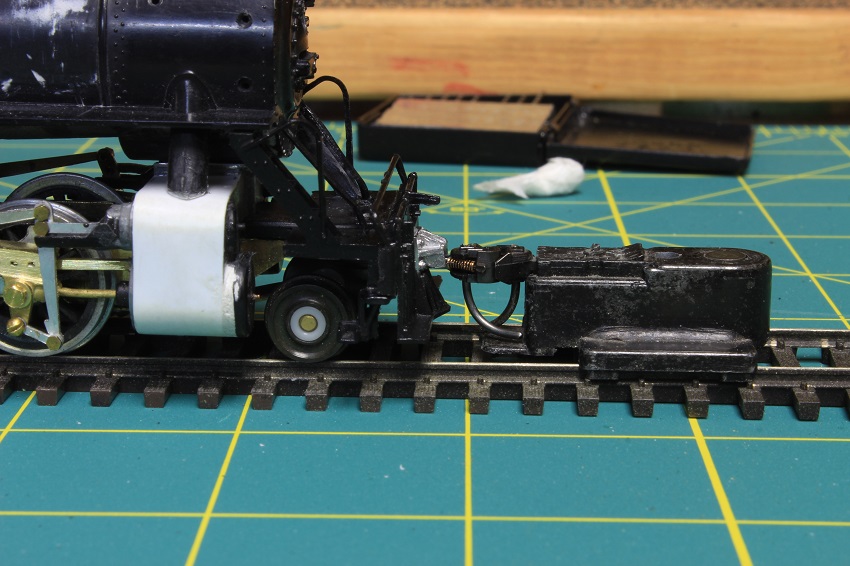
Here's a look at the front of he pilot after I removed the molded on coupler and enlarger the opening for a new working coupler.
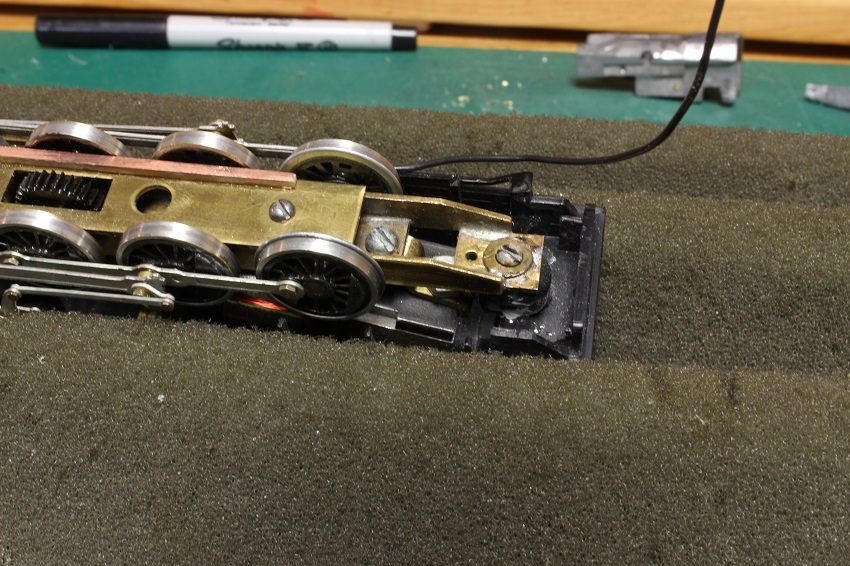
I used an old Lee-town casting for the draft gear and a long shanked Kadee to make up the front coupler. It did take a little shimming and fussing with to get it to fit.
My other car is a locomotive, ARHS restoration crew
Posts: 2,724
Threads: 160
Joined: Dec 2008
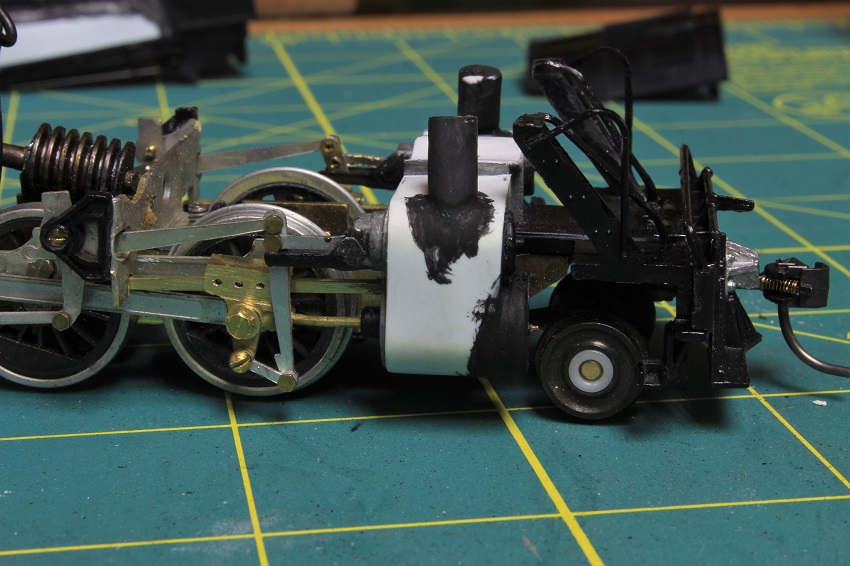
My coupler modification worked out well, you can also see that I installed the steam delivery pipes on the cylinders.
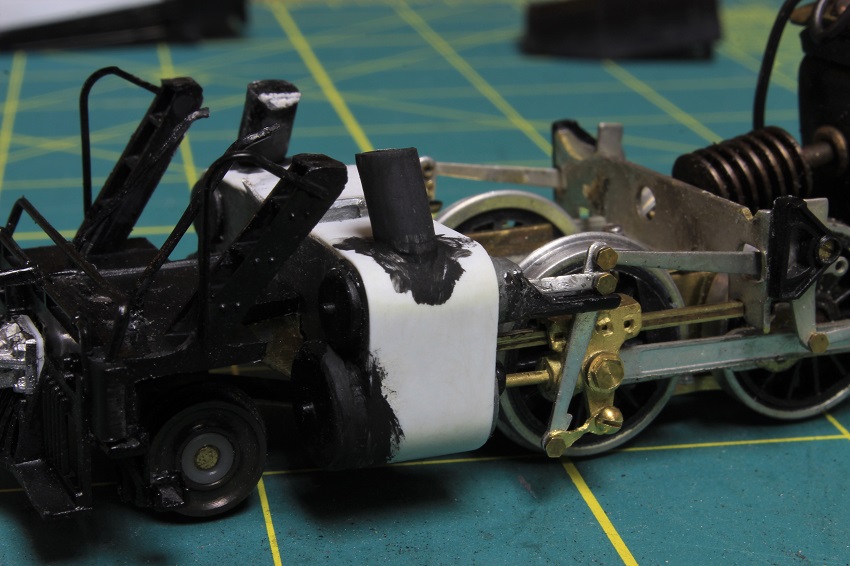
They were removed from the old cylinder castings...
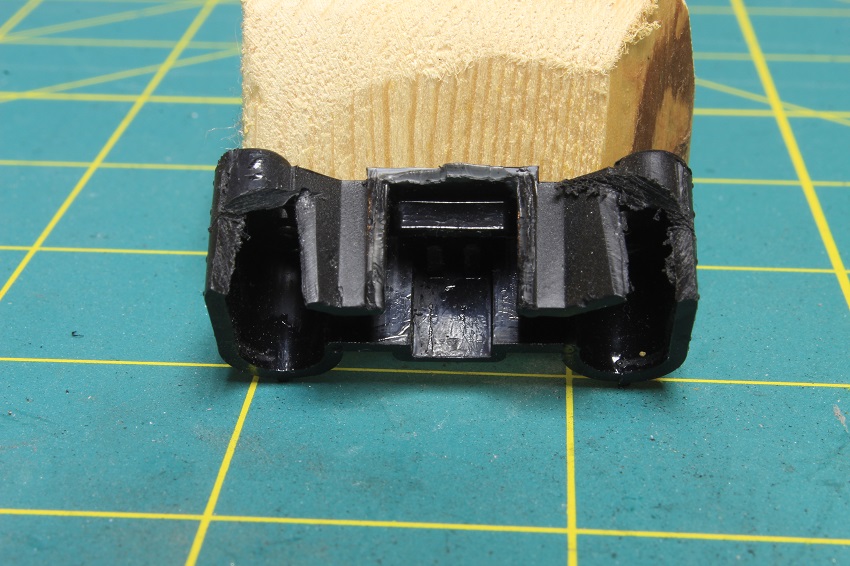
I had to do some filling to do where the delivery pipes meet the cylinders. I brushed on some flat black to make sure the body filler was smooth enough after sanding.
My other car is a locomotive, ARHS restoration crew
Posts: 2,724
Threads: 160
Joined: Dec 2008
My other car is a locomotive, ARHS restoration crew
Posts: 1,123
Threads: 85
Joined: Nov 2010
|


 . I remember doing some research on this Bowser kit at one time and if I remember correctly, this drive is the same drive under Bowser's H-9. So yes, the cylinder chest is of Pennsy vintage. And Steve, the H-9 I had been working on in the "challenge" originally had the brass frame. For some reason after a period of time I noticed the frame had failed solder joint. Which is why when I began the rebuild of the H-9, I tracked down a Zamac frame. Although I've seen from your other builds that you have the equipment to go over those joints. But, believe it or not, Bowser still has them on they're website, part 1-820, for 7 bucks. I'm just throwing that out there for your consideration.
