Posts: 65
Threads: 6
Joined: Mar 2009
e-paw--
Nice work. I will have to look for one of those drills at Harbor Freight.
For your all wheel pickup, did you glue on some circuit board material? I have some Bowser kits that could use better pickup...
Posts: 2,724
Threads: 160
Joined: Dec 2008
I did glue the PC board to the underside of the frame with CA type glue. I have also soldered it in other projects. Both methods have worked well for me.
My other car is a locomotive, ARHS restoration crew
Posts: 248
Threads: 52
Joined: Oct 2012
GNA, some years ago I posted a question about making pickups for the H9 I've been working on. Ray m, posted a little tutorial on how he was making his. The PC board Steve is using looks similar to a product that Ray recommended in his post to me. He posted a link to Jameco, only the part # he recommended in his post is not good anymore. I did find this part # 169279 as being similar. Stuff comes in sheets and you cut off what you need. I made mine in a way similar Steve's, glued to the bearing plate. However, I used phosphorus bronze rod for wipers and did pickups for both rails. There's also a picture in that build of the PC board sheet Ray m had recommended. Only I couldn't remember at the time where it came from or who suggested it. Your post made me move a few rocks around in my head to remember.
Mark
Posts: 5,859
Threads: 175
Joined: Dec 2008
There are a number of threads here that deal with adding all-wheel pick-up, with several variations on the theme, too.
There's one photo at the bottom of page one HERE (but little other info).....
...and a complete how-to HERE....
...another thread HERE....
....a couple of ideas HERE which also may be of interest.
Wayne
Posts: 65
Threads: 6
Joined: Mar 2009
doctorwayne Wrote:There are a number of threads here that deal with adding all-wheel pick-up, with several variations on the theme, too.
There's one photo at the bottom of page one HERE (but little other info).....
...and a complete how-to HERE....
...another thread HERE....
....a couple of ideas HERE which also may be of interest.
Wayne
Thanks for the links. I have used Harold's pickup method with Kadee springs on some other locos. I think I'll try the circuit board approach with pickups on my connie.
Posts: 2,724
Threads: 160
Joined: Dec 2008
I actually had some time to myself this weekend, so I spent it wisely at the workbench on the I-10.
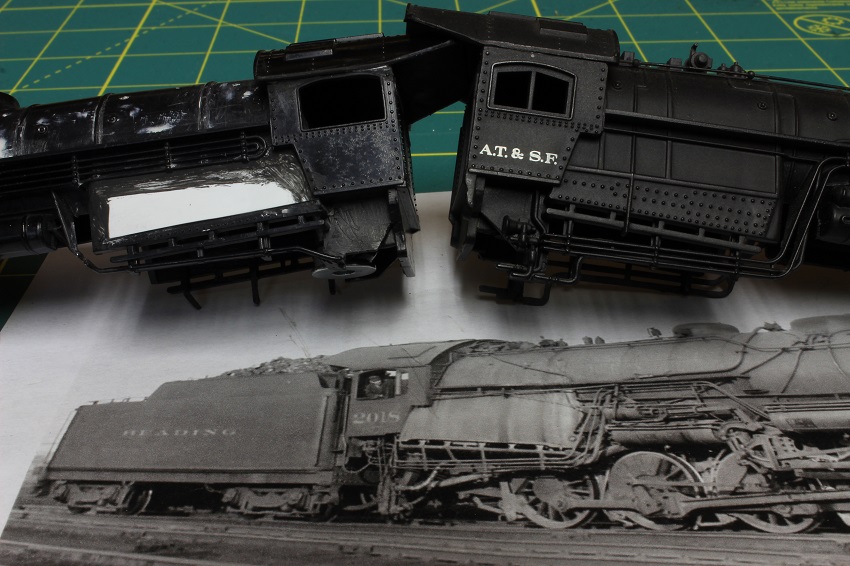
First off I have a comparison shot of the lowered roof, the modification can really be seen in this photo. On the left is the new roof line, the right is the stock model, and underneath is a prototype pic for reference. I don't know what Bachmann was thinking when the did this. When I first saw this model I felt it was a nicely done reproduction, but the more I work with it, the more I find wrong with it.
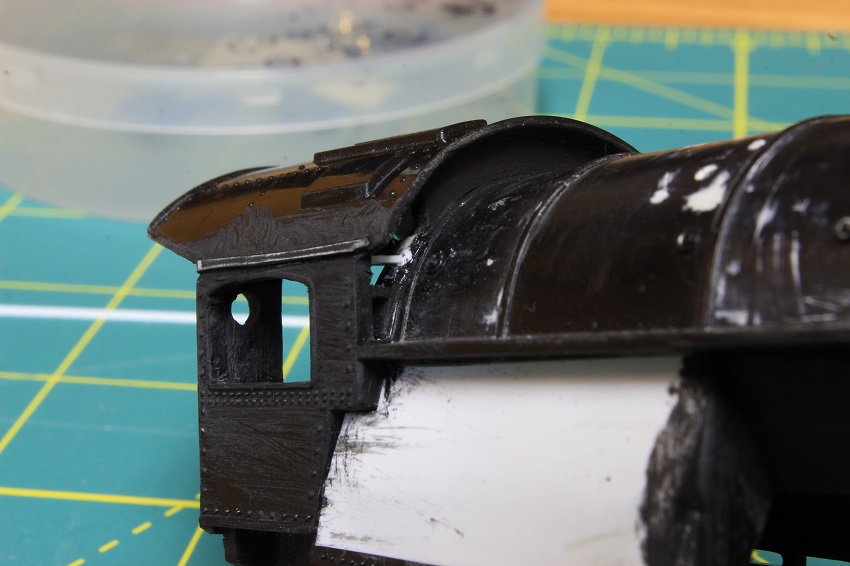
I also had to rebuild the cab windows, and touch up the drip edge on the engineers side. The cab roof was not square and needed some reworking to get it to fit properly. I checked the seams with some paint to insure I had a tight fit.
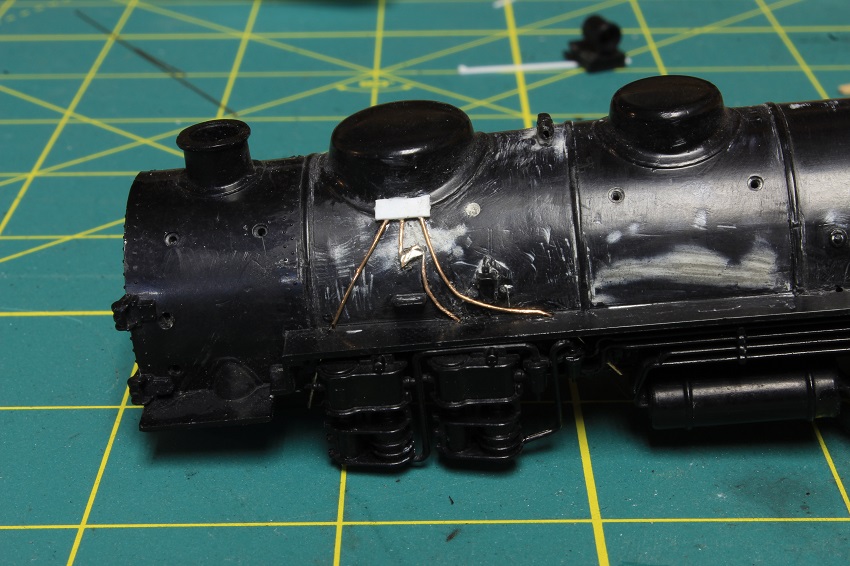
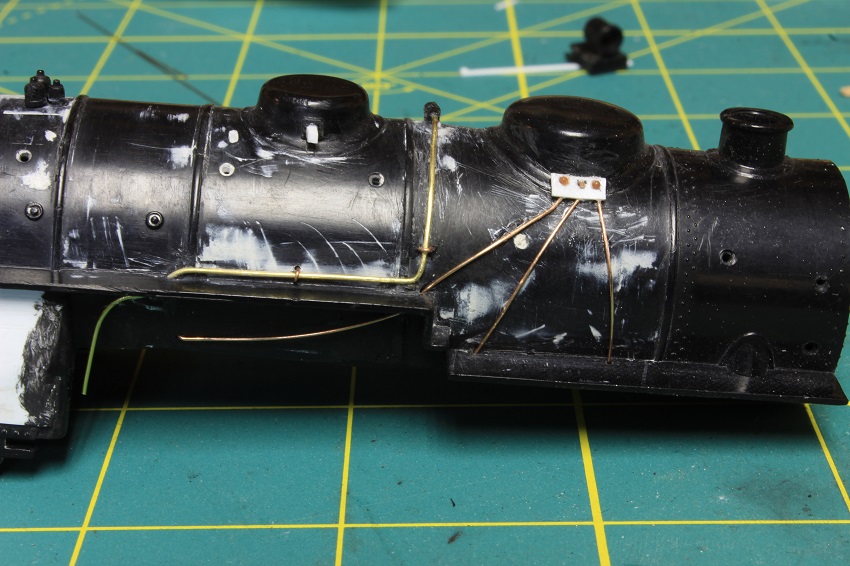
The boilers plumbing was also started. I need to stop at the not so local hobby shop to pick up some .022 wire to get to other side of the top mounted check valve piped in. The sand lines are .015 wire. I tried to reproduce the sander valve on the center sand line with a blob of solder that was filed to shape.
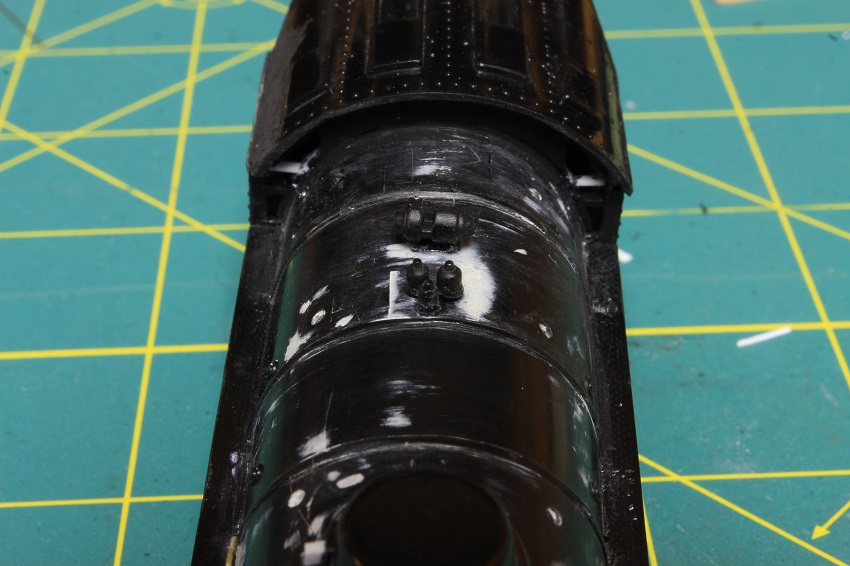
My last pic will be of the generator and safety valves. The generator was a leftover from my parts bin and the safety valves were salvaged from this boiler. I just relocated them in the proper spot and placed them in the correct configuration. Bachmann had two sets of four of them for some reason.
My other car is a locomotive, ARHS restoration crew
Posts: 248
Threads: 52
Joined: Oct 2012
Looking good Steve  . Nice pick up on the roof detail, too. What did you use to get rid of all the molded on plumbing? I was in the midst of that when mine got shelved.
Mark
Posts: 248
Threads: 52
Joined: Oct 2012
twilight Wrote:Looking good Steve  . Nice pick up on the roof detail, too. Quality work as usual. What did you use to get rid of all the molded on plumbing? I was in the midst of that when mine got shelved. . Nice pick up on the roof detail, too. Quality work as usual. What did you use to get rid of all the molded on plumbing? I was in the midst of that when mine got shelved.
Mark
I should really stop editting my posts on my smartphone. Can't see the small letters anymore.
Posts: 2,724
Threads: 160
Joined: Dec 2008
My other car is a locomotive, ARHS restoration crew
Posts: 2,724
Threads: 160
Joined: Dec 2008
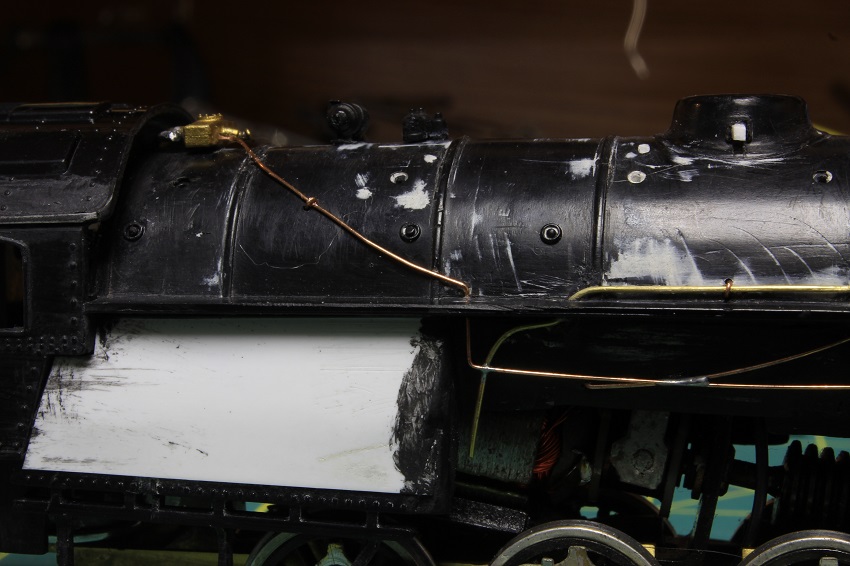
Well I got the .022 wire ,, and ordered a set of injectors. Meanwhile on the workbench .... The turret and first steam line were run. In the pic you can see where I soldered it to the water line that runs to the check valve and sander. This will give all three a little more strength, and this splice will be hidden behind the power reverse.
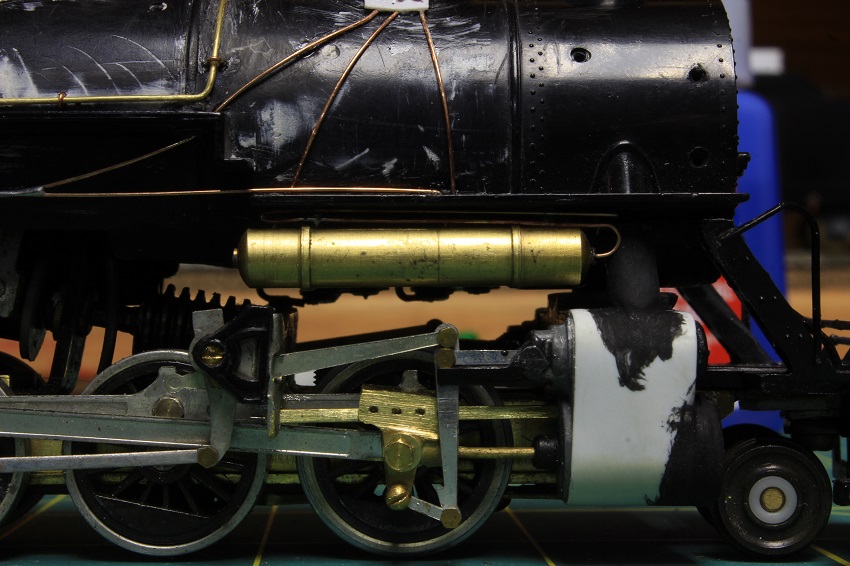
I also soldered up the first air tank and air line. It's now mounted in place.
My other car is a locomotive, ARHS restoration crew
Posts: 5,859
Threads: 175
Joined: Dec 2008
Posts: 2,724
Threads: 160
Joined: Dec 2008
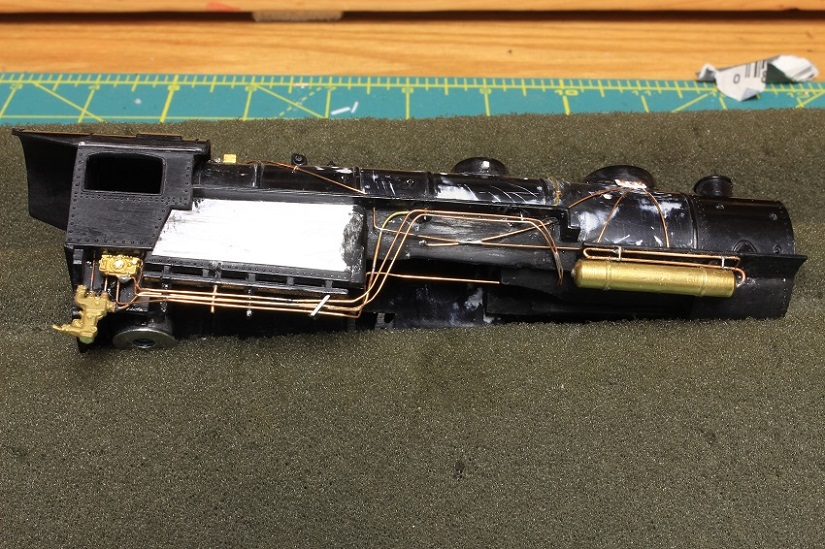
I little more progress... I managed to get some more plumbing mounted on the engineers side and mount an injector and brake valve. The valve is a modified lubricator that I think I will have to make a little smaller as it still looks a little large. I couldn't find the proper Reading built injector , I don't think anyone has ever produced it. I noticed that even the higher end brass manufactures use ones that are incorrect on this loco, so I won't feel too bad about it. I was not very happy with how the front air tank and piping came out so it was also redone.
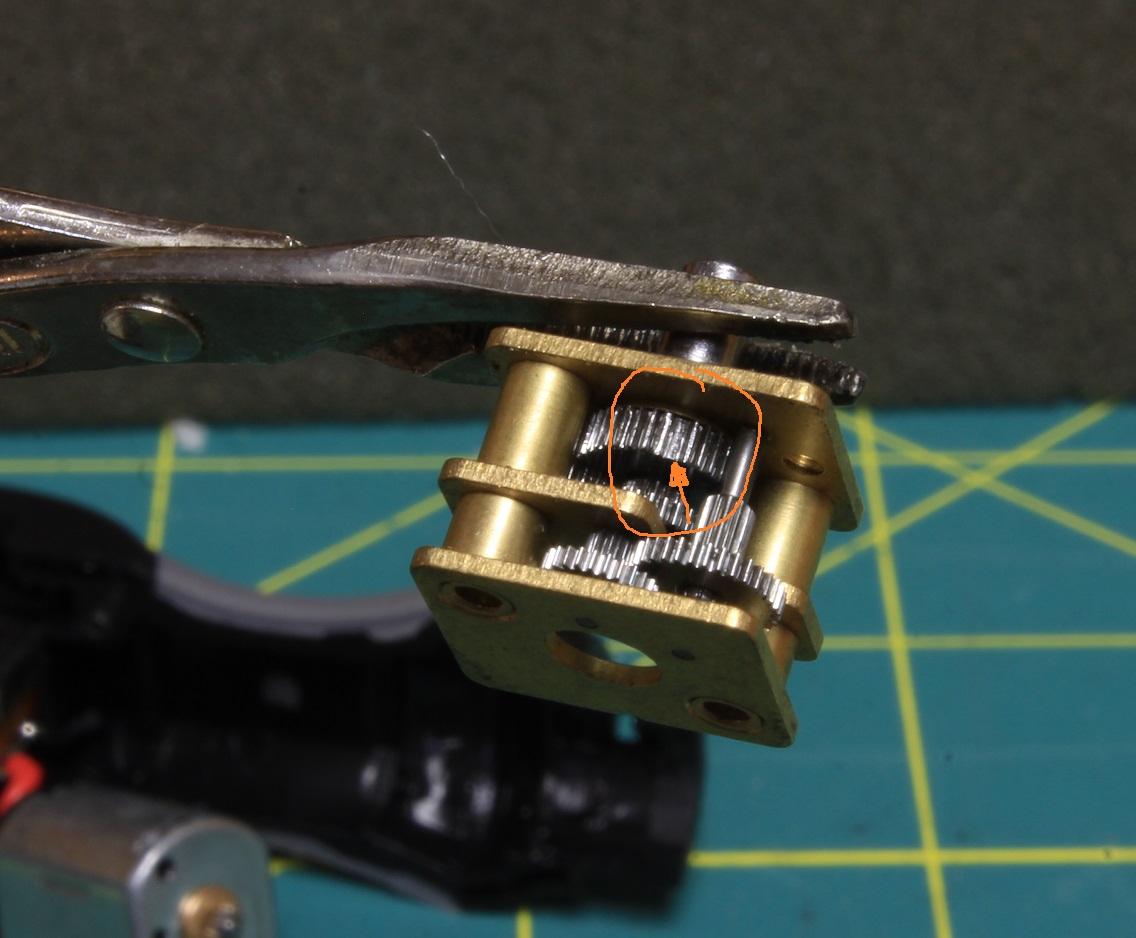
I will now take back everything good I mentioned about the small pencil drill I talked about earlier,,,,,, After I estimate 25 to 30 holes I drilled with it, It jammed. I took it apart to see what the cause was and found out that a tooth has broken clean off one of the gears. Now when the teeth engage this part of the gear, the drill becomes hopelessly jammed.... So into the trash bin it will go.
My other car is a locomotive, ARHS restoration crew
|


 . Nice pick up on the roof detail, too. What did you use to get rid of all the molded on plumbing? I was in the midst of that when mine got shelved.
