CN Blackwater division
#46
Thanks you Mike and Wayne.

I spent a number of hours in the train room yesterday and today. I started with fitting the bridge into the first gap:
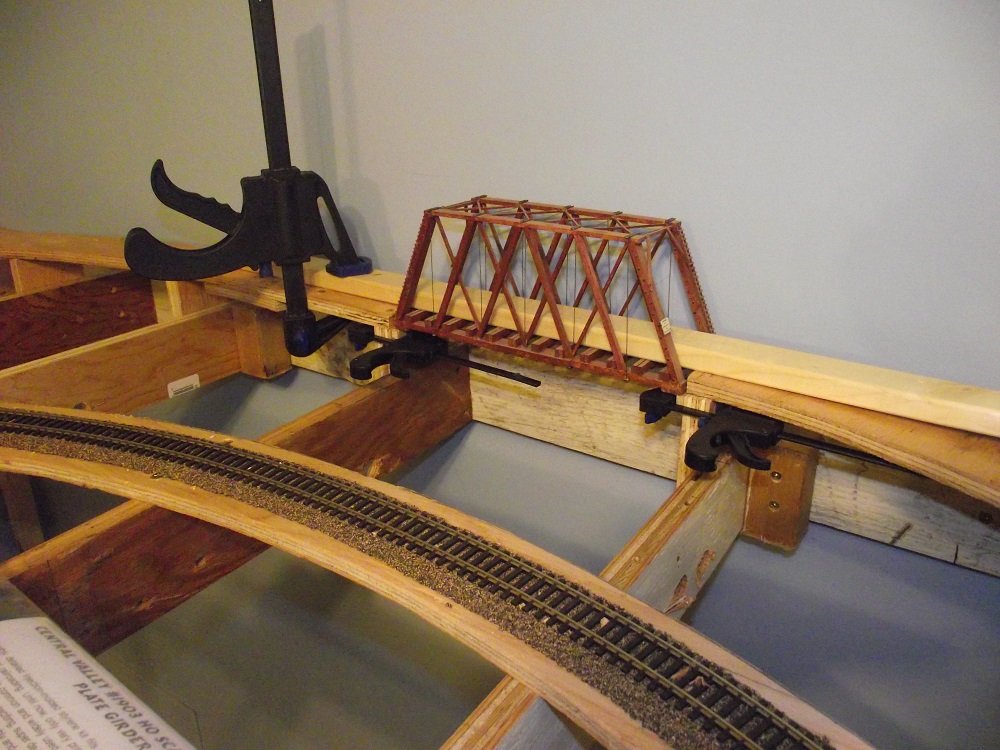
   

I used some 1/4" square basswood to form the abutment/rests for the bridge. The 1X2 is clamped in place to keep the bridge level with the roadbed while everything dries.
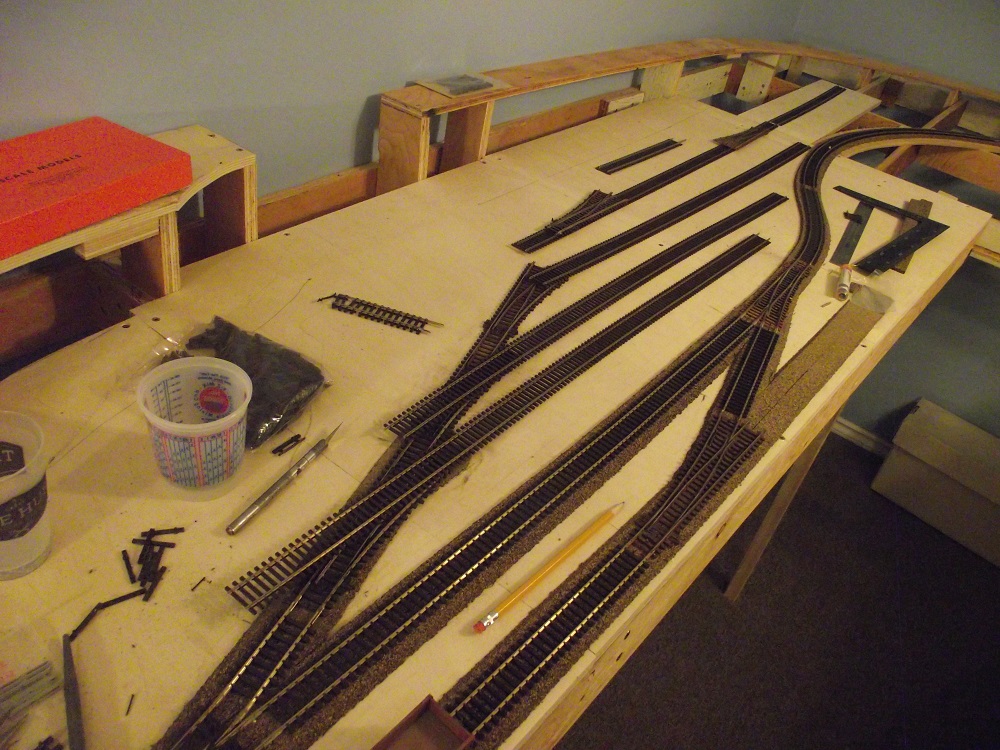
   

Then I started to layout how I wanted the smaller town's yard. At first I wanted three yard tracks, a fourth track heading to an undetermined industry on the far end and a run-around track on that spur. After laying it out I didn't like how much room the run-around track was going to use so I decided to leave it off. I already have the passing siding on the outside to use as a run-around anyway.
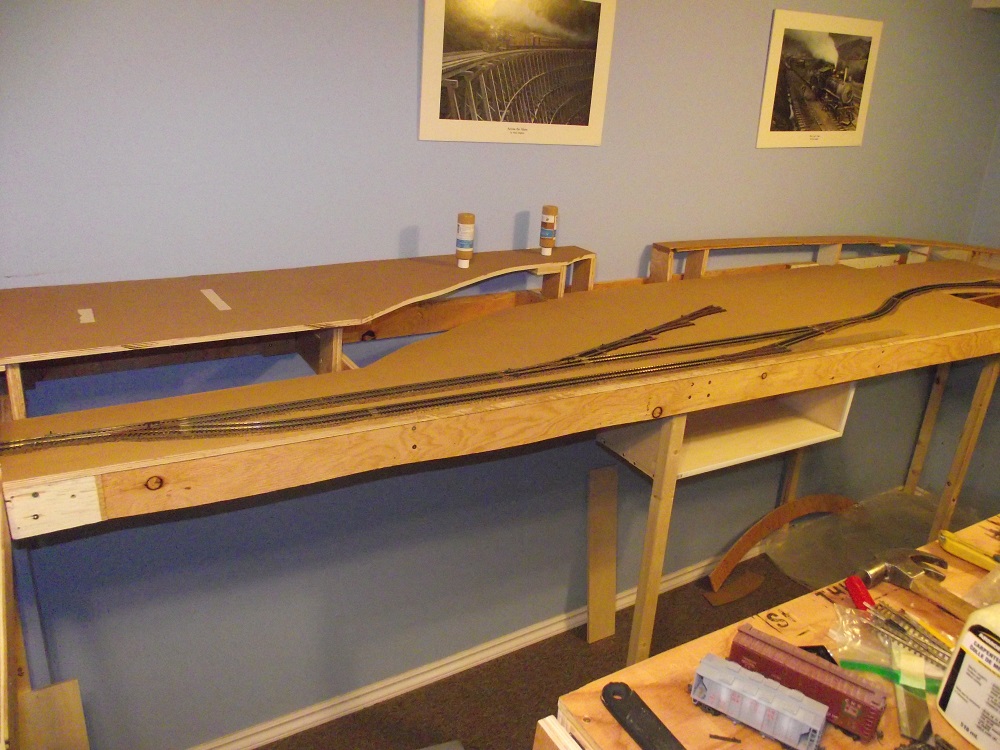
   

After that I figured I should paint the deck before laying track directly on it. I went to the dollar store and picked up several bottles of Water-based Acrylic 'Cashmere Tan' and painted the roadbed of the stamp mill branch, the lower deck and the upper deck to the logging branch. I think it looks allot  better now. 
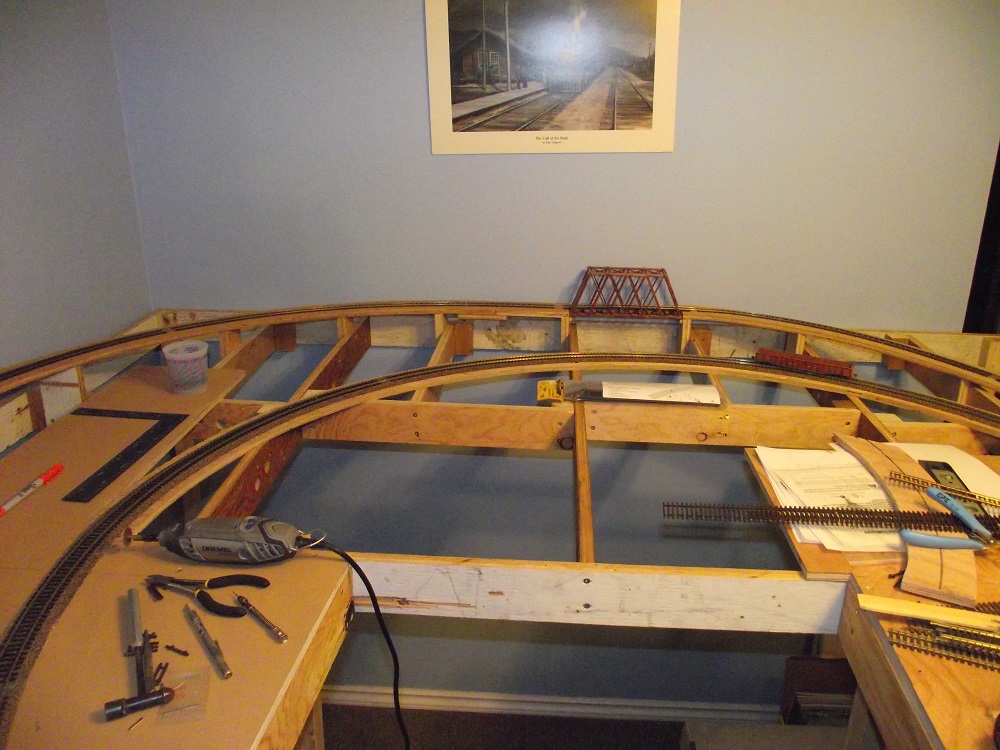
   

When The paint dried overnight I laid the track up to the stamp mill. It's hard to see in this picture but I used Micro-engineering's bridge track in the truss bridge. It still needs a bit of fine tuning but I like the way it looks. The track and bridge it still removable so I won't have to work around them when it comes to scenery.
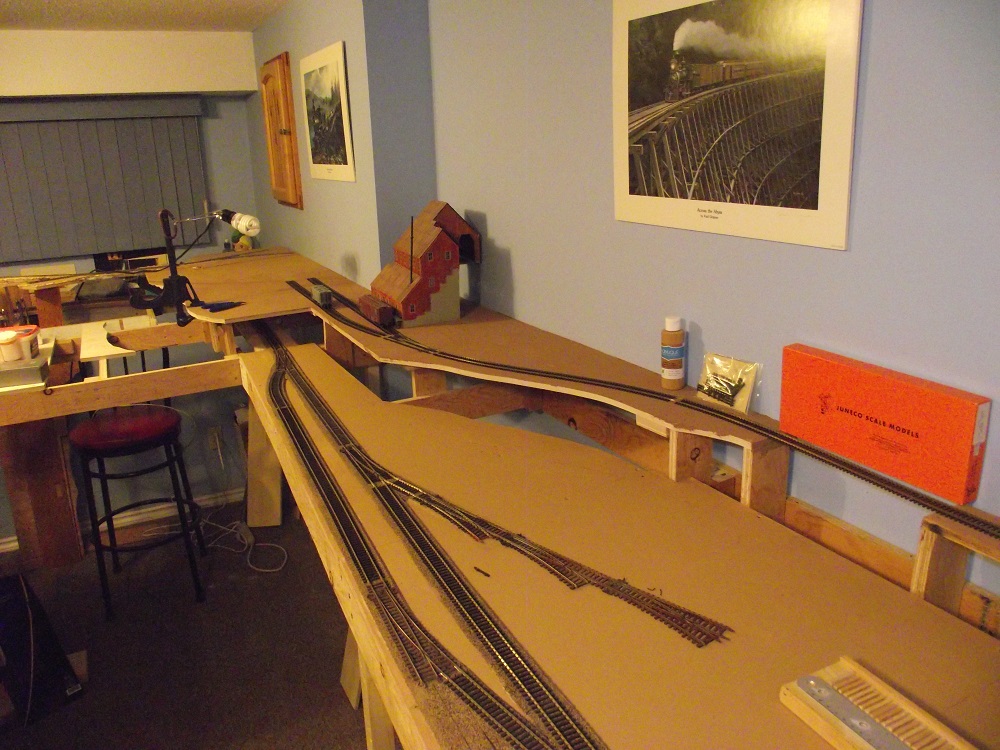
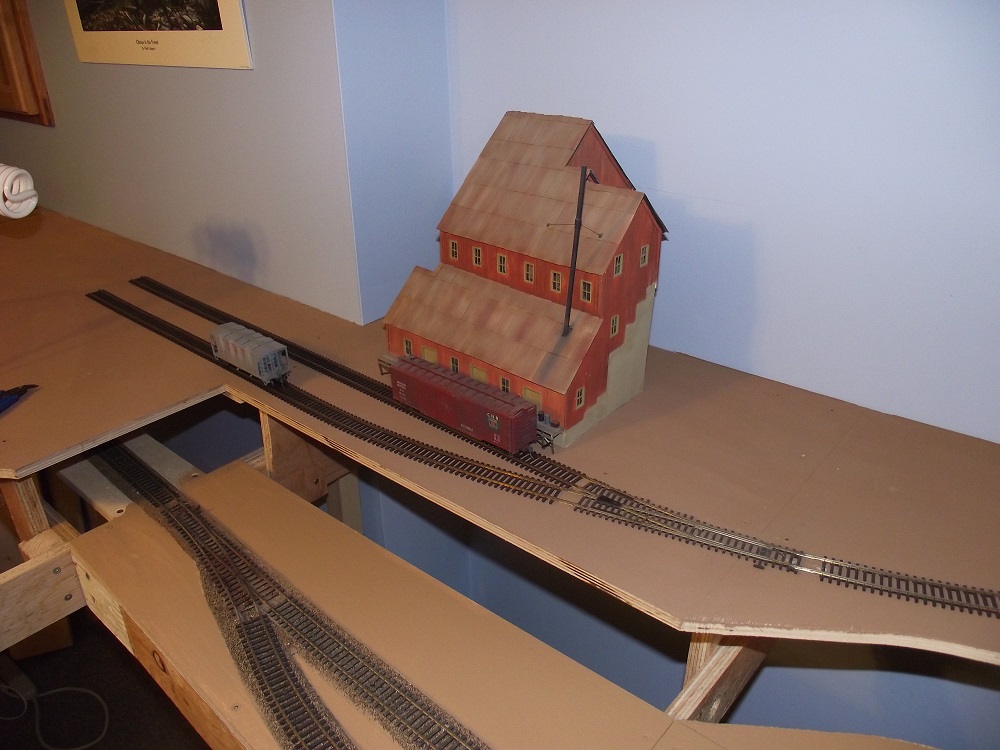


I ran the track right up to the stamp mill. The track is temporarily laid across where the second bridge will go. I added a turnout for the stamp mill with the second track continuing to the logging area. I haven't figured out the track for that quite yet so it will just stat like this for now. 

Next I want to start to put the small town's yard in:

     
Reply
#47
Have you given thought to how to do the scenery/backdrop where the track and that bridge is so close to the wall?
Mike

Sent from my pocket calculator using two tin cans and a string
Reply
#48
I have given some thought:
   

I'm thinking of running a 12" backdrop around the back on the layout and making some mountains/hills that will slope down towards the bridge. the far corner will be all mountain and will also be the first scenery being put it while I can still get to it easily.
Reply
#49
Thumbsup Cheers
Mike

Sent from my pocket calculator using two tin cans and a string
Reply
#50
While I'm waiting to be able to cut the hardboard for the backdrop, I laid out the yard:
   

The turnouts are tacked down but the flextrack sidings are just there to give me some visual reference. I plan to hand-lay the sidings to give some contrast to the main. 
   

Originally I was going to use the furthest track from the main to be the industry spur, but the third one runs to the one side instead of the middle which will give me more room.


I've also started to make some tie strips with my home-made tie jig. I made it awhile back for hand-laying my HOn3 branch, but it works for Standard gauge as well.


Some of the tire strips I made. It makes thus part of hand laying allot easier.
Reply
#51
I kept myself busy this weekend, fitting the backdrop in.

Last week I measured and made a cut list so I could take it to work and use our wall saw to cut all the pieces.


The backdrop is cut from 1/4" tempered hardboard. We use it at work for a few projects and I used to cut-offs to make the 5 parts of the backdrop. I test fitted them before adding some structure to the back and painting them.


Aren't you glad I didn't use this shade of blue? This was Pacific Blue, I thought it was going to fade a bit when it dried but that certainly wasn't the case. Fortunately I went out a second time  and :


I settled on a pale blue to start. I'll probably be adding a bit more color later but at least it doesn't burn the eyes like the first attempt. 
I used some 2X2 blocks to attach some of the backdrop parts to the decking, other parts of the backdrop were attached to the benchwork underneath. I'll be hiding the bocks and other attaching parts under scenery later.


I'm figuring that a fair amount of the backdrop will be used as support for mountain/hill sides, like in my previous layout. 


I did have to change my trackwork by the stamp mill. After the backdrop went in, I found that I had to move the stamp mill out a bit to clear. That means I had to move the track out to the edge. I'll probably build the upper area out a bit more using foam when I do my scenery in this area.
Reply
#52
I started a bit of trackwork today. Yesterday I was helping my local club take down a fellow member's layout who passed away a few months ago. I did get some scenery supplies and some other items but what will really help me now is:
   

The layout that we are taking apart was all Micro Engineering code 83 track. We were able to salvage the track in the areas that were not ballasted but the ballast and glue kept the track from coming out in one piece everywhere else. I figured I may as well recycle the rail and use it to hand-lay the yards and other sidings. I spent about an hour this morning with a soldering gun, removing the remains of feeder wires and generally cleaning up the track.


I then drew out my sidings and laid down the ties. 

Now I'm almost ready to start spiking some rails down but first I have to think of wiring. I'm using all Peco insul-frog turnouts and 'm trying to figure out insulating tracks and adding feeder wires in a way that will make sure I don't cause shorts.


Now I've already added insulators to the turnout from the main and will be adding feeder wires to the short piece of track between it and the first turnout in the yard. I'm also insulating each siding and adding feeders to that. Is that enough or should I further isolate each turnout from the others? I'm probably over thinking this (as usual)
Reply
#53
Glen:
unless you want to move two trains at a time in the yard, I would run the power from the first bit of track through the turnouts. You might run extra power through switch machine contacts to supplement the contact at the points, if you have contacts on the switch machines.
If you only plan one loco at a time in the yard (no isolating) you could wire the whole yard live as one block -- insulfrog will tolerate that -- and remember not to run through poits set the wrong way. Worst problem with this can be shorting from metal wheels of the rails in the frogs.
David
Moderato ma non troppo
Perth & Exeter Railway Company
Esquesing & Chinguacousy Radial Railway
In model railroading, there are between six and two hundred ways of performing a given task.
Most modellers can get two of them to work.
Reply
#54
Thanks. I should have mentioned that I'd wiring this for dcc and I'm also not using switch machines. All turnouts will be manual and within reach of the operators.
Reply
#55
I started laying some rail over the last few nights. I first had to figure out hove to deal with a transition from a Code 100 Turnout to code 83/70 Rail. This is what I came up with:
   
I used code 100 rail joiners and inserted the code 83 rail into it, then wedged a toothpick under the rail to push it up to the level of the code 100 rail. When that was lined up I soldered it in place and it worked fine. It sure beats buying a Walthers transition for 16$  Cnd.


Then I started drilling and spiking. I used some 9/32" long spikes. I pre-drilled with a #25 drill bit. I don't know how other modelers hand-lay but this method seems to work best for me. At this rate I can do about a foot and a half an hour. Did I mention I'm not in a big hurry?


By this afternoon I completed the first siding and a couple inches on the second. I'm spiking every 5th tie except at the beginning I'm spiking the first four since I'll be cutting the rail there to insulate the siding.


I also checked my work with both an NMRA gauge and running a car over the completed trackwork.

I also got an early Christmas present in the mail yesterday:


I got two Kits from Interaction Hobbies. The first is a CPR portable station. It also contains the optional detail kit:


This will be the station for the smaller town where I'm laying track right now. The detail kit comes with the interior details and an LED lighting kit.

I also got this:


This is one of Interaction's latest kits. I hope to build this and place it in the industrial area of my larger city.
Right now my plan is to finish the smaller town's yard, finish wiring the existing track to get some trains running and then build the CPR station kit.
Reply
#56
Happy boxing day to everyone. I finished the trackwork in the small town yard:


It took about a week of evenings to complete the 12 feet of track, spiking every 5th tie. Before I laid the rail down I ran my sander over the tops of the ties to level them out a bit. I also like the aged and greyed look of them after.


I did spike the first four ties for each siding. I plan to cut the rail here to isolate them to eliminate potential shorts feeding back through the turnouts. 


In the process of laying all the track I've almost run out of my good track spikes and I don't know where to get them from. For that matter I also don't even know who makes them. They are about 5/16" long with a fairly small head. I bought some micro engineering spikes, thinking that they were the same but the M.E. spikes have much larger heads on them. anyone know whoose these are?
Reply
#57
I spent the last week prepping and wiring in the DCC. I first needed to lay down my two main bus lines, that also required that I rough in the river:
   

I made another benchwork stringer to serve as the basic outline for the river, then I used some 1/2 plywood screwed to the bottom of the benchwork for the basic river bottom. When that was done I was able to route the buss wires under the riverbed.
I'll be adding insulation foam to contour and raise the river bottom. When I figure out the river depth, I'll router out the plywood stringers to that height. (I hope that makes sense.)


The thing about wiring is there isn't much to see. I just ran my two bus lines around the layout and attached feeders to them using the suitcase connectors. These made hookup very easy. I made a couple mistakes, creating some shorts as I went but I tested each section as I hooked them up so it was fairly straightforward to catch. I did get a short when I accidently impaled a   feeder with my staple gun but I caught it right away and it was an easy fix. I've been running a proto1000 F-3 around the layout for the past couple hours to see if it can find any bugs.


Another thing I found by raising the layout an extra 6-8 inches is the extra space I now have under the layout. Now that the wiring is done I started to clean up and organize things. These drawers are all my scenery supplies. I hope to have the rest of it cleaned up soon so I can start work on the Portable Station kit.
Reply
#58
After taking a break and building some structures, I thought it would be best to start some scenery work in the harder to reach places. 
   

Particularly the one corner where I can still reach in to the track, but not the very corner. This area will have a mountainside in it so I stacked up some foam and glued it in place with carpenters glue.
     

Then I used a Woodland Scenics hot wire foam cutter to trim it to what I wanted. The wire cutter can only take a bit off at a time since it's wire is only 5" wide. 


And it's ready for plaster cloth or plaster soaked paper towel. it would be nice to plaster cloth all of the scenery but that could get expensive. 


While I was at it, I also added the slope between the branchline and the yard. I'm leaving space below for a roadway that will go to the future sawmill complex and oil dealer.
Reply
#59
I got a bit more progress this weekend. Starting with fitting ties into the bridge approaches.


I notched some ties to clear the rail joiners and glued them in place so I'll be able to remove the two bridges for cleaning and maintenance later. 


and with the bridge in place. When that was done, I fired up my airbrush and painted the track. I used Polly-s RR tie brown. Kind of a gross creosote color. I do like how it tones down the ties and sides of the rail.


The only problem was that since I used acrylic paint, it dried within minutes of spraying so today I spent about 2 hours cleaning track. I also had to use a brass wheel on my dremel to clean the contact points on my peco turnouts to they would work properly again. The other thing I managed to do was to slip some ties under the track where sections were joined. I should have done this before I painted but halfway through painting I remembered and taped a bunch of loose ties on a board and painted them separately. 
I had planned to add the hydrocal/paper towel layer to the mountain I am working on but all I managed was this:

   
I mixed a bit of my 20 year-old hydrocal up earlier this week to see if it was still usable. I guess this shows that it is. I'm lucky I live in a mid dry climate so no moisture got into the bag it was stored in. I plan to  work on the mountain shortly.

On the plus side, I did run a train today!
Reply
#60
While I'm waiting for the weekend to try out my hardshell scenery skills, I started to rough in the scenery around the small townsite of Meadows.


Here's the gap between the station and the stamp mill. 


And filling in the gap. I used some 1/2 plywood behind the station and the tunnel portal. The tunnel portal was a scratchbuilt piece salvaged from the previous layout. I plan to use wood cribbing/retaining wall along the longer section. I have a plaster mold for that retaining wall panel which will make it considerably easier. I also will be placing my CPR tool shed beside the station as well.


The curvy part of the gap will be initially covered by this thin veneer plywood, glued and tacked into place. below will be the townsite with a road beside the yard the will cross the yard throat, the mainline and passing siding before leaving the layout. the other end of the road will run beside the yard to the oil dealer and future sawmill on the other end of the layout. The thin plywood will be covered by rock castings and or more retaining wall.

One other thing that I did this week was to fill and paint the joint in the backdrop behind the deck bridge. It had been bothering me for a bit and it was a one evening project to make it disappear.
Reply


Forum Jump:


Users browsing this thread: 1 Guest(s)