09-12-2018, 12:34 AM
...and perhaps some scratchbuilds.
I'm currently working on some of Accurail's Fowler boxcars, and will be lettering them for my own free-lanced Elora Gorge & Eastern. What I have in mind is some early boxcars that have seen a few minor upgrades or modernisations.
The Accurail kits come with a plank roof, which was typical for most of the early Fowler boxcars, although some pre-production versions of the real ones had all-steel radial roofs, and there was at least one with corrugated steel sides, in place of the usual wood.
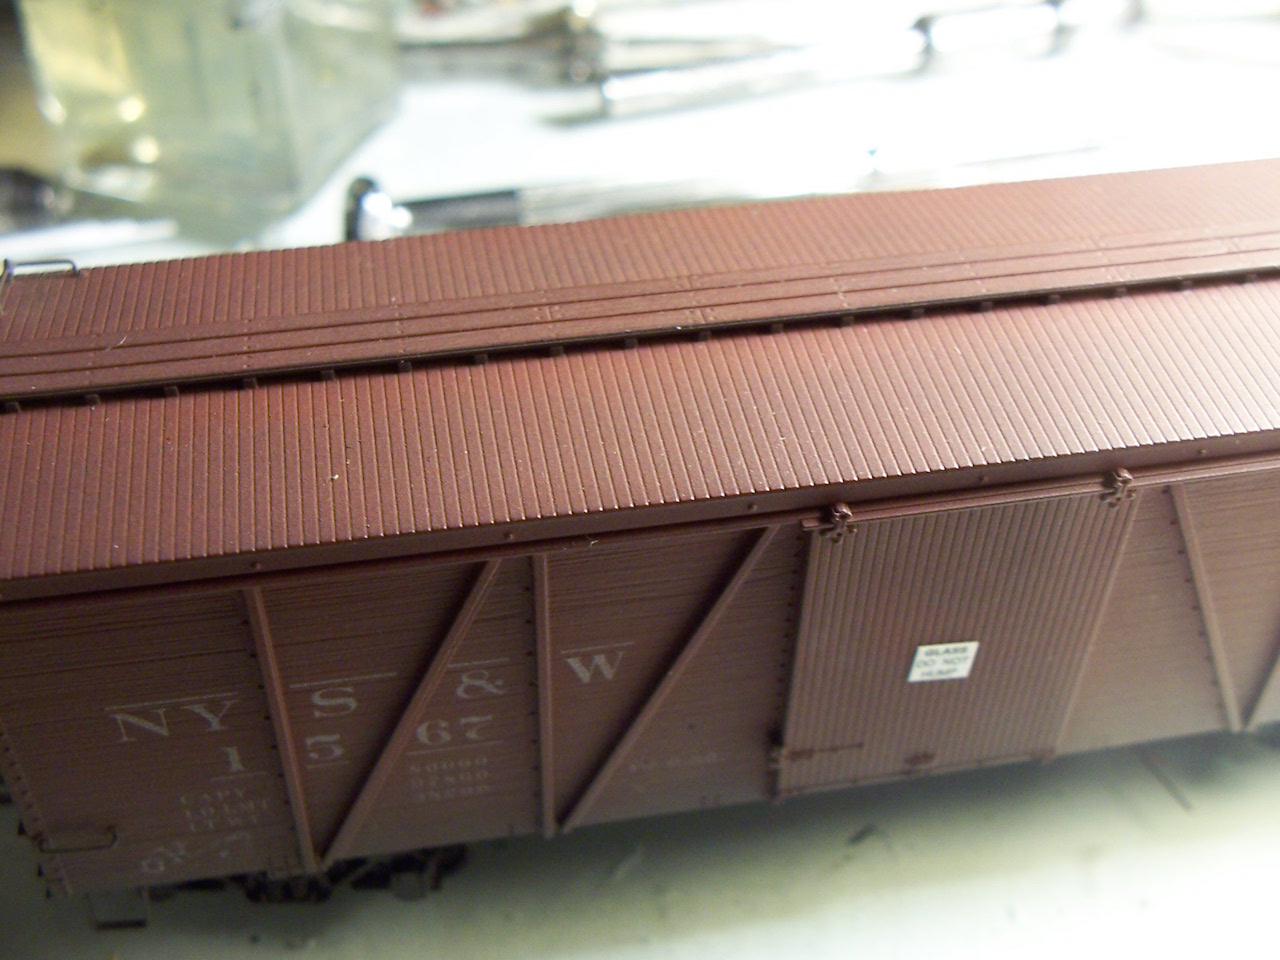
My first modification is to modify the roof to either an all-steel or steel-sheathed type, as leaking wooden roofs were a major problem. Here's an Accurail Fowler boxcar, unmodified...
I cut .010" sheet styrene to a size just a bit wider and longer than each half of the car's roof - there was no way I was going to remove all 27 of the cast-on roofwalk supports, just to allow sheathing of the entire roof. I'm hoping that once the new roofwalk is in place, and the roof painted black (many cars had roofs coated with what was commonly called "car cement" a usually black coating with tar-like qualities) that the entire roof will appear to be uninterrrupted metal. Black roofs and ends for boxcars is standard practice on the EG&E.
To affix the styrene to the car's roof, I dipped a soft 1" wide brush in MEK, then applied it, fairly generously, to one side of the car's roof, and before it could evapourate, slapped the .010" sheet onto the roof. This prevented possible damage to the thin styrene, had I applied more MEK directly on it. In a few minutes, the sheet was bonded firmly to the roof.
Next, I used a NWSL "Chopper" to cut strips of .010"x .080" strip styrene into lengths just a bit longer than the slightly overly-wide roof panels, and used dividers and a small machinist's square to add the strips at regular intervals. When those were all in place, I cut Evergreen .040" half-round strips into similar lengths and aligned them, by-eye, centred atop the .080" strips. This combination is meant to represent the metal battens holding the roof panels together, and preventing the incursion of water.
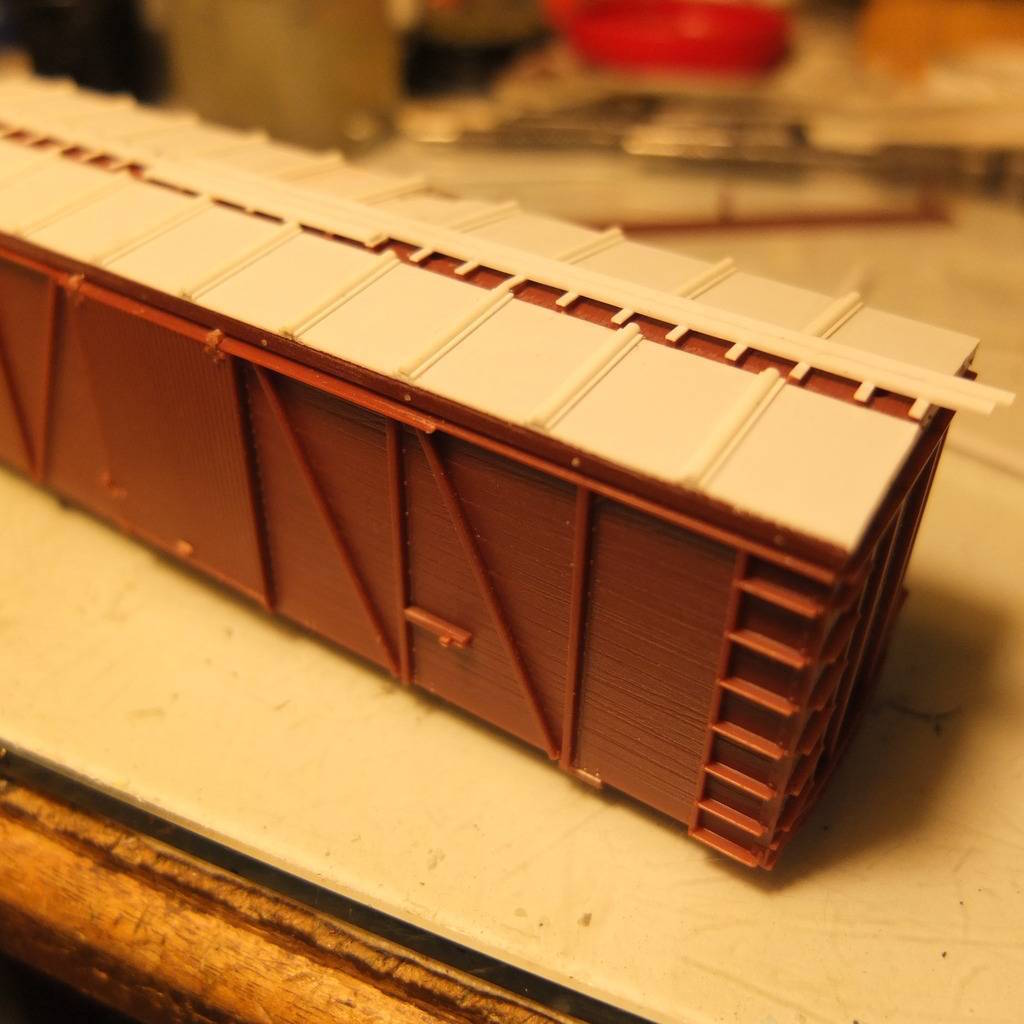
Here's a car with the roof applied, and installation of the running boards (roofwalk) underway. I added strips of .010"x.030" styrene to the top of each roofwalk support to compensate for the thickness of the applied "metal" roof material...
...and the completed roof on the "test" car...
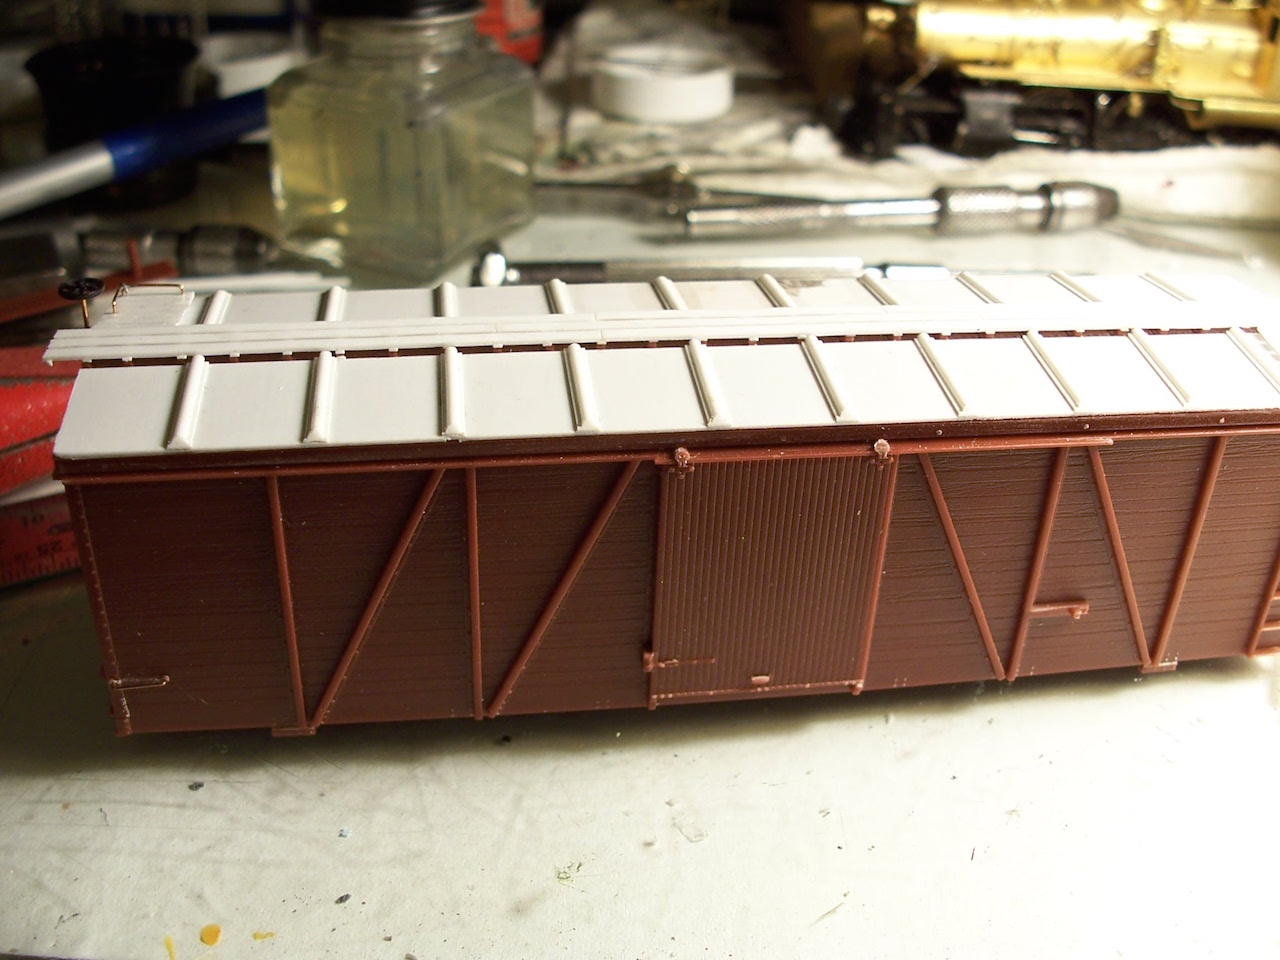
I opted to replace the supplied running boards with built-up ones because the original ones were 6" (HO) too short on both ends, as compared to the prototype drawings to which I have referred. The Accurail ones are otherwise well done, and may be accurate for some road's Fowler cars, but according to the info I have, the CPR's cars had a full 1' overhang on each end.
With the first car's roof completed, I went ahead and finished the other nine cars in the same manner.
As you can see in the last photo, I've replaced the cast-on grabiron with a metal one, and while all cars will get this upgrade, some will get a second grabiron above the first, a safety feature introduced in the mid-'30s. Since most railroads had vast rosters of freight cars, these upgrades would have been implemented over a period of years.
I've not yet decided whether or not to replace the other cast-on grabirons on the cars' ends with wire, but the cars' ladders will definitely remain as cast-on-only details.
My next modification to three of these cars is to change the doors. Wooden doors especially were susceptible to damage, and as steel doors became more readily available, railroads began to replace the damaged wooden ones on otherwise-sound cars.
For the one-piece Accurail carbody, the door has to be cut out so that the replacement door won't look too thick, as it would if simply cemented over the existing door. I started out by drilling a couple of largish holes in the door, with the intention of using an X-Acto knife to carve away the material around the holes until the entire door was gone, but the casting here is very thick, making for very slow work.
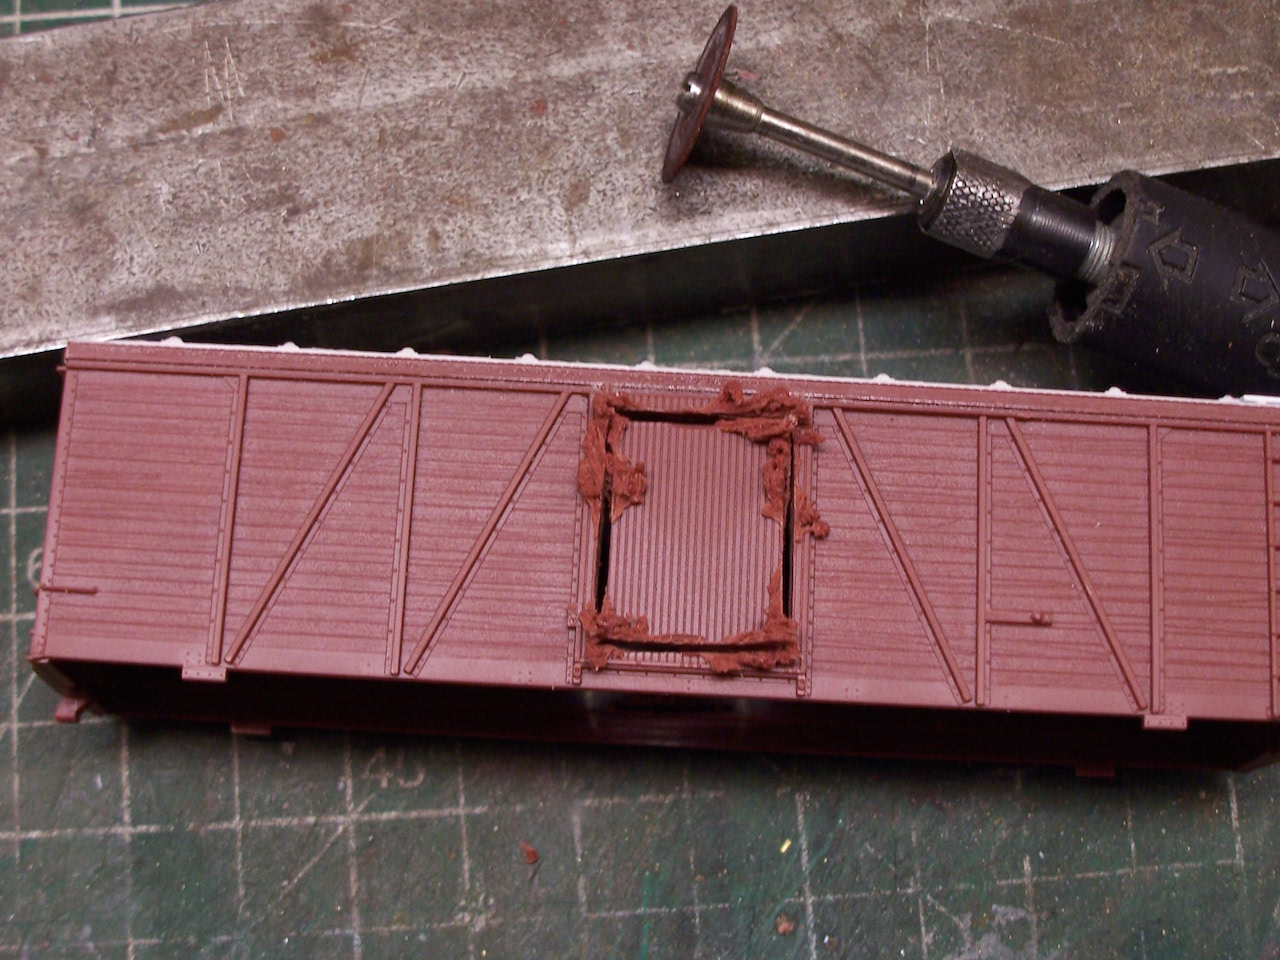
Instead, I opted to use a cut-off disc to cut around the periphery of the door, but not right to its edges...
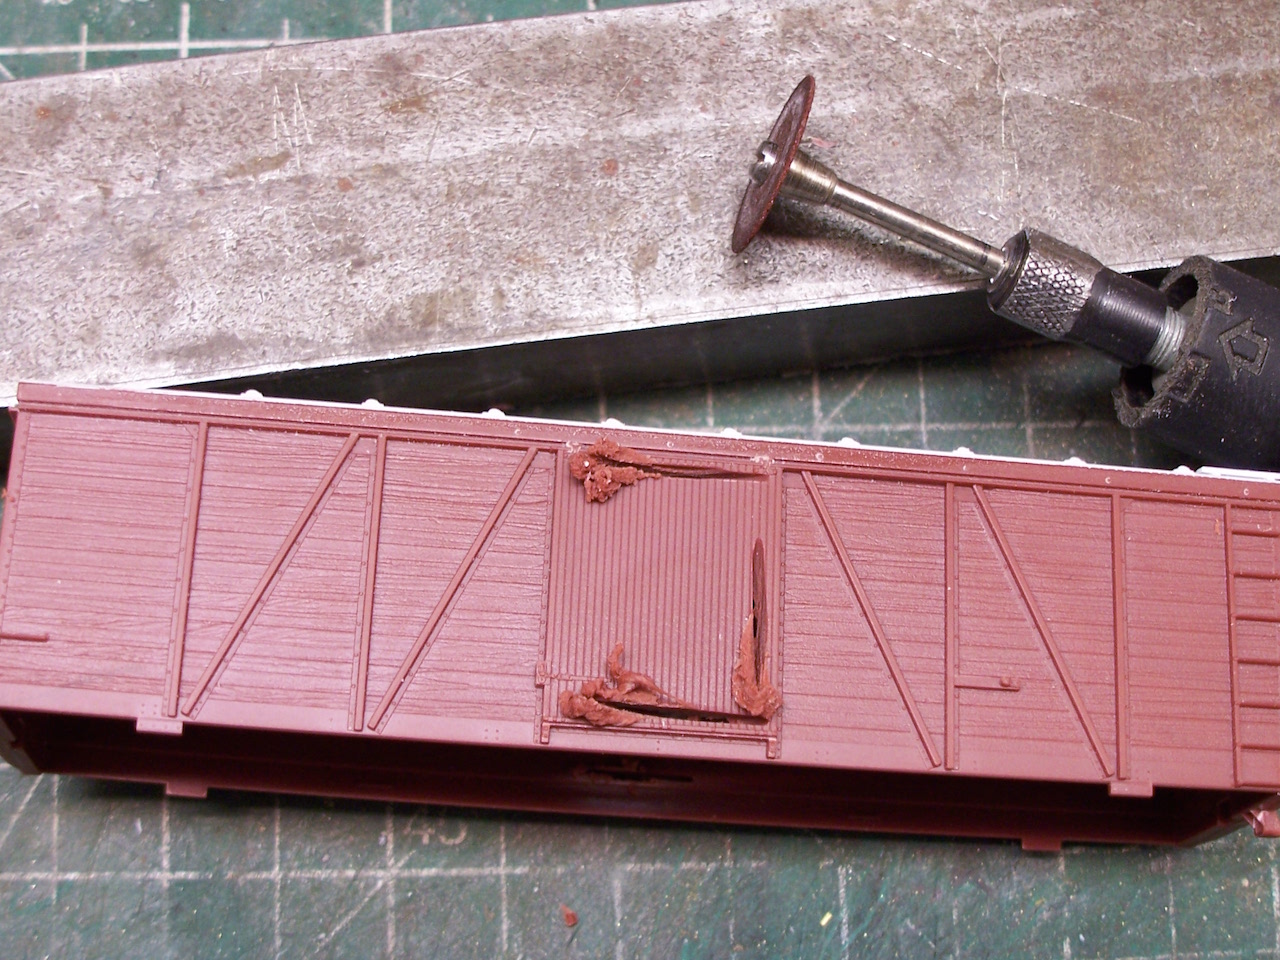
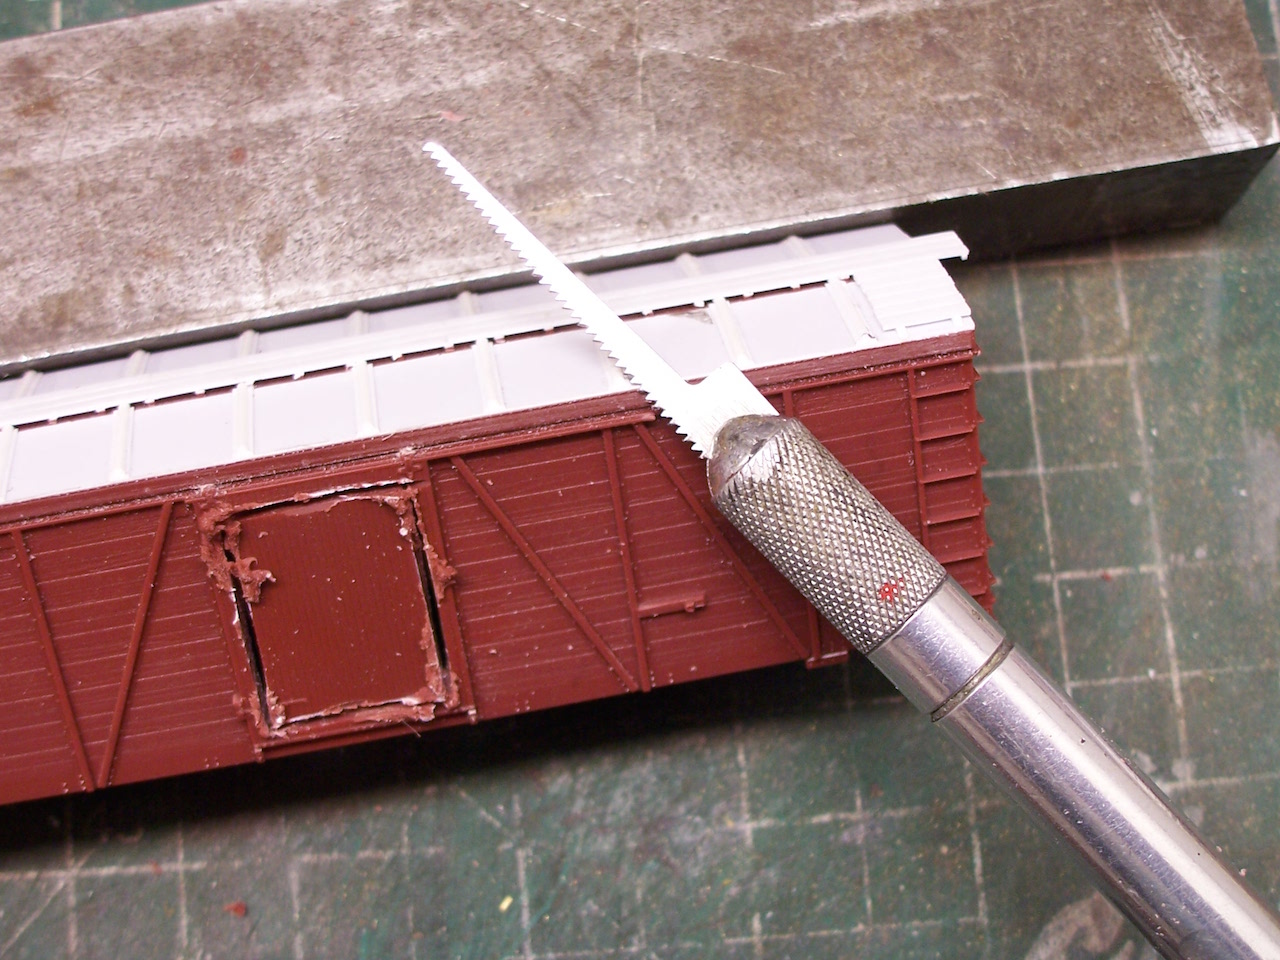
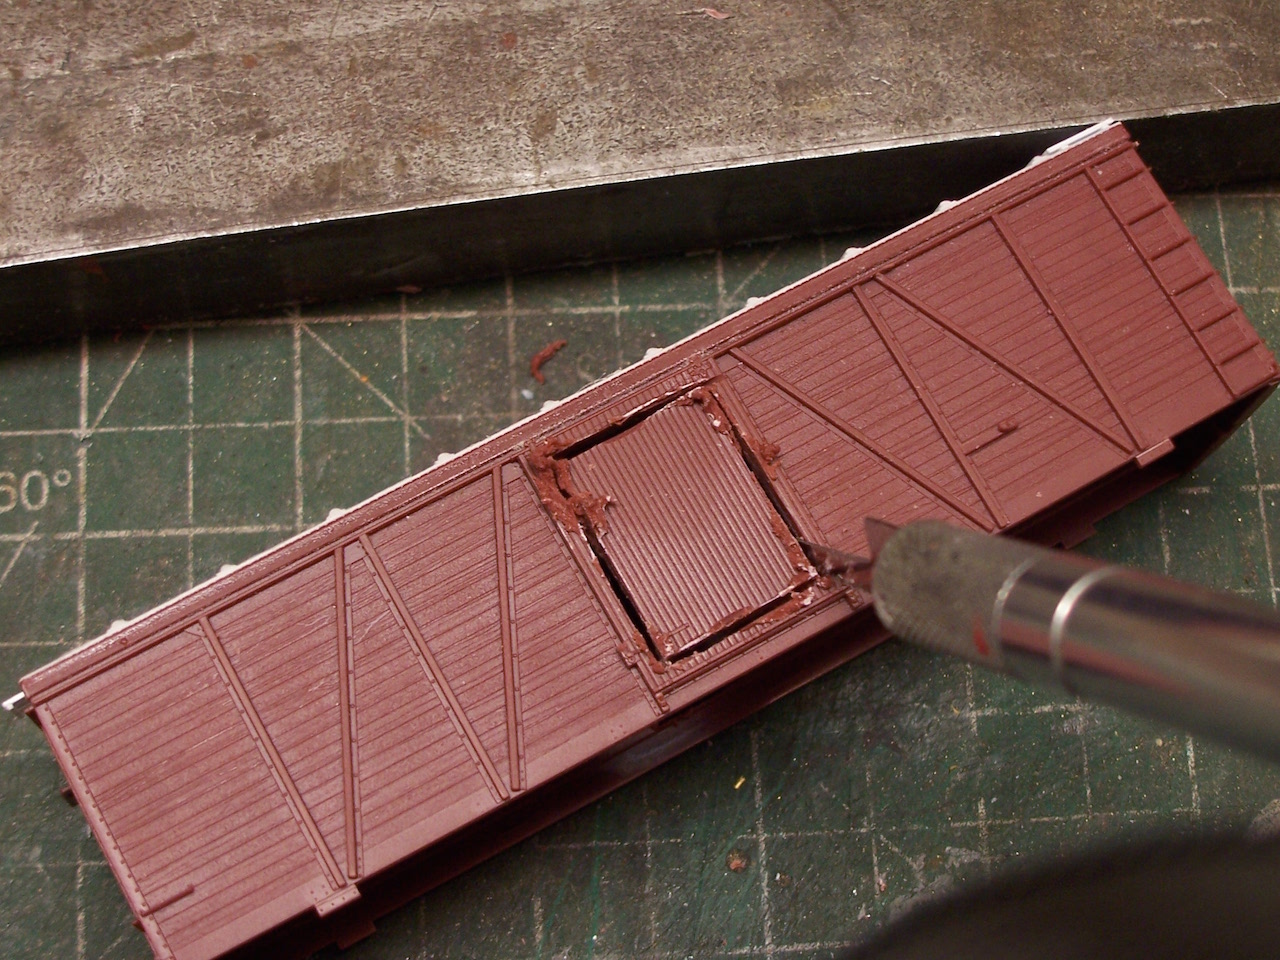
Because I didn't want to risk the cut-off disc cutting beyond the door, I finished the cuts at the corners using an X-Acto #15 keyhole-type saw blade....
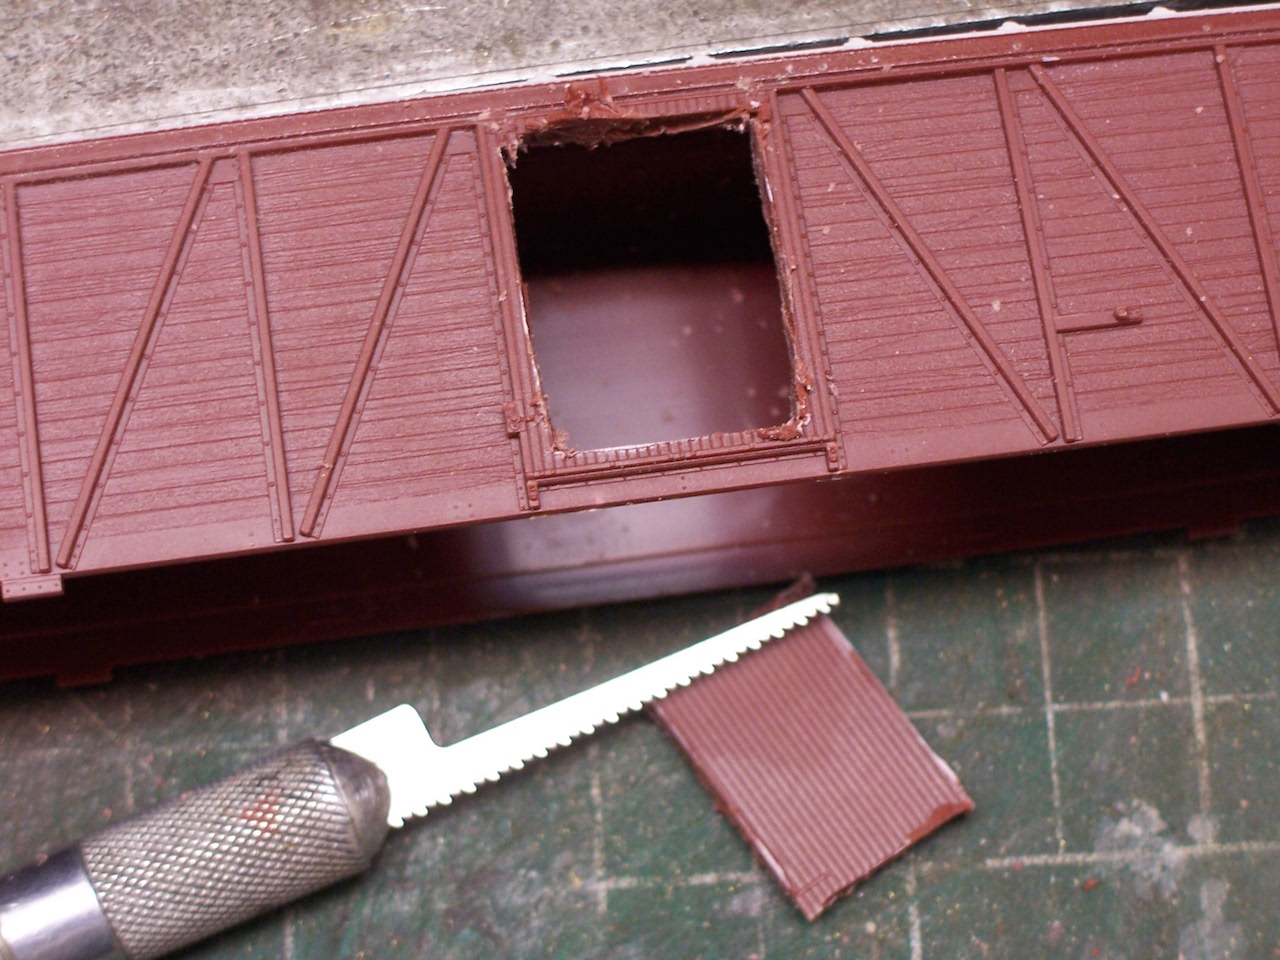
Here's the rough opening...
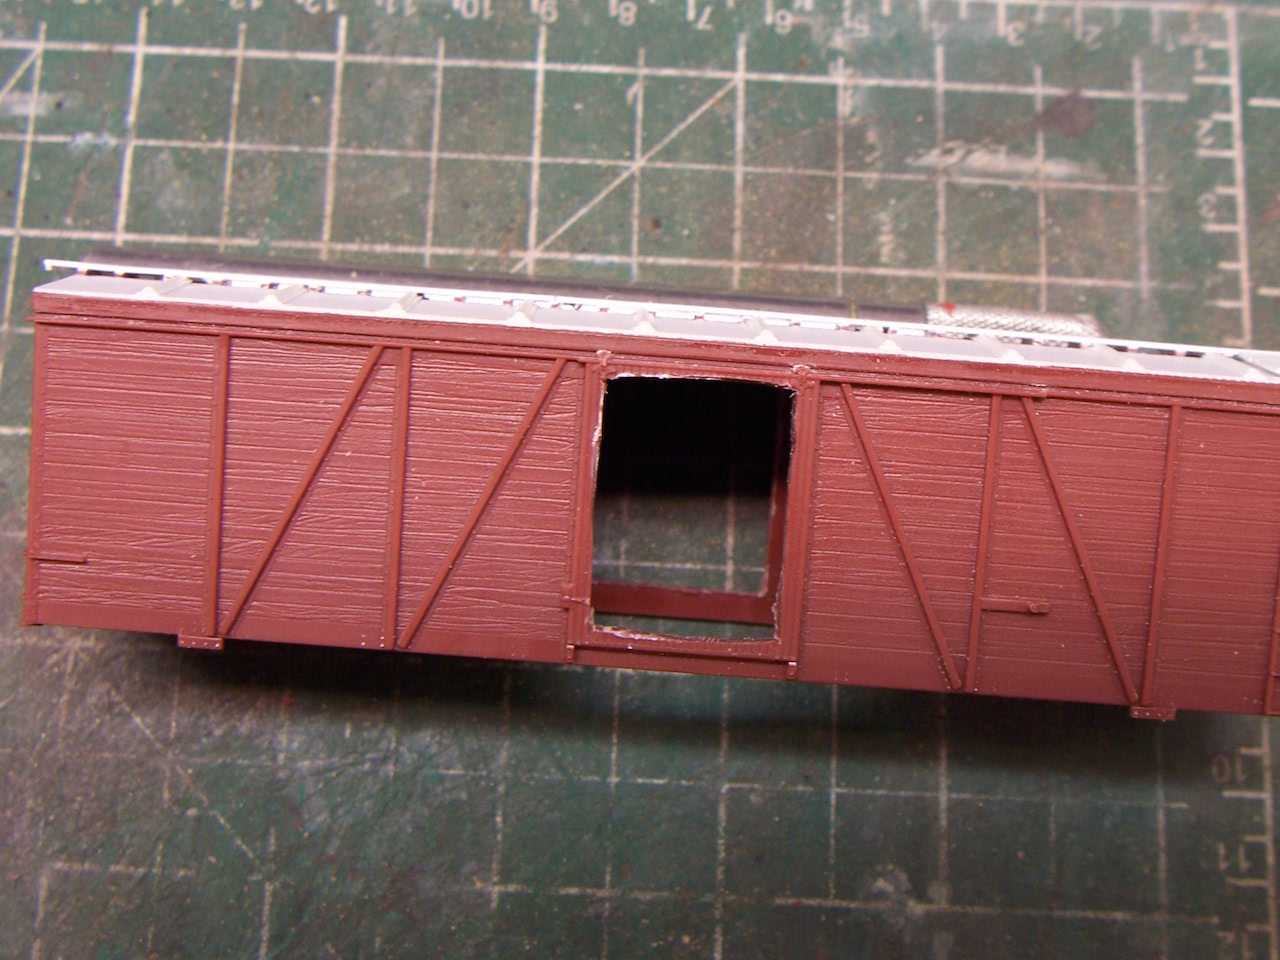
...and the opening trimmed and filed to-size...
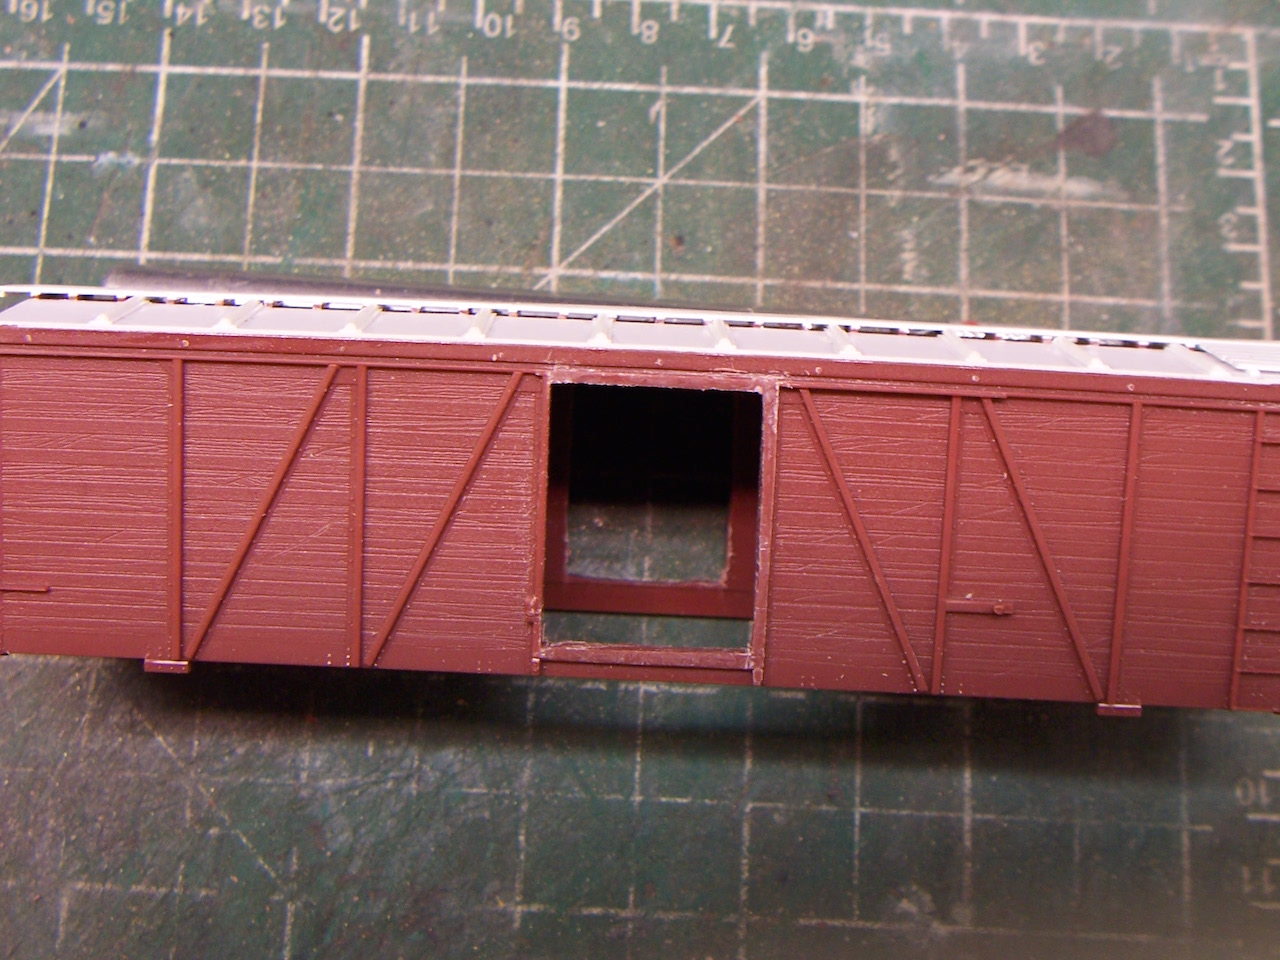
If you choose to replace the doors on your Accurail Fowler boxcars, there are a couple of things to keep in mind. The cast-on door has a thickness, as mentioned, but it also has a modelled thickness - that is, a visible scale thickness suggested by the different levels apparent at both the top and bottom edges of the door. This not-too-great photo shows that at the top, just above the ragged edge of the cut, there's a slight change in profile of the part which represents the top of the original door, and the slightly higher portion immediately behind that, which represents the top framing of the door opening...
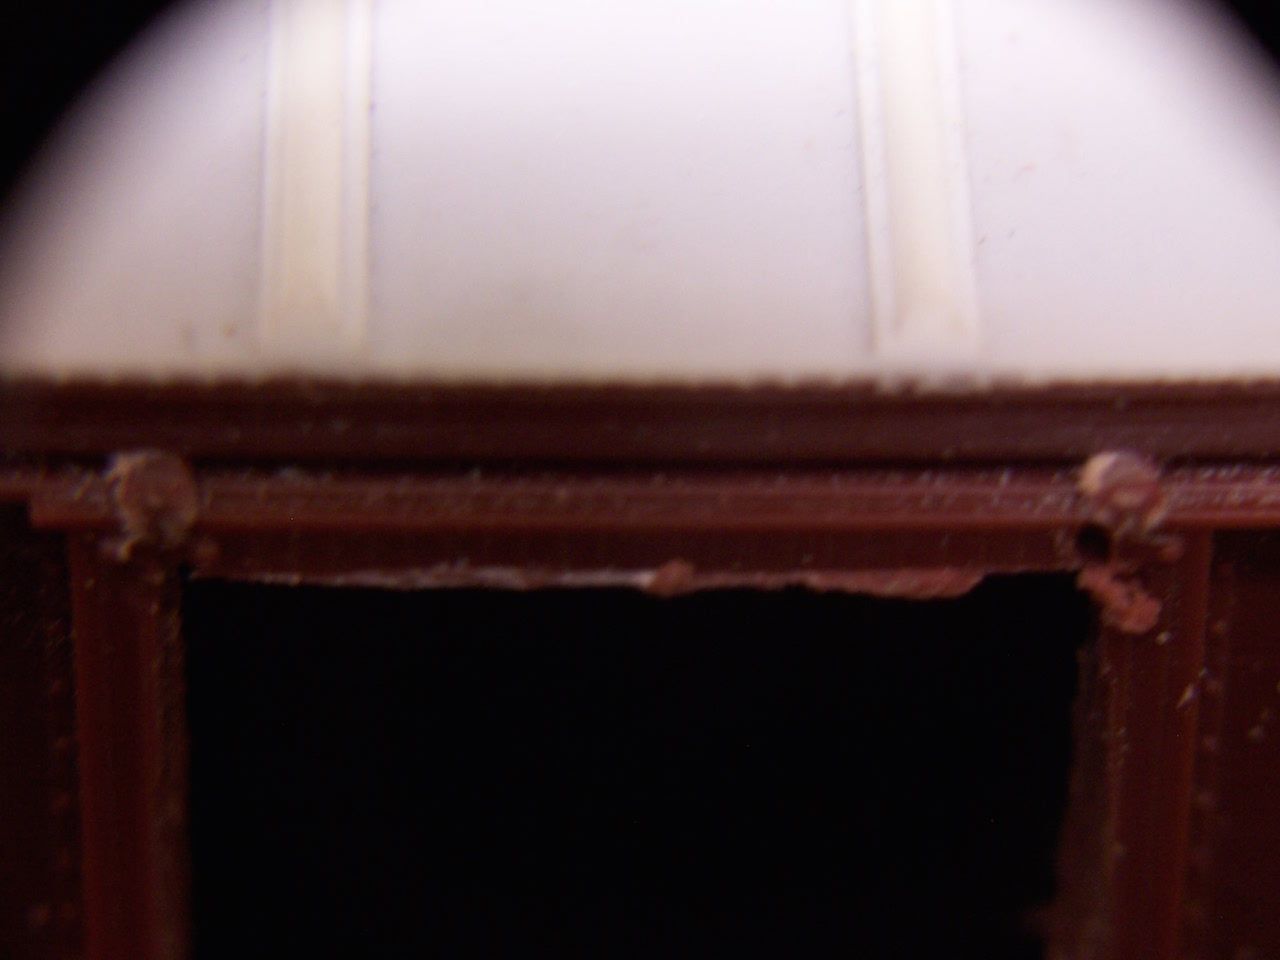
The portion representing the door's top edge needs to be removed, while the edge of the door's opening needs to remain.
Likewise, and better-shown in the photo below, is the bottom of the door, where the portion with the ragged edge...
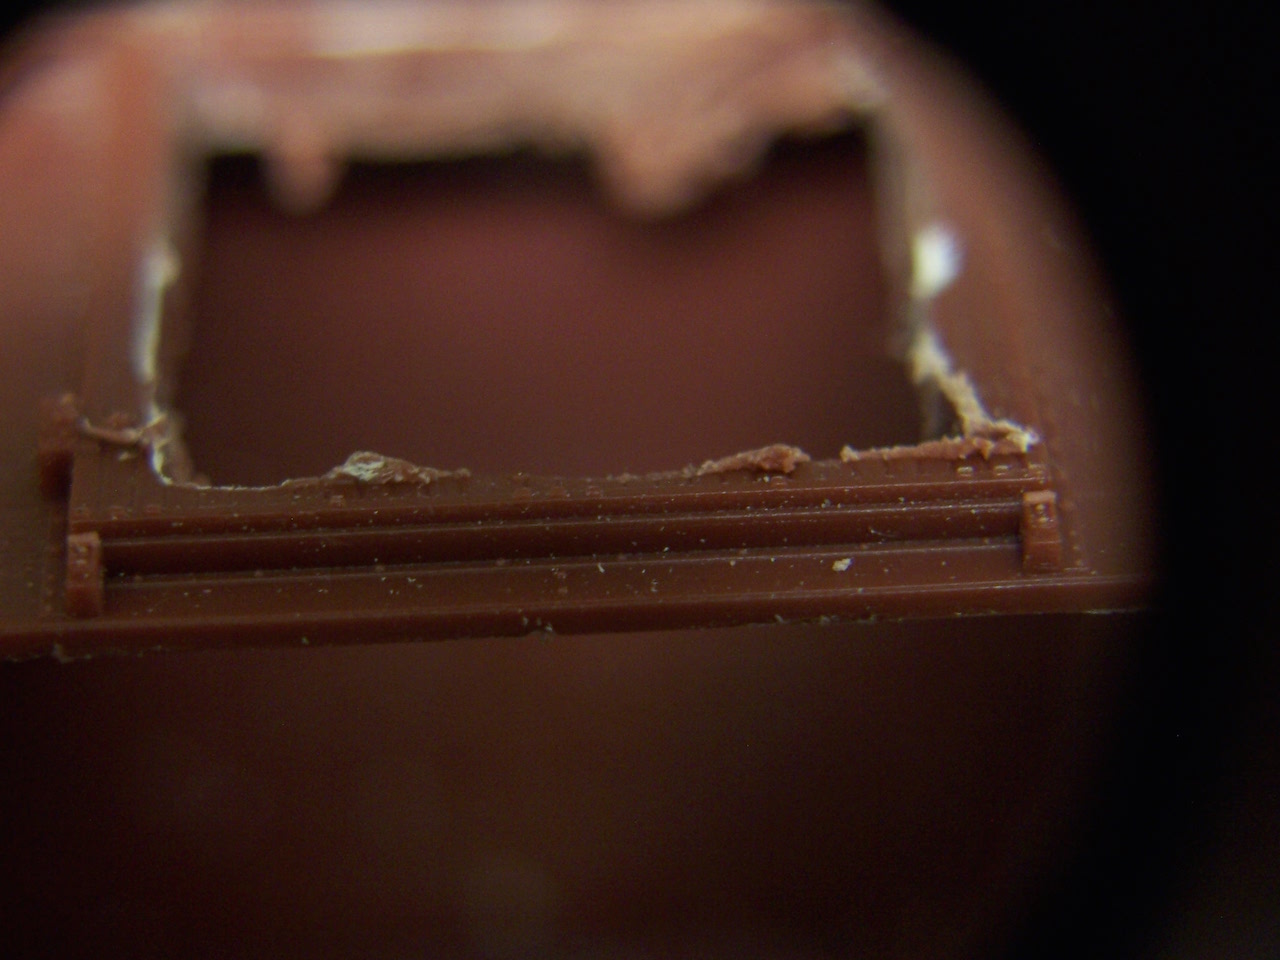
....needs to be removed down to the first step in the profile - it represents the bottom edge of the door, while the portion below it represents the doorsill, which needs to remain in place.
The vertical portion of the door remaining on the right side of the opening (the part which represents the last board) should remain, but its thickness reduced down to the same level as the material at the top and bottom, as it will then represent the doorway's framing.
On the left side of the door, the edge appears, at first glance, to be one of the boards which make-up the door, but it's actually the doorstop, so when you're filing away the excess door material left after the initial removal of the centre, make sure that that strip of doorstop remains. It should also be left at its original thickness, as the new door will butt-up against it.
If you're using styrene replacement doors, they can simply be cemented atop the material at the top, bottom, and right side of the opening, and butted against the doorstop at the left side.
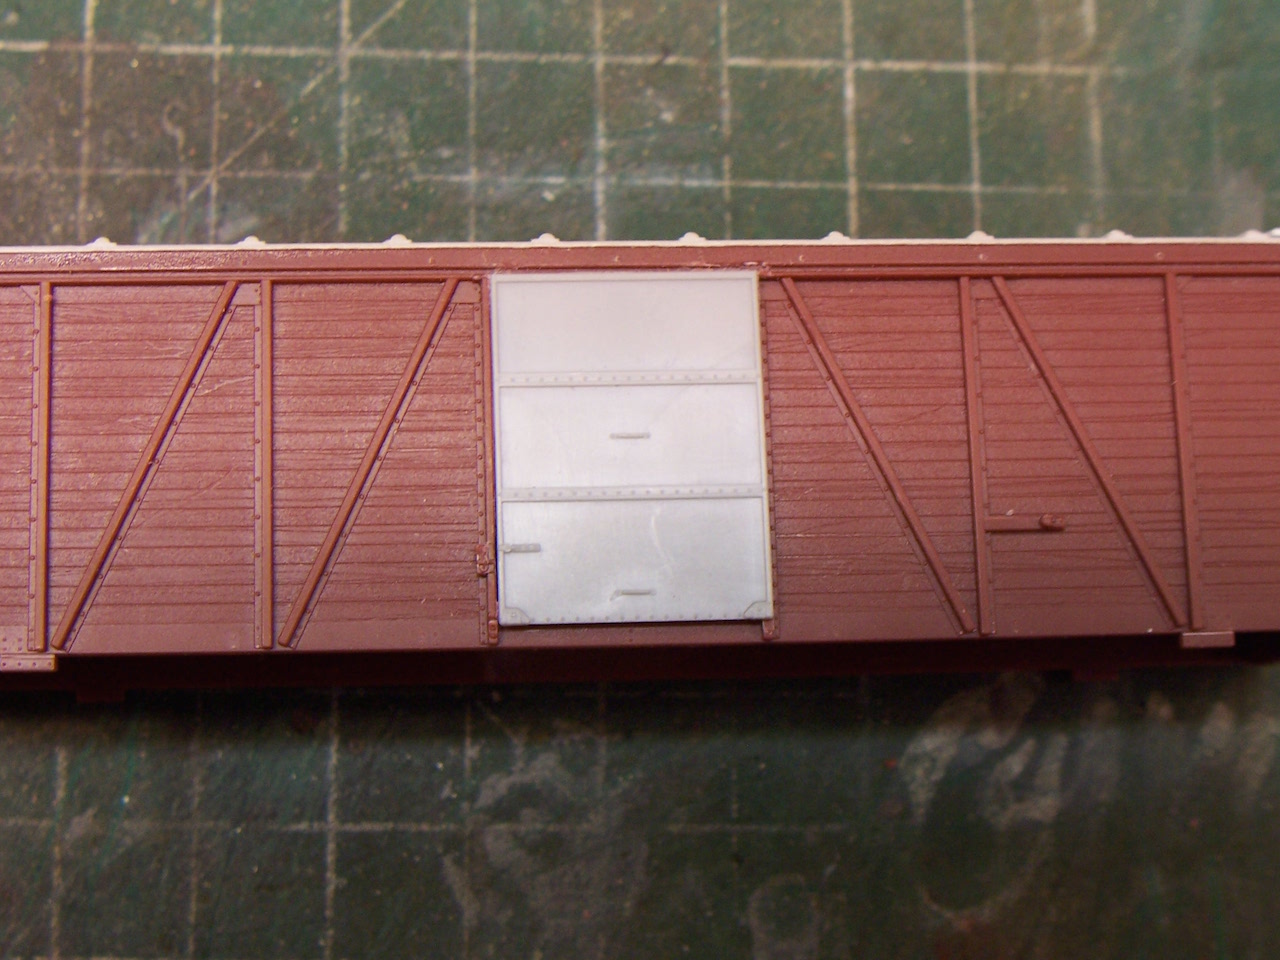
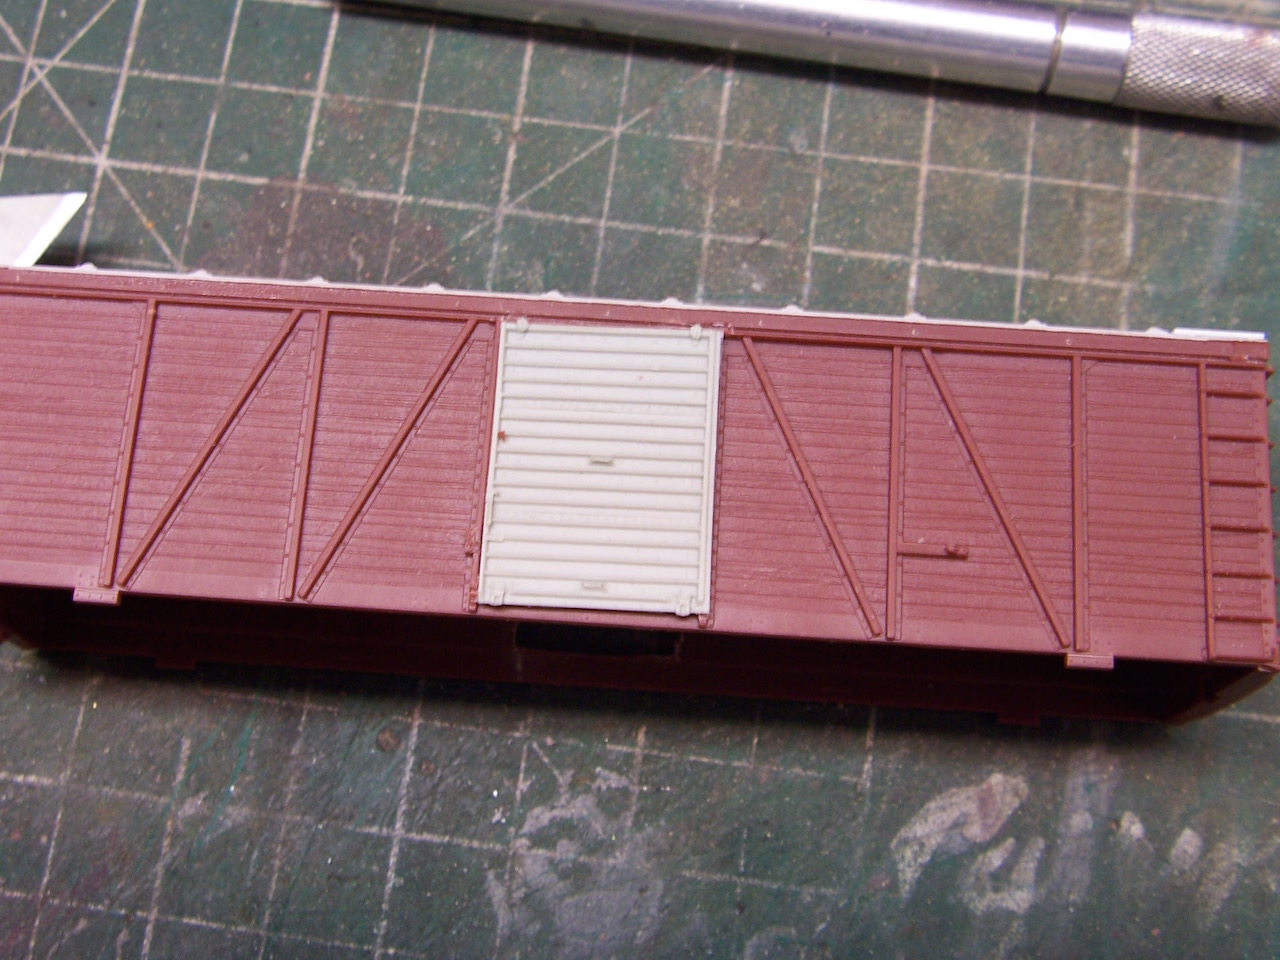
Two sets of my replacement doors are styrene, while the third pair are from a resin kit. My plan is to plug the entire doorway with .060" sheet styrene, then cement the doors directly to that and also to the door frame. With full backing, the relatively thin doors will be less likely to bow inward or out.
Here are a couple of views with replacement doors simply set in place...
For both types, I'll add top and bottom door tracks, but that's about it for this installment.
Wayne
I'm currently working on some of Accurail's Fowler boxcars, and will be lettering them for my own free-lanced Elora Gorge & Eastern. What I have in mind is some early boxcars that have seen a few minor upgrades or modernisations.
The Accurail kits come with a plank roof, which was typical for most of the early Fowler boxcars, although some pre-production versions of the real ones had all-steel radial roofs, and there was at least one with corrugated steel sides, in place of the usual wood.
My first modification is to modify the roof to either an all-steel or steel-sheathed type, as leaking wooden roofs were a major problem. Here's an Accurail Fowler boxcar, unmodified...
I cut .010" sheet styrene to a size just a bit wider and longer than each half of the car's roof - there was no way I was going to remove all 27 of the cast-on roofwalk supports, just to allow sheathing of the entire roof. I'm hoping that once the new roofwalk is in place, and the roof painted black (many cars had roofs coated with what was commonly called "car cement" a usually black coating with tar-like qualities) that the entire roof will appear to be uninterrrupted metal. Black roofs and ends for boxcars is standard practice on the EG&E.
To affix the styrene to the car's roof, I dipped a soft 1" wide brush in MEK, then applied it, fairly generously, to one side of the car's roof, and before it could evapourate, slapped the .010" sheet onto the roof. This prevented possible damage to the thin styrene, had I applied more MEK directly on it. In a few minutes, the sheet was bonded firmly to the roof.
Next, I used a NWSL "Chopper" to cut strips of .010"x .080" strip styrene into lengths just a bit longer than the slightly overly-wide roof panels, and used dividers and a small machinist's square to add the strips at regular intervals. When those were all in place, I cut Evergreen .040" half-round strips into similar lengths and aligned them, by-eye, centred atop the .080" strips. This combination is meant to represent the metal battens holding the roof panels together, and preventing the incursion of water.
Here's a car with the roof applied, and installation of the running boards (roofwalk) underway. I added strips of .010"x.030" styrene to the top of each roofwalk support to compensate for the thickness of the applied "metal" roof material...
...and the completed roof on the "test" car...
I opted to replace the supplied running boards with built-up ones because the original ones were 6" (HO) too short on both ends, as compared to the prototype drawings to which I have referred. The Accurail ones are otherwise well done, and may be accurate for some road's Fowler cars, but according to the info I have, the CPR's cars had a full 1' overhang on each end.
With the first car's roof completed, I went ahead and finished the other nine cars in the same manner.
As you can see in the last photo, I've replaced the cast-on grabiron with a metal one, and while all cars will get this upgrade, some will get a second grabiron above the first, a safety feature introduced in the mid-'30s. Since most railroads had vast rosters of freight cars, these upgrades would have been implemented over a period of years.
I've not yet decided whether or not to replace the other cast-on grabirons on the cars' ends with wire, but the cars' ladders will definitely remain as cast-on-only details.
My next modification to three of these cars is to change the doors. Wooden doors especially were susceptible to damage, and as steel doors became more readily available, railroads began to replace the damaged wooden ones on otherwise-sound cars.
For the one-piece Accurail carbody, the door has to be cut out so that the replacement door won't look too thick, as it would if simply cemented over the existing door. I started out by drilling a couple of largish holes in the door, with the intention of using an X-Acto knife to carve away the material around the holes until the entire door was gone, but the casting here is very thick, making for very slow work.
Instead, I opted to use a cut-off disc to cut around the periphery of the door, but not right to its edges...
Because I didn't want to risk the cut-off disc cutting beyond the door, I finished the cuts at the corners using an X-Acto #15 keyhole-type saw blade....
Here's the rough opening...
...and the opening trimmed and filed to-size...
If you choose to replace the doors on your Accurail Fowler boxcars, there are a couple of things to keep in mind. The cast-on door has a thickness, as mentioned, but it also has a modelled thickness - that is, a visible scale thickness suggested by the different levels apparent at both the top and bottom edges of the door. This not-too-great photo shows that at the top, just above the ragged edge of the cut, there's a slight change in profile of the part which represents the top of the original door, and the slightly higher portion immediately behind that, which represents the top framing of the door opening...
The portion representing the door's top edge needs to be removed, while the edge of the door's opening needs to remain.
Likewise, and better-shown in the photo below, is the bottom of the door, where the portion with the ragged edge...
....needs to be removed down to the first step in the profile - it represents the bottom edge of the door, while the portion below it represents the doorsill, which needs to remain in place.
The vertical portion of the door remaining on the right side of the opening (the part which represents the last board) should remain, but its thickness reduced down to the same level as the material at the top and bottom, as it will then represent the doorway's framing.
On the left side of the door, the edge appears, at first glance, to be one of the boards which make-up the door, but it's actually the doorstop, so when you're filing away the excess door material left after the initial removal of the centre, make sure that that strip of doorstop remains. It should also be left at its original thickness, as the new door will butt-up against it.
If you're using styrene replacement doors, they can simply be cemented atop the material at the top, bottom, and right side of the opening, and butted against the doorstop at the left side.
Two sets of my replacement doors are styrene, while the third pair are from a resin kit. My plan is to plug the entire doorway with .060" sheet styrene, then cement the doors directly to that and also to the door frame. With full backing, the relatively thin doors will be less likely to bow inward or out.
Here are a couple of views with replacement doors simply set in place...
For both types, I'll add top and bottom door tracks, but that's about it for this installment.
Wayne


