02-04-2011, 03:00 PM
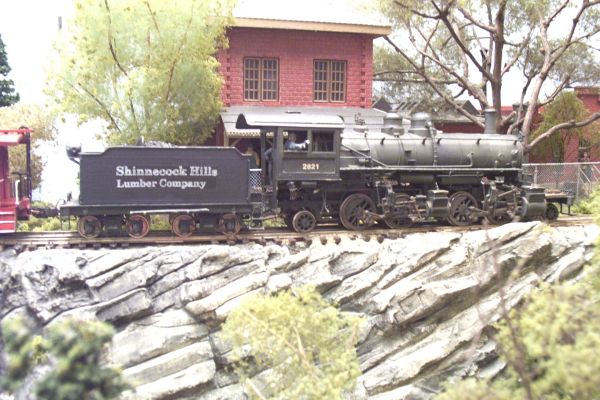
The rock in this picture, is "hand carved":

I start with an "oatmeal consistency" of Hydro-cal, and as it begins to harden, work in the rough form of the rock strata. Then, as the hardening continues I use finer, and finer yet, "tools", to work in the strata, cracks, broken pieces. When the Hydro-cal is fully set, I use some old dental tools, to work in the finest seams, cracks, strata lines.
Very thin washes of browns, tans, black are then used to color the rock ( I'm looking for gray-dark gray colors ).
I work in sections that are about 7" (avg) wide, it's fairly easy to lay the next section up, and blend it into the previous one.
It actually goes almost as quickly as setting up molds, mixing and pouring plaster,waiting for the molded plaster to cure, and applying the cast rock to the scene. Even here, some carving might be necessary to blend the cast rock into the scene, or blend separate castings together.
I also did this at the club layout, and was about to vacuum up the debris, when one of the members suggested leaving it in place, coloring it, and securing it with a water/white/glue/detergent mix. The debris made an excellent talus pile, and looked very natural. since then I've left the pile where ever I've carved the rock.
We always learn far more from our own mistakes, than we will ever learn from another's advice.
The greatest place to live life, is on the sharp leading edge of a learning curve.
Lead me not into temptation.....I can find it myself!
The greatest place to live life, is on the sharp leading edge of a learning curve.
Lead me not into temptation.....I can find it myself!


