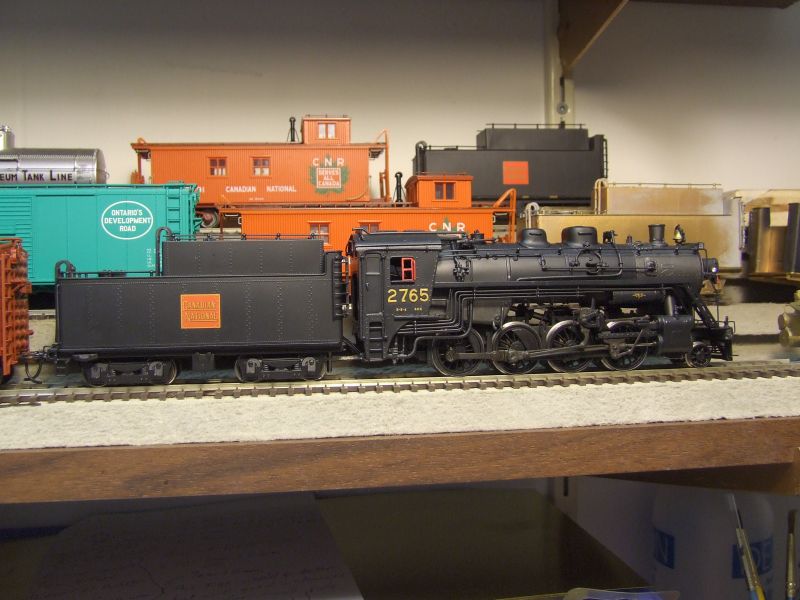
A few additions to my locomotive roster and a rebuild
#1
Well I was hoping to have posted a few projects I was hoping to complete this summer but it seems my plans to get a lot of projects done were doomed before they even got started. Sad The house we live in and rent was put up for sale so we decided to see about buying a house. Well needless to say finding one with a good basement or a suitable spare room for a decent sized layout proved to be hard. So with winter not that far off and the house were living in off the market now we have decided to stay put to spring. This means I can finally get some quality time in my shop. Big Grin

My last big project was my brass Canadian National N-5-d 2-8-0 rebuild complete with DCC & sound.
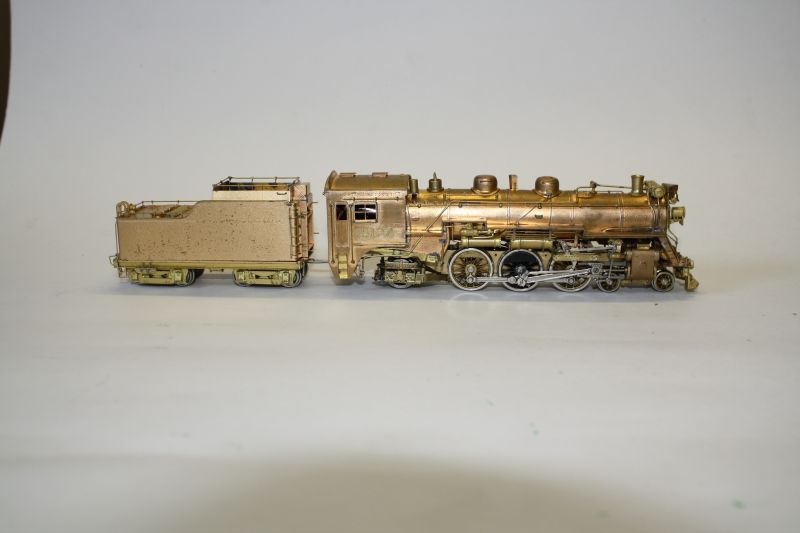
   

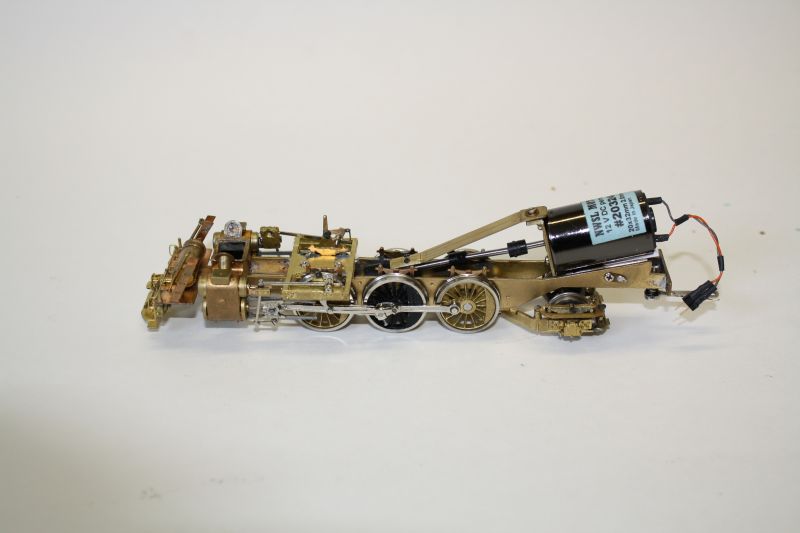
I did manage to start and finish another locomotive rebuild. A brass Canadian National J-4-e Pacific. This one also got DCC & sound. I was going to post the rebuild on the 4-6-2 but a crash of the hard drive on my laptop computer left me with no photos. Now it was not a big loss as there was not much work to be done on it. I installed a new gearbox, can motor, new drivers for the #1 and #2 axles and fixed a few bad solder joints.


Wayne Reid
Reply
#2
I did say I managed to install DCC & sound in the CNR Pacific and here are a few shots of the 99% complte locomotive and tender. I still need to add a front coupler and give it some weathering and paint the wires running between the locomotive and tender.Some how I missed them and did not notice until I was resizing the photos this evening. :oops: The weathering will be done once I have a few more locomotives finished so I can do them all at once.


I am happy with how this one turned out. I gave it a slightly glossy look for the cab and tender. The boiler was painted with an almost flat finish and the smoke box and fire box got a flat finish. The black paint I used was the new True Line Trains warm black acrylic paint. It also got the round Canadian National monogram as I model the late 1950's and most passenger locomotives got the round monogram by then. I wanted it to have a fresh shopped look. It runs very nice and sounds great as well. I will be happy to give it some weathering though as I find the white walls on the drivers and pilot and trailing truck wheels is so bright it looks like a parl locomotive. Goldth

A few thoughts on the TLT warm black paint I used. I find this to be a very nice water based acrylic. It is airbrush ready right out of the bottle and spray very nice with a slightly glossy look. This is good for decaling. I decaled the 4-6-2 right over the paint without adding a gloss finish with no problems. I also find for steam locomotives the warm black is a very nice black. it is designed for indoor viewing and I find it looks good.

Wayne Reid
Reply
#3
Now even though I was very busy this summer I did manage to purchase a few more locomotives for my roster. My goal for my layout was to end up 8 to 10 CNR steam locomotives. Either by kitbashing some plastic locomotives or finding some more bass locomotives for a good price.

The first new addition to my roster is a CNR S-2 mikado. This one is new in the box and had only been test run. I will be installing a can motor in it along with DCC & sound. It may also get a new NWSL gearbox. The factory gearbox is a little noisy but I may be able to adjust it and cure the noise problem. I hope to paint this one soon. I am just waiting on the decoder and speaker to arrive so I can get to work on it.


The next addition to the roster was by pure luck. A friend informed me of a web site that had some estate sale items on it. One item was a brass CNR U-1-f mountain locomotive ( think 6060 ). I have been wanting a bullet nosed mountain for years but most I have seen for sale were going for a $1000 Cdn. Eek Way to pricey for me. I have a frame with drivers, valve gear, side rods ect for one but was never able to find the other 80% of the locomotive at swap meets. Sad


Needless to say the price was right for the estate sale 4-8-2 so I bought it. It was painted when I got it and did run well. It had a bit of gearbox noise and the factory can motor was a little rough running. When I stripped the paint I found a number of bad solder joints. Some have been repaired. My plans are to make this one a rebuild thread like my CNR 2-8-0.

The last locomotive I purchased was another one I have always wanted. A brass CNR H-6-g ten wheeler. I have always thought they are very nice looking little locomotives. This one was a super deal as I got it for $100 plus shipping. Now it was in rough shape and the owner was unsure how it ran. Seeing as brass CNR 4-6-0s always seem to sell quick and can be hard to come by I decided tio take a chance on it. This is one of the pictures I was sent.


Wayne Reid
Reply
#4
A few more pictures of the CNR ten wheeler.


Wayne R
Reply
#5
Even though the 4-6-0 seemed to be in bad shape I decided to tackle it while I am waiting for the decoder and speaker for the mikado.
I decided my first move would be to see if it would run and if so how good would it run. I decided to try and get it running with the paint still on the drive as it was already together. I gave it a little oil and fixed the wires. The test run would be on regular DC power. Seeing as it has a factory can motor I was hoping it worked well so I could keep it. If the gearbox turned out to be noisy I would replace it with a NWSL gearbox.

Well I got my first big surprise. Even though the locomotive an tender looked very rough it turn out the drive ran real well. Very quiet and smooth. It would creep along so slow it took it about 4 minutes to go 3 feet. Eek The factory gearbox was even very quiet. It is looking like my $100 was very well spent. This is got to be the best running one I have bought yet. It even creeps slower than the new test run only mikado.

With the big boost in excitement from the drive working so well I decided to tackle the broken tender ladder. I have never had much luck scratch building brass ladders and seeing as the original was only missing one of the top loops I decided to see if there was a way of fixing it. My first move was to make a new loop.

   
Original broken ladder and the new side piece. The side piece was made from a piece of small brass flat bar.

My idea was to thin out the original broken side post with a good sharp file and solder the new piece over top of it. Granted this will make that side post a little thicker than the other side but once painted it should not be to noticeable. After about an hour of carefull filing I was able to solder the parts together.
   

It turned out good and just needs to be mounted on the tender.


Wayne R
Reply
#6
Nice additions Wayne---they're going to look great by the time you're finished---looking forward to seeing more pictures as the work progresses
Reply
#7
Looks like you're well on your way to that dream roster..!!! Those are superb looking engines, and you seem to have the right touch to bring them to life... Thumbsup

Keep as updated on your project....
Gus (LC&P).
Reply
#8
Nice job on that sweet little Pacific, Wayne. Thumbsup Thumbsup
And a nice steal on the Ten Wheeler, one of my favourite CNR locos. You'll have the old girl looking like new in no time. Goldth

Wayne
Reply
#9
Thumbsup

I really pick up quite a bit of info watching you guys do these rebuilds. That ladder looks great. If there is any difference in the thickness, I certainly can't see it. Wink
Reply
#10
Tetters I am happy you cannot notice the difference in thickness of the new vertical part. it mean all my work was worth it.I spent an hour filing the broken side down from 0.020" thick to just a little over .005" thick. I also marked the inside of the new vertical part and filed down the area that would be solder to the original side piece. After all that the repaired side is just a little over 0.003' thicker than the unbroken side. I might have been able to get it closer but the new part was to easy to bend while filing it.

Today I decided to fix the broken coupler cut lever. I have actually gotten good at bending new one freehand ( no jig ). It seems every locomotive I have rebuilt so far needs at least one new one. Seeing as I do not like replacing perfectly good stanchions I start with a slightly longer piece of brass wire ( 0.015" ) than needed and bend one side to shape. I then slide the new piece through the stanchions and bend the other end in place on the tender. my first attempts at this method on my CNR 2-8-0 rebuild ended with me having to do it several times before I got it right. By the time I got to my 4-6-2 pacific I could do it first try and that is how it went on the ten wheelers tender.
I also replaced the horizontal handrail bar above the coupler cut lever with a new piece of straight 0.020" brass wire.
   

The next repair was to make a new stirrup step for the left rear side of the tender.
   
Tender side with missing step.

   
New step bent from some small flat brass bar next to tender side with original step still in place. I still have to make a small rung for the new step. This was a fun part to make is it is real small.


Wayne R
Reply
#11
Wayne R Wrote:After all that the repaired side is just a little over 0.003' thicker than the unbroken side.

Well...now that you've pointed it out! Icon_lol Icon_lol Icon_lol


Looking good fine sir. Thumbsup
Reply
#12
With the new step made the fun part was going to be soldering it in place without unsoldering any other details parts nearby. Eek Some small alligator clips for heat sinks and some wet tissue helps. I am not scared to admit it took me three tries to get it right. The first two attepts at soldering it in place I got a crooked step. I used my homemade resistance soldering unit to do the job. The very small rung was soldered in place with a 45 watt soldering iron.


Another picture of the finished tail end of the tender frame.


With the frame done ( well except for some re-railers ) I soldered the repaired ladder back on the end of the tender body. I then installed the trucks and a Kadee #58 coupler on the tender frame and mounted the shell so I could see how things looked all back together.


Wayne Reid
Reply
#13
Hello Wayne---thought you might like to see a couple of my locomotives that were painted and modified by Doctor Wayne---hopefully they'll keep you inspired while you're working on your engines

[Image: 1210022.jpg]

[Image: 1210014.jpg]
Reply
#14
cn nutbar

Those are some very nice CNR steam locomotives. Great inspiration they are. I will be the first admit how much your fleet of CNR steam locomotives ( diesels to ) is a very inspiring sight. Now that I have managed to collect six of my own I wish I would have started years ago. I think I spent a few too many years deeply involved with my second hobby of RC aircraft. I gave that up last year to concentrate on my model railroading.

I got a lot more done on the 4-6-0 and will be posting more pictures soon. I just need to resize them. It looks like I will be able to paint the 4-6-0 next week as even though it looked in very rough shape the repairs have gone quickly and have been not all that hard to do. The fact that the drive and gearbox works great also saved me a lot of work. I am also hoping to post some rebuild pics of the 4-8-2 once I get back to working on it. I am just waiting for some 1.4 mm screws to arrive from NWSL for the tender trucks. Each truck requires 12 1.4 mm screws of various lengths. The factory brass screws have seen better days.


Wayne R
Reply
#15
Hi Wayne---glad you're making progress on your 4-6-0.In my opinion,all the credit for inspiring anyone should go to Doctor Wayne.I am just very fortunate to have a supportive wife who has enabled me to add to my collection---if it wasn't for the good Doctor,I would only have a shelf full of shiny locomotives.Here's another example of his workmanship---I know this is one of Wayne's favourite engines---the shot was taken at Lowbanks on his EG&E

[Image: 111016-2.jpg]
Reply


Forum Jump:


Users browsing this thread: 1 Guest(s)