Posts: 921
Threads: 33
Joined: Dec 2008
I love this... and the 4-8-0 that you built. Have you built others? Would you start a roster thread so we can see your work? You are a phenomenal steam locomotive builder, I hope I am able to use your threads as a tutorial when I build my first steamer...
Dave
-Dave
Posts: 1,127
Threads: 86
Joined: Nov 2010
e-paw 
Looking for the solution of LEDs in the front lights.
Lutz
Posts: 5,859
Threads: 175
Joined: Dec 2008
I'm enjoying following your progress, Steve. 
While I will use them when there's no other option, I'm not personally a big fan of putty fillers, and find it's faster and gives a good finish more easily when I use styrene strip or rod to fill holes in plastic. Simply choose strip or rod slightly larger than the opening (.003"-.005") then liberally coat hole and filler with solvent-type cement, and jam the filler into the hole. Let it sit until hardened, then trim off the excess with a knife, and finish with files and/or sandpaper. In most cases, no further filling will be needed, and the plug will be imperceptible once painted.
If the hole isn't compatible with the filler stock which you have on hand, use a drill, file, or knife to enlarge the opening to a size appropriately smaller than your filler material.
Wayne
Posts: 1,992
Threads: 81
Joined: Dec 2008
You thinking about bringing any of these to the Northeast Fallen Flag RPM this weekend? I remember I saw your "first" camelback all the way back in 2009, and it was fantastic.
<!-- m --><a class="postlink" href="http://www.hansmanns.org/neff_rpm/">http://www.hansmanns.org/neff_rpm/</a><!-- m -->
Modeling New Jersey Under the Wire 1978-1979.
![[Image: logosmall.png]](http://i543.photobucket.com/albums/gg445/CAB_IV/Model%20Trains%202013/logosmall.png)
Posts: 2,724
Threads: 160
Joined: Dec 2008
AGGGGG!!! GEC that's the first that I have heard of the RPM, don't know If I could make it. I'll see if I can put some things off till next week, I see that Bill Schaumburg from RMC will be there. I would love to have a chat with him....I have been trying to get Tomustang to go to one of these also.
My other car is a locomotive, ARHS restoration crew
Posts: 1,992
Threads: 81
Joined: Dec 2008
e-paw Wrote:AGGGGG!!! GEC that's the first that I have heard of the RPM, don't know If I could make it. I'll see if I can put some things off till next week, I see that Bill Schaumburg from RMC will be there. I would love to have a chat with him....I have been trying to get Tomustang to go to one of these also.
Shoot, I wish I mentioned it sooner! I was really excited this year, because I wasn't able to make it last year. Its always good fun, and its MUCH bigger than it was when it was in High Bridge.
Modeling New Jersey Under the Wire 1978-1979.
![[Image: logosmall.png]](http://i543.photobucket.com/albums/gg445/CAB_IV/Model%20Trains%202013/logosmall.png)
Posts: 2,724
Threads: 160
Joined: Dec 2008
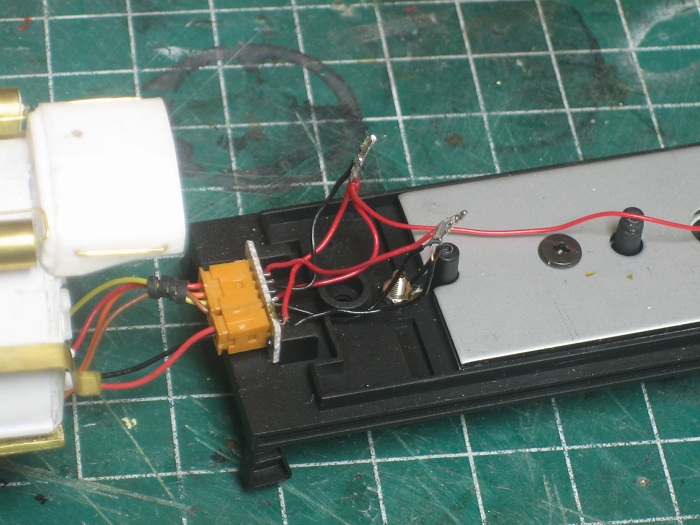
Today is boiler front day  . But before I start, I need to test my weiring,that includes continuity and polarity. On my work bench test track, if you put the direction switch to the left, forward direction will be to the left as long as everything is wired correctly. That was the first thing that I was looking for, and I discovered that one of the decapods motors were weired backwards. This was something that I was able to correct easily. I removed the PC board for the DCC hook up and hard weired all the connections in the tender flipping the polarity of the motor leads there.
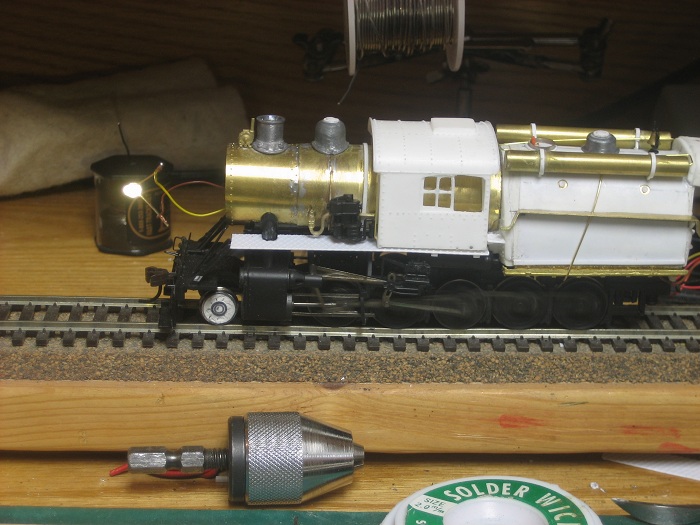
I will leave the soldered joints uninsulated for now as the tender lighting will have to be weired to it latter.I then temped the LED on to the headlight leads and turned the throttle up to full power. I do that to make sure that the LEDs resistor is correct and the lamp doesn't burnout at full voltage.
And look at them drivers fly.... One more thing that you need to be careful with is that the LED acts as automatic directional lighting. If it doesn't light up in the proper direction just flip the leads.
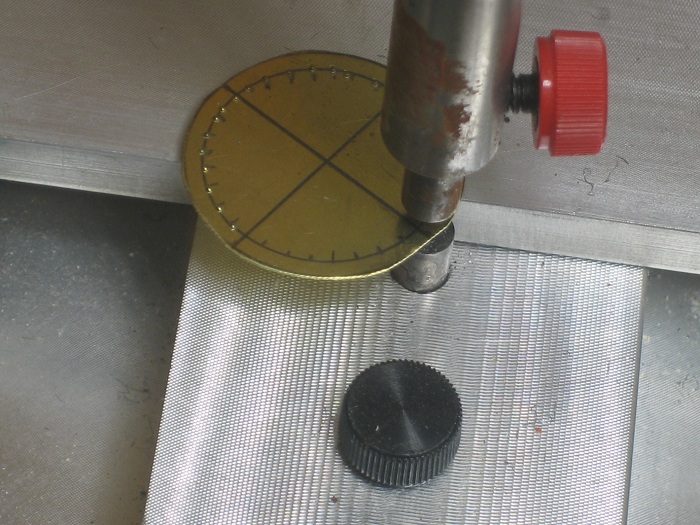
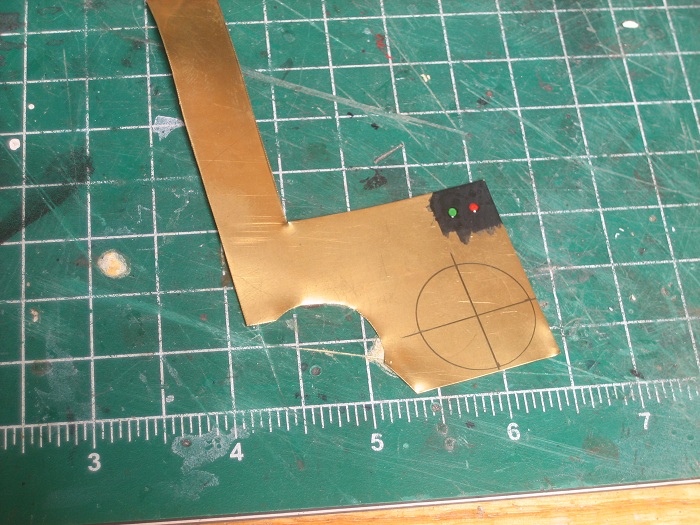
With that all working correctly I measured the diameter of the smokebox and drew out a circle on some brass that was ever so slightly larger. This was done to help hide any slight out of round spots in the smoke box.
This was then cut out with some snips. I then drew another smaller circle centered in the box front with evenly spaced hash marks on it. This is my guide for a row of rivets located there.
The rivets were then punched in with my riveter.
My other car is a locomotive, ARHS restoration crew
Posts: 2,724
Threads: 160
Joined: Dec 2008
My next step was to solder it in place. I cleaned the front edge of the smoke box and back side on the box front with some fine emery paper and applied some flux to both surfaces.
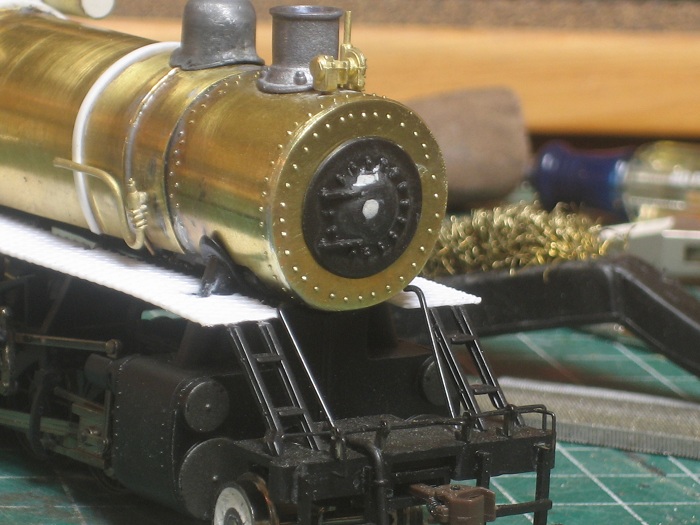
I lined it up and temporarily held it in place with some painters tape. This allowed me to use both hands to run a bead of solder around the whole smoke box.
I then cleaned up the excess solder with a bunch of small files. In this step you have to be careful not to file off the rivets on the smoke box.

Next you wipe off the smoke box front with some rubbing alcohol to get rid of any flux residue. You do this so that you can glue the door from the original box front in place with some CA glue.
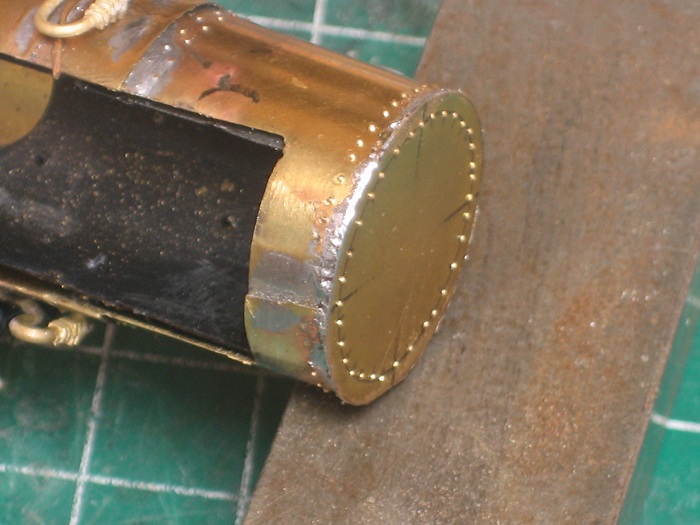
My other car is a locomotive, ARHS restoration crew
Posts: 5,859
Threads: 175
Joined: Dec 2008
It's enjoyable watching it all come together.  
Wayne
Posts: 233
Threads: 5
Joined: Dec 2010
greeting from the blade city Solingen / gruß aus der Klingenstadt Solingen
Harry
Scale Z and N
Posts: 1,682
Threads: 101
Joined: Dec 2011
Thumbs up! Flawless work!
Matt
Posts: 720
Threads: 53
Joined: Dec 2008
Nice work. What type of body filler do you use? I've only ever been happy with bondo and jbweld, but find them to be a nuisance to use. Accordingly, I usually try to do what Wayne has suggested.
Michael
My primary goal is a large Oahu Railway layout in On3
My secondary interests are modeling the Denver, South Park, & Pacific in On3 and NKP in HO
<!-- m --><a class="postlink" href="http://thesouthparkline.blogspot.com/">http://thesouthparkline.blogspot.com/</a><!-- m -->
Posts: 2,724
Threads: 160
Joined: Dec 2008
Thanks guys, I like to use the body filler from squadron. It comes in a white and a green version. I prefer the white one, I find it is easier to paint lighter colors over.
My other car is a locomotive, ARHS restoration crew
Posts: 80
Threads: 9
Joined: Oct 2012
E-Paw,
I know you've done some work on the Camelbacks from your Dad.....that he mentioned to me, any chance you have more of those "kitbits" that could be well.. molded? I want to build a few Camelbacks, myself, but finding the parts is whats killing me on this project and your dad had me join here to talk to you about it directly!
Let me know, PM me or e-mail me!
yellowstone10 @ hotmail.com (without the spaces)
~John AKA "Yellowstone" OR "EM-1"
Posts: 2,724
Threads: 160
Joined: Dec 2008
Sent you a PM EM-1.
The next thing on the to do list is to finish wiring the head light and get it mounted.
With a light mounted at the top of the smoke box like this there isn't a whole lot that you can do to hide the wires, I will just try to make then as inconspicuous as possible. In order to get power to the LED I needed to drill a hole just behind where it would mount.
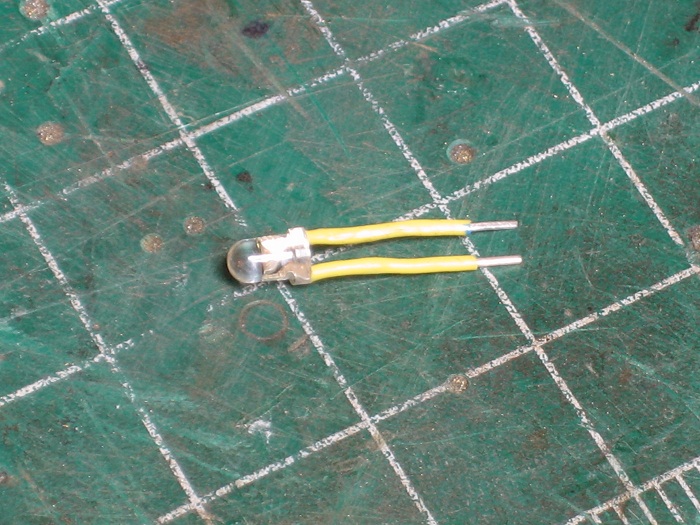
I also drilled out the back of a PRR style light from Cal-Scale #190-477 to make room for the LED.

I reused the same mounting bracket from the original models and mounted the PRR lamp to it after removing the old one from it. Note the small tab at the rear of the bracket, that will be used to hold it to the new firebox.
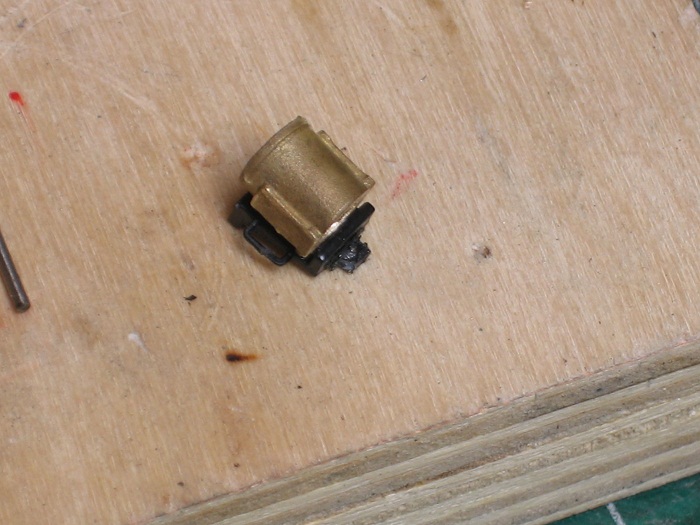
I located the spot where the lamp would go on the top of the fire box, drilled a small hole in that spot and worked it into shape with a small file. I kept checking it for fit with the new headlight, and stopped when it was a tight fit. I also had to remove the rivet on either side of my mounting hole to get it to sit just right.
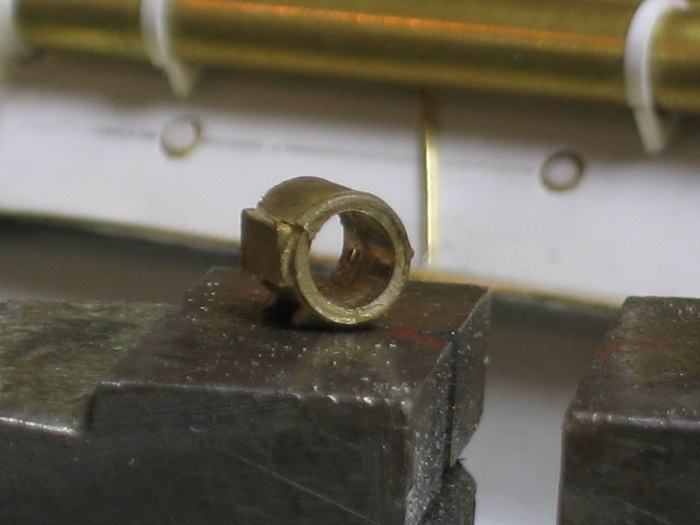
With all this done I striped some insulation from some phone wire ans slid it over the leads on the LED to keep it from shorting out against each other or the headlight casting.

My other car is a locomotive, ARHS restoration crew
|


![[Image: logosmall.png]](http://i543.photobucket.com/albums/gg445/CAB_IV/Model%20Trains%202013/logosmall.png)
 . But before I start, I need to test my weiring,that includes continuity and polarity. On my work bench test track, if you put the direction switch to the left, forward direction will be to the left as long as everything is wired correctly. That was the first thing that I was looking for, and I discovered that one of the decapods motors were weired backwards. This was something that I was able to correct easily. I removed the PC board for the DCC hook up and hard weired all the connections in the tender flipping the polarity of the motor leads there.