Posts: 2,724
Threads: 160
Joined: Dec 2008
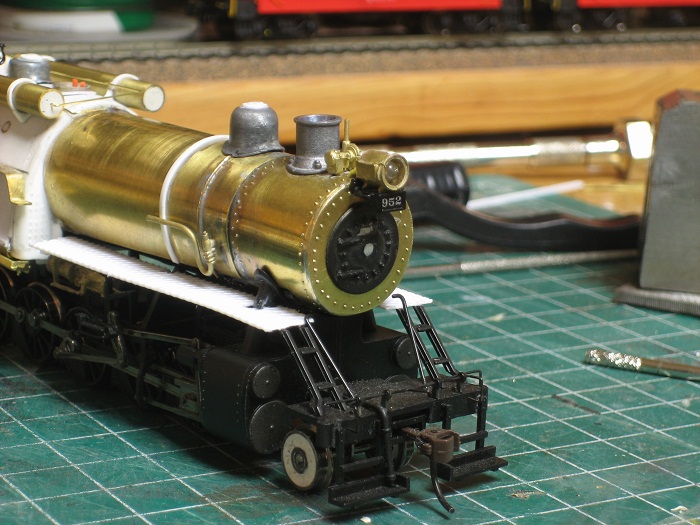
My next step was to loosely place the LED into the headlight and fish the leads through the hole in the top of the firebox so that they could be soldered.
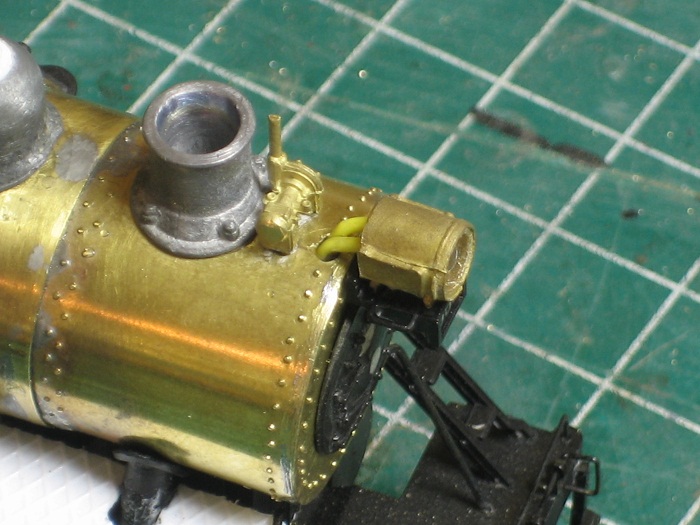
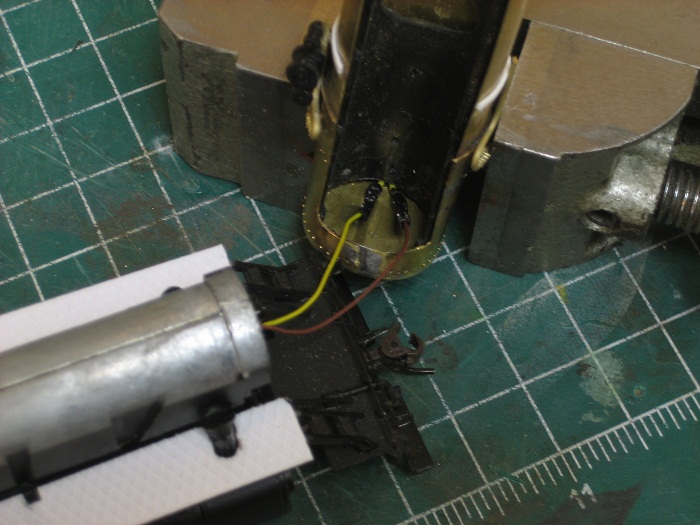
You may want to recheck the polarity again before you solder it up, or the lamp will only light in reverse. I used heat shrink insulation to cover my solder joint but electrical tape would work just as well. As you can see from the last pic I left enough slack in the wire to be able to remove the boiler from the frame.
I replaced the boiler on the frame by pulling the slack head light wire back into the firebox (the only place where there is room on this model) and glued the assembly in place. After it dries completely I'll bend the wire into it's final position and fill in the holes with putty.
My other car is a locomotive, ARHS restoration crew
Posts: 80
Threads: 9
Joined: Oct 2012
e-paw,
You have done some impressive work here. you really got me going to work on the B&O's I have planned! VERY NICE!
~John AKA "Yellowstone" OR "EM-1"
Posts: 2,724
Threads: 160
Joined: Dec 2008
Moving onward,,
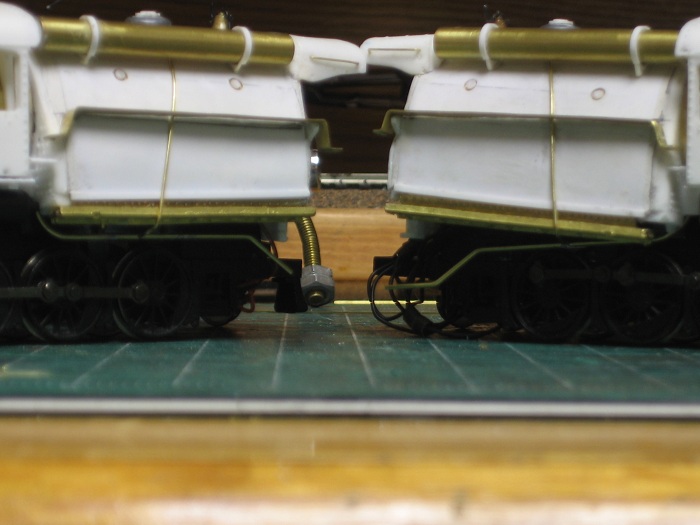
I have started on some of the plumbing on the 2-10-0's. I'll start by showing the cold water feed from the tender, it is just a 2 inch scale pipe that runs on either side of the loco up into the cab where the injectors would be located.
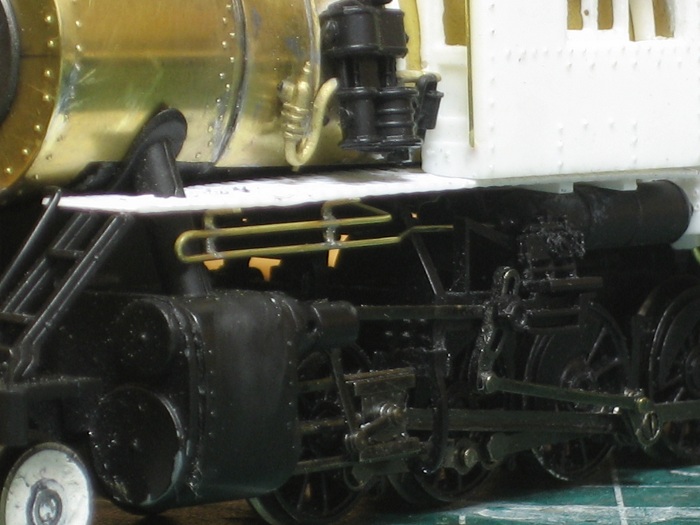
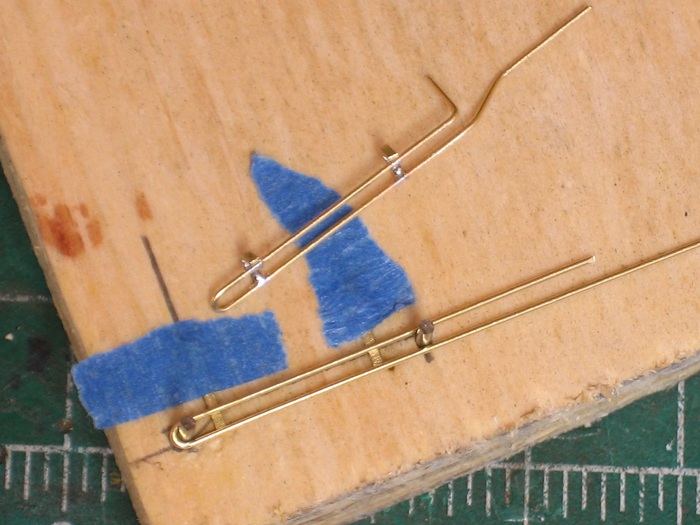
I also shaped some of the piping that will be placed under the walkways. I did this by forming some brass wire around some nails and soldering some hangers to it. This picture shows one that is complete and one that's in the works.
after they were formed I attached them to the walkways with some CA glue.
My other car is a locomotive, ARHS restoration crew
Posts: 2,724
Threads: 160
Joined: Dec 2008
I also bent some steps that I soldered to the side of the smokebox.
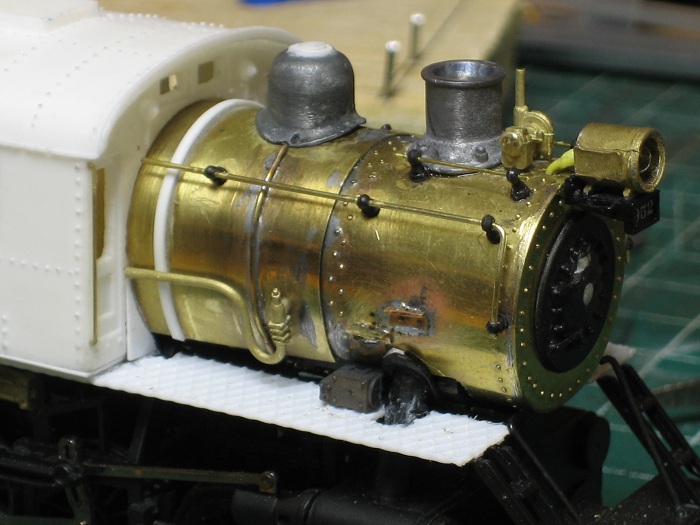
Also note the large gap at the bottom of the cab where it continues straight down and the boiler curves away from it.
Well I filled it..
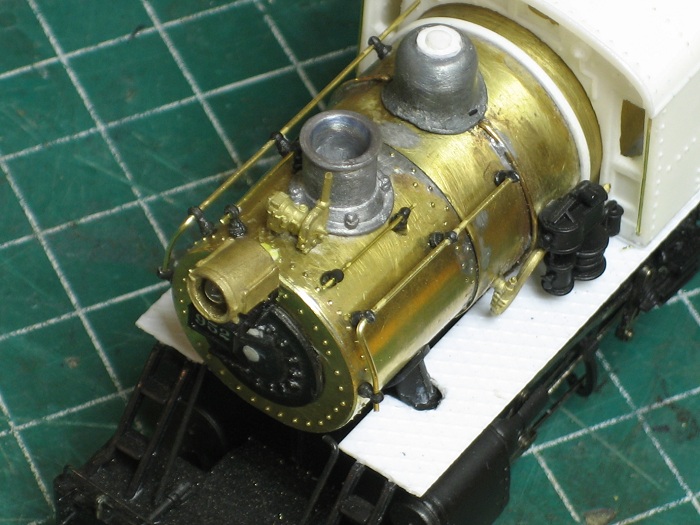
To add some subtle differences to the two locomotives I cut up an A-B valve and turned it into a control cabinet that I then mounted on the top of the walkway.
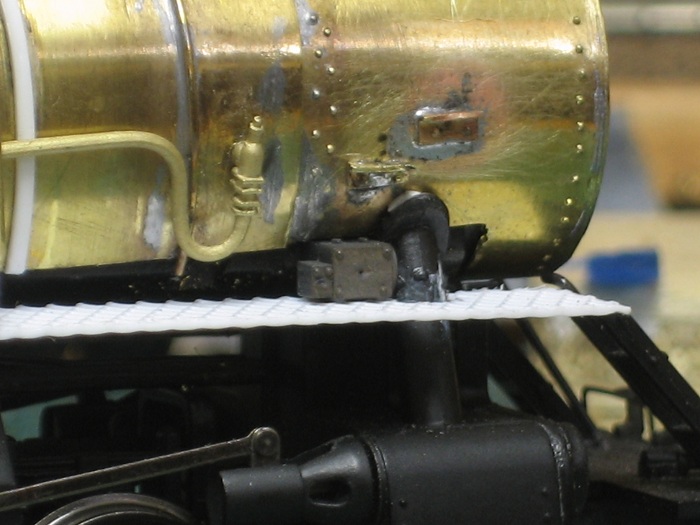
After that I moved on to the forward handrails. For this section of handrails I was able to salvage the stations from the old boilers. The rear section will have to be a custom fabrication type of job.
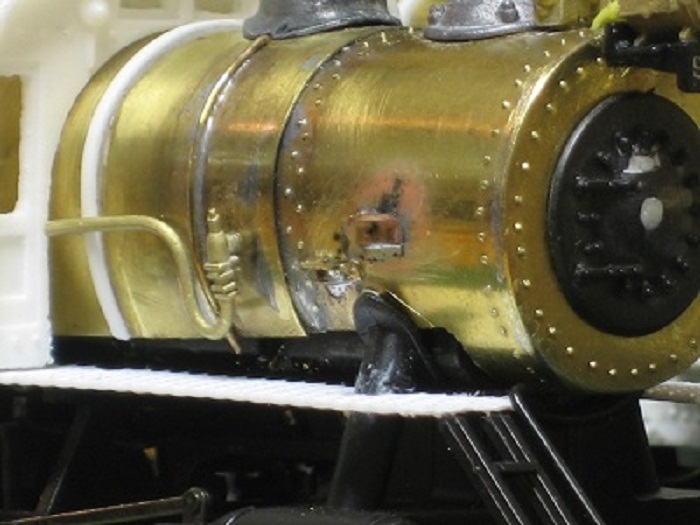
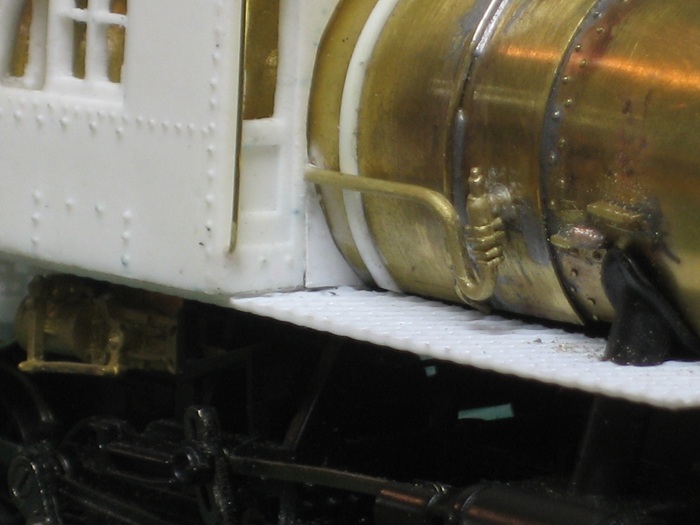
My other car is a locomotive, ARHS restoration crew
Posts: 80
Threads: 9
Joined: Oct 2012
e-paw,
VERY GOOD eye to detail you got there!
NICE work! Very impressive!
~John AKA "Yellowstone" OR "EM-1"
Posts: 2,724
Threads: 160
Joined: Dec 2008
Thank you EM-1..
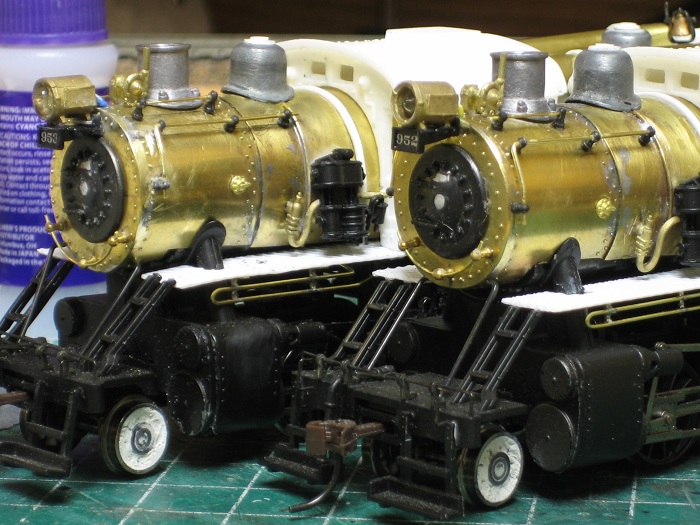
I finished up the handrails on the front half of the boiler And also added the bleeder valve to the smoke box.
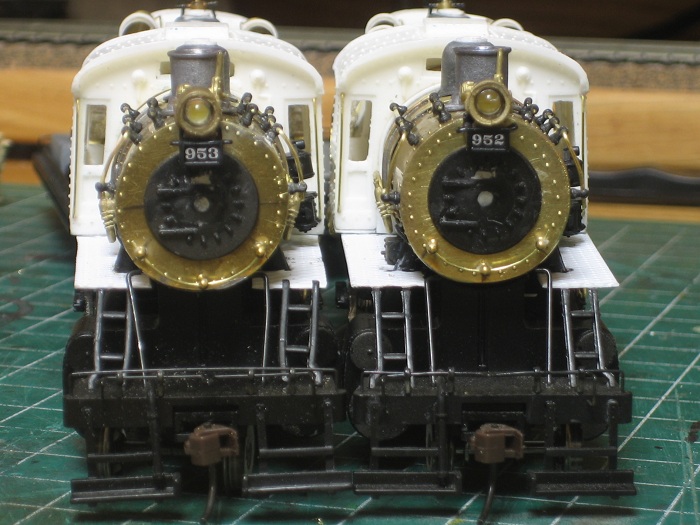
I still have to add a few more things here and there to the front of the boilers before I can move on to other places on the model. One thing that needs attention are the boiler supports, but that's another day.
Here's a front on view of the two locomotives.
My other car is a locomotive, ARHS restoration crew
Posts: 157
Threads: 31
Joined: Dec 2010
I just love this build!
Are they finished?
Posts: 2,724
Threads: 160
Joined: Dec 2008
They were finished a while age.. It seems that a good portion of the thread is now missing, I'm not sure what happened to it. I sent Ngauger a PM to see if he could help.
Here's a pic of one of the completed camels.

My other car is a locomotive, ARHS restoration crew
Posts: 720
Threads: 53
Joined: Dec 2008
Very Nice!
Michael
My primary goal is a large Oahu Railway layout in On3
My secondary interests are modeling the Denver, South Park, & Pacific in On3 and NKP in HO
<!-- m --><a class="postlink" href="http://thesouthparkline.blogspot.com/">http://thesouthparkline.blogspot.com/</a><!-- m -->
Posts: 2,724
Threads: 160
Joined: Dec 2008
Thanks NKP,,I just wish the rest of the thread was still here.. :cry: :cry: :cry: :cry: :cry:
My other car is a locomotive, ARHS restoration crew
Posts: 82
Threads: 17
Joined: May 2011
Howdy; The finished locomotive photos are still not here. Can you re-post? Thanks - Dave
Posts: 2,724
Threads: 160
Joined: Dec 2008
Well since the end portion of this thread has disappeared into Big Blue purgatory ,and I have neither the time, stomach, or pictures to repost the missing portion of this thread. I took a few shots today of the two camelbacks in action on the layout.
Here 434 does some switching in Allentown (AT) yard.
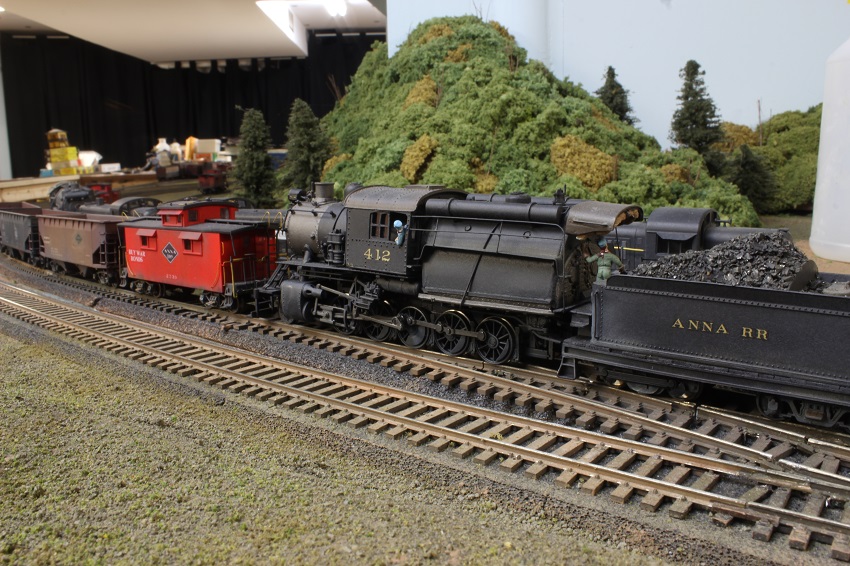
412 comes into view with a cut of cars in the same location. This is the most common assignment for the 2-10-0's . They normally work this yard in pairs, facing each other, so that the engine with the better visibility will handle the respective east or west move. There is more than enough work for the two crews in this yard as war time traffic has stretched this line well past what the brass thought they could handle.
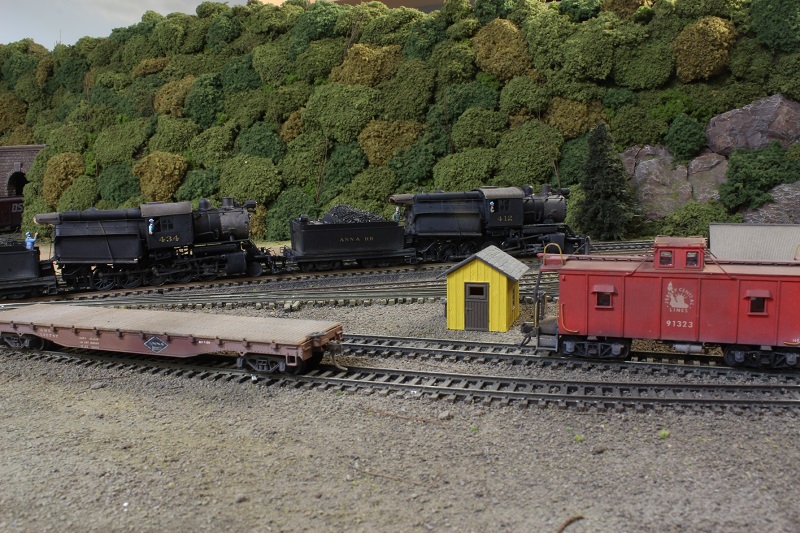
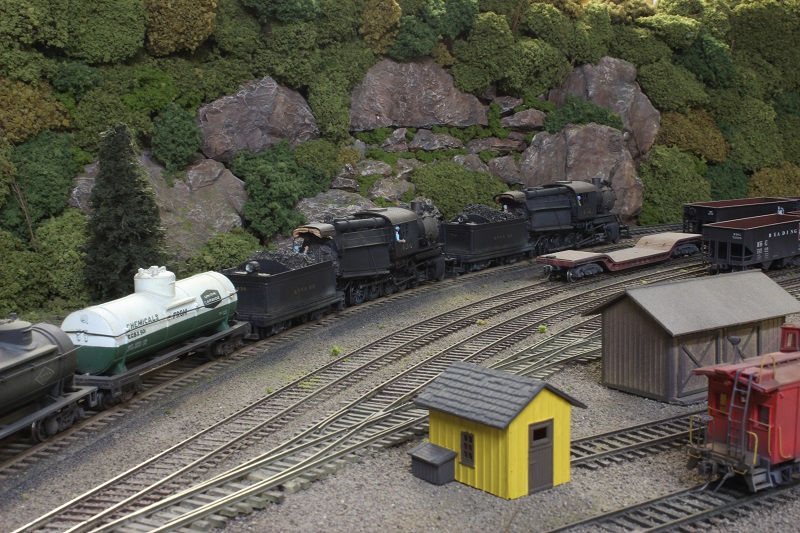
The decapods do still see plenty of main line work. Here is a run by near the west entrance of AT yard with 434 and 412 double heading an eastbound chemical train.
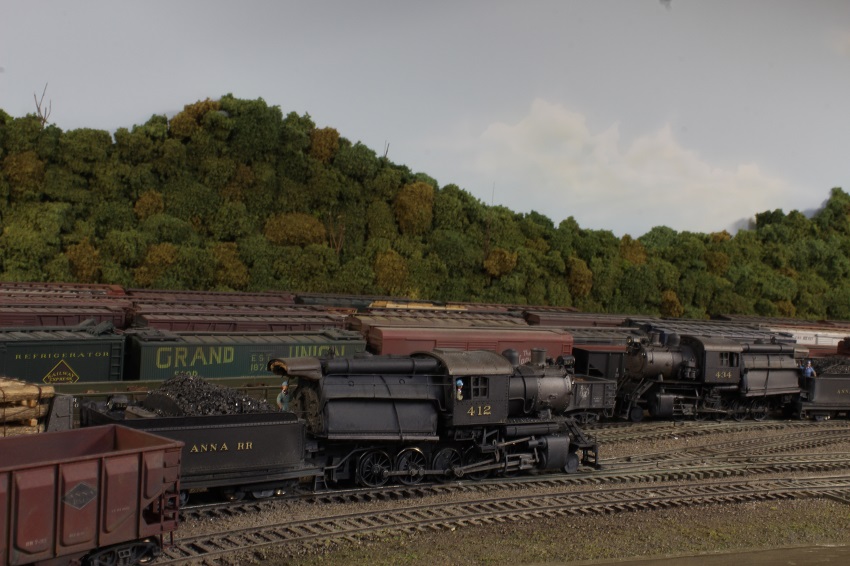
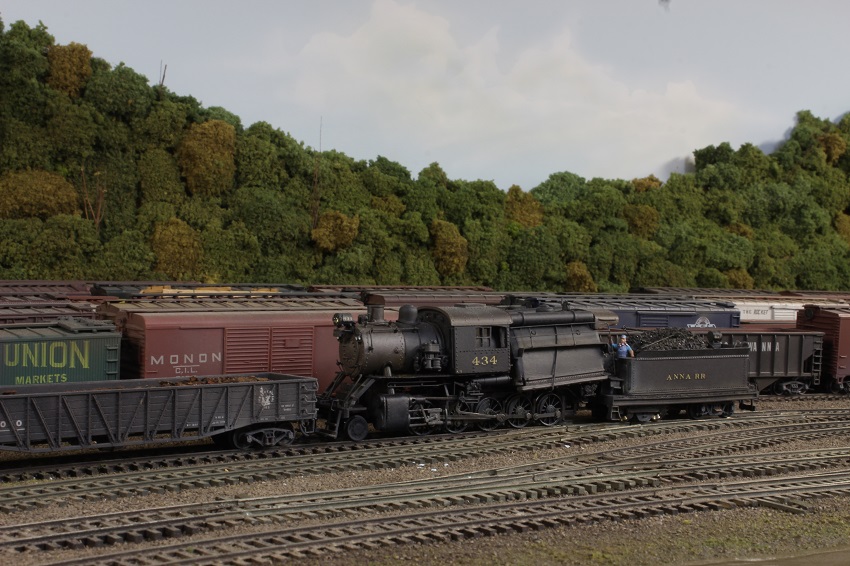
Pusher service is also a common task for these camels, here 412 shoves hard on the rear of an 100 plus car train of empty coal hoppers. This helper district starts here in Bath and runs west to the coal fields in Mahanoy city.
My other car is a locomotive, ARHS restoration crew
Posts: 2,724
Threads: 160
Joined: Dec 2008
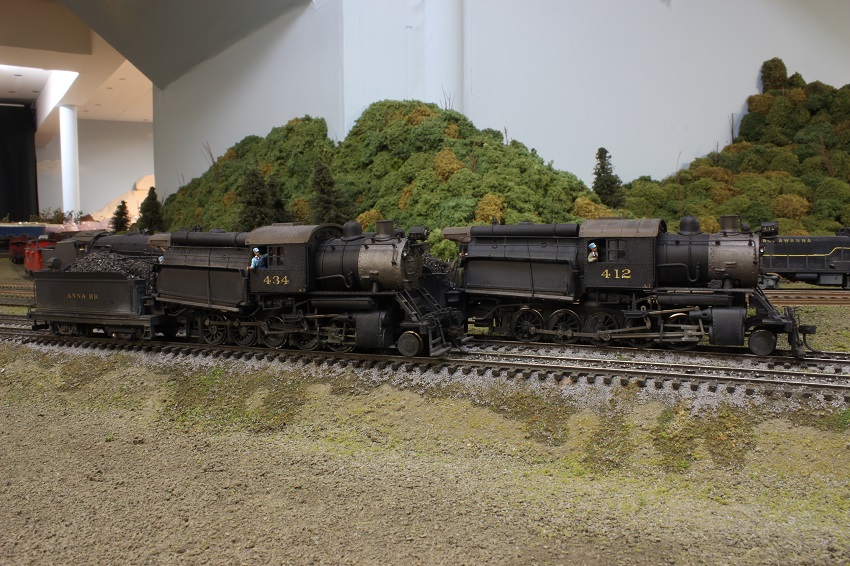
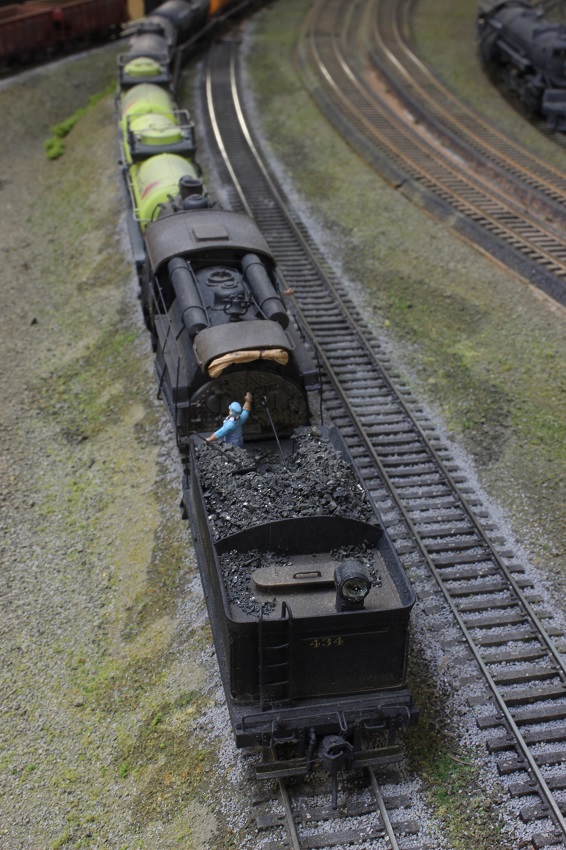
As there is always switching to do, here is an overhead shot of 434 working the siding of a chemical plant in Bath PA.
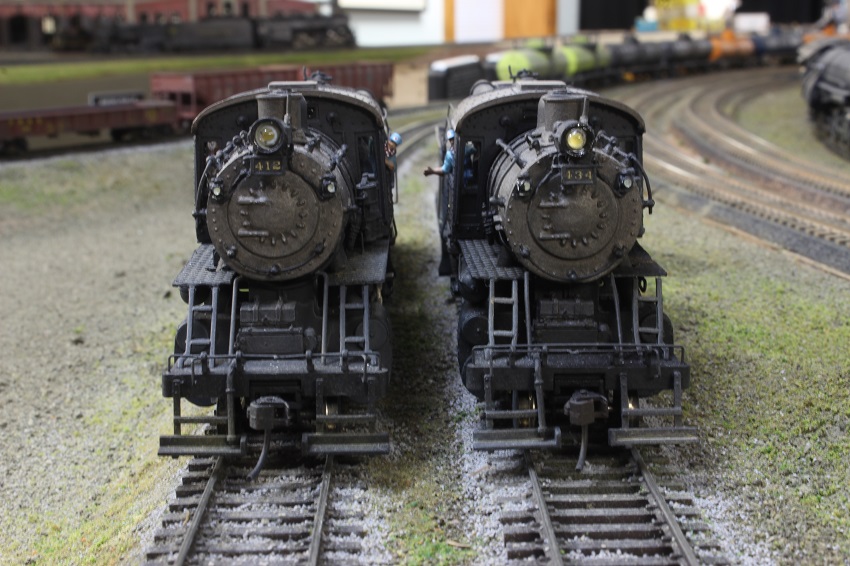
Here the two sisters pose side by side for us.
My other car is a locomotive, ARHS restoration crew
Posts: 990
Threads: 47
Joined: Jan 2009
Great pictures and excellent built loco models!
Thanks for sharing!
Cheers, Bernd
Please visit also my website
www.us-modelsof1900.de.
You can read some more about my model projects and interests in my chronicle of
facebook.
Posts: 5,263
Threads: 195
Joined: Apr 2009
My diesel heart has a soft spot for camelbacks... Great models and phootos

Reinhard
 You may want to recheck the polarity again before you solder it up, or the lamp will only light in reverse. I used heat shrink insulation to cover my solder joint but electrical tape would work just as well. As you can see from the last pic I left enough slack in the wire to be able to remove the boiler from the frame.


