Posts: 496
Threads: 22
Joined: Dec 2008
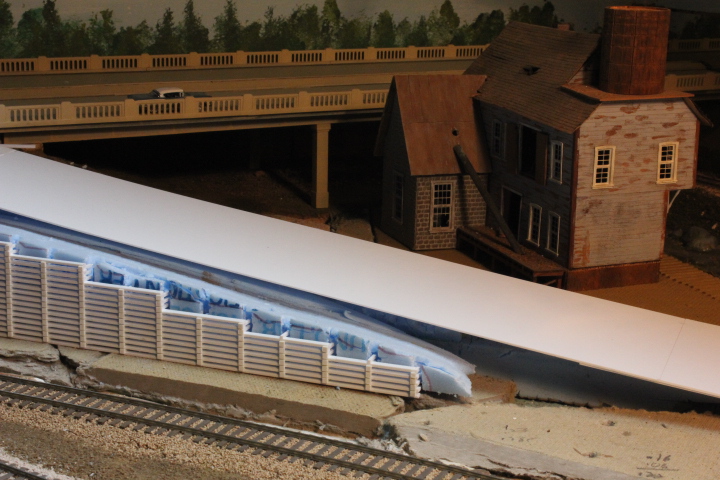
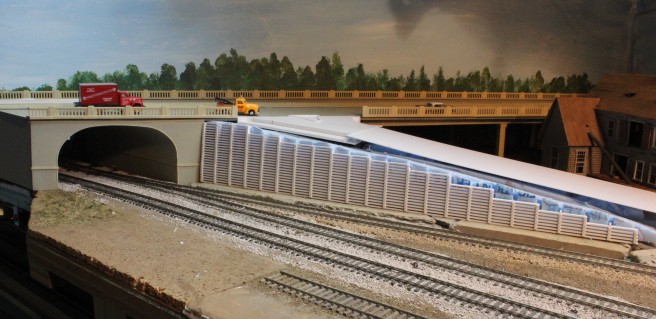
I recently had done some track work (the track had been there for years, but only the mains were operable) and so with the new operations available I was inspired to get some senery done. Part of that was finishing a highway overpass where the mainline goes thru a backdrop. For perhaps 10 years the tracks went beneath an unpainted acrylic sheet cut to size, supported with a 2x4. I have scratchbuilt the bridge over the tracks according to one in a Lackawanna book, typical of the area in North Jersey. The highway itself is based on Rt 23 running thru Morris County. I used the Rix guardrails and styrene added to the acrylic. Here are some pics in primer, I have some questions I hope you'll have input on regarding a retaining wall I need to build then I can paint.
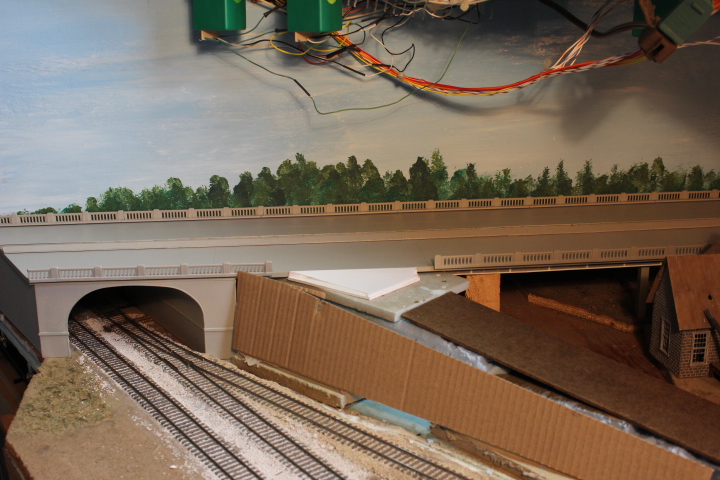
The cardboard is where the retaining wall needs to be. I want to use a wall made from concrete castings similar to modern ties. I'll post a pic next post. I'm hoping someone knows of some available item or I'll need to scratchbuild a half dozen then make molds and start casting. If I need to go that route I'll need some referance material! The white styrene piece is the on/off ramp and will be concrete like the highway. I will switch to macadam beyond that, where the masonite is filling in for the road surface.
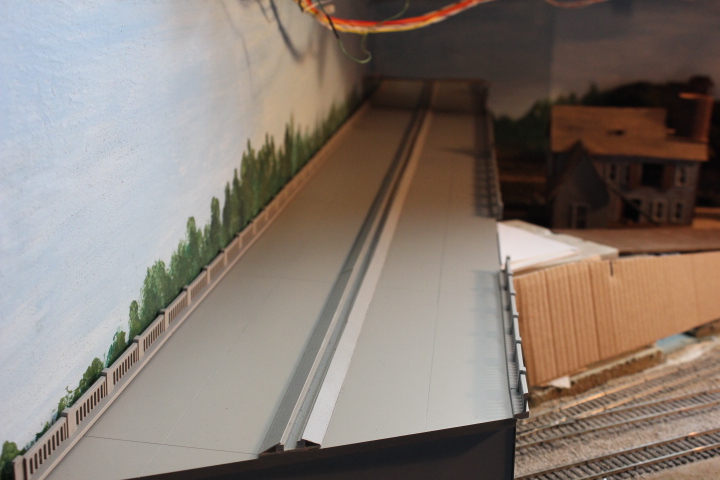
Rt 23 has low concrete curbing with gentle sloping sides, the prototype has oval shaped recessions cast in, I had to go with v grooved styene. Inbetween there is usually dirt blown in by wind and weeds taken root. That is what I'll be going for.
Posts: 496
Threads: 22
Joined: Dec 2008

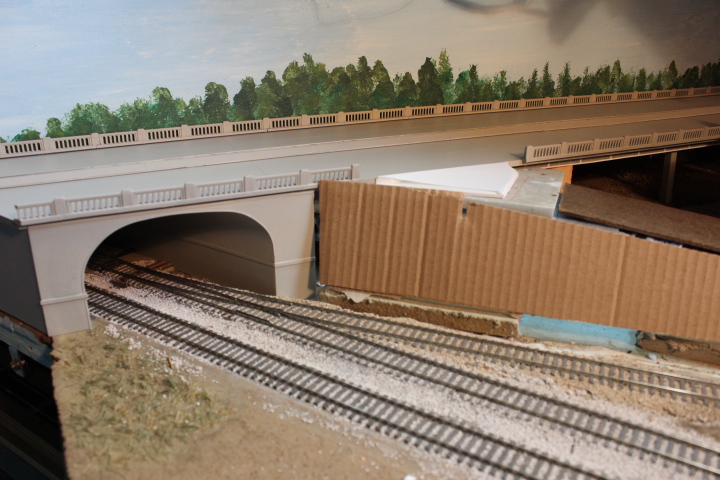
This is a more modern wall than what I have in mind, but I have not found a pic of what I'm thinking of. I don't even know what it may be called. I have seen these quite tall, tall enough for the scene I'm building. They tend to slant back as they rise. Any thoughts?
Posts: 4,553
Threads: 100
Joined: Dec 2008
 Have I been asleep at the switch !!, or has it been that long since you last posted! :o 
OK  I've been asleep at the switch...  The highway's looking good !! been a while since I've seen a wall like you describe, and my memory's 'bout sharp as a bowling ball  so it might take me a bit before I can be of any help.
We always learn far more from our own mistakes, than we will ever learn from another's advice.
The greatest place to live life, is on the sharp leading edge of a learning curve.
Lead me not into temptation.....I can find it myself!
Posts: 496
Threads: 22
Joined: Dec 2008
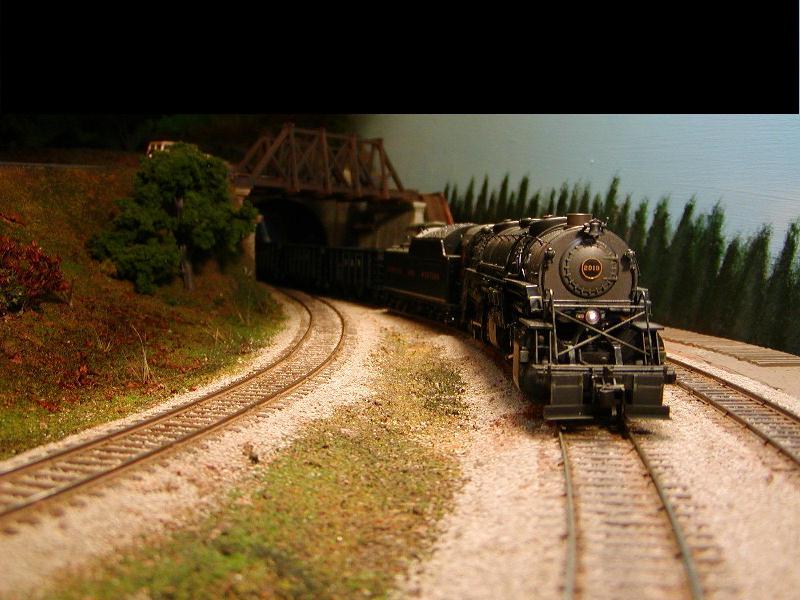
Ha! Hi Pete. No, it hasn't been 10 years since I've posted, but all too infrequently for the past 4 or so. I went digging for this pic and the file tells me it was October 2002, more than 10 years ago when you visited and we ran this train. So, you saw the unpainted acrylic highway!
Posts: 4,553
Threads: 100
Joined: Dec 2008
Over ten years ! :o That !, however, I do remember ! As well as the superb hospitality I was shown.  
It's been quite some time since I was last back East, and was thinking of getting back to Long Island, just to see how the old home town fared, in "Sandy". The street I lived on had to be flooded by the storm surge, though the barrier beaches, and Great South Bay might have protected that area a little.
Got some things here that need "lookin' at" ( and most likely payin' for ), before I can take any trips. Time does take its toll on all things. :o 
We always learn far more from our own mistakes, than we will ever learn from another's advice.
The greatest place to live life, is on the sharp leading edge of a learning curve.
Lead me not into temptation.....I can find it myself!
Posts: 2,724
Threads: 160
Joined: Dec 2008
I like your bridge work there Gary  . I think it looks close enough to RT 23 to me. It's a big improvement to that section of the layout. keep the pics coming.
My other car is a locomotive, ARHS restoration crew
Posts: 4,161
Threads: 174
Joined: Dec 2008
That looks really good! 
Posts: 496
Threads: 22
Joined: Dec 2008
Posts: 496
Threads: 22
Joined: Dec 2008
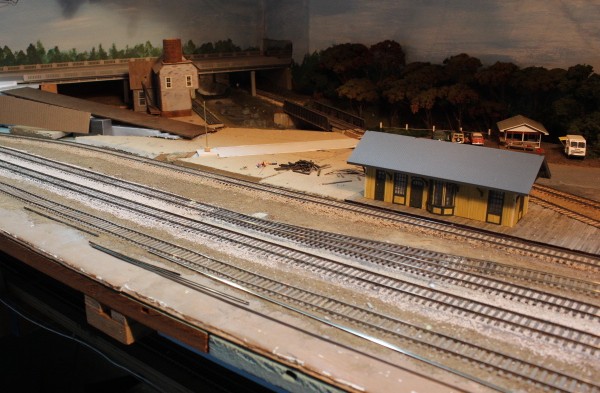
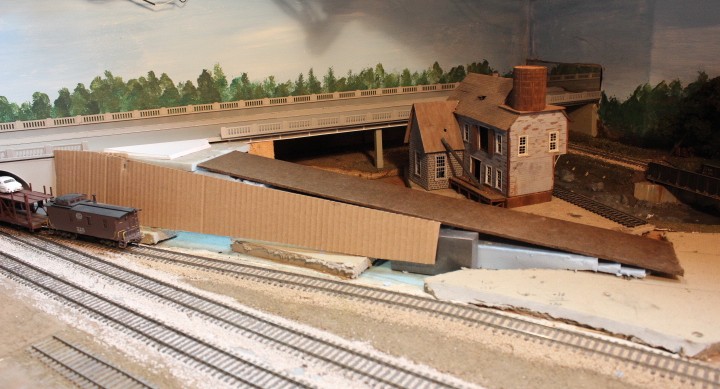
Here are a few more pics of the area I'm working on. I bought an Atlas Maywood station kit, have installed the door and window trim and assembled the walls, the roof is just sitting on it for now, I built a wood platform to fit the junction of the NYC and JGL tracks. You'll see the old Atlas lumberyard building, I need to build an office/store to go with it, I have none in mind yet so would love to see any suggestions.
This is the train I ran to check clearances

Posts: 496
Threads: 22
Joined: Dec 2008
Posts: 1,682
Threads: 101
Joined: Dec 2011
I've recently found retaining walls made of ties in Tichy Train Group catalog. They represent wood ties. Maybe older than what you want, but it could work.
Also, I've watched many historic pictures of highways and parkways built during the 30's and the 40's and similar to what you've done. Often, there's low concrete retaining wall and slopes covered with flat random-patterned stone patchwork.
Matt
where is your layout located? im from oak ridge nj, cool to see someone modeling local scenery. looks great
Posts: 88
Threads: 1
Joined: Oct 2010
Those concrete ties seem a bit modern compared to your rolling stock and structures, but then I don't know when they were invented. Here's a pic of a similar situation nearby in Bethlehem Pa.
![[Image: Bethplatforms.jpg]](http://i454.photobucket.com/albums/qq261/MrBill/Bethplatforms.jpg)
Posts: 496
Threads: 22
Joined: Dec 2008
Hi MrBill, thanks for that photo. I'm not sure when the type concrete wall I'm modeling came into use either. I still don't know what to call it! I know I saw the walls in the pics I posted in the early 80's and they looked old at that time, but that could mean they were built in the 60's, I just don't know. But as you'll see below, I've gone ahead with the construction of it. It's been a long time since I last posted, I had my cataract surgery in early January. Happy to say my vision in that eye has improved tremendously. For anyone who may be curious about the procedure, they make a 2.2 mm slit in your eye, suck out the cataract along with the lens it was on, and insert a lens (of your choice) The lens is folded to make the slit as small as possible, and unfolded once in the eye. It takes between 5 and 10 minutes! Once you get to the surgeon of course. Then an hour in post op. Some people tell me their vision improved the same day, mine took 3 days and continued to improve dramatically for the next week. They say the improvement continues for 3 to 4 weeks, and on 2/8 I have my lst follow up appointment when they will allow me to go to the Optometrist to get a prescription for new glasses. I mentioned above they allow you to select the lens they implant. Apparently there are lenses which allow both distance and reading, but these are expensive and not covered my most insurance. So, you can choose between reading and distance. I chose reading, so I can do modeling work without glasses, and it has allowed that much to my delight. My closeup vision in the eye operated on is now better than the other eye. I will probably need this surgery on that eye in two years. Some of the post op instructions were to avoid coughing and sneezing, or straining at bowel movements. I laughed and said I could control one of those things but how in the world do you avoid coughing and sneezing? As it turned out, the day after the surgery I started to feel like I was getting a cold. The day after that I woke up feeling really achy, and by the end of that day I knew I had the flu. That lasted 5 days with me downing cough medicine! But my eye is fine, thank God.
Anyway, so I built the wall, and have painted the overpass and highway. I'm still not completely happy with the paint job appearance and I need to weather of course, and add lines, etc. Here are some pics:

Posts: 496
Threads: 22
Joined: Dec 2008
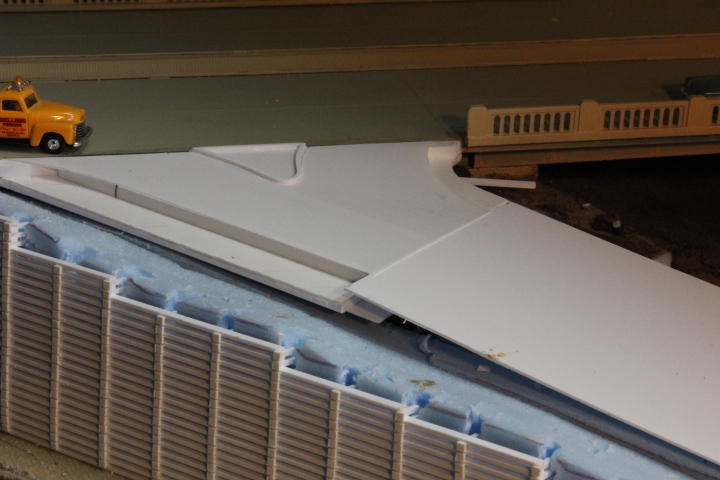
Here is a pic of the entrance/exit ramp. I made an island out of .060 strip and will put some dirt and weeds in it. I'm thinking it would be appropriate to add some solid white lines about a foot from the curb, with the lines joining just past the point of the island. There will be a sign on the island with an arrow pointing to the right for the drivers coming up the ramp toward the highway. Any input (or links to 50's era roadway pics and signage) is welcomed!
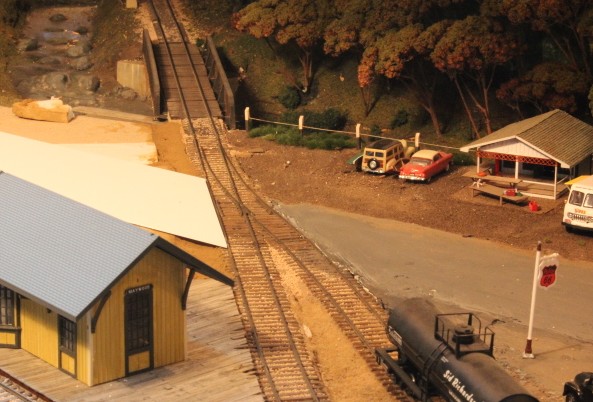
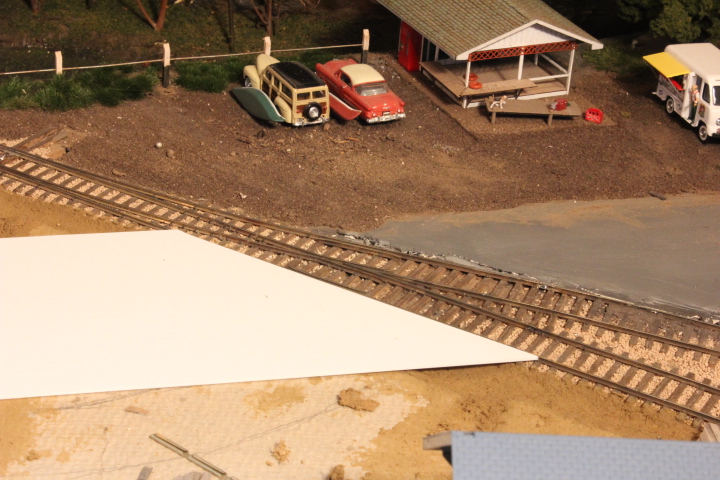
At the other end of this road section, there is a grade crossing. Here are a couple pics. You see that to the right of the track I had already made a road about 12 years ago. It is macadam. It was made from plaster poured and sanded. I am using styrene for the new section. It is concrete at least as far as the ramp above, but can switch to macadam at some point beyond that, or stay concrete. If it becomes macadam I'm wondeing how it will look compared to the plaster road on the other side. The pavement in the track will be styrene as well, though I wonder if timber may be acceptable? Complicating that is the turnout frog in the middle of the intersection. I'd love to hear thoughts on this.
|


 Have I been asleep at the switch !!, or has it been that long since you last posted! :o
 I've been asleep at the switch...
  The highway's looking good !! been a while since I've seen a wall like you describe, and my memory's 'bout sharp as a bowling ball
![[Image: Bethplatforms.jpg]](http://i454.photobucket.com/albums/qq261/MrBill/Bethplatforms.jpg)