Posts: 1,475
Threads: 44
Joined: Dec 2008
In this thread will be the progress of this project, it is here in the kit-bash because they need new undersides(from scratch) and possibly some detail rework as well.
Will shortly post some pics of the box of parts and the beginning of an assembled box car. There are enough parts to make 6 box cars. I plan on making them the first rolling stock painted up for BFT in S scale/gauge. If they prove to assemble with out too much hassle might brake out the casting stuff and make a mold of the body parts after they have been "improved"(modifed) detail wise I still think the seems and rivit detail could be a bit bigger.
Posts: 1,475
Threads: 44
Joined: Dec 2008
Posts: 1,475
Threads: 44
Joined: Dec 2008
Posts: 1,475
Threads: 44
Joined: Dec 2008
Posts: 1,475
Threads: 44
Joined: Dec 2008
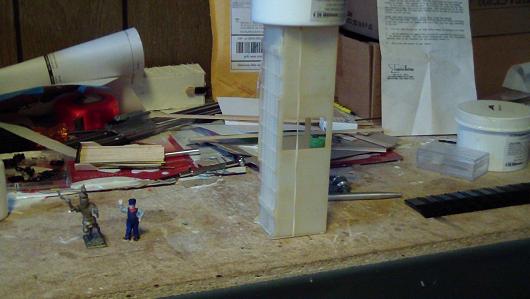
Hi all here is the latest pic all four sides glued together. the previous pic was 3 sides with the roof just laying on them as a test fit and a comparison to a pacific rail-shops built up kit with flyer compatible couplers.

Posts: 5,263
Threads: 195
Joined: Apr 2009
It is interesting to watch you building the car step by step.
Does Faller sell it's plastic glue in the US too? I wonder it is worth the shipping cost.
![[Image: file.php?id=16392]](http://www.the-gauge.net/forum/download/file.php?id=16392)
Reinhard
Posts: 1,475
Threads: 44
Joined: Dec 2008
Faraway,
Walthers carries Faller and other Glues, it was marked down a few years ago so I got it and seems easy to work with, also like the walthers GOO another good one but is messy if you are not careful.
Walthers has Wiking HO vehicles and of course Periser figures in their catalog and flyers.
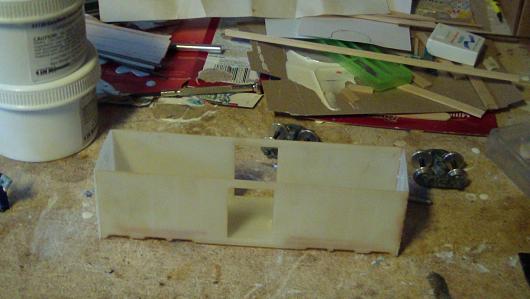
The first car is going to be fun as I have to modify the under side to fit American Models trucks and couplers after that it will be an assembly line. Because of that and the extreme amout of flash to file off the parts more so the roof and the floor parts I have placed the thread here.
Posts: 1,475
Threads: 44
Joined: Dec 2008
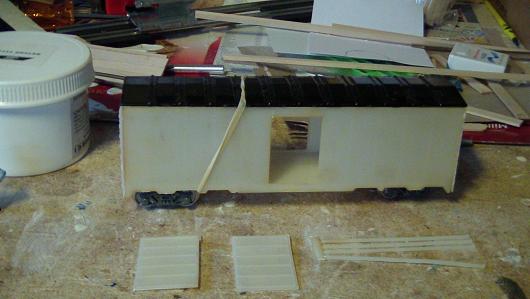
The first box car is taking shape nicely .


Note the use of rubberbands to keep a tight fit as glue sets up.
Posts: 2,959
Threads: 158
Joined: Dec 2008
So far, so good. Are these car sides plastic or resin castings?
--
Kevin
Check out my Shapeways creations!
3-d printed items in HO/HOn3 and more!
<!-- m --><a class="postlink" href="https://www.shapeways.com/shops/kevin-s-model-train-detail-parts">https://www.shapeways.com/shops/kevin-s ... tail-parts</a><!-- m -->
Posts: 1,475
Threads: 44
Joined: Dec 2008
nachoman Wrote:So far, so good. Are these car sides plastic or resin castings?
They are styrene parts but are almost as challenging as fitting resin castings together I am trying to build as the kit diagram shows the other 5 I will more then likely make some changes to at least one set of sides and maybe make a mold of them just for fun.
The fit is not perfect even with flash removed from parts I guess this qualifies as a kitbashing project. The manufacture is Locomotive workshop. May add the doors and door slides latter today. Kinda wanted to paint car but too wet out and do not have a paint booth

I have 3 choices paint wise, They will be BFT box cars maybe red w/white logo and lettering, brown w/white lettering or gray w/black lettering I have enough parts to do one of each and if I cast some copies maybe some variations of the 3 schemes. I have been meaning to do a Gauge box car and a GERN box car as well.
Posts: 1,475
Threads: 44
Joined: Dec 2008
another pictorial update,
Here roof and doors are glued on again just siting on some Iron rail models trucks S gauge hirail.


Posts: 1,475
Threads: 44
Joined: Dec 2008
Posts: 70
Threads: 5
Joined: Dec 2012
AF350,
Looking good, tough task of keeping those corners square while glueing. From your pictures, it looks like the new car matches the SHS car pretty close in size. Nice thing about those old 40' box cars, they came in many sizes for height and width. Depended on when they were made and by who and for who. Have you decided on a road name yet?
Keep up the good work.
Greg
Posts: 1,475
Threads: 44
Joined: Dec 2008
Thanks Greg,
This kit is a challenge to be sure but not impossible. Of the parts left the best looking I will clean up the flash and try to cast some copies of the main parts roof, sides, ends and floor. still have to add the under side details and the break wheels and ladders.
The hardest part so far was gluing the doors and door slides the intent of the instructions was to have the doors operable but I fixed them in place as it was easy to glue the slide rails to the door and then glue them to side as an assembly.
I have an awesome logo for my BFT(Buckeye Freight & Terminal) but can not make up my mind as to get some custom decales or buy the setup for making custom Dry transfers. The decale pro set up is really cool you can make just about any color including metalic dry transfers, the only 4 things required in addition to the kit are an laminator they sell the best one for the task, a laser printer black or color either one is fine, a heat gun(not a hair dryer) an a computer the system is called Decal pro FX worth a look to see what all hooby and business uses it has.
Posts: 1,475
Threads: 44
Joined: Dec 2008


 I have 3 choices paint wise, They will be BFT box cars maybe red w/white logo and lettering, brown w/white lettering or gray w/black lettering I have enough parts to do one of each and if I cast some copies maybe some variations of the 3 schemes. I have been meaning to do a Gauge box car and a GERN box car as well.