Posts: 11,782
Threads: 571
Joined: Nov 2008
I've said it before, but it's hard to not repeat myself.... absolute excellence Pete and definitely worthy of your high standards.
Don (ezdays) Day
Board administrator and
founder of the CANYON STATE RAILROAD
Posts: 4,553
Threads: 100
Joined: Dec 2008
We always learn far more from our own mistakes, than we will ever learn from another's advice.
The greatest place to live life, is on the sharp leading edge of a learning curve.
Lead me not into temptation.....I can find it myself!
Posts: 4,553
Threads: 100
Joined: Dec 2008
Air Line is run ! It crosses under the boiler right at the back of the smokebox, from the Fireman's side expansion tank
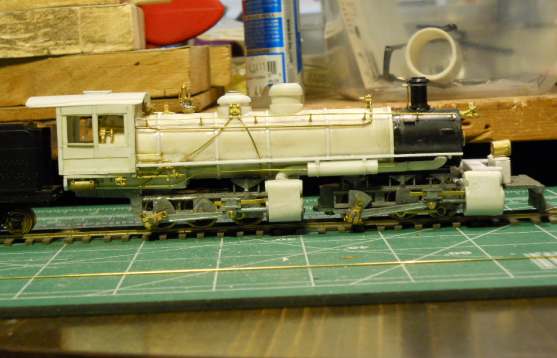
to the Engineer's side tank, and then back to the cab, and up throught the cab floor to the Brake stand.
I also got the tank straps in place and added the sand box cover handles ( top of boiler, and pilot )
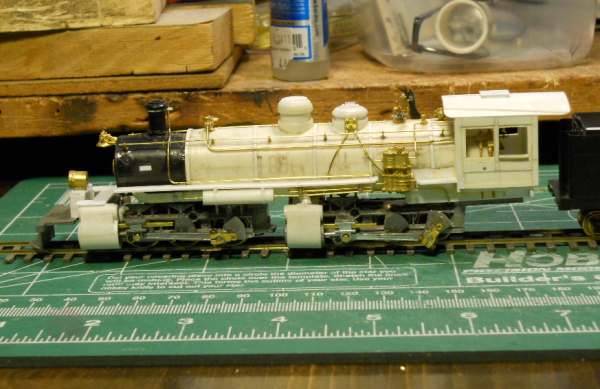
In the first picture, at the top of the stack, to the right of the stack you can see what appears to be a white dot. That is the bracket for the Air Compressor steam exhaust. It still needs a little "dressing up" before it is done.
I'm thinking that I should paint the cab interior next, so I can get it attached. I should be able to mask / block off the window openings etc. to do the finish paint. There's just too many "breakables" on, and around the Backhead.
We always learn far more from our own mistakes, than we will ever learn from another's advice.
The greatest place to live life, is on the sharp leading edge of a learning curve.
Lead me not into temptation.....I can find it myself!
Posts: 5,859
Threads: 175
Joined: Dec 2008
Very nicely done, Pete, and she's turning into a really good-looking locomotive.  
Wayne
Posts: 4,553
Threads: 100
Joined: Dec 2008
Got a little more work done on this project.....I know,, what good is that with out photos ! 
OK -- -- -- -- Photos !
I got the trailing truck positioned in place, and had to remove the bar across the back end and replace it. I also moved the lead engine back about a scale foot. I will have to do a "swing test" to be sure the boiler clears the top of the lead valve pistons. If it doesn't, I will have to "flatten" the bottom of the smoke box.
------------------------------------------------------------------
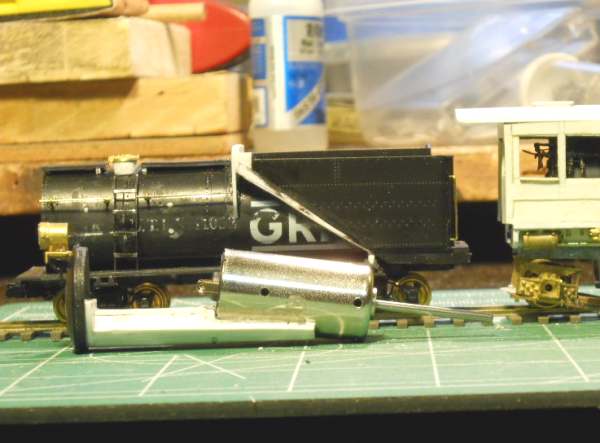
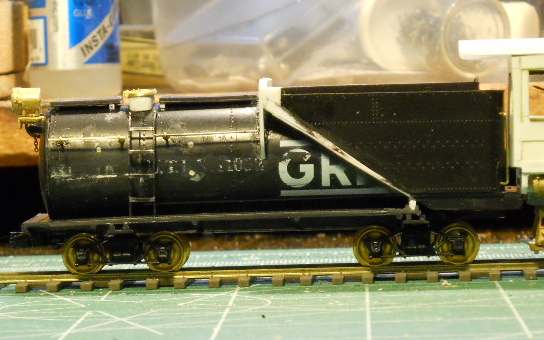
This close-up of the tender shows the ladder and new railings, just built and installed. I had to adjust the coal bin angle, so there's some "filler" between it and the slope sheet.
------------------------------------------------------------------
I'll have to light the cab interior a little better before taking the next shot of it.
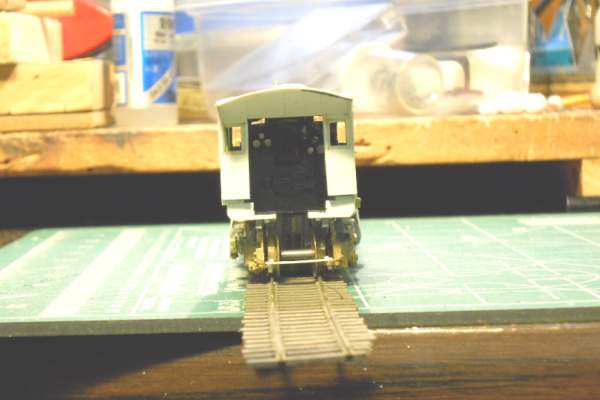
The beginning of the new trailing truck rear crossbar can be seen. I'm using styrene for this.
------------------------------------------------------------------
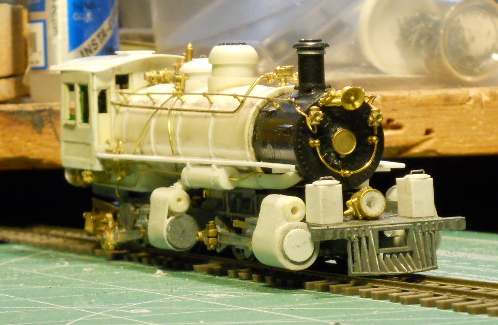
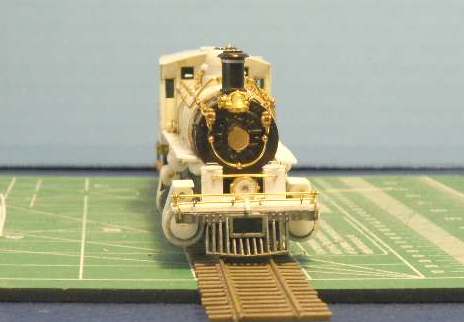
This head end shot shows the arrangement ( current, but not permanent ) of the pilot deck, and the front of the smoke box as it will remain.
------------------------------------------------------------------
Here, the motor is hot glued to the "sled". There are guides inside the tender tank, that will hold the sled down on the bottom of the tank, and a single 2-56 screw up from the tender frame will lock it in place. A universal drive "cup" will be attached to the motor shaft, and a short shaft with a universal drive ball on each end will couple the motor to the mechanisms.
------------------------------------------------------------------
We always learn far more from our own mistakes, than we will ever learn from another's advice.
The greatest place to live life, is on the sharp leading edge of a learning curve.
Lead me not into temptation.....I can find it myself!
Posts: 2,724
Threads: 160
Joined: Dec 2008
coming along nicely...
My other car is a locomotive, ARHS restoration crew
Posts: 3,732
Threads: 44
Joined: Dec 2008
Love the way it overhangs the track !  
Mike
Sent from my pocket calculator using two tin cans and a string
Posts: 11,782
Threads: 571
Joined: Nov 2008
Don (ezdays) Day
Board administrator and
founder of the CANYON STATE RAILROAD
Posts: 4,553
Threads: 100
Joined: Dec 2008
I got a little more detail done on the tender, found some leftover diamond tread styrene sheet for the pilot deck, got the headlight mounted on the pilot deck between the two sandboxes, and mounted steps on top of the valve cylinders.
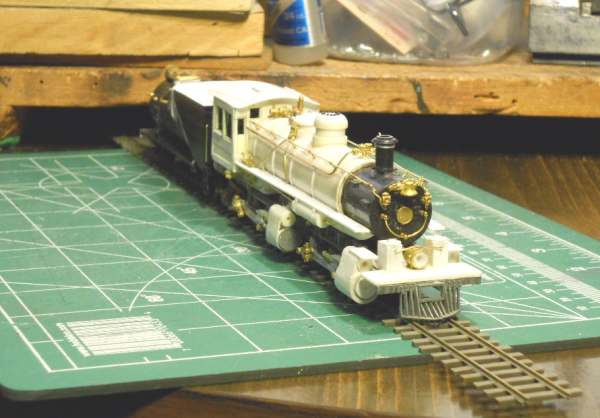
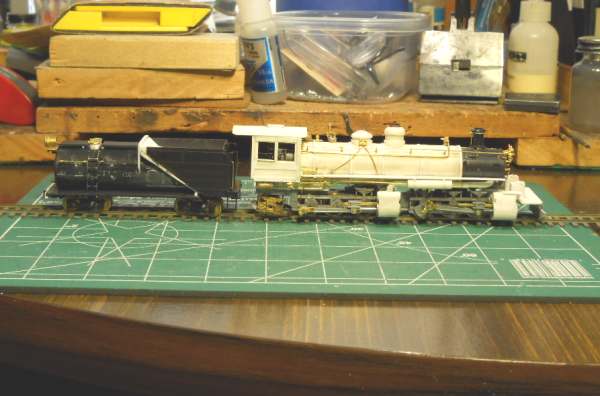
I found a set of blow-off valve castings. So now I will have to put the "slope" in the bottom of the firebox, to lower the front end, so there is a place for the Blow-off valves. Never thought I would see the day when my fingers were faster than my memory. Then again, it has been a while since my last steam loco build, and there are details that I haven't thought of since then. :o I'm sure there will be a few more before this is done.  
The original "hang-up" with this project was the "running gear". At this point, I should be able to get to that and get it done.
Still no gearboxes, but, once all the running gear is built and in place, I will have to work out any binds, or other problems before installing the gears, and drive shafts, shaft bearings, universal drive cups,and balls.............and then? Paint!
We always learn far more from our own mistakes, than we will ever learn from another's advice.
The greatest place to live life, is on the sharp leading edge of a learning curve.
Lead me not into temptation.....I can find it myself!
Posts: 4,553
Threads: 100
Joined: Dec 2008
Blow off valves are installed, and the operating rods from the cab to the valve handles are also in. I added the washout plugs that came with the valve castings. I did have to slightly re-rout the air line back to the cab, it was in the way of the engineer's side blow off.
I added the pilot, coupler lift bar, and railing. I still have to build a set of pilot steps, and install them, For whatever reason, I had removed them, probably to use somewhere else.
Took the loco down to the old modules to do a quick "swing test" ( there is an 18" radius "S" curve on the "back-tables" behind the module skyboards ) everything looks good, "as is", so one less worry. There's still the tender steps for the back end of the tender, and a couple more railings, and/or hand grabs to put on, and the tender will be ready for paint-------pending a final * inventory of appurtenances *, to make sure that I haven't missed anything. ( :oops: I really do not enjoy having to add detail :oops: after the paint has been applied   )
Photos at 11:00 
We always learn far more from our own mistakes, than we will ever learn from another's advice.
The greatest place to live life, is on the sharp leading edge of a learning curve.
Lead me not into temptation.....I can find it myself!
Posts: 4,553
Threads: 100
Joined: Dec 2008
   It's 11:00 - - - - somewhere! 
Fireman's blow off valve, forward bottom corner of firebox. I decided to leave the bottom edge level rather than sloped.
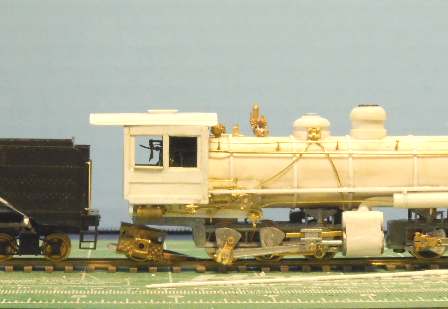
------------------------------------------------------------------
Front end of loco, pilot coupler lift bar/rod, and pilot grab rail in place.
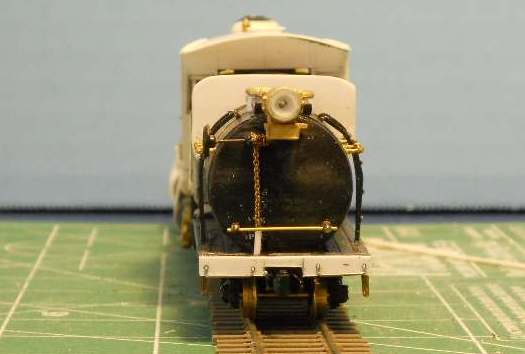
------------------------------------------------------------------
Back of the tender, still needs a coupler lift rod, but will not get any additional steps. The vertical white thing in the way of the brake chain, was a plug in an existing hole in the tender deck ! :oops: it's gone now.
------------------------------------------------------------------
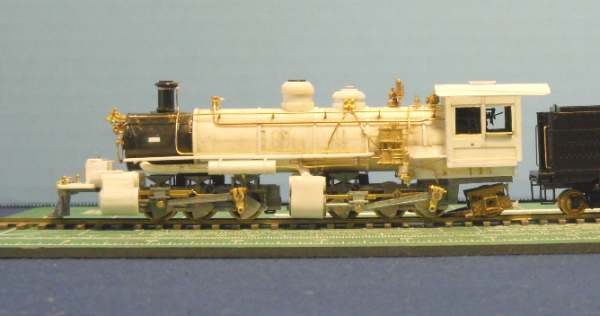
engineers side blow off valve, nice silhouette of the throttle lever assembly in the rear side window 
------------------------------------------------------------------
There's some frame modification that have to be made to adequately clear the trailing truck, and to permit the installation of the shaft that will connect the loco mechanism to the motor in the tender. I'm planning on adding an ash dump chute. I will have to see just how much "side-to-side" clearance there will be, as the *drive wheels-trailing truck* negotiates the 18" radius curves, of the narrow gauge tracks. The chute may end up little more than a "profile piece".
We always learn far more from our own mistakes, than we will ever learn from another's advice.
The greatest place to live life, is on the sharp leading edge of a learning curve.
Lead me not into temptation.....I can find it myself!
Posts: 4,553
Threads: 100
Joined: Dec 2008
e-paw Wrote:That's some great work you did there Sumpter. I love the articulates almost as much as I like Camels... I am watching this thread carefully because I think my next center-cab will use this drive.........[ATTACHMENT NOT FOUND]
June 1970 issue of "Railroad" ( it took me a while to find, there's only the three pages I saved ) has photos of Erie RR, Camel Back 0-8-8-0's. There were only three of them ever built 2600, 2601, and 2602. The cab sat just forward of the main engine cylinders, and went forward to just behind the smoke box / boiler junction. They were sent to Baldwin to be rebuilt as conventional 2-8-8-2's in 1921.
I couldn't find any information about 2-6-6-2 Camel Backs, but that's still an interesting idea.....O K , different.  
We always learn far more from our own mistakes, than we will ever learn from another's advice.
The greatest place to live life, is on the sharp leading edge of a learning curve.
Lead me not into temptation.....I can find it myself!
Posts: 4,553
Threads: 100
Joined: Dec 2008
Gettin' close to the end of this challenge, and still not close to being finished ! :o :o
The Gear boxes / gears, arrived at the hobby shop, and I picked them up Yesterday afternoon.   
The Trailing truck is finally attached, and I've figured out how I'll build the connection of the two engines.The "articulation link" will be the next thing to do, and, I have some considerable "modifying" to do to the gearboxes, so they fit in the smaller slots in the frames.
I will also get the pilot truck, and the tender draw bar installed, so I can couple the loco to a powered unit for some "run time" to "exercise the running gear", and work out the "rough spots". This will be helpful for the valve gear too, once that is built and installed.
I still have to build the valve gear, and modify the linkage supports to fit around the gear boxes. I can get to that now that I have the boxes.
Most of the major detailing is done, and I'll keep a running progress thread going after the challenge is over.
Building a "Prototype", where there is no "reference" to follow, has its drawbacks, but is an excellent way of learning and understanding just how a Steam Locomotive, and all its "parts" work.
I'll get some "last minute photos" posted before the end of the challenge.
We always learn far more from our own mistakes, than we will ever learn from another's advice.
The greatest place to live life, is on the sharp leading edge of a learning curve.
Lead me not into temptation.....I can find it myself!
Posts: 1,548
Threads: 99
Joined: Jan 2012
Nice looking loco , and good work ! 
T
To err is human, to blame it on somebody else shows management potential.
Posts: 4,553
Threads: 100
Joined: Dec 2008
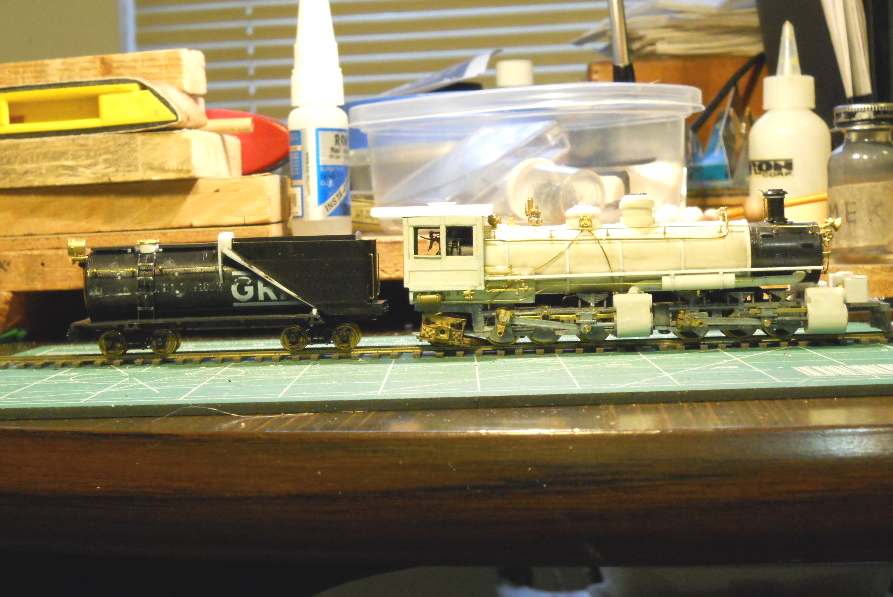
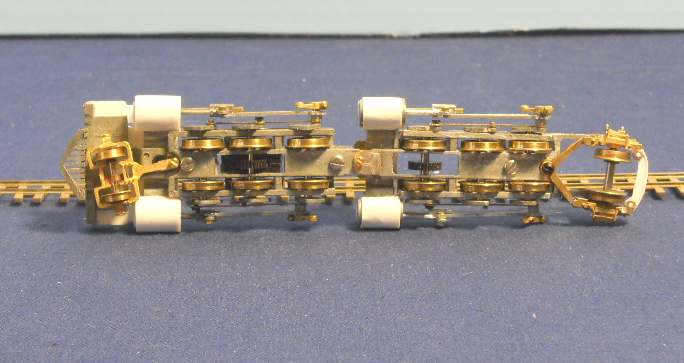
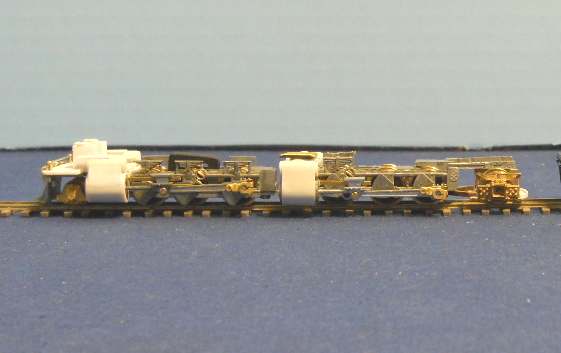
This is where the project is at:
First, what the whole locomotive looks like at this time.
------------------------------------------------------------------------------------------
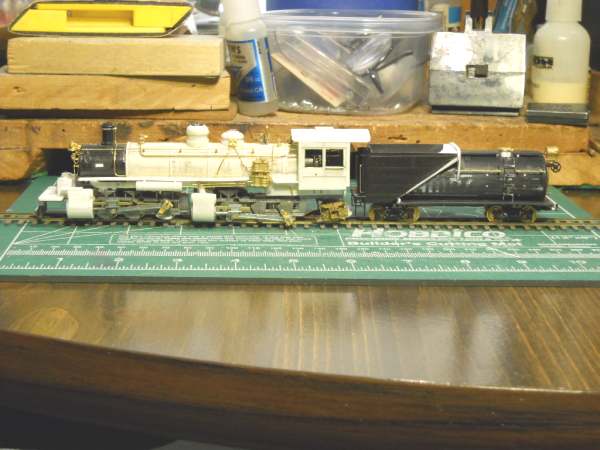
Same shot, with just the Loco frame.
------------------------------------------------------------------------------------------
And this shot looking at the bottom of the frame, showing the pilot truck, both engine frames and drivers, and the trailing truck. One of the gearboxes has been "Thinned, and shortened" to fit. Still have to do the other one.
( Hmmmmm, guess who forgot about "cylinder drain cocks" )
The "Articulation link" turned out to be easier than I thought, two brass plates, attached to the front end of the rear engine's "cover plate", the rear end of the front engine's "cover plate" cut, filed to shape, with a clearance hole for the 1-72 brass screw.
The upper brass plate is tapped for 1-72, the lower plate also has a clearance hole. Yeah, I didn't think about running the screw from the top down. :oops:
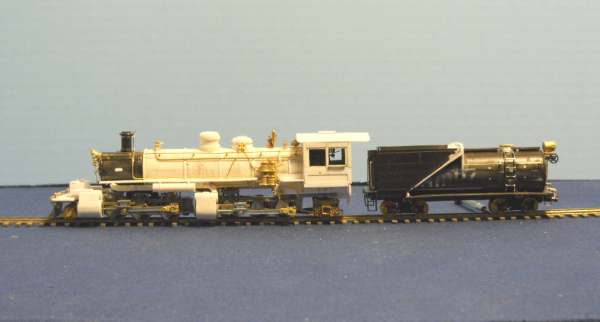
------------------------------------------------------------------------------------------
I finally figured out why the rear engine has been so difficult to get running smoothly. :o the engineer's side wheel, on the middle axle, does not sit perpendicular to the axle, and "wobbles"......that wobble messes up the side rod alignment and causes binding. Soooo, I have to disassemble the rear engine, remove the middle driver set, and see if I can "eliminate" the wobble without destroying the wheel.      Fortunately, the axle has "D" ends that the cranks align to, so wheel doesn't have to be "quartered", and replacement is easily done.......finding a replacement wheel ? Aye, that's the hard part.
We always learn far more from our own mistakes, than we will ever learn from another's advice.
The greatest place to live life, is on the sharp leading edge of a learning curve.
Lead me not into temptation.....I can find it myself!
|


 )
)