South River Modelworks roundhouse project I've been working on
#1
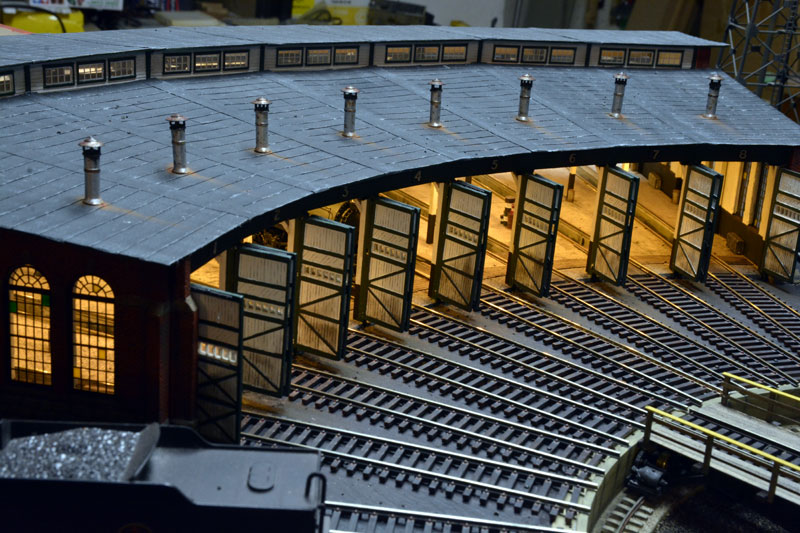
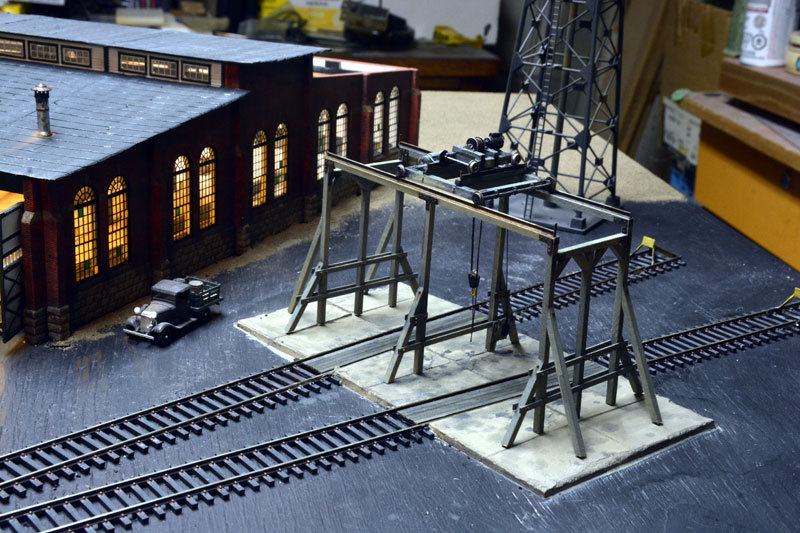
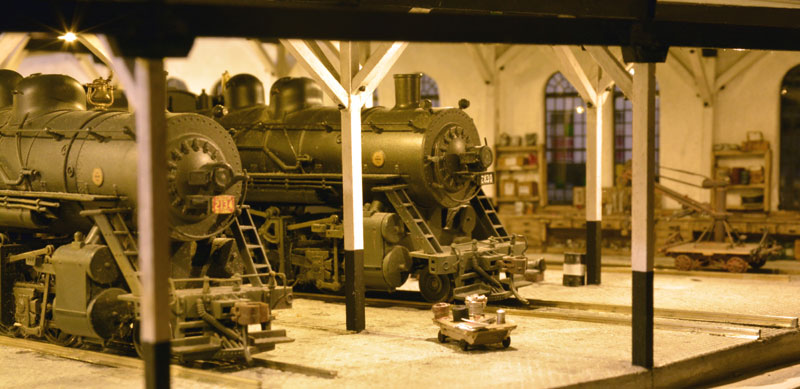
Hi everyone, I thought I would share with you some pics of a project that I've been working on for more than a year now.
It's a kit that I bought 20 years ago and have finally got around to building it.
It's from "South River Modelworks" the HO scale Brick 8 stall roundhouse kit No. 220.
I also kitbashed what was a "Downtown Deco 2 stall engine house kit into a machine shop at the rear of my roundhouse.
Both kits wall are made from Hydrocal so they worked together well.
It's still a project in the works, but I am now far enough along to show you some pics of how it's looking.
I also switched out the powerhouse that came as part of the roundhouse kit for another one the came with a different SRMW"s kit "Black Stone Paper Mills" instead.
Anyway here are some progress pics.
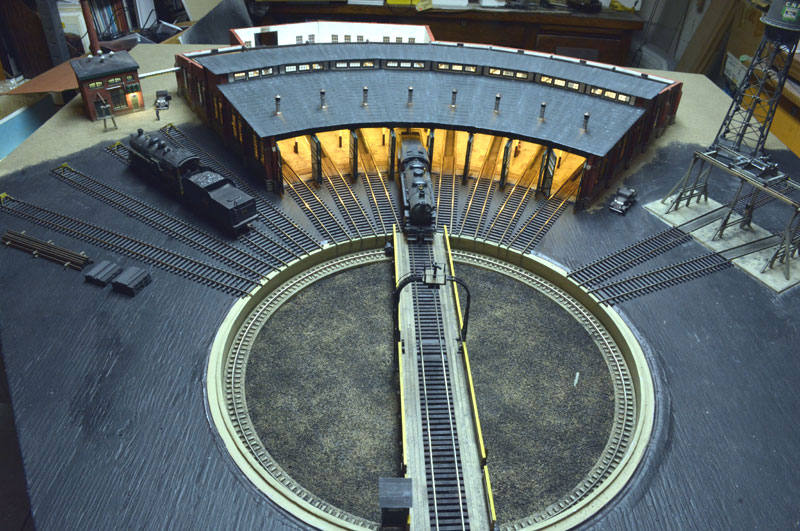
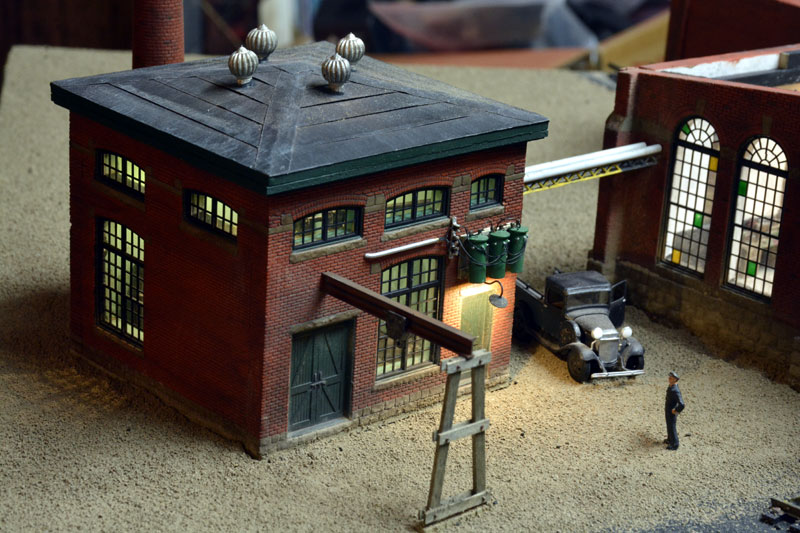


I will update with more photos as my project proceeds.
Thanks for having a look!

Greg


Attached Files Image(s)
   
Reply
#2
That's really looking great, I really likke the neat interior view.  Worship
Charlie
Reply
#3
VERY nice work!

Tom
Life is simple - Eat, Drink, Play with trains

Occupation: Professional Old Guy (The government pays me to be old.)
Reply
#4
It's always special when you post your outstanding creations---thanks again for sharing Greg.
Reply
#5
Very good work.
Reply
#6
Superb modeling!
Tom
Silence is golden but Duct tape is silver
Ridley Keystone & Mountain Railroad
My Rail Images Gallery
Reply
#7
Thanks very much guys! For your very kind comments.

Greg
Reply
#8
Impressive for sure. Worship
Don (ezdays) Day
Board administrator and
founder of the CANYON STATE RAILROAD
Reply
#9
verry nice looking reminds me of when i was dreaming of a layout and built a large roundhouse then reality snuck in and had to salvage what i could .
Jim
Reply
#10
Don & Jim, thanks for your nice comments!
Jim, I will build an entire layout around this roundhouse if I need to!

Greg
Reply
#11
Hi everyone, I have been able to do a little more work on my roundhouse scene.
First I decided to finish off the ballasting around all of my track work and have even started on the weeds and ground foam around this scene.
I have also glued down some of the rusty parts that one might find around such a scene.


I made the machine shop removable so that I could photograph through the backwall of the roundhouse.
By doing so I was also able to place the LED distribution boards under the machine shop for easy access when it came to hooking up those LED's
So I glued clump foilage around the base of my machine shop to help hide that seam. I also used a thin piece of cardstock glued under the track exiting the machine shop
and the glued ballast down on that.


This is how it looks when it's removed. Notice the LED distribution boards now exposed.


I also added some workbench lighting over the large workbench inside of the roundhouse.


Here is a better shot of it from the opening at the back when the machine shop is removed.


That's all I have for now.
Thanks for having a look!

Greg
Reply
#12
Greg, It looks great and some very great ideas that you have shared. 
Charlie
Reply
#13
Thanks! Charlie.

Greg
Reply
#14
Hi everyone, well work continues on my roundhouse.
The kit calls for some outside steam lines to be built from styrene, .015 wire and even some brass etched parts.
I decided to build my steam towers using brass parts instead of the styrene.
I decided on brass because it would be easier to add some LED lights to the brass ones.
Here's a photo showing both stryene & brass towers side by side.


Here are those steam lines now installed over my outside storage tracks.


This is how they look at night lit up.


That's all I have for now.
Thanks for looking!

Greg
Reply
#15
That's very impressive Greg. I realize how much work it is to light a scene but the effort show up in the photos. 
Charlie
Reply


Forum Jump:


Users browsing this thread: 1 Guest(s)