
08-09-2026, 06:28 PM
The Bank Job....
Printed out a full set of 5 sheets that make up the FREE Crystal Lake Bank (courtesy of the Illinois Historic Preservation Agency) - that'll be turned into the 1st National Bank in White Haven. I suppose because all of these buildings are free, they don't include a whole lot of extra pieces to build up the detail relief (around windows, doors, etc.), and you can certainly put together a flat face for each side of the building, but I'm used to Clever models with a bunch of layers that when applied, bring out architectural details and make the building more like a typical plastic model. You can still do that with these kits - you simply have to print multiple copies of the sheets, cut and paste while building from the interior. For instance, in order to give the windows the depth I like, I printed out 3 copies - the rearmost level has the lower sash, the 2nd level the upper sash and sash frames, the thrid level the window frame, and finally another layer for the window sill. In the photo below you can see where I've cut out the sash frames on the main wall, and the layer below that is glued and placed under the main wall to give more depth.
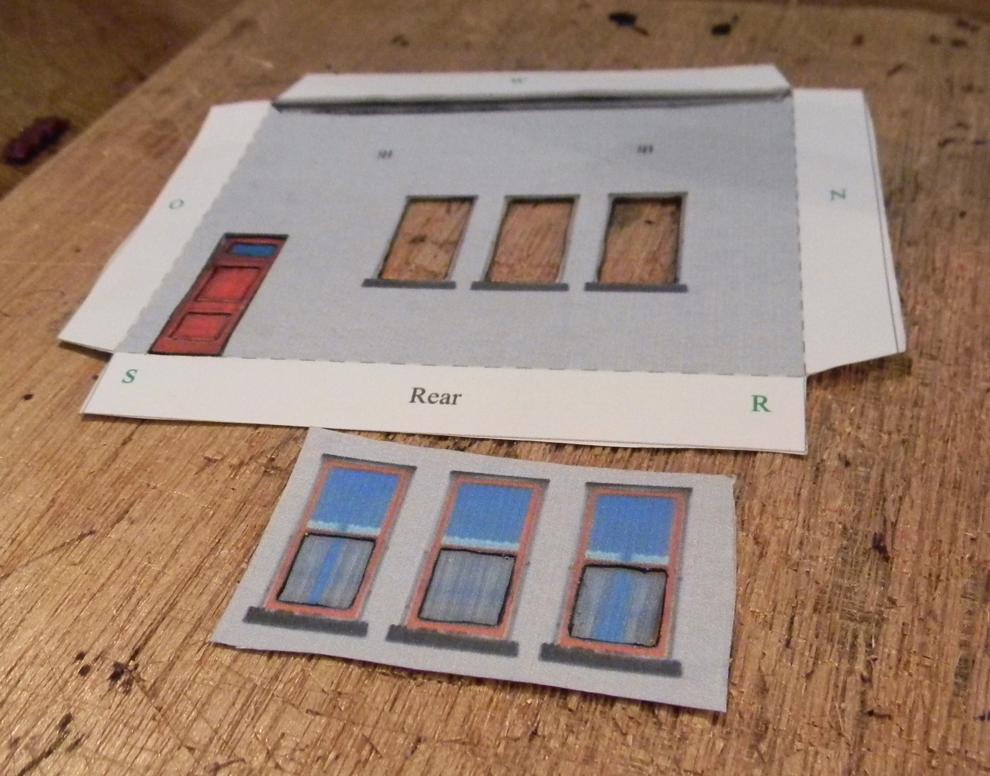
Cutting carefully, using a paint pen or a marker to coat each cut edge, and gluing can make your building sides a lot more realistic. If you want some shine to the windows, you can also attach clear cellophane tape on one of the layers (I didn't do that on the rear face of the bank, but I might to the front). One easy side done... The front has a good bit of gothic elements that will be a little bit of a challenge, but the right and left sides are about as easy as the back.
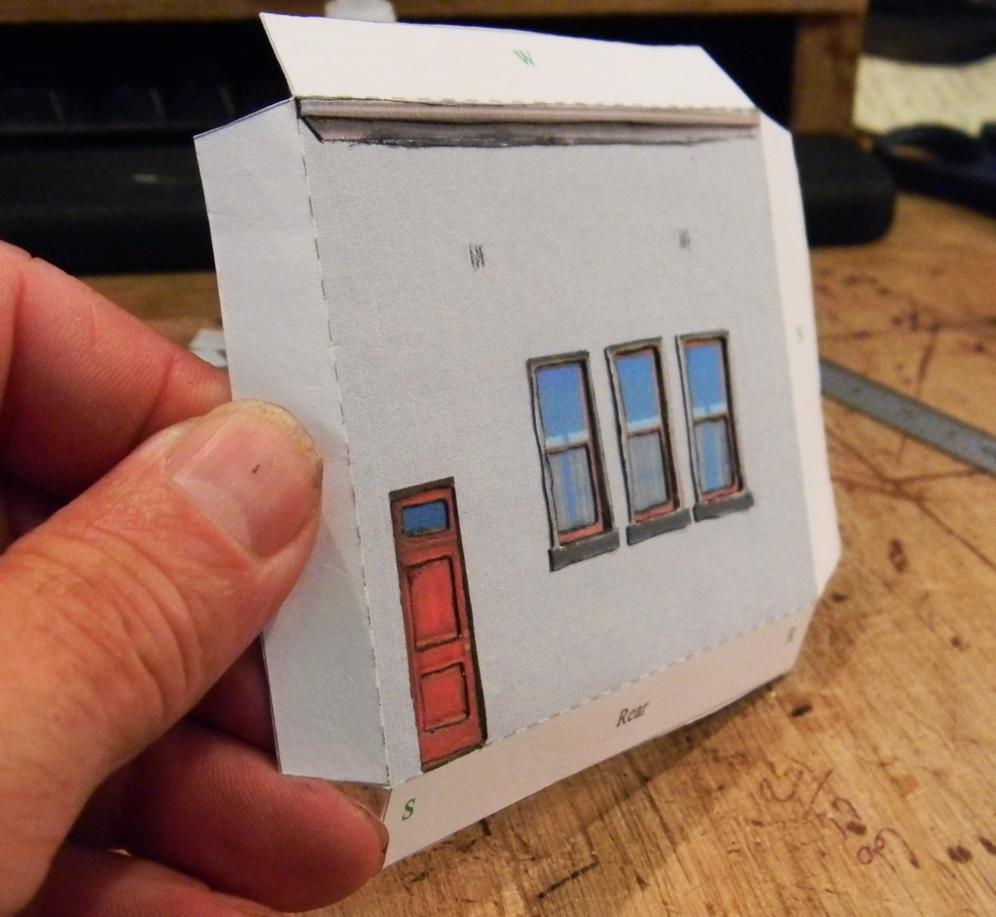
Printed out a full set of 5 sheets that make up the FREE Crystal Lake Bank (courtesy of the Illinois Historic Preservation Agency) - that'll be turned into the 1st National Bank in White Haven. I suppose because all of these buildings are free, they don't include a whole lot of extra pieces to build up the detail relief (around windows, doors, etc.), and you can certainly put together a flat face for each side of the building, but I'm used to Clever models with a bunch of layers that when applied, bring out architectural details and make the building more like a typical plastic model. You can still do that with these kits - you simply have to print multiple copies of the sheets, cut and paste while building from the interior. For instance, in order to give the windows the depth I like, I printed out 3 copies - the rearmost level has the lower sash, the 2nd level the upper sash and sash frames, the thrid level the window frame, and finally another layer for the window sill. In the photo below you can see where I've cut out the sash frames on the main wall, and the layer below that is glued and placed under the main wall to give more depth.
Cutting carefully, using a paint pen or a marker to coat each cut edge, and gluing can make your building sides a lot more realistic. If you want some shine to the windows, you can also attach clear cellophane tape on one of the layers (I didn't do that on the rear face of the bank, but I might to the front). One easy side done... The front has a good bit of gothic elements that will be a little bit of a challenge, but the right and left sides are about as easy as the back.
Check out my "Rainbows in the Gorge" website: http://morristhemoosetm.wixsite.com/rainbows