12-15-2008, 07:54 PM
Well I hope to be assembling the drive train tonight but it will now be this weekend before I can get to it.
I read about a neat trick to help keep the paint on the side rods and valve gear from wearing off when the locomotive is handled. I do not plan to handle it a lot but decided to try it. It involved cleaning the side rods and valve gear in lacquer thinner to remove all traces of oil and dirt. Next they got a little scuffing with some 800 grit wet/dry sandpaper. Just enough to dull the plating a little but not enough to break through the plating. Next was a bath in 99% alcohol then they got sprayed with some dullcote. This is supposed to help the paint grab better. Once the drive is reassembled they will get sprayed with the same black used on the locomotive with the wheels turning slowly.
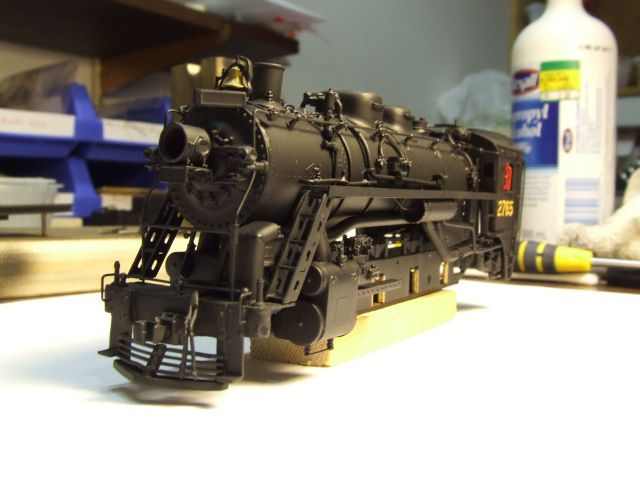
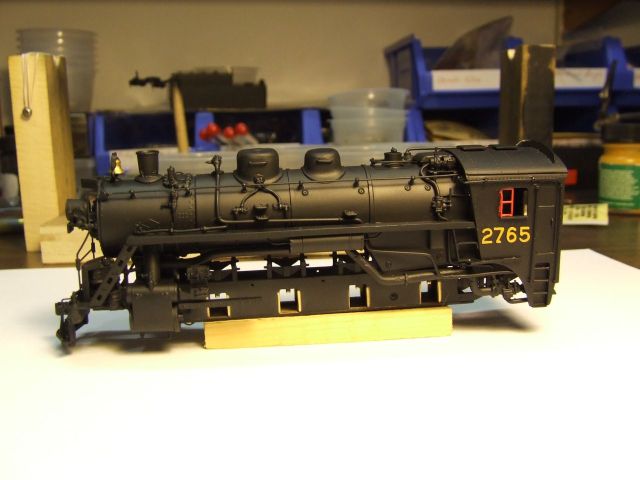
Seeing as I could not assemble the drive tonight I decided to mount the steam chest, pilot, and boiler back on the frame to see how things were going to look. I have been dying to see how it will look now compared to when I got it. In short curiosity killed the cat finally.
I took a couple of pictures so here they are.


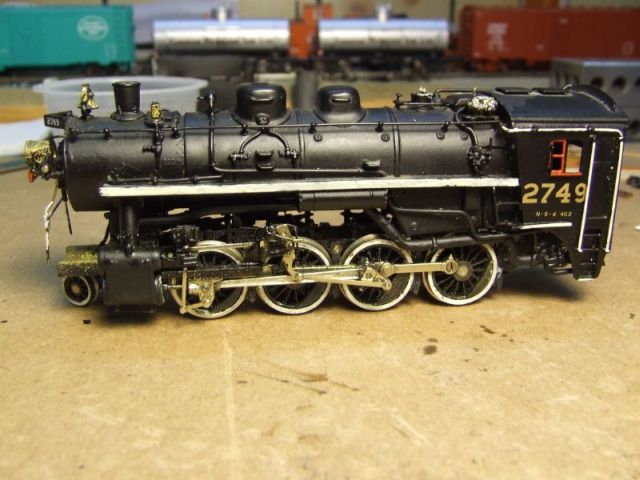
This is how it looked when I received it so many months back.

I am actually very happy with the color of the Polly Scale steam power black paint I used. I person it looks a little more blacker than the photos I took. Also depending on the lighting it looks anywhere from black to a gray color and seems to photograph nicely. The lighting I took the pictures with is just about the exact lighting I will be using on my new layout. I used a lamp for extra lighting for the pictures and the yellow light from it gave the paint a warm black look with a slight brown tint. More so in the picture than in person.
Wayne R
I read about a neat trick to help keep the paint on the side rods and valve gear from wearing off when the locomotive is handled. I do not plan to handle it a lot but decided to try it. It involved cleaning the side rods and valve gear in lacquer thinner to remove all traces of oil and dirt. Next they got a little scuffing with some 800 grit wet/dry sandpaper. Just enough to dull the plating a little but not enough to break through the plating. Next was a bath in 99% alcohol then they got sprayed with some dullcote. This is supposed to help the paint grab better. Once the drive is reassembled they will get sprayed with the same black used on the locomotive with the wheels turning slowly.
Seeing as I could not assemble the drive tonight I decided to mount the steam chest, pilot, and boiler back on the frame to see how things were going to look. I have been dying to see how it will look now compared to when I got it. In short curiosity killed the cat finally.
I took a couple of pictures so here they are.
This is how it looked when I received it so many months back.
I am actually very happy with the color of the Polly Scale steam power black paint I used. I person it looks a little more blacker than the photos I took. Also depending on the lighting it looks anywhere from black to a gray color and seems to photograph nicely. The lighting I took the pictures with is just about the exact lighting I will be using on my new layout. I used a lamp for extra lighting for the pictures and the yellow light from it gave the paint a warm black look with a slight brown tint. More so in the picture than in person.
Wayne R


