02-22-2024, 09:44 PM
The "Move" tool is to the left of the rectangle selection tool
The next step is to fill the background color. Click on the colors at the bottom of the tool bar (I am being crude because it is faster)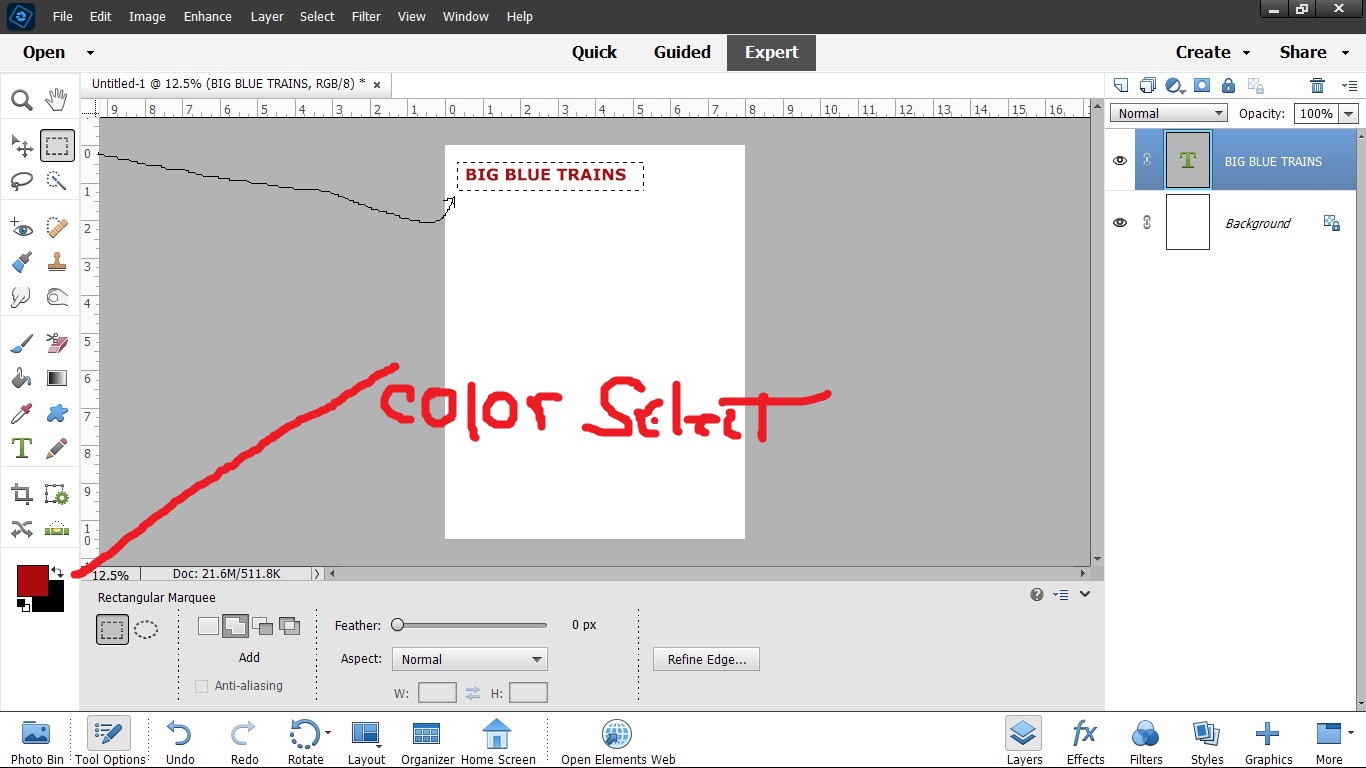
When you click on the color (In this case I will click on the red) a window will come up and you can select from all of the colors available in windows
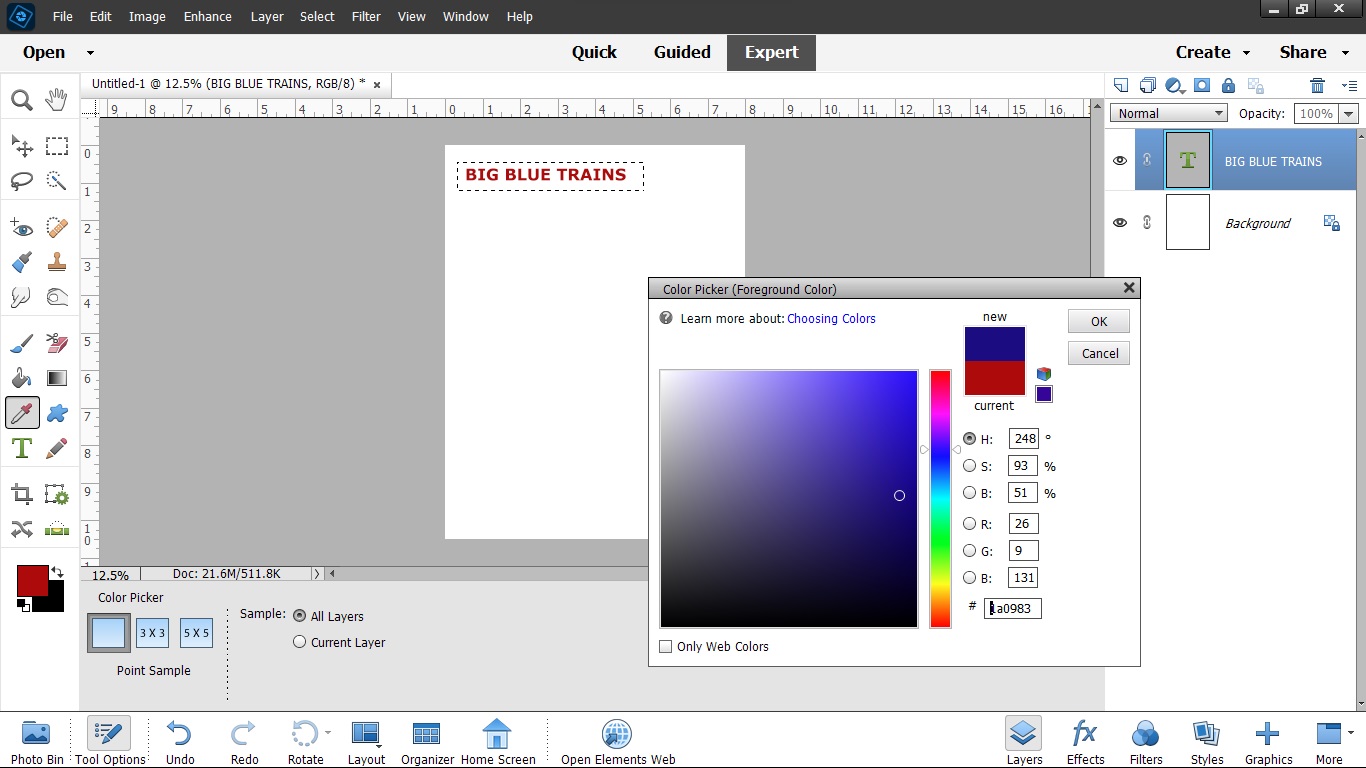 I selected the blue and click OK. Now I select the paint bucket (there is a tolerance selection for the tool which allows it to select shades close to what you are painting, or very precise as to the color it replaces. Here we want to replace the white background with blue. First the image has to be flattened which merges the layer that has the text on it with the background picture
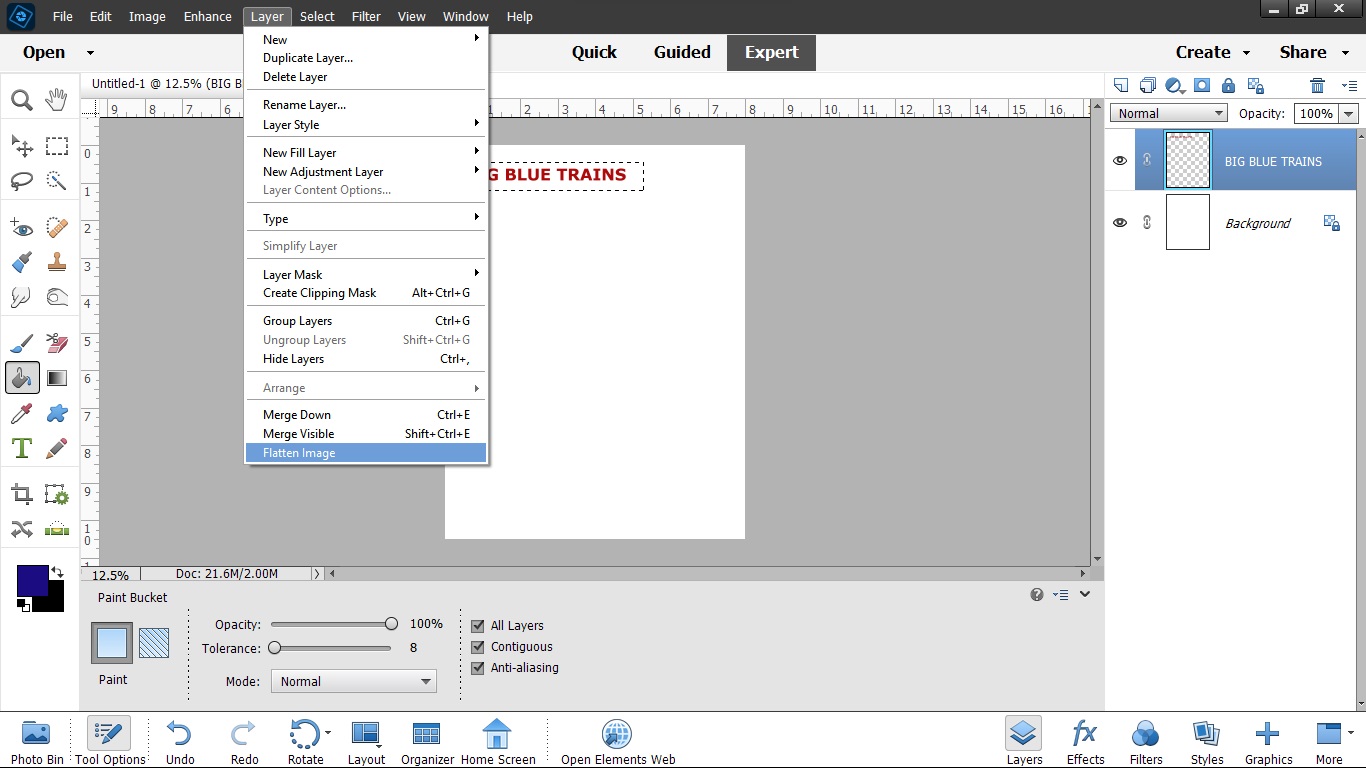
place the paint bucket inside the selection box and click to fill around the red text. There will be letters like B G etc that have centers that don't fill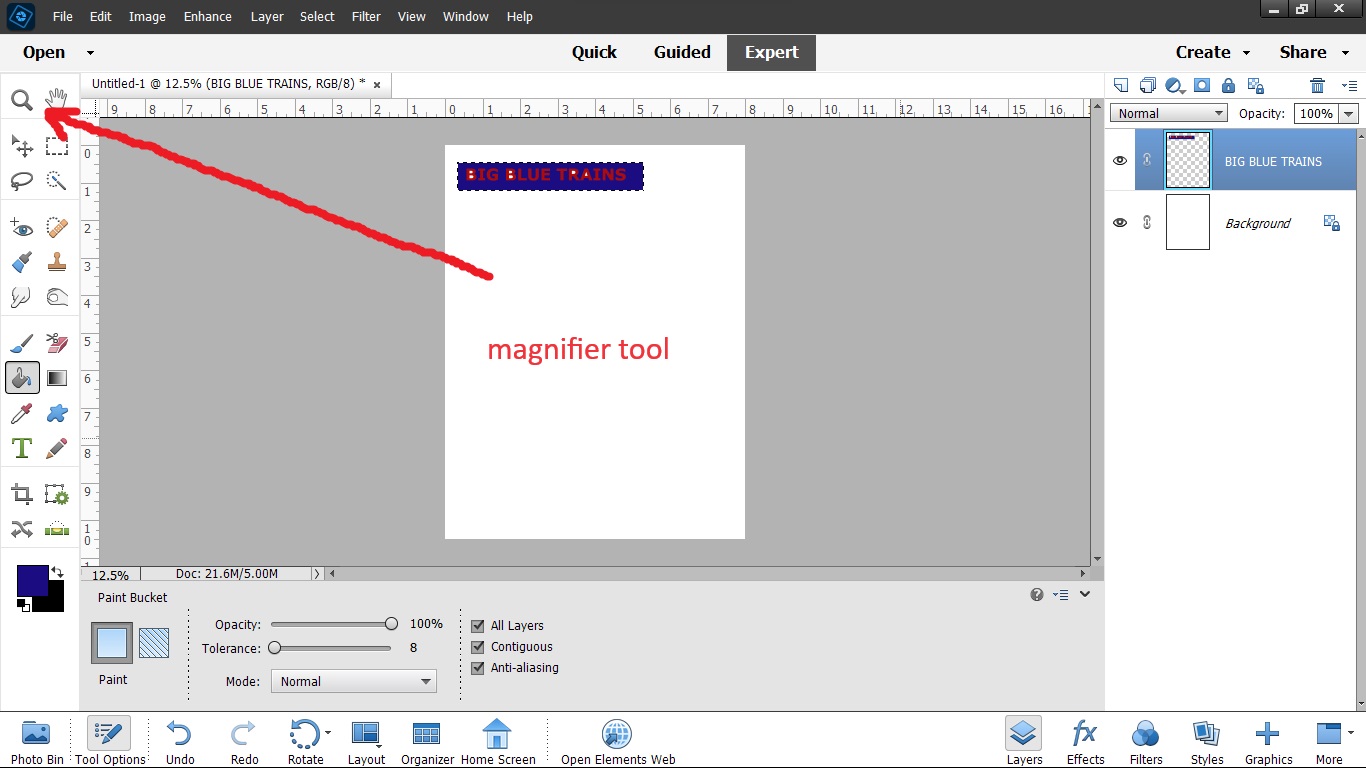
Click on the magnifier (+ or minus can be selected at the bottom of the tools) and enlarge the selection then fill in the letters with the paint bucket tool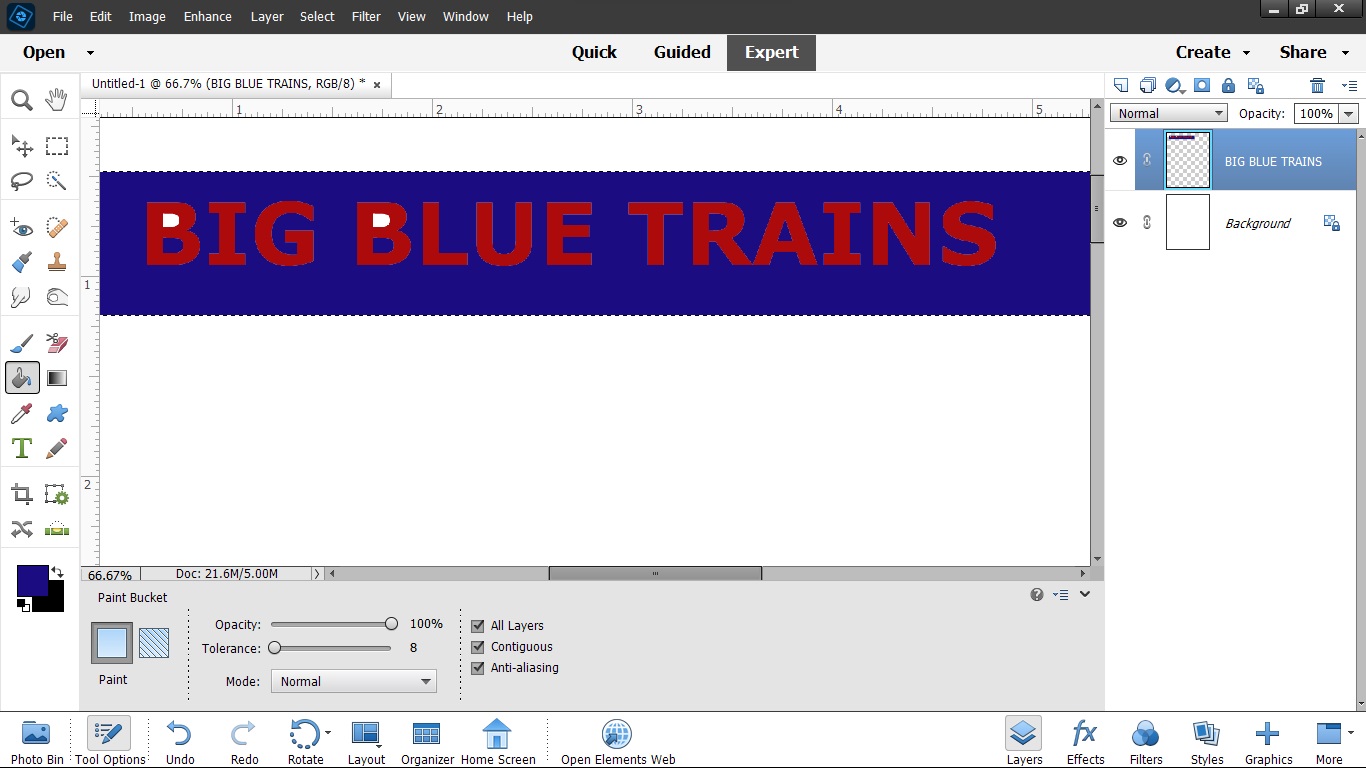
The next step is to fill the background color. Click on the colors at the bottom of the tool bar (I am being crude because it is faster)
When you click on the color (In this case I will click on the red) a window will come up and you can select from all of the colors available in windows
place the paint bucket inside the selection box and click to fill around the red text. There will be letters like B G etc that have centers that don't fill
Click on the magnifier (+ or minus can be selected at the bottom of the tools) and enlarge the selection then fill in the letters with the paint bucket tool


