02-08-2010, 05:46 PM
The first step was to disassemble the cars, and then cut the bodies so that they can be re-assembled to produce a car of the desired length. I chose to make the splice in the center of the car body, meaning each half would be approximately half the total length of the new car. Because I wanted the window spacing to remain consistent and the siding to line up, the two halves weren't exactly the same length. I sanded each half as square as I could, and glued them together.

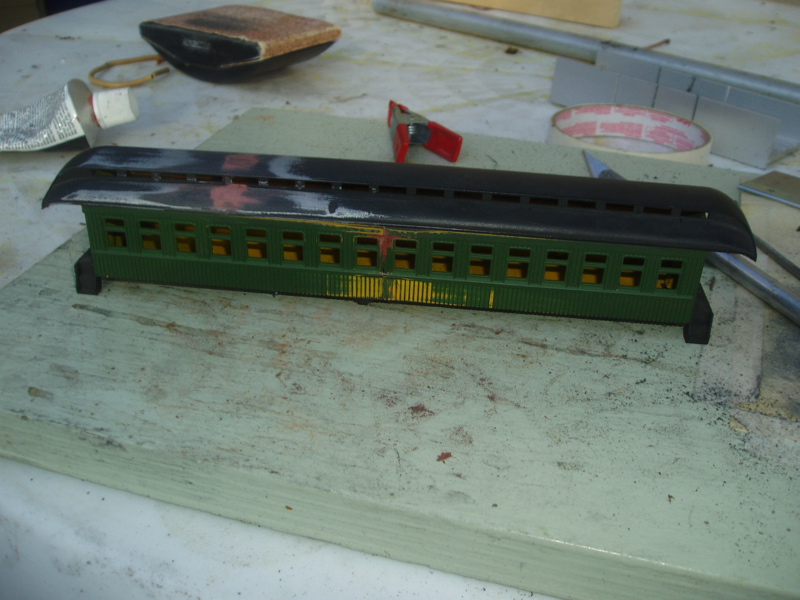
For the roof, I decided to make the splice towards the end. I wanted to stagger the splices so that they will be less noticeable. I then glued the roof sections together such that the clerestory windows are a constant width. This left a roof that is about 7 scale feet longer than the car body, meaning I will have vestibules about 3.5 feet long on each end of the car. The plans I have show vestibules about 3' long. Here is the way the car looks as of now:
For the roof, I decided to make the splice towards the end. I wanted to stagger the splices so that they will be less noticeable. I then glued the roof sections together such that the clerestory windows are a constant width. This left a roof that is about 7 scale feet longer than the car body, meaning I will have vestibules about 3.5 feet long on each end of the car. The plans I have show vestibules about 3' long. Here is the way the car looks as of now:
--
Kevin
Check out my Shapeways creations!
3-d printed items in HO/HOn3 and more!
<!-- m --><a class="postlink" href="https://www.shapeways.com/shops/kevin-s-model-train-detail-parts">https://www.shapeways.com/shops/kevin-s ... tail-parts</a><!-- m -->
Kevin
Check out my Shapeways creations!
3-d printed items in HO/HOn3 and more!
<!-- m --><a class="postlink" href="https://www.shapeways.com/shops/kevin-s-model-train-detail-parts">https://www.shapeways.com/shops/kevin-s ... tail-parts</a><!-- m -->


