05-16-2010, 04:08 PM
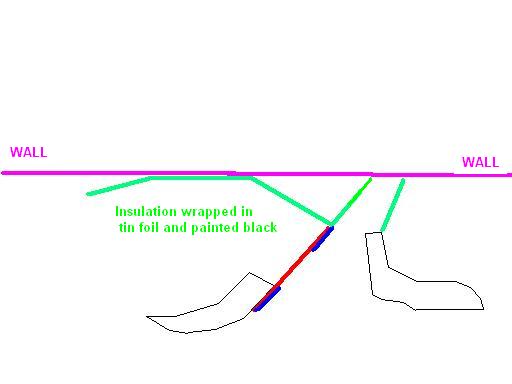
in this picture is the shape of the templates in black, the wall in pink, and the background (inside details of the tunnel) in green

Note that the tunnel is supporting the portal with a second complete portal (in red) and that is actually glued to the edge of the layers as they are installed. The edge of each layer that meets up with the inner tunnel portal is the only thing that has to be constant.
On the right side hill (Water tower) the only constant is the flat facade that i had to create so the hill would not hang over the layout edge into the walkway. Therefore that is almost flat too.
How do you do this???? Easy - The first (bottom) layer becomes the template. You trace "LOOSELY" around the template onto a piece of insulation and cut it out Freehand. Yes it will be "off, yes it will be larger than the template and yes - this is exactly what you want. Imagine - something you don't have to measure twice and cut once!!!


What you will end up with is the layers that you see on the 2 hills. Note the center layer, see how it "Hangs out and I did have to trim it.
In the first picture:
See also, the crevasse (hole) that I created by using 2 scrap pieces. (third layer down and the natural sliver - 6th layer behind tree.
Note that the tunnel is supporting the portal with a second complete portal (in red) and that is actually glued to the edge of the layers as they are installed. The edge of each layer that meets up with the inner tunnel portal is the only thing that has to be constant.
On the right side hill (Water tower) the only constant is the flat facade that i had to create so the hill would not hang over the layout edge into the walkway. Therefore that is almost flat too.
How do you do this???? Easy - The first (bottom) layer becomes the template. You trace "LOOSELY" around the template onto a piece of insulation and cut it out Freehand. Yes it will be "off, yes it will be larger than the template and yes - this is exactly what you want. Imagine - something you don't have to measure twice and cut once!!!


What you will end up with is the layers that you see on the 2 hills. Note the center layer, see how it "Hangs out and I did have to trim it.
In the first picture:
See also, the crevasse (hole) that I created by using 2 scrap pieces. (third layer down and the natural sliver - 6th layer behind tree.
~~ Mikey KB3VBR (Admin)
~~ NARA Member # 75
~~ Baldwin Eddystone Unofficial Website
~~ I wonder what that would look like in 1:20.3???
~~ NARA Member # 75
~~ Baldwin Eddystone Unofficial Website
~~ I wonder what that would look like in 1:20.3???


