09-04-2011, 04:26 PM
I guess it's that time again... time to start up a new project! At first I considered doing a mini-mall with a main store like a Best Buy in the center... but doing a little research I realized that it would take quite a lot of space... It would fit, but I don't want it to be the focal point of my module, so instead, a little burger joint that gave me two years of employment when I was a young'un.
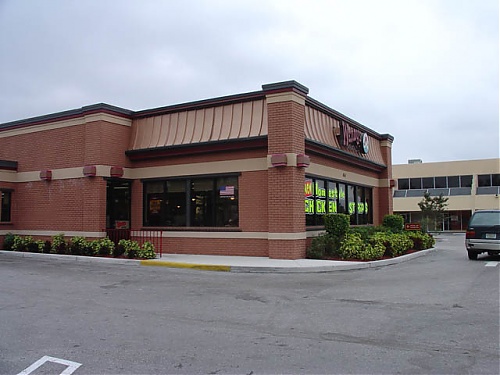
Well, let's start things off with a picture of the prototype. I'm pretty much going to based it on this Wendy's, but I've already had to make some changes to fit the building within it's alloted space of 8" x 10". This will likely be alongside the gas station.
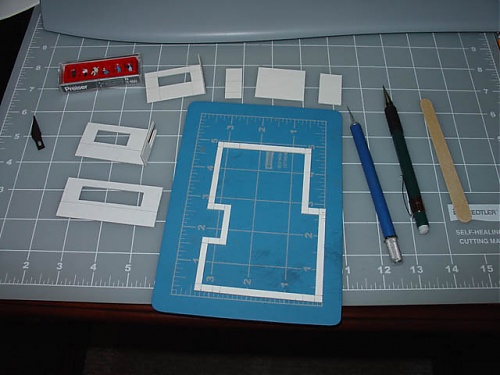
What I've got so far:
The pieces you see on the larger mat are some of the walls with windows/doors cut out. The odd shaped piece you see on the little mat is going to serve as a ceiling frame to hold the wall pieces together. Note the odd shape of the structure. This is a technique I developed with the Chevron that allows me to build the structure as a removable piece from it's base, at the same time allows me to have a removable roof as well.
Well, this is all I've got for tonight, I wanted to start this thread so I could document my progress as it occurs, to get a more accurate idea of how long it takes me to do things.
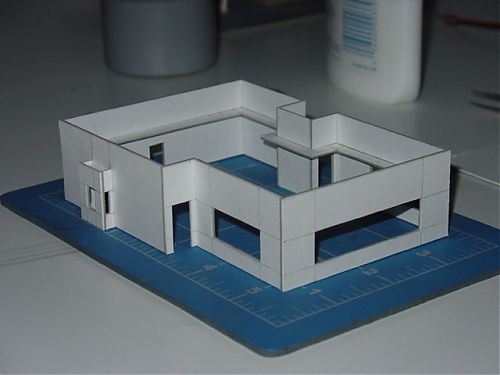
Well, here's a little more progress before I call it a night. Got some walls up, showing how the frame piece fits into the scheme of things. A thin posterboard ceiling will be glued to the underside of this, with openings cut out for the ceiling panel lights that are typical to this buildings. The roof will have the fixtures holding the LEDs and the wiring will likely pass down somewhere near the back so it's out of sight. I plan to populate this with lots of little LPB's (hence the painting LPB thread) so I think this interior shot should be pretty neat. Let's hope, anyway!
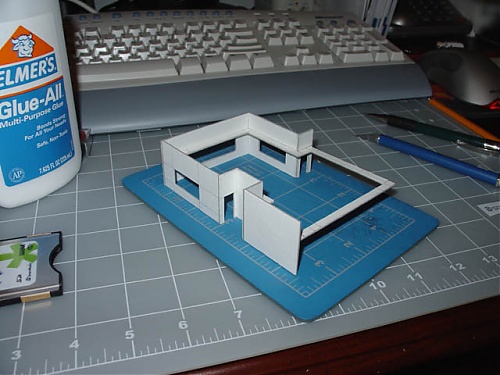
Here's the outside part almost finished and ready for sanding then priming. I use regular cheap flat white spray paint for this. If you get a good enough coat on there, the glue joints tend to "merge" a little bit more. Sanding the corners also helps. The prototype has two drive-thru windows, but the one I worked at as a teen had only one, and in the interest of space, I shortened it
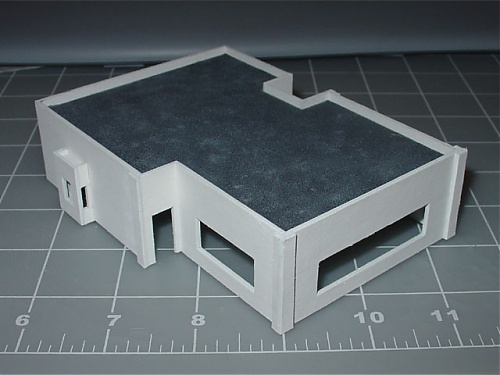
A little bit of progress...
The removable roof section is created. Obviously, there will be thingies put on here later on (as soon as I figure out what they are) but it does help to keep the corners square. I've also promed the building white. It helps keep the illustration board from coming apart and also smooths out some of the edges.
Arlaghan is offline Report Post
Well, let's start things off with a picture of the prototype. I'm pretty much going to based it on this Wendy's, but I've already had to make some changes to fit the building within it's alloted space of 8" x 10". This will likely be alongside the gas station.
What I've got so far:
The pieces you see on the larger mat are some of the walls with windows/doors cut out. The odd shaped piece you see on the little mat is going to serve as a ceiling frame to hold the wall pieces together. Note the odd shape of the structure. This is a technique I developed with the Chevron that allows me to build the structure as a removable piece from it's base, at the same time allows me to have a removable roof as well.
Well, this is all I've got for tonight, I wanted to start this thread so I could document my progress as it occurs, to get a more accurate idea of how long it takes me to do things.
Well, here's a little more progress before I call it a night. Got some walls up, showing how the frame piece fits into the scheme of things. A thin posterboard ceiling will be glued to the underside of this, with openings cut out for the ceiling panel lights that are typical to this buildings. The roof will have the fixtures holding the LEDs and the wiring will likely pass down somewhere near the back so it's out of sight. I plan to populate this with lots of little LPB's (hence the painting LPB thread) so I think this interior shot should be pretty neat. Let's hope, anyway!
Here's the outside part almost finished and ready for sanding then priming. I use regular cheap flat white spray paint for this. If you get a good enough coat on there, the glue joints tend to "merge" a little bit more. Sanding the corners also helps. The prototype has two drive-thru windows, but the one I worked at as a teen had only one, and in the interest of space, I shortened it
A little bit of progress...
The removable roof section is created. Obviously, there will be thingies put on here later on (as soon as I figure out what they are) but it does help to keep the corners square. I've also promed the building white. It helps keep the illustration board from coming apart and also smooths out some of the edges.
Quote:Originally posted by belgI take the measurements of what it would be as a square or rectangle and cut that out first. Then I cut out the odd shapes that are missing here and there. Once I've got the exact outline, I then start to test fit it and see where it rubs against the structure... I sand those areas with an emory board (the type for finger nails filing). It's tedious work, but the roof is really the only piece that needs to be so precise.
Alex how did you cut the roof to fit so tight turning the building over and tracing?
Arlaghan is offline Report Post


