02-07-2009, 05:33 PM
...on grabirons.
I'm in the process of re-equipping my railroad with rolling stock suited to a late-'30s time frame, so the '50s stuff is being sold-off or repainted in earlier paint schemes. To replace the cars sold, I'm buying new kits of cars appropriate to the era, and even some (gasp!) ready-to-run. Of course, it's not really "ready-to-run". In addition to changing car numbers, and adding weathering, I like to add a few details, such as free-standing metal grabirons, sill steps, and basic brake rigging. Well, I don't really like doing it, at least for so many cars, but it needs to be done.
There are commercially available grabs and sill steps offered, and I generally use them. Occasionally, though, grabirons of a non-standard size are required, or I run out of the ones I need and can't be bothered going to the hobby shop. With some suitably-sized wire and some basic modelling tools, you can make your own. I also made a couple of very simple jigs that can save time and aid in keeping these details uniform.
For HO scale grabirons, I use .012" brass wire, from Detail Associates, and, occasionally, .012" stainless steel wire, also from D.A. or music wire. The brass is easiest to work with, especially if using the simple jigs shown.
To make a grabiron, bend a 90 degree angle near the end of the piece of wire - this short length will be one of the "legs" which will mount in holes drilled into the carbody. Make this a suitable length for the thickness of the carside, (I bend mine over on the inside of the car, then secure them with ca) and make these "legs" even longer if you're going to be
creating drop-style grabs.
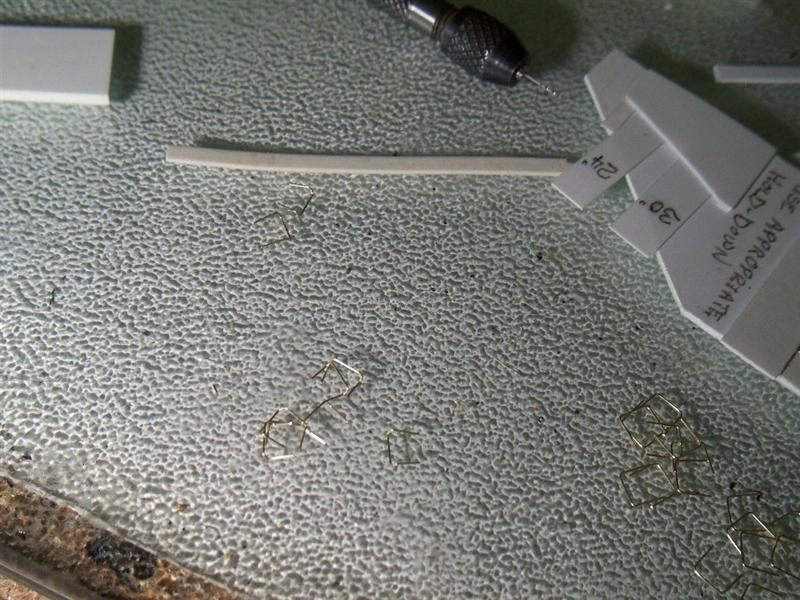
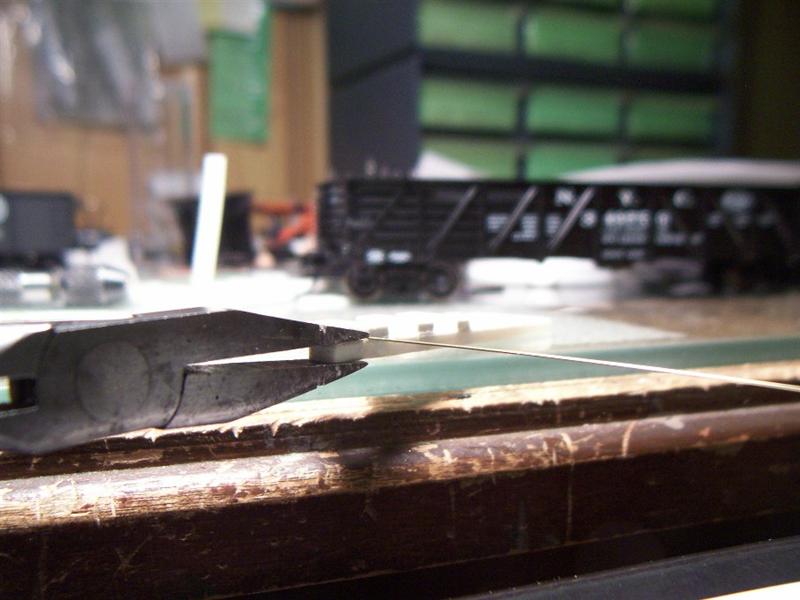
In addition to the long wire with the bent end, you can see the simple styrene bending jig (with the numbers 18", 24", and 30" written on it) that I use to maintain accurate lengths. It's basically a tapered piece of .060" sheet styrene, with "stops" (the bits with the numbers written on) cemented at the appropriate points. On the far side of the jig are slots which accept the short bent leg of the wire, then the wire is butted against the side of the stop (indicated by the arrows) and grasped with pliers, holding the short leg in its slot and the main wire against the "stop", as shown below. The free end of the wire is bent down, using the fingers, along the edge of the jig.
The formed grab, attached to the wire, is placed on a sheet of glass (my usual work surface), and cut free with a knife.
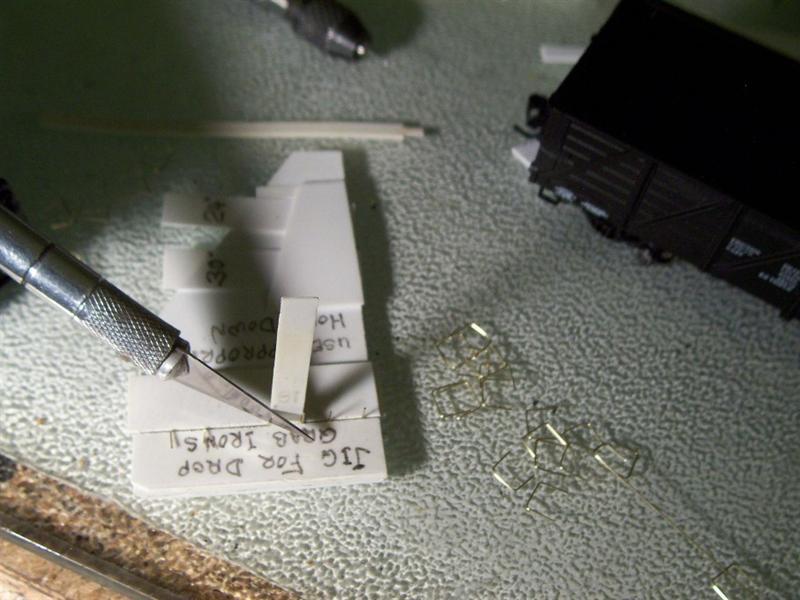
I use an old blade (I always seem to have way more old ones than new ones) which gives a much cleaner cut than do side-cutters. The stainless steel wire, at least in small diameters, can also be cut this way, but in all cases, secure the grabiron with your finger before "snicking" it free, as they do take-off.
(You can also cut larger diameter soft brass wire with a knife - working on a hard surface, simply place the blade at the appropriate spot, and while applying downward pressure, roll the wire back and forth with the blade.)
Another useful jig is one for bending drop-style grabirons. Because the jig is made from styrene, grabs made from brass wire are best suited for making into drop grabs - stainless and music wire are too hard to bend easily, and will quickly ruin the jig. A more substantial jig could be made of brass or aluminum if you prefer the harder wire.

The jig consists of a sheet of .060" styrene, to which have been cemented pieces of .020" and .030" sheet (giving a total thickness of .050"). The .050" material was placed using short lengths of .012" wire as spacers, creating a slot between the sheets .012" wide x .050" deep. I also used .010" sheet styrene to make "hold-downs" for the grabs, one each for 18", 24", and 30" sizes. These are kept with the main jig, as shown.
With the straight grabiron inserted into the slot, with the "legs" sticking up, the "hold-down" is pressed into place, as shown below, then a small screwdriver or knife blade (the blade in the picture should have the back (non-sharp) edge of the blade against the wire) is used to bend the legs down flat. In the jig below, from left to right, is a bent grab, one being bent, and a straight one.
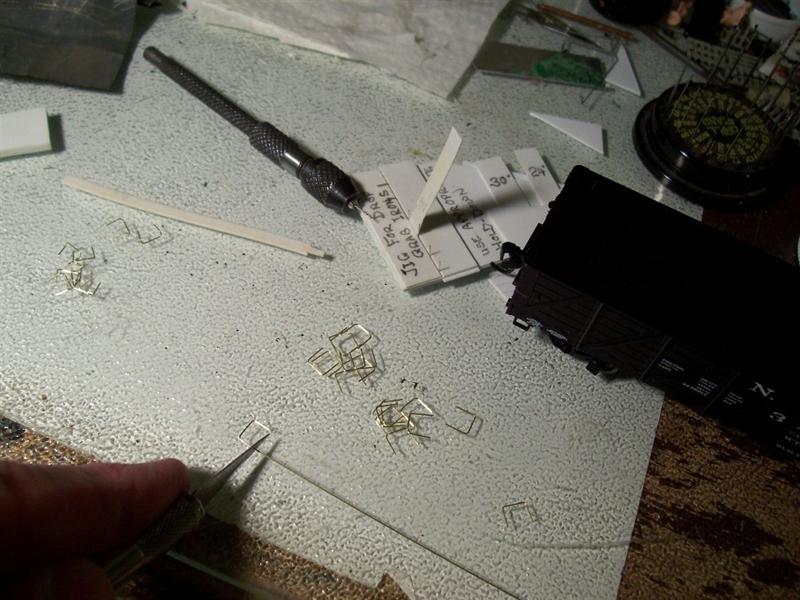
Here are the drop-style grabs, on the left, with some straight ones to the right:
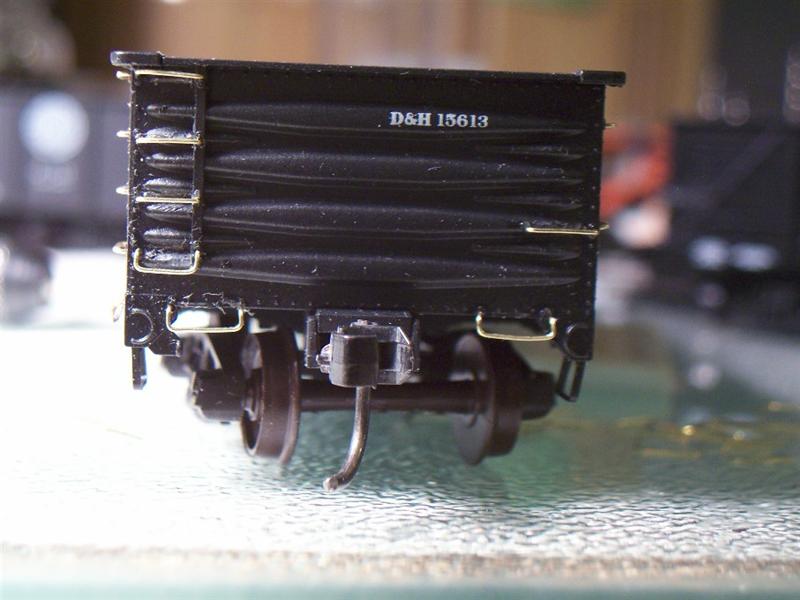
And here they are installed on an Accurail gondola. The ones on the ladder stile, to the left, are narrower than 18", and were bent to fit (not using the jig), while the single grab at right and the drop grabs on the end sill were made on the jigs. All of the grabirons on the side of the car, and those for a few other gondolas, too, are 18" ones made with the jigs.

And for any sharp-witted viewers, I am aware that the Accurail car is of a 1941 prototype. With a little re-lettering and some weathering, its generic style is "close enough" for me
For most car kits which come with free-standing plastic grabirons to be added by the modeller, I throw them directly into the garbage. However, if you wish to use them instead of wire ones, use a suitably-sized drill bit, in a pin vise, to ream-out the moulded-in holes - usually, the car has been painted by the manufacturer, and the accumulated paint makes the opening too tight to accept the plastic grabiron. My other suggestion is to not use tweezers to handle the grabirons - all too often, it's simply a method of launching them to a place where you'll only find them when you step on them, if you find them at all. The small, smooth-jawed pliers, shown in the second photo, were only a buck-or-so, and are much superior to tweezers in this type of operation.
Wayne
I'm in the process of re-equipping my railroad with rolling stock suited to a late-'30s time frame, so the '50s stuff is being sold-off or repainted in earlier paint schemes. To replace the cars sold, I'm buying new kits of cars appropriate to the era, and even some (gasp!) ready-to-run. Of course, it's not really "ready-to-run". In addition to changing car numbers, and adding weathering, I like to add a few details, such as free-standing metal grabirons, sill steps, and basic brake rigging. Well, I don't really like doing it, at least for so many cars, but it needs to be done.
There are commercially available grabs and sill steps offered, and I generally use them. Occasionally, though, grabirons of a non-standard size are required, or I run out of the ones I need and can't be bothered going to the hobby shop. With some suitably-sized wire and some basic modelling tools, you can make your own. I also made a couple of very simple jigs that can save time and aid in keeping these details uniform.
For HO scale grabirons, I use .012" brass wire, from Detail Associates, and, occasionally, .012" stainless steel wire, also from D.A. or music wire. The brass is easiest to work with, especially if using the simple jigs shown.
To make a grabiron, bend a 90 degree angle near the end of the piece of wire - this short length will be one of the "legs" which will mount in holes drilled into the carbody. Make this a suitable length for the thickness of the carside, (I bend mine over on the inside of the car, then secure them with ca) and make these "legs" even longer if you're going to be
creating drop-style grabs.
In addition to the long wire with the bent end, you can see the simple styrene bending jig (with the numbers 18", 24", and 30" written on it) that I use to maintain accurate lengths. It's basically a tapered piece of .060" sheet styrene, with "stops" (the bits with the numbers written on) cemented at the appropriate points. On the far side of the jig are slots which accept the short bent leg of the wire, then the wire is butted against the side of the stop (indicated by the arrows) and grasped with pliers, holding the short leg in its slot and the main wire against the "stop", as shown below. The free end of the wire is bent down, using the fingers, along the edge of the jig.
The formed grab, attached to the wire, is placed on a sheet of glass (my usual work surface), and cut free with a knife.
I use an old blade (I always seem to have way more old ones than new ones) which gives a much cleaner cut than do side-cutters. The stainless steel wire, at least in small diameters, can also be cut this way, but in all cases, secure the grabiron with your finger before "snicking" it free, as they do take-off.
(You can also cut larger diameter soft brass wire with a knife - working on a hard surface, simply place the blade at the appropriate spot, and while applying downward pressure, roll the wire back and forth with the blade.)
Another useful jig is one for bending drop-style grabirons. Because the jig is made from styrene, grabs made from brass wire are best suited for making into drop grabs - stainless and music wire are too hard to bend easily, and will quickly ruin the jig. A more substantial jig could be made of brass or aluminum if you prefer the harder wire.
The jig consists of a sheet of .060" styrene, to which have been cemented pieces of .020" and .030" sheet (giving a total thickness of .050"). The .050" material was placed using short lengths of .012" wire as spacers, creating a slot between the sheets .012" wide x .050" deep. I also used .010" sheet styrene to make "hold-downs" for the grabs, one each for 18", 24", and 30" sizes. These are kept with the main jig, as shown.
With the straight grabiron inserted into the slot, with the "legs" sticking up, the "hold-down" is pressed into place, as shown below, then a small screwdriver or knife blade (the blade in the picture should have the back (non-sharp) edge of the blade against the wire) is used to bend the legs down flat. In the jig below, from left to right, is a bent grab, one being bent, and a straight one.
Here are the drop-style grabs, on the left, with some straight ones to the right:
And here they are installed on an Accurail gondola. The ones on the ladder stile, to the left, are narrower than 18", and were bent to fit (not using the jig), while the single grab at right and the drop grabs on the end sill were made on the jigs. All of the grabirons on the side of the car, and those for a few other gondolas, too, are 18" ones made with the jigs.
And for any sharp-witted viewers, I am aware that the Accurail car is of a 1941 prototype. With a little re-lettering and some weathering, its generic style is "close enough" for me
For most car kits which come with free-standing plastic grabirons to be added by the modeller, I throw them directly into the garbage. However, if you wish to use them instead of wire ones, use a suitably-sized drill bit, in a pin vise, to ream-out the moulded-in holes - usually, the car has been painted by the manufacturer, and the accumulated paint makes the opening too tight to accept the plastic grabiron. My other suggestion is to not use tweezers to handle the grabirons - all too often, it's simply a method of launching them to a place where you'll only find them when you step on them, if you find them at all. The small, smooth-jawed pliers, shown in the second photo, were only a buck-or-so, and are much superior to tweezers in this type of operation.
Wayne


