Posts: 1,250
Threads: 20
Joined: Jun 2022
Well, the Central Camera "kit" is a total of three pages that I printed out this afternoon:

The easiest starting point was to assemble the "easy" walls, which were all together on page 2 of the printouts. After making the folds and cutting out the unit containing the rear and side walls, I added the window and door details and three sides are now complete.

The bear is the front facade which is going to take much more time, but has some cool details. The third page also has a complete interior for the front of the shop, so I need to find some transparent film to use as window material.
Posts: 2,543
Threads: 63
Joined: Dec 2008
I bought an interesting tool at the art shop. It's just a piece of hard plastic with a point that can be used to score fold lines. The point is not sharp enough to cut into the paper but just makes a very narrow dent.
David
Moderato ma non troppo
Perth & Exeter Railway Company
Esquesing & Chinguacousy Radial Railway
In model railroading, there are between six and two hundred ways of performing a given task.
Most modellers can get two of them to work.
Posts: 1,250
Threads: 20
Joined: Jun 2022
That would be a good tool, David. I'll have to look for one. What I do instead (currently) is turn my knife upside down (so the blade is pointing upward) to score the cardstock (lightly).
Posts: 1,250
Threads: 20
Joined: Jun 2022
As I said yesterday, the tough part of this build is the front facade and interior details - this one has window glass on the front facade as well as on an interior wall between the front display windows and the back of the store. Those three pieces are laid out in the picture below (the intermediate wall is lower right). Of course, I got a streak of glue on each of the two front display windows, but I'm going with it anyway.

After gluing the display cases in, I found some areas that should really be filled in (like the area below the decking of the display cases), so I'll have to bash those and add them in before finally gluing the intermediate glass wall to the display cases.
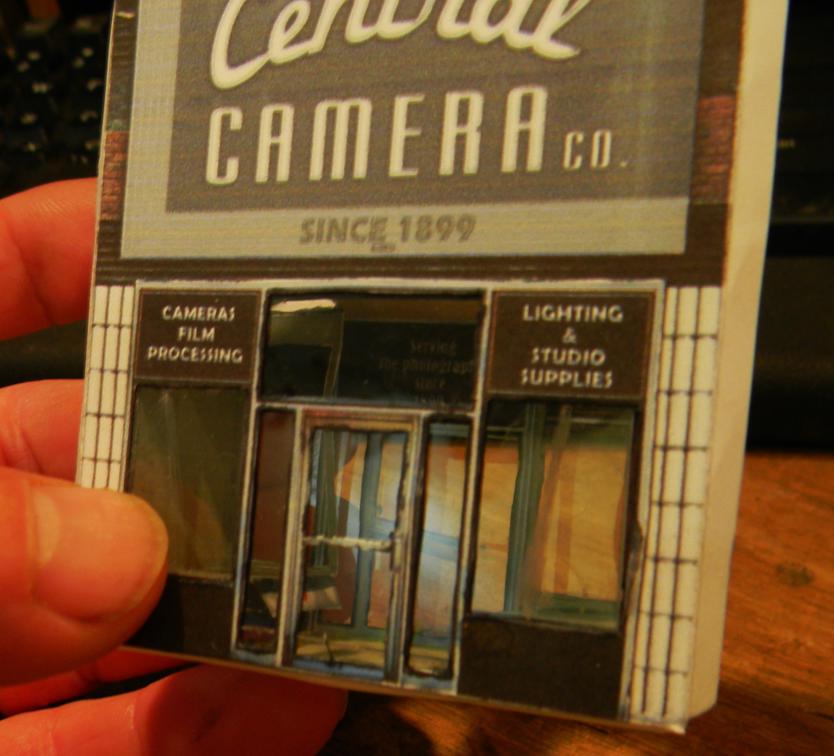
If all of that goes well, I'll install the shadow box part of the interior to the intermediate wall and the upper story recessed windows. I expect the signage will have to wait until tomorrow.
Posts: 1,250
Threads: 20
Joined: Jun 2022
Before heading up for some shuteye I stuck an LED into the back portion of the finished interior and lit it up.

Posts: 1,250
Threads: 20
Joined: Jun 2022
Continued to put the details together on the front side, joined the sides together, added interior supports, and eventually installed the roof and this bad boy is done. I'm sure she'll be a nice addition to Main Street in White Haven once I get there. There is a small Kodak sign in the kit, but there's also supposed to be a support bracket that goes along with it. I've sent a message to Clever to see where that bracket is, but my guess is that I'll have to scratchbuild it.

Posts: 2,595
Threads: 52
Joined: Dec 2008
Looks good. I am impressed how these kits look when you are fiished with them.
Posts: 6,676
Threads: 1,136
Joined: Nov 2008
Posts: 1,250
Threads: 20
Joined: Jun 2022
Thanks fellas. I started work on Rudy's Printing - very similar building, but I interrupted that program because I got a new decoder from Soundtraxx to replace one damaged by a wayward motherboard in my Athearn Genesis GP39-2 (x-Reading, patch out for the D&H). After about 50 days of frustration (as well as a new motherboard and two decoders), this thing is now again DCC functional. As far as the culprit? Unknown.
I was going to put her all back together (I had to remove the shell to get access to the motherboard) and run her with my D&H consist when something in my brain said.... "Wouldn't this be a good opportunity to weather this locomotive? (and actually start weathering the D&H fleet)". As opposed to most of my locomotives, dear old 7412 still was looking really good into 1978 - being one of the last purchases of the Reading company before inclusion in Conrail. Here's a shot from a slide up for sale on evil bay...
https://www.ebay.com/itm/397182244600
As you can see, some typical road grime, but no discernable rust or paint change. So, I'll be "lightly" weathering this locomotive which is a challenge for me... Pictures forthcoming.
Posts: 1,250
Threads: 20
Joined: Jun 2022
Mixed bag....
Got started on the minimalist weathering of the GP39-2. I'd weathered the carcass (entirely dry brushed acrylic black to tone everything down and add some wear with a focus on the top deck, air intake grills, running gear, walkways and fuel tank), put the handrails, couplers and plow back on....
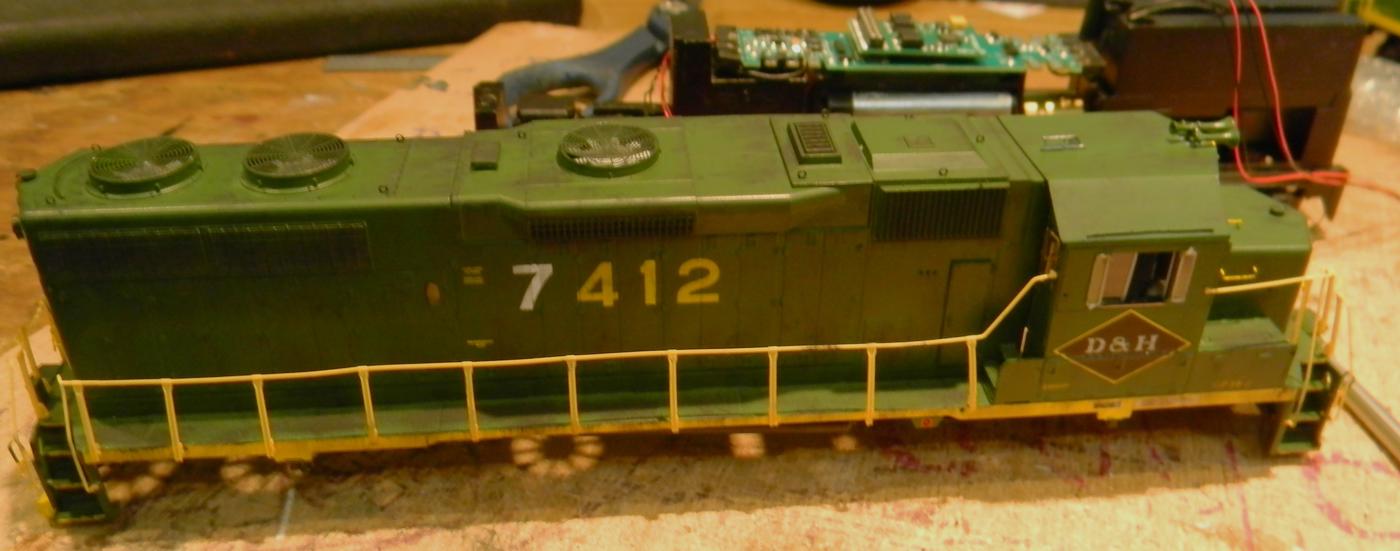
and thought I'd get some shots of it on various places the layout (you'll notice that the headlight's on and all systems are go):

About halfway around my viewing level, the locomotive started to labor and then came to a stop and I smelled foulness. My electrical problems persist... I was going to add some road grime and call this one done, but the need for a full teardown and examination of every possible point of potential shorting has to be done. Table all of that...
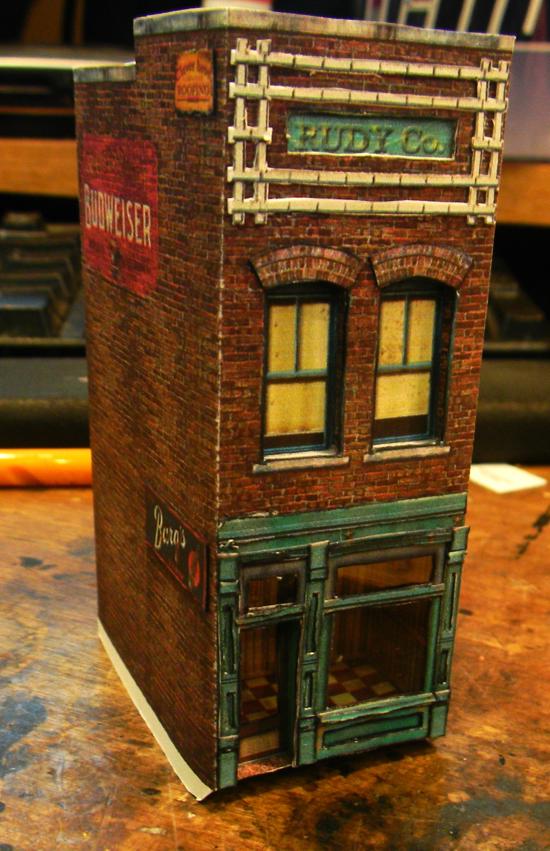
Went back to structure building and got the basic framework (including the front first floor interior) of Rudy's Printing done (minus roof). This one is super narrow and would fit just about anywhere on a layout. It also has some tricky detailing, so it might take a few more days to call this one done.
Posts: 1,250
Threads: 20
Joined: Jun 2022
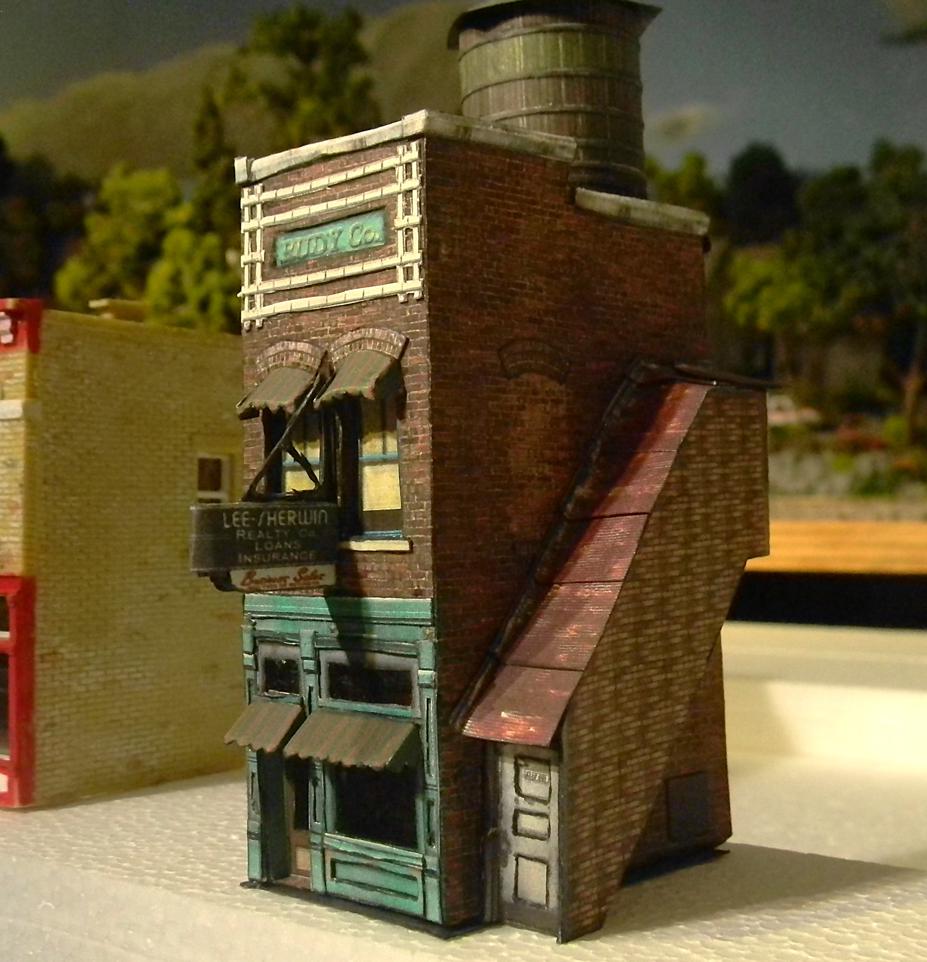
Well, the Rudy Co. building became a realtor's office with an apartment on the 2nd floor. The detail parts (especially the awnings, walkup and sign) took some time and patience, but the extra efforts were worth it. Really cool building that will look great on Main Street. The building still needs some paint touchups, but that can wait.
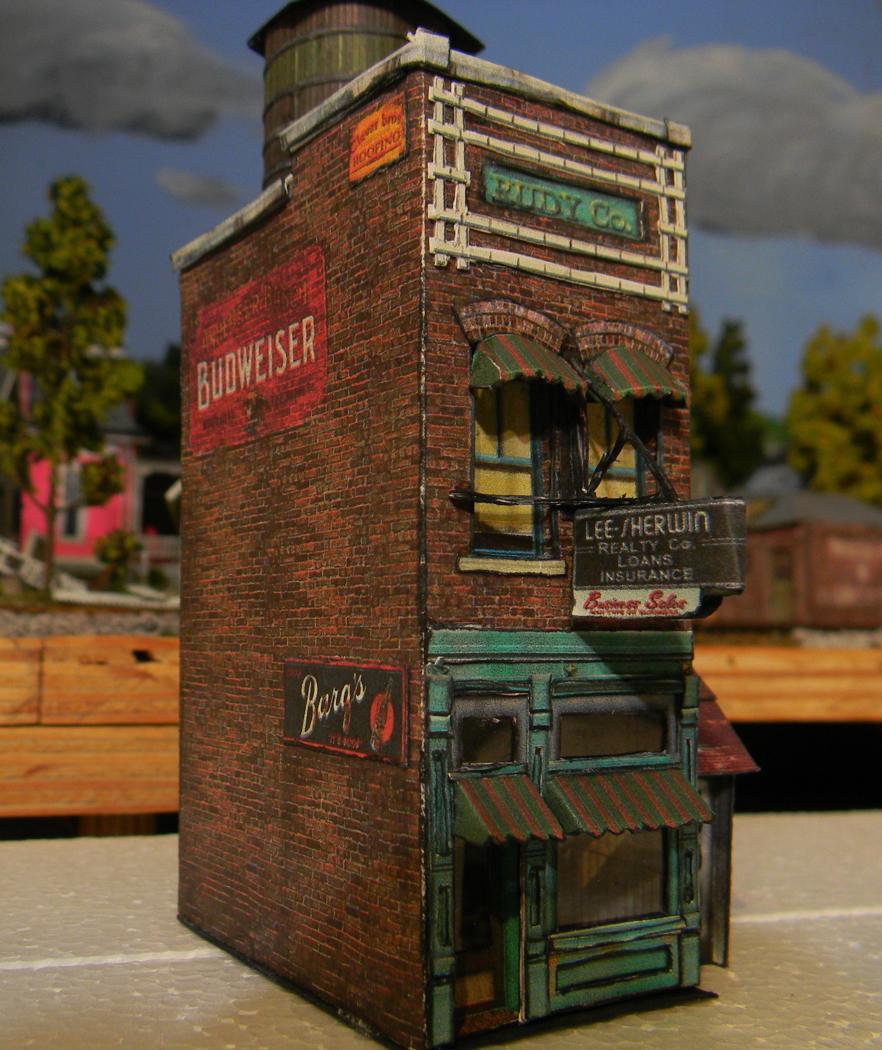
Here are the buildings for Main Street so far - the two on the left are plastic builds - I think they're both Walthers Cornerstone units, and the ones on the right are the recent Clever builds.

I think I'll be doing the strip mall next.
Posts: 10,820
Threads: 248
Joined: Dec 2008
Looking great Todd.
Charlie
Posts: 1,250
Threads: 20
Joined: Jun 2022
Thanks Charlie!
Strip mall and it's history - more convoluted than I thought....
Here's a current shot taken from the south end of Main Street:
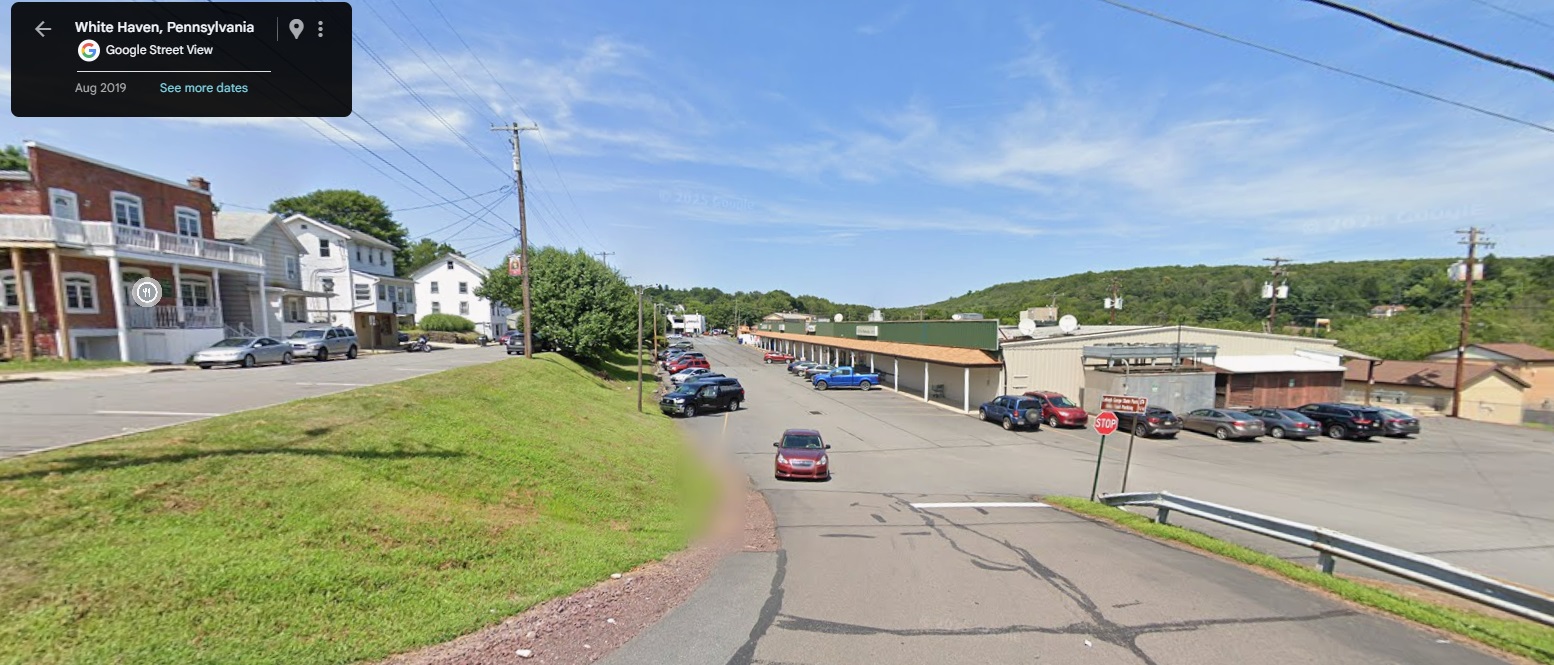
Main Street in the photo is actually the road above the strip mall, and it was my original intent to model the whole strip mall. However, I reread the article I found on what is the current White Haven Market. Turns out, the current market still occupies the same space as the ACME built in 1970, however, the Rite Aid pharmacy and Laudromat (among others) were more recent additions, and the front of the ACME was on the north face of the original building (the current front doors of the market are on the west side of the building under the green facade). I'll try to keep your head from spinning with another photo - this time an aerial:

You can see the "strip mall" complex is actually three different buildings with the former ACME (now the White Haven Market) being the biggest portion toward the bottom (south end) of the photo. Based on the article, the front doors for the ACME would have been located on the north face of the largest building. No photos though... (yet), but knowing the terrain (sloping toward the river, I would bet that the front doors would have been located on the high side nearest Main Street. We had an ACME in Stroudsburg at about the same time with the doors located at the left-hand corner, and I did find a picture of a similar ACME located in Wyoming Valley:

Looks like the rough size of the building is about 80' wide by a little more than 100' deep. Not sure I want a building that large, but I'll look at the real estate available. I'd bought some green siding (prominent on the strip mall facade) as a texture from Clever, but that's not going to work now, but the cinder block walls for the three other sides should. I did grab what I remember was the typical logo from the 1970's (which would go right where the plywood is on the previous photo):

Based on the building site and the current photos, the store looks like it's built on a concrete slab with a precipitous dropoff on the river side of the building. I think I may model that with a partial basement on that side of the building. For compression purposes, I'm also going to locate the building on the edge of Main Street which is going to be fairly wide with quite a few parking spaces.
Posts: 2,595
Threads: 52
Joined: Dec 2008
I am going to be curious to see how the Acme turns out. That style of building was what they built in 1960's and thusly what I grew up with. I love the multi-color sign.
I also remember Acme had a whole fleet of trucks and tractor trailers. They even had their own tow trucks. Their distribution center was along the Main Line between 52nd Street and Overbrook.
Posts: 10,820
Threads: 248
Joined: Dec 2008
If you need a window sign 

Charlie
|


