08-28-2024, 05:54 PM
Hi everyone, I've been slowly working at building this kit from Scale Structures called "Dorothy's House" kit #1125.
I bought this kit decades ago, but finally got around to building it.
What inspired me to finally build this kit, is my 3 year old grandchild Brynnlee.
So I'm calling it Brynnlee's House. I wanted her to have it as a future keepsake of what her grandfather spent so much his spare time doing(building models).
I also decided to detail the inside of this Victorian looking house with period details.
My kit did not include the interior details, so I had to buy those as an extra to add to this house.
I wanted to make one wall removable so that you could see most of the details that will be added to the interior.
I remember in the early 70's as a kid in grade school seeing SS Ltd. new line of Fezziwig's Furniture adds in the model railway magazines.
I thought those details were amazing to my young 10 year old eyes, and thought it would be so cool to one day when I was older build something using them.
Well that day has finally come!
This kit comes with a lot of cast metal details on it's own, never mind the extra interior details that I'm adding.
It also requires you to model the interior details like wallpaper window & door trim before you build the entire exterior.
I also plan to add interior lighting to this stately home, so that adds another thing I have to think about while building this kit.
Anyways here are some photos showing some of the progress that I have made so far.
You can see what this house will eventually look like in the B&W photo shown on the instructions.
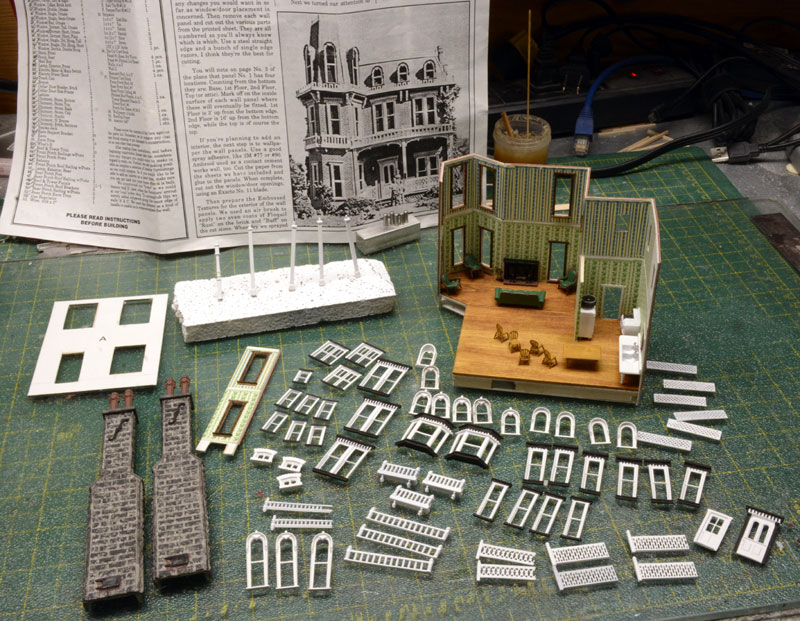
The kit includes some printed on paper brick sheeting, which I switched out for some styrene brickwalls which are then glued onto cardstock wall panels.
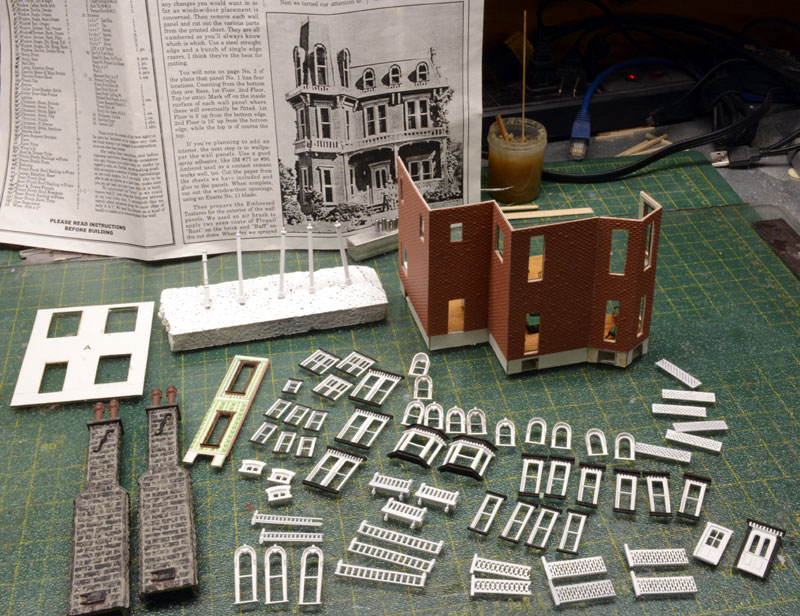
Here's a couple of pics showing more interior walls added and more interior details.

The second floor and remaining exterior walls will be added once I have all of the first floor details in place.
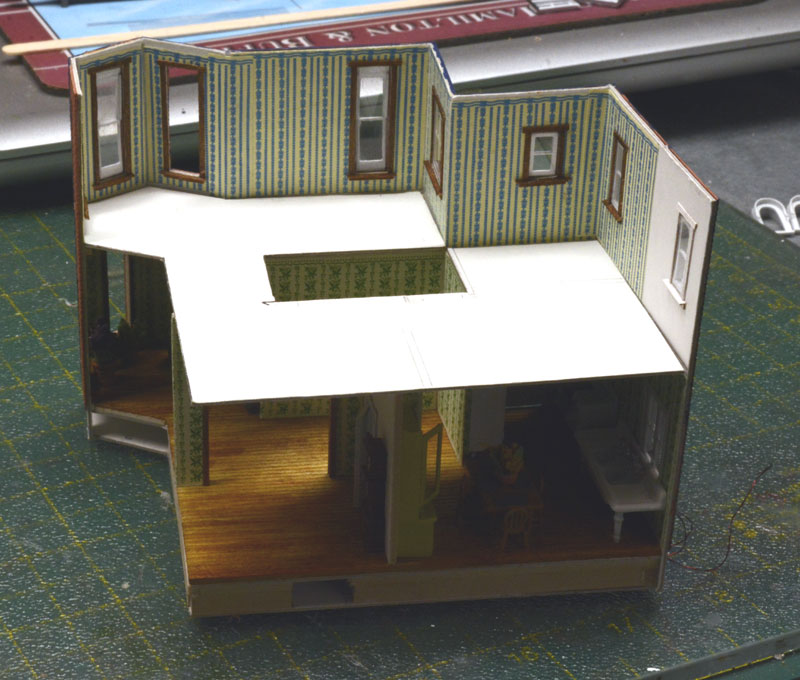
I will run the magnet wires for the lighting between the cardstock floor and the wooden scribed floor that I will be laying on to of the cardstock floor.
The wires will run over to the far exterior wall out through a hole and down the hollow cast chimney on that wall.
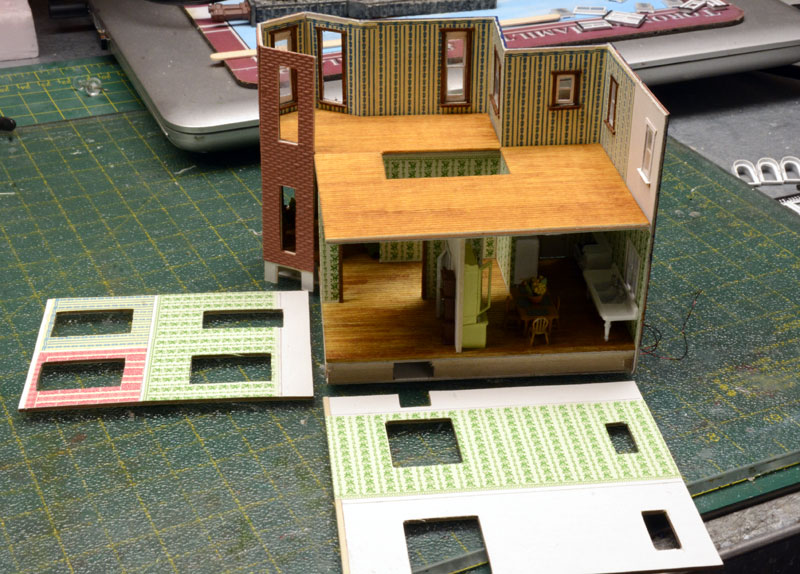
Most of the details on the first floor are now done, I'm just starting to now install the lighting for the first floor.
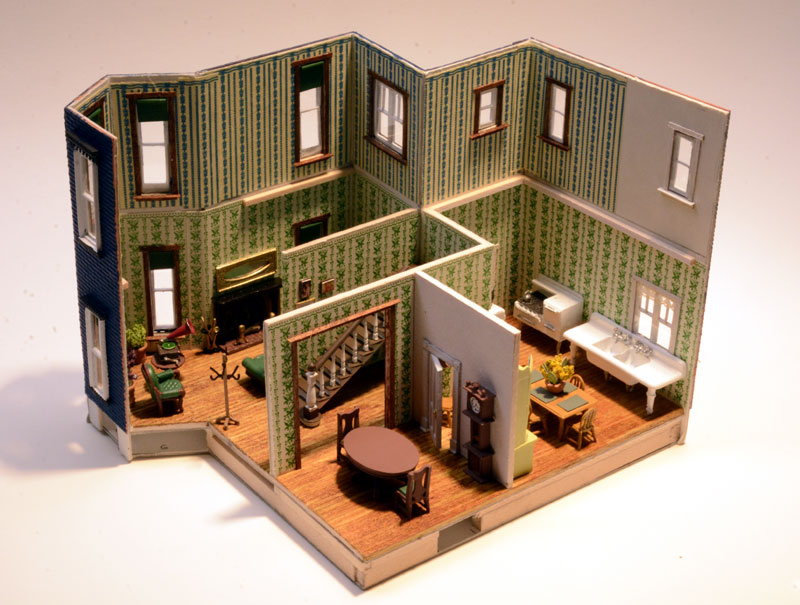
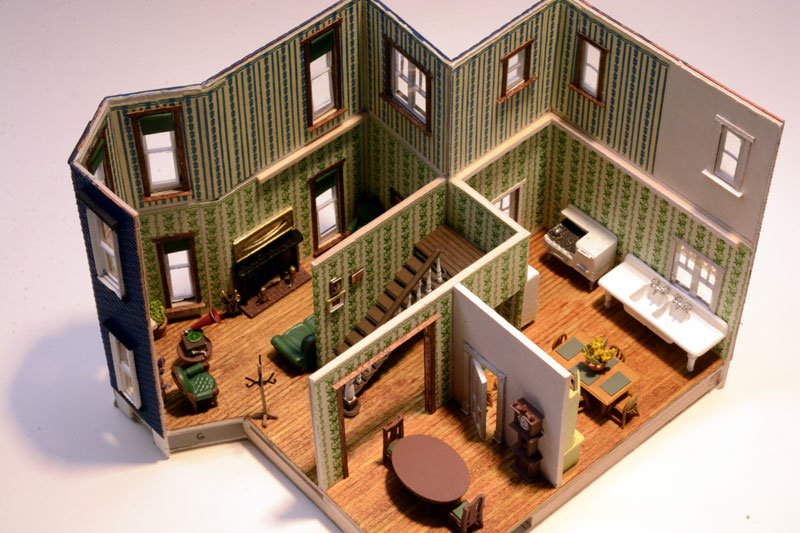
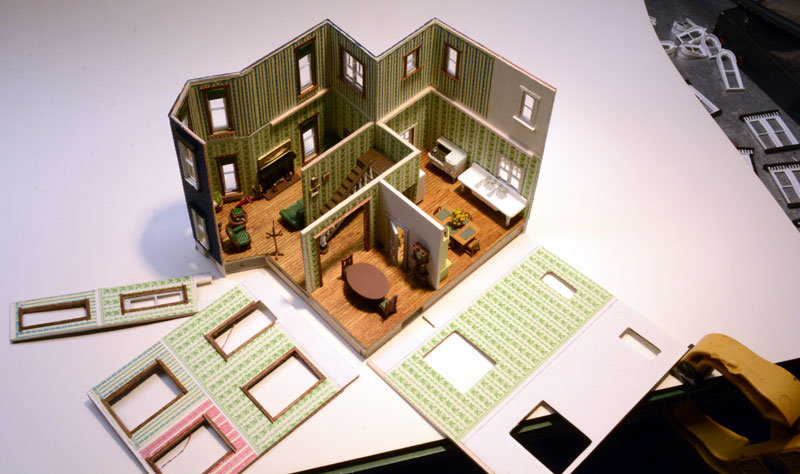
The second floor will show a bathroom & bedroom above where the kitchen & dining room are.
The exterior wall on the side where these rooms are located will be the wall that is removable.
I will update you as I progress, thanks for having a look and for your interest in this project.
Greg
I bought this kit decades ago, but finally got around to building it.
What inspired me to finally build this kit, is my 3 year old grandchild Brynnlee.
So I'm calling it Brynnlee's House. I wanted her to have it as a future keepsake of what her grandfather spent so much his spare time doing(building models).
I also decided to detail the inside of this Victorian looking house with period details.
My kit did not include the interior details, so I had to buy those as an extra to add to this house.
I wanted to make one wall removable so that you could see most of the details that will be added to the interior.
I remember in the early 70's as a kid in grade school seeing SS Ltd. new line of Fezziwig's Furniture adds in the model railway magazines.
I thought those details were amazing to my young 10 year old eyes, and thought it would be so cool to one day when I was older build something using them.
Well that day has finally come!
This kit comes with a lot of cast metal details on it's own, never mind the extra interior details that I'm adding.
It also requires you to model the interior details like wallpaper window & door trim before you build the entire exterior.
I also plan to add interior lighting to this stately home, so that adds another thing I have to think about while building this kit.
Anyways here are some photos showing some of the progress that I have made so far.
You can see what this house will eventually look like in the B&W photo shown on the instructions.
The kit includes some printed on paper brick sheeting, which I switched out for some styrene brickwalls which are then glued onto cardstock wall panels.
Here's a couple of pics showing more interior walls added and more interior details.
The second floor and remaining exterior walls will be added once I have all of the first floor details in place.
I will run the magnet wires for the lighting between the cardstock floor and the wooden scribed floor that I will be laying on to of the cardstock floor.
The wires will run over to the far exterior wall out through a hole and down the hollow cast chimney on that wall.
Most of the details on the first floor are now done, I'm just starting to now install the lighting for the first floor.
The second floor will show a bathroom & bedroom above where the kitchen & dining room are.
The exterior wall on the side where these rooms are located will be the wall that is removable.
I will update you as I progress, thanks for having a look and for your interest in this project.
Greg


