Posts: 1,196
Threads: 18
Joined: Jun 2022
Thanks! I always wonder if I'm providing too many photos, but I'm glad it's at least educational. As I've relayed on many occasions, these kits are tailor made for kitbashing and are very adaptable. They are cardstock, so there are imperfections in folds, cuts and gaps, but I think because of the built in weathering that's incorporated, these kits in some cases look every bit as good as a plastic or lasercut kit (well, at least that I'd build anyway).
Finished up the basis of Building B (it's on the right side of the photo below) last night while watching my Phillies pull out game 2 of their series with the Mets. Building B was a little smaller in footprint and could be integrated into portions of building A (on the left), but these are going to be separate for the brewery. I'm still thinking about some grain and water storage for the brewery, and I may have some leftovers from some old plastic kits that would suffice.
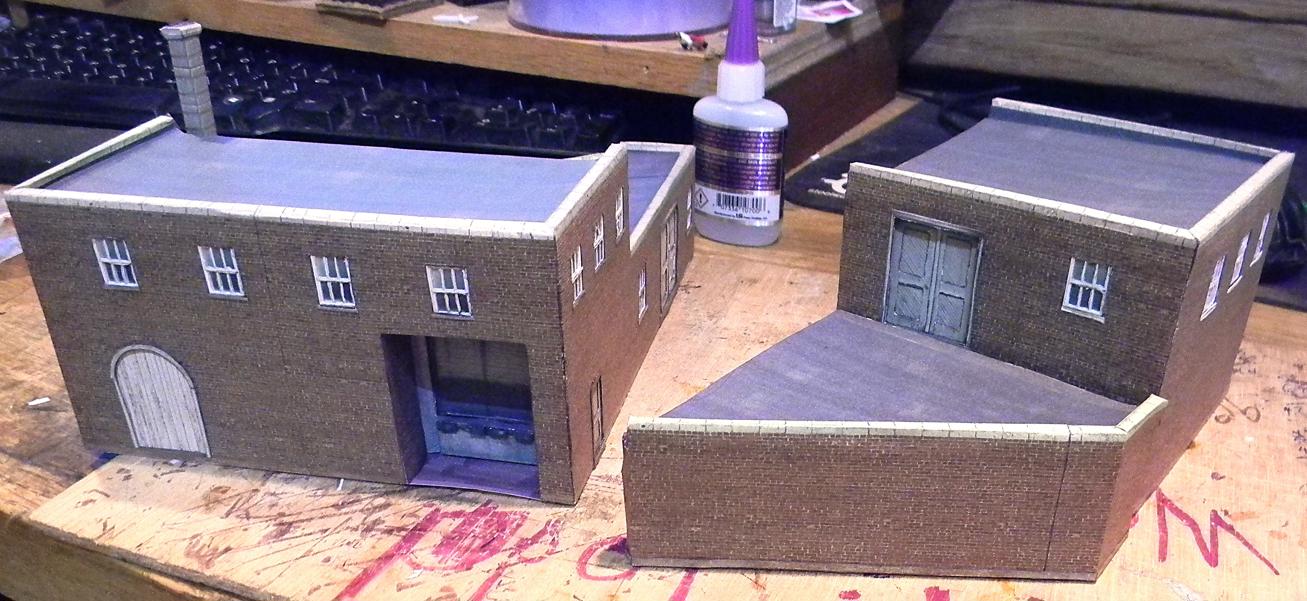
I'm planning on a large "Pilsner" billboard on the top of the 2nd story of either building A or B along with some additional signage on the building, I hope to build that stuff in the next couple of weeks.
I still haven't managed to stop by Home Depot and pick up some 3/4' styrofoam panels to cut up and lay out my terrain, roads and place buildings, but that's next on the list for my section of Hazleton, since I think I have enough structures built. I've found that it's fairly easy to play around with the styrofoam "levels", cutting and stacking under the structures until you achieve a "look" that you like, and it then provides a decently level surface to serve as a base for each building. A little foam glue secures the stacks together, and then you can work on final contours with the addition of plaster cloth and sculptamold. That's the technique I employed for the back section of White Haven and that worked really well there, so why mess with something that works. My hope is that I'll have pictures coming in the next few weeks.
Posts: 2,538
Threads: 63
Joined: Dec 2008
I went to the art store and bought a plastic stick for scoring the fold lines in cardboard. A hard plastic and it has a point at the bottom -- one on the wide side and a fine one on the thickness. \only fault is that the point runs a bit away from the ruler, like some pens.
David
Moderato ma non troppo
Perth & Exeter Railway Company
Esquesing & Chinguacousy Radial Railway
In model railroading, there are between six and two hundred ways of performing a given task.
Most modellers can get two of them to work.
Posts: 1,196
Threads: 18
Joined: Jun 2022
A good scoring tool is essential to make the folds work, and I've recently been using the suggested technique for "mountain" folds of scoring from the back side of the cardstock - you do this by cutting through the fold lines outside of the model, turning the cardstock over and scoring between the two punctures that you made from the front - doesn't cut through the ink that way along the fold line. I'll try to get a picture or two of that at some point. For my scoring, I turn my knife over and score with the back edge of the blade, which works well for me.
Posts: 1,196
Threads: 18
Joined: Jun 2022
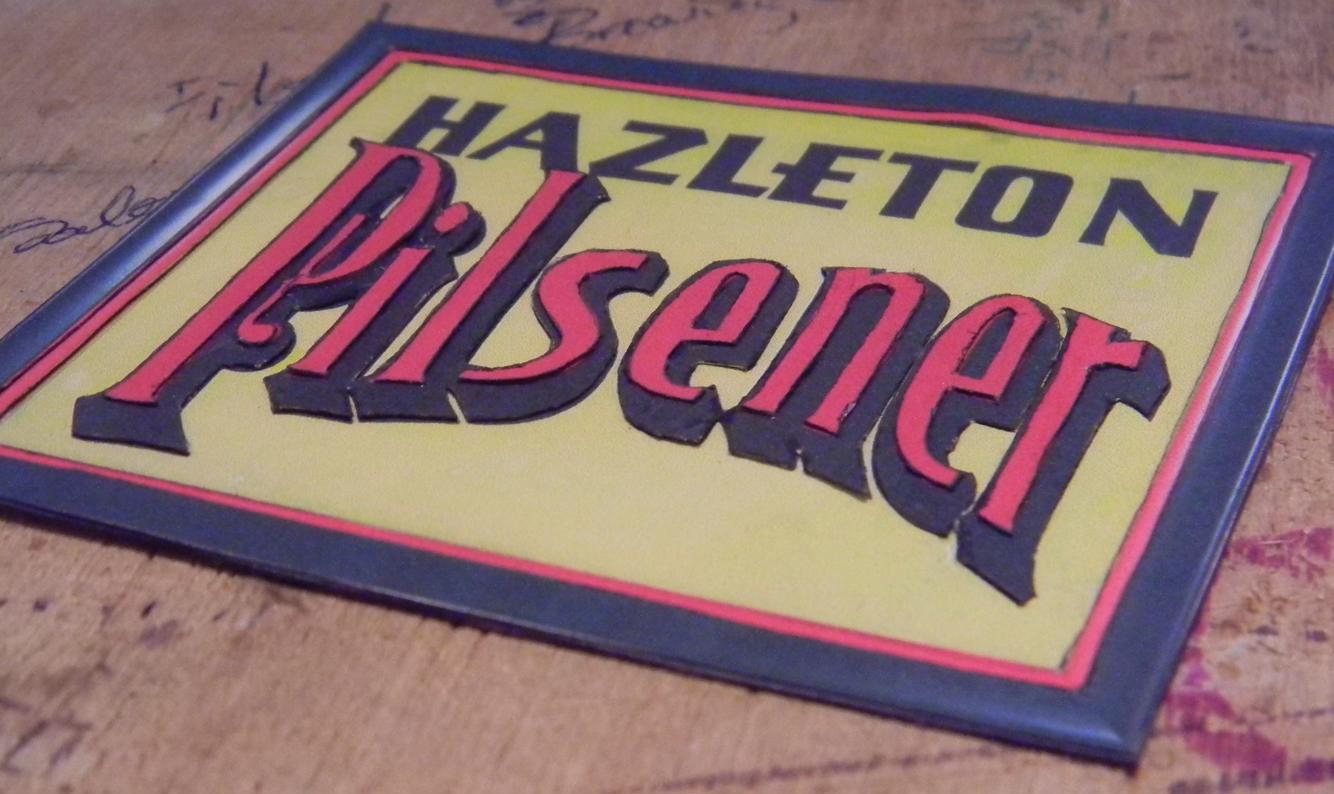
I found a good sign graphic for the Hazleton Pilsener Brewery off via a web search. I think it was a photo of a framed sign, but figured I'd use it as a billboard. Printed three copies onto cardstock once I got the scale right and layered the graphics to give a little 3-d effect to the "Pilsener" letters and the frame around the edge of the billboard. I'm going to put a "wood plank" backing behind the sign and then run some vertical supports that'll run to a frame that'll sit on top of the brewery roof. I also found a round sign that I think I'll hang off of a frame mounted to the side of the building, but one thing at a time....

Posts: 1,196
Threads: 18
Joined: Jun 2022
As it can from time to time, real life interferes with model railroad progress.
I'm still working on the brewery signs, but I also picked up some 3/4" foam panels from Home Depot the other night on the way home from work. These came 6 to a pack and were 48" long. I'm sure a lot of you have had similar experiences, but cutting foam board on a table saw can be problematic. The stuff will bind quickly, especially if you're cutting freehand without a fence.
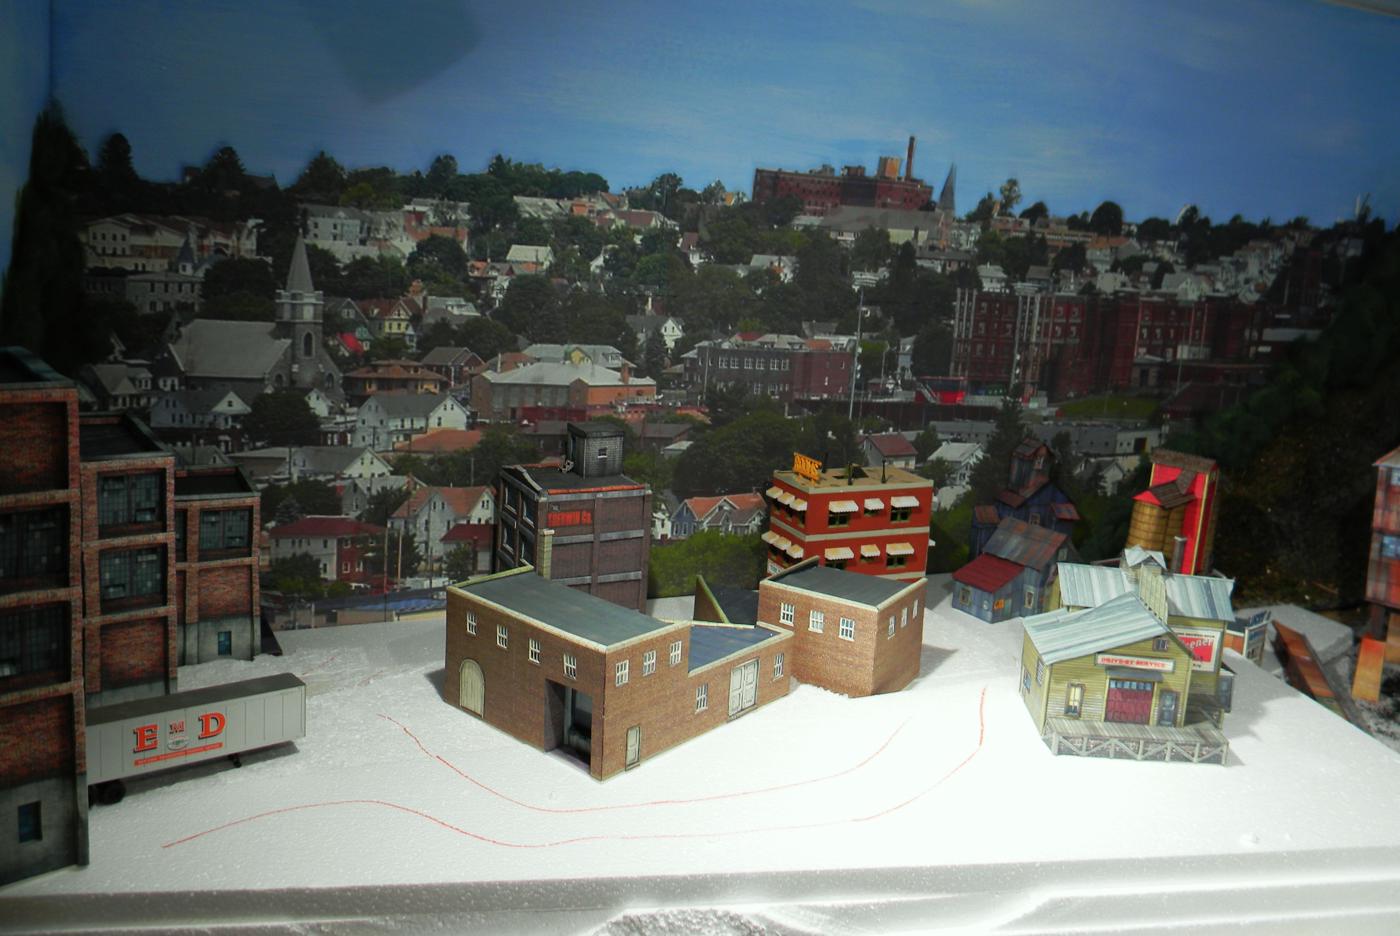
The stuff came in 14" wide pieces, so I did some cutting and hacking to make the base layer that went over the new section in front of the backdrop. I then cut some smaller places and layered them with the tallest of the layers closest to the front of the section to give the impression that there's a hill falling away from the front of the section down toward the backdrop. I then roughly positioned the structures I wanted to use and started playing around with potential roadways. All of the styrofoam panels will be covered over (eventually with plaster cloth and Sculptamold once the terrain is finalized).

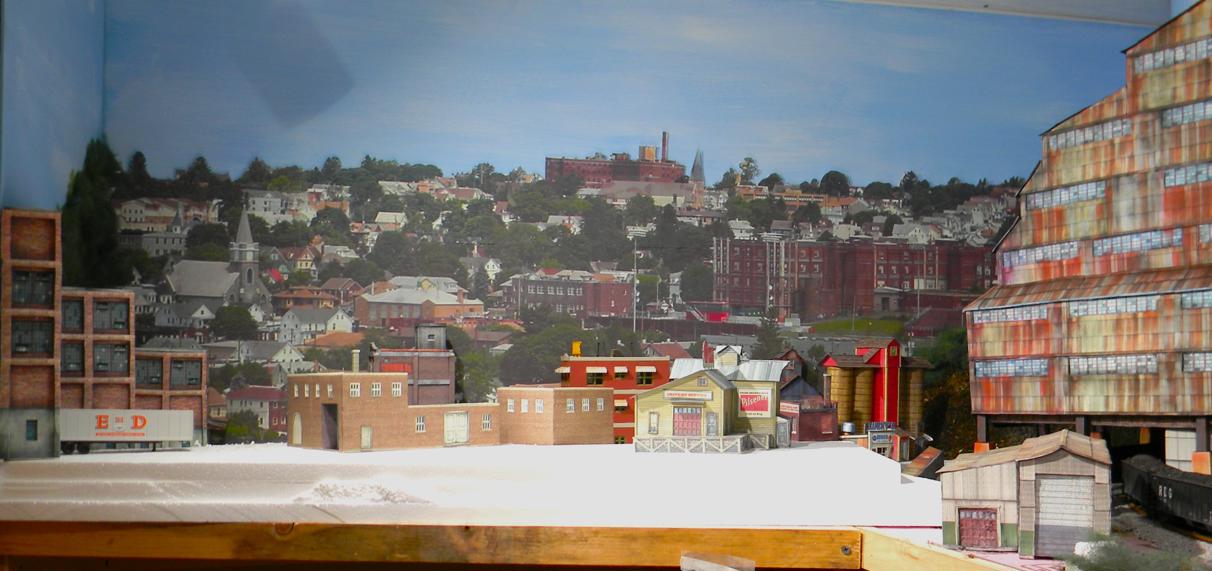
I still need to hack down some of the styrofoam with my foam cutter - especially as I approach the breaker and tie that terrain to the new area, and I'm still considering moving a good many of these structures, but the basic ideas are there to play around with over the weekend. One decision I have to make is how to layout the roadways - informally or in blocks, but I am planning some sort of receding roadway running down toward the rest of the town in the backdrop that'll be roughly parallel with the backdrop and will disappear behind some sort of fence or rock outcrop or a wall or trees or shrubs. The rest of the roads will be spurs off of that main roadway heading to the individual structures.
Posts: 1,196
Threads: 18
Joined: Jun 2022
So.... there in the deepness of the last photo, you see a lone plastic kit - I think it's a Model Power Belvidere Hotel kit that I put together probably 45 years ago. I think I was a little heavy on Tester's model glue, especially on the corners. The biggest problem is that the brick screams "PLASTIC!", but that's pretty easy fix.

I think the key to brick walls is that they are in no way uniform. They tend to mottle with dirt, sun bleaches bricks differently, water pulls dirt into crevices, etc. Brick is also constructed with a wide variety of base materials and can intentionally be different brick to brick.
First, I hit each and every brick and mortar line with an ivory arcylic. It automatically deadens the plastic look and gives you mortar between your bricks. It also gives the face of the brick some grip for the next layers of acrylic paint.
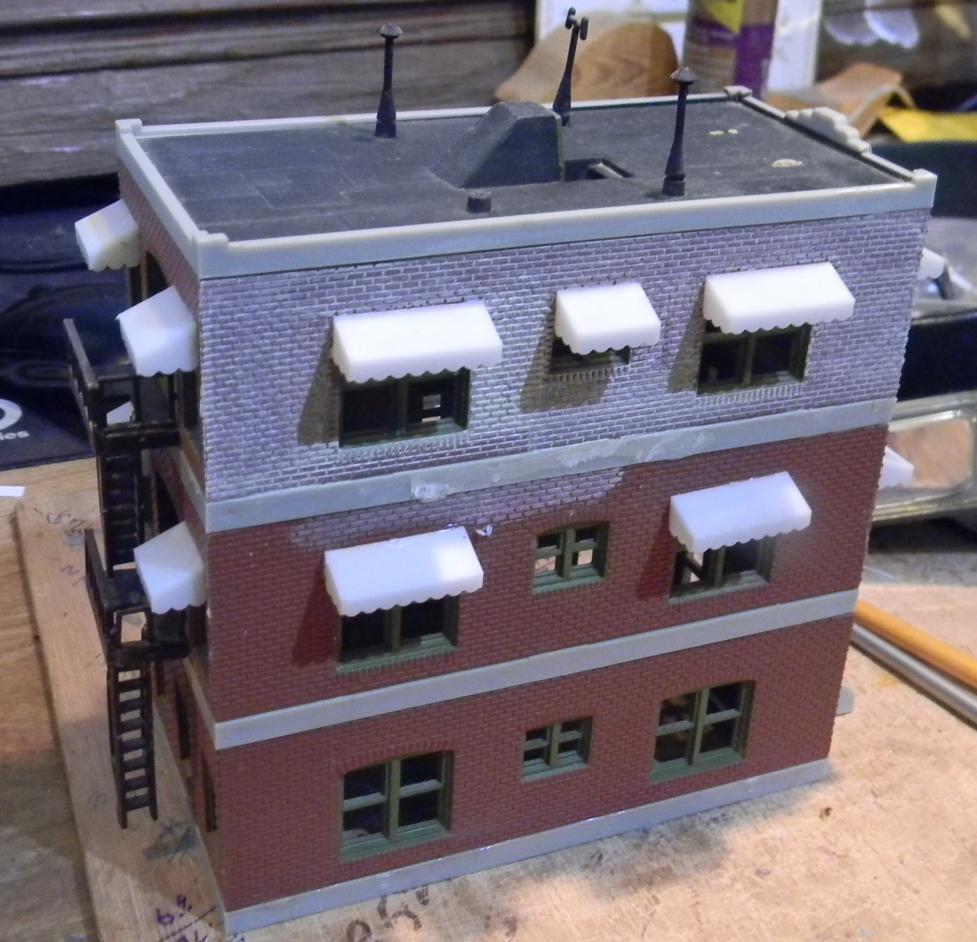
The next layers of paint are all done with a "dry" brush. I simply grabbed a single color - in this case "Brick Red", grab a little bit of paint on the end of a soft brush, dab it until there's very little paint on it, and dab.
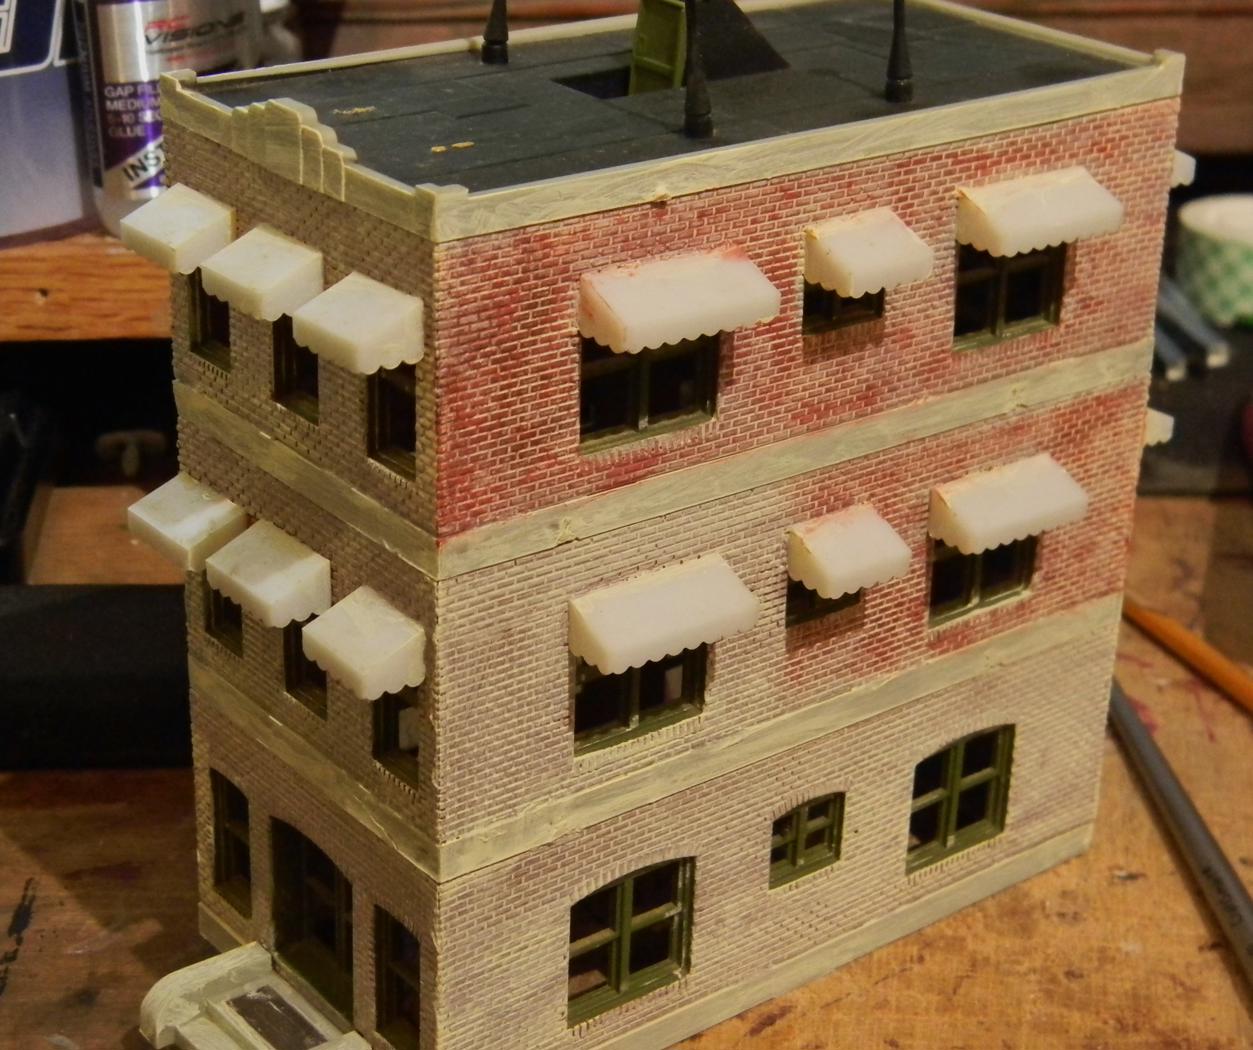
Once the bricks get finished, there's some other plastic parts that also need to be painted, and I'm going to add windows and floors.
Posts: 1,196
Threads: 18
Joined: Jun 2022
I hit all 4 sides, may add some different tones, but here's the rough draft of the bricks. Looks a ton better than the plastic and was well worth the distracted effort while watching a football game.

Posts: 2,579
Threads: 52
Joined: Dec 2008
Great job. I have the same kit with the same problem.
Posts: 1,196
Threads: 18
Joined: Jun 2022
Well Tom, I can be a trailblazer for both of us!
I spent a little more time this afternoon with a stiff brush painting the concrete features on this building, and while I was at it, also hit the awnings with the same gray paint - nothing in Hazleton is white for more than a few weeks, so it stands to reason that the awnings wouldn't have started as white either.

The window trim is a woodsy green, so I decided to try a lighter green for the awnings and tried to pull my paintbrush down the awning. I don't know if that's the final color, but it's something for now.
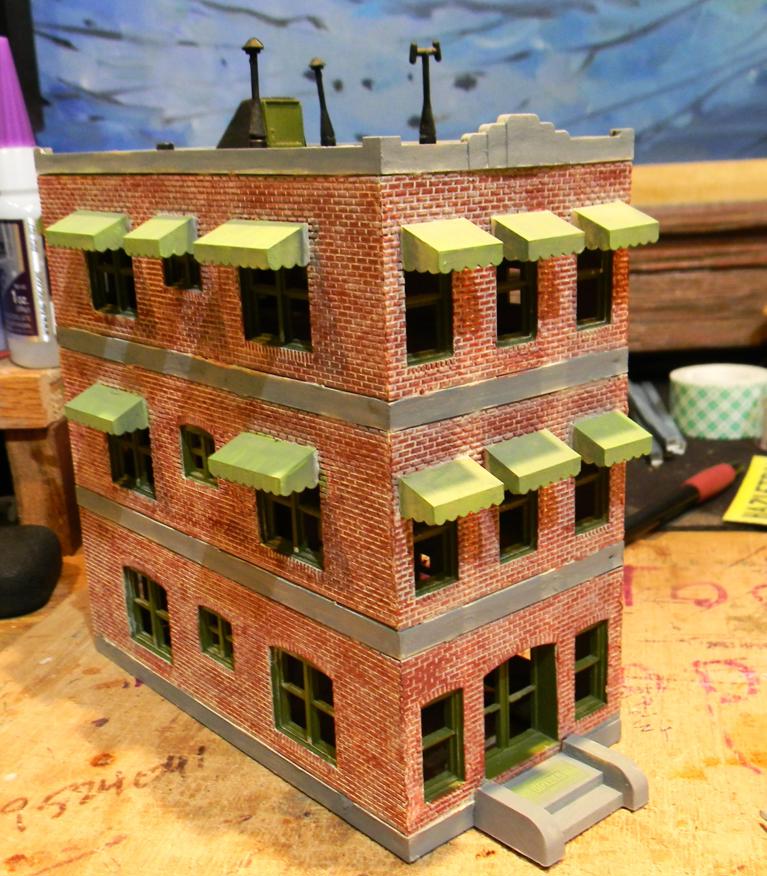
Looking more unplastic after 24 hours.
Posts: 1,196
Threads: 18
Joined: Jun 2022
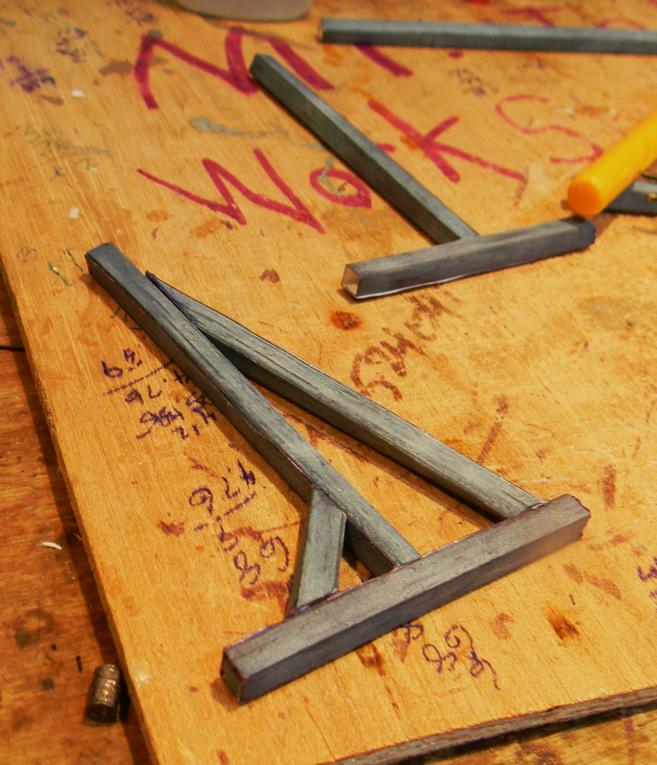
I have to make some headway in getting stuff off of my workbench - the amount of space available has shrunk to an unacceptable level. I still had some paper beams that I'd intended to join together to make the supports for the billboard that goes on top of the brewey, and I finally came up a way to join them shown in the bottom left of the photo. I just need to finish the other 3 that get attached to the back of the billboard...
Posts: 295
Threads: 18
Joined: Nov 2015
I had that same Belvidere Hotel kit as a kid. Your work on yours has me wanting to pick up one off of ebay and build it.
————————————————————————————
Modeling the East Broad Top as it was between 1937-1942
~Amanda
Posts: 1,196
Threads: 18
Joined: Jun 2022
I'm glad to inspire, Amanda! I've been lax in pursuing all thing model railroading in the last couple of weeks (fatigue after long days at work I suppose), but I'm getting the itch again.
I did a little bit of moving tonight, trying to find the right balance between spacing of buildings and allowance for roadways here in Hazleton. I'll be getting ready to get the foam cutter out to lay waste to the foam (after I've glued it together with some foam glue), creating the base terrain.
So, here's a shot at more of the viewing level - the intent is to give the impression that the buildings are heading away from you downhill to integrate with the backdrop. In the past I've always run uphill and away from the viewer, but this is something different to try. Obviously, the further away from the viewer's eye, the less they see of the structures, but even this space, which is only about 16 inches deep, you get that impression that things are receding away and down. I'll further that perception by breaking up the view from front to back with fences, trees, walls, signs, etc.

Posts: 2,579
Threads: 52
Joined: Dec 2008
Very nice. Things are blending in well and seamlessly.
Posts: 1,196
Threads: 18
Joined: Jun 2022
Got the foam cutter and a flat rasp out and shaped my terrain around the building locations (which have to be flat, otherwise they look "wrong"), paying special attention to roadways. It's tough to get a good picture of this since the foam is a blanket of white. Starts with three 1/2" layers of foam in front and recedes to the back with only one layer. I'll be gluing these down over the next few days with foam glue which sets up in 24 hours. I'll also be cutting out some 1/4" plywood for fascia at the edge of the layout with the same profile as the foam.

Posts: 1,196
Threads: 18
Joined: Jun 2022
Well, finished up the brewery billboard and the support members....
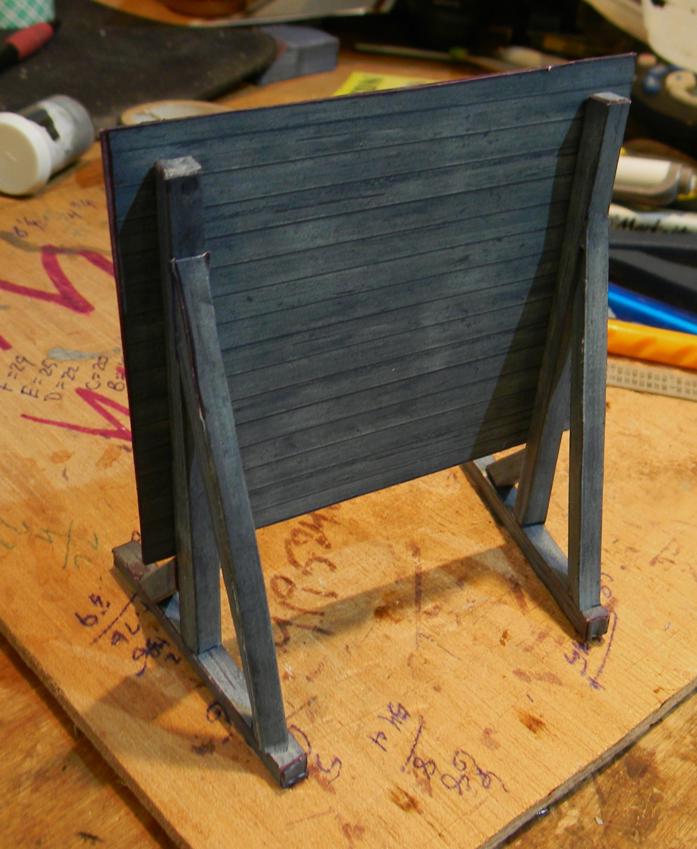
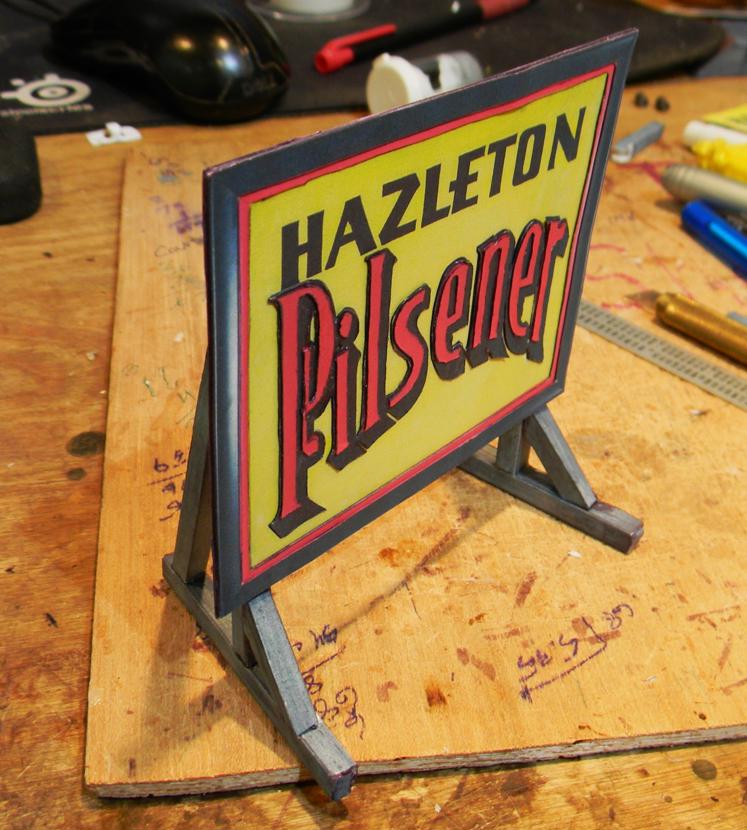
then put it in place temporarily on the brewery itself....
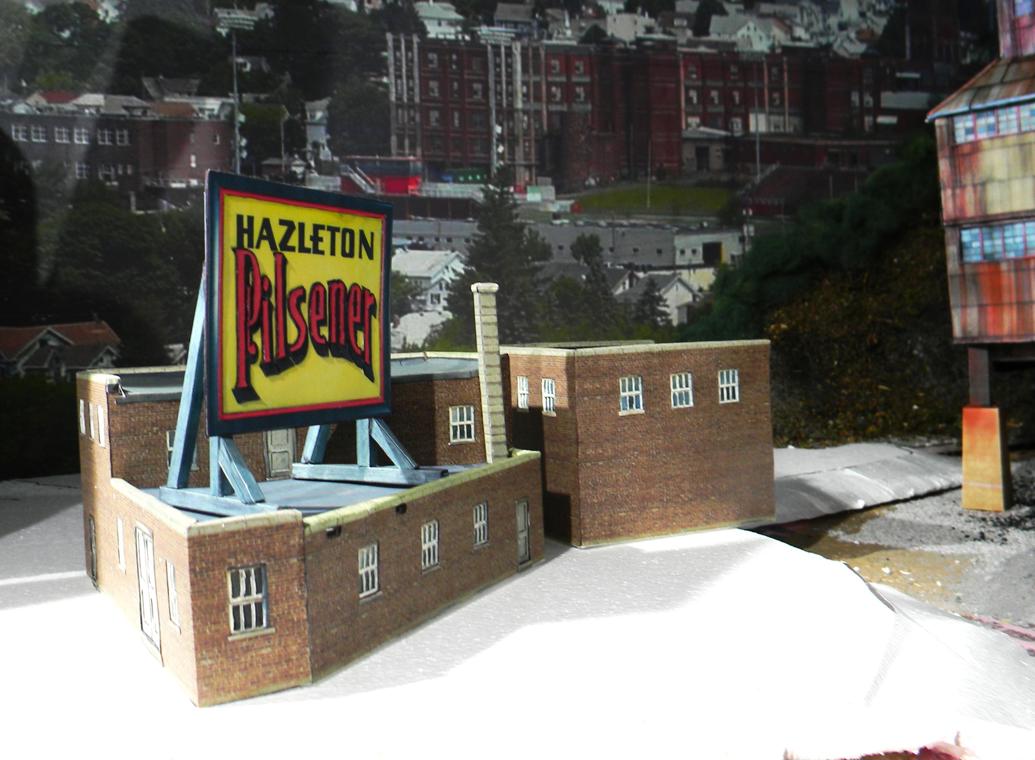
My verdict is that the support beams are over scale. Probably would look good on in O-scale, but not HO. The billboard itself is OK, so at some point I'll replace the supports. Another "you live, you learn" moment.
|


