

Juneco/ Keystone Danby sawmill
#16
I've finished the mill up to the roof install.
I detailed the interior and some of the exterior.
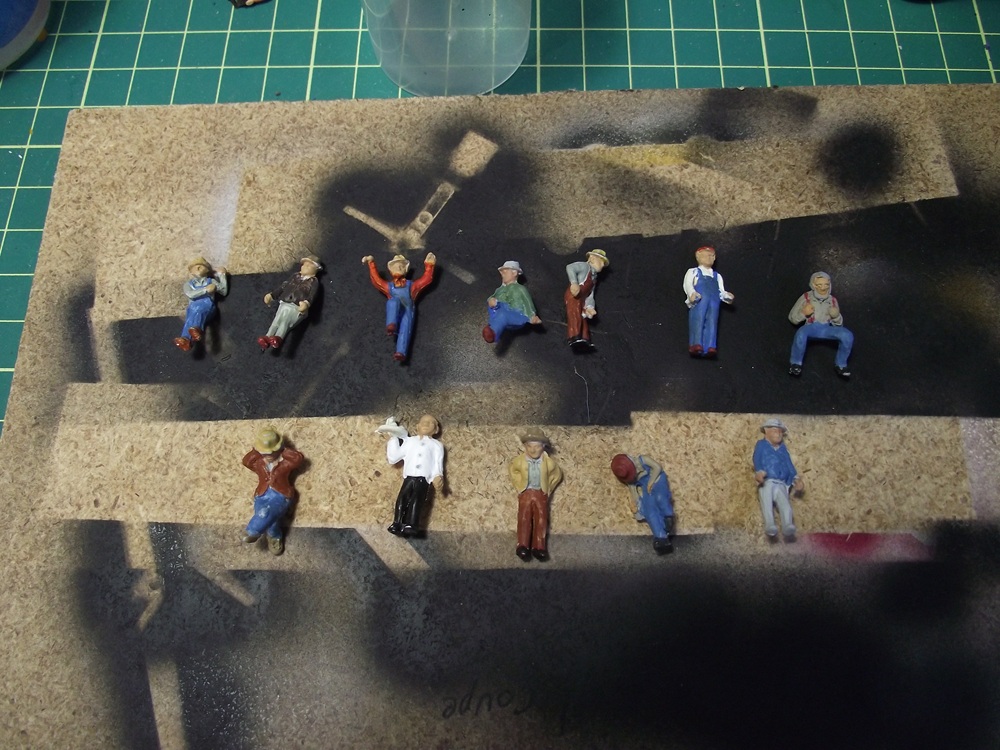
   

I started with painting some figures that will go into the structure. These are all made by Juneco as well, just not included in the kit. I spray primered them in white and hand painted them from there.
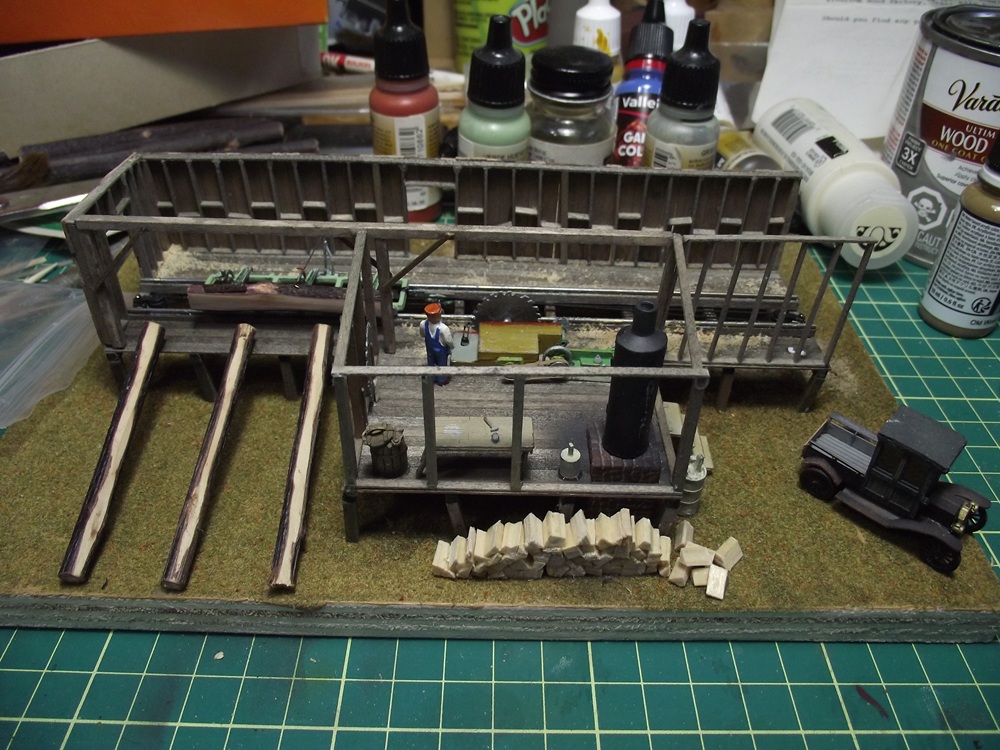
   

Then I added detail parts to the workshop area of the mill. The workbench, extra saw blade, barrels and drums all came with the kit. I added a drive belt from the steam engine to the saw husk assembly, made from brown paper.
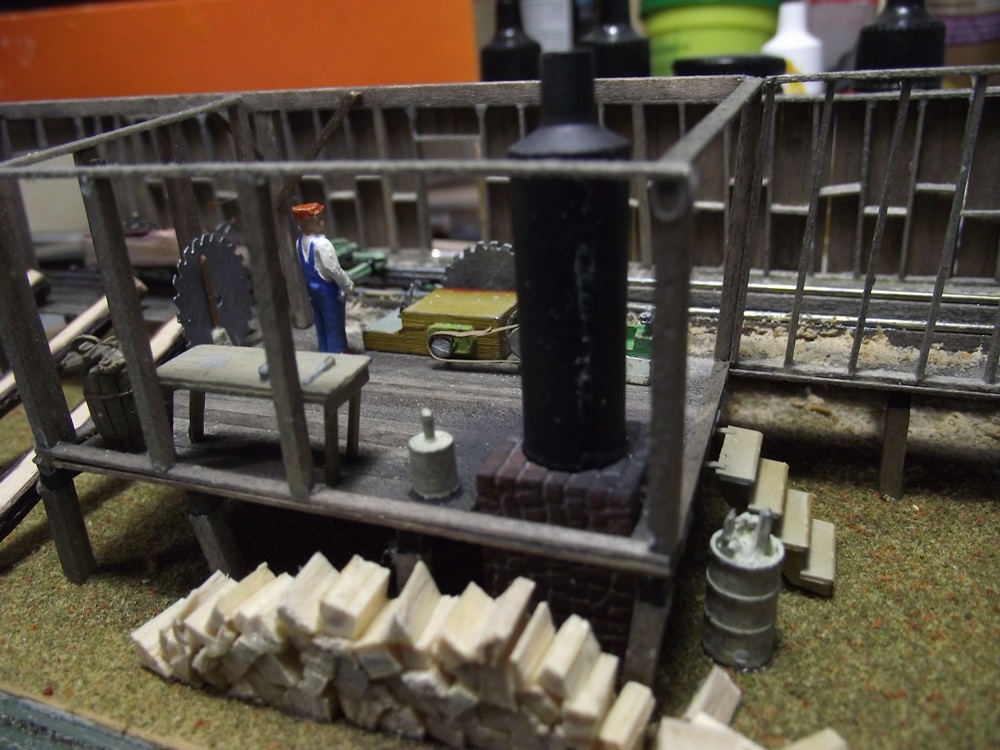
   

The stairs are from Central valley. I made the wood stack by cutting a piece of 2X4 into a slice about 2 scale feet wide and using a sharp knife, I cut scale firewood. It's all glued together with Matte Medium.
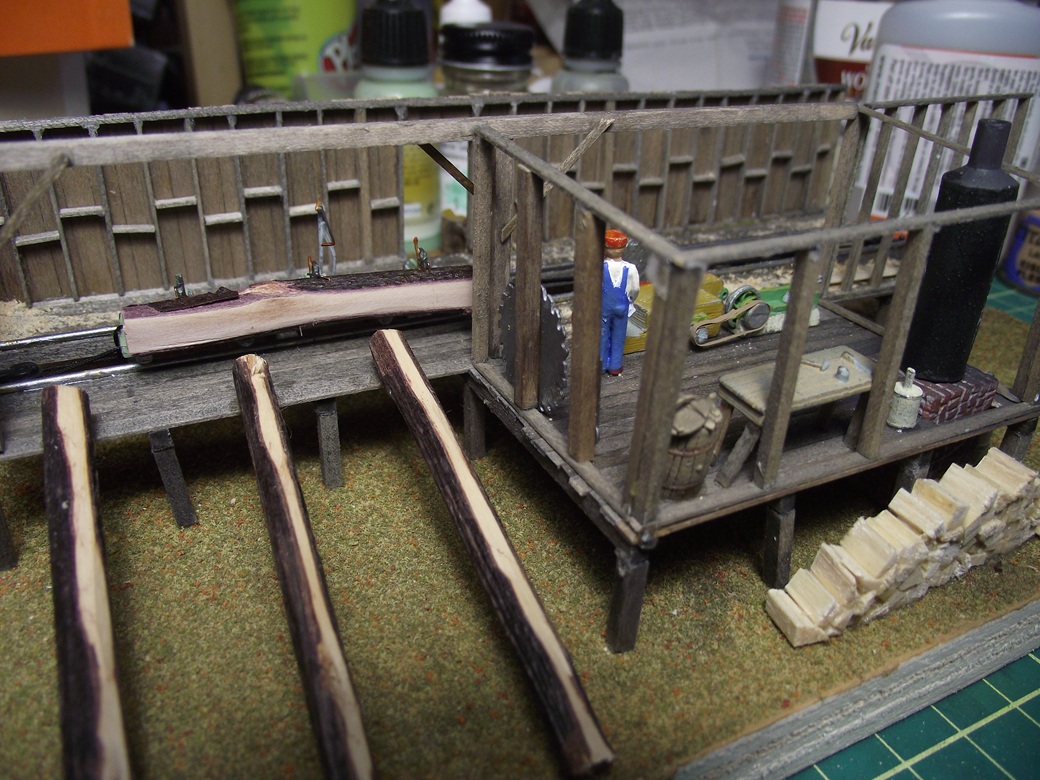
   

The next project will be a roof over the sawmill, but I wnat to leave the workshop open for viewing. I'm also considering a small elevated water tank to supply the boiler with water. The kit comes with a cast metal cistern, but I like the idea of a water tower instead.
Reply
#17
(05-16-2026, 11:07 PM)cnrglen Wrote: ...
 I'm also considering a small elevated water tank to supply the boiler with water. The kit comes with a cast metal cistern, but I like the idea of a water tower instead.


That could also double for fire protection for the mill.
A detailing opportunity for hoses and hosecarts!

Keep up the good work, great project!
--Hillyard
Willamette City Belt Line: WCBL
 Virtual Interchange 
Reply
#18
Thanks, the water tower is currently in the design phase.
In the meantime, roofing has started.


I started with installing the rafters on the main building. These all line up with the framing studs on the long wall. For a change, these were actually including in the kit.


I added stringers across the rafters for the corrugated roofing to lay across. These were not in the kit and the instructions tell you to lay the roofing directly on the rafters. I don't know if that's a proper building standard and this looks better to me.


I did cut the roofing into strips but I'm not sure about the size. The smaller size is about what the instructions call for, I cut others at twice the size for comparison. I'll think about it for a bit before comiting.
Reply
#19
A small change of plans. I didn't like how everything was going to be so crowded on the base.


So I added an extra 2" on 2 sides. Now I'll be able to put the water tower with a bit more space and I can also add the finished lumber stack on the end.


I bit of my basic ground cover and the joints dissappear.


I did go with the smaller pieces of roofing. it does look better. I glued the bottom row and am waiting for the glue to dry (aileen's tacky) before adding the second.

I am also working on the water tower but there's not much to show yet.
Reply
#20
Glen, your sawmill is really looking wonderful!
I think it was a good call to go with the smaller pieces of roofing.
Are you going to rust them up a bit?

Greg
Reply
#21
Great build, Glen (as usual). Love the ramp to roll logs into the facility - probably ought to be some refuse bark and piles of sawdust up under there.... That area would accumulate a lot of detritus....
Check out my "Rainbows in the Gorge" website: http://morristhemoosetm.wixsite.com/rainbows
Reply
#22
Thanks everyone. I do plan to add logging and sawmill debris all around the mill, just working on some details first.


I have rusted up the roof. I airbrushed two shades of rust and will probably add a bit more. The photos seem to make the rust look lighter than it really is.


As I mentioned before I left the roof off the workshop/ boiler room so you can see into the mill better. I will be adding stacks of cut lumber on the one end, and some loggs to the other. 
I have been working on the water tower.


I've started with a cardboard tube, cut about 6 scale inches high, capped on both sides. I painted it black to seal it and I'll be wraping it with stripwood and adding some trestle supports as I go.
Reply
#23
I finished up the sawmill diorama this weekend.
Starting with the water tower.


I wrapped the cardboard tube with scale 2X8's and made the rings out of styrene 1X4. The trestlework was built out of scale 8X8's. I used a produce called 'gallery glass' for the water.


The ladder came from the same stair and ladder kit from Central Valley.
Reply
#24
That water tower is awesome! Scale is really nice and the details are spot on. Great thought on wrapping around the cardboard tube.
Check out my "Rainbows in the Gorge" website: http://morristhemoosetm.wixsite.com/rainbows
Reply
#25
Thanks, all I need now is a couple girl figures swimming in the tank!

With the last major part of the mill finished it was just a matter of details.


I added to the log ramp and added some logs waiting for their turn.
   

The sawmill debris was made buy taking a 4" piece of Christmas tree branch and running it through a pencil sharpener. I then added some fine sawdust to the mix and glued it all down. I added a worker with shovel and wheelbarrow attempting to clean up the mess.


I needed some finished lumber in piles and remebered that I inherited several bundles of vintage scale lumber made by Ayers (no longer around)


It took me a couple evenings but I made three lumber stacks, one 2X8, one 4X8 and one 4X12. I have another worker stacking the lumber as it comes out of the mill.


And I added a couple figures in the mill. The white shirted fellow is the operator/ foreman and the blue coverall guy is the fireman added wood to the boiler.


Around back I added a few tree stumps and a waste barrel. I'll probably add an outhouse as well. I'll leave the diorama the way it is until I start to figure out my logging camp on the layout.
Reply
#26
You aced that, Glen! Perfection. Love the lumber stacks. If they were my Dad's he'd have "stickers" between each layer for airflow, but a commercial op would do exactly what you did.
Check out my "Rainbows in the Gorge" website: http://morristhemoosetm.wixsite.com/rainbows
Reply
#27
Awesome job Glen.
Matt
Conrail's Blairsville Cutoff 
Reply
#28
wow Glen.
this is looking great.
I like the overall look -- all the various textures seem to go together.
I don't know why, but my eyes were drawn to the neatly stacked firewood.
Reminded me of living in a rental farmhouse we heated by wood, and that is how it stacked up.
--Hillyard
Willamette City Belt Line: WCBL
 Virtual Interchange 
Reply
#29
Glen, you must be very proud of your end results on this one.
It all came out looking just wonderful!

Greg
Reply
#30
Thanks everyone, now it's time to try to figure out how to place it on the layout!
Reply


Forum Jump:


Users browsing this thread: 1 Guest(s)