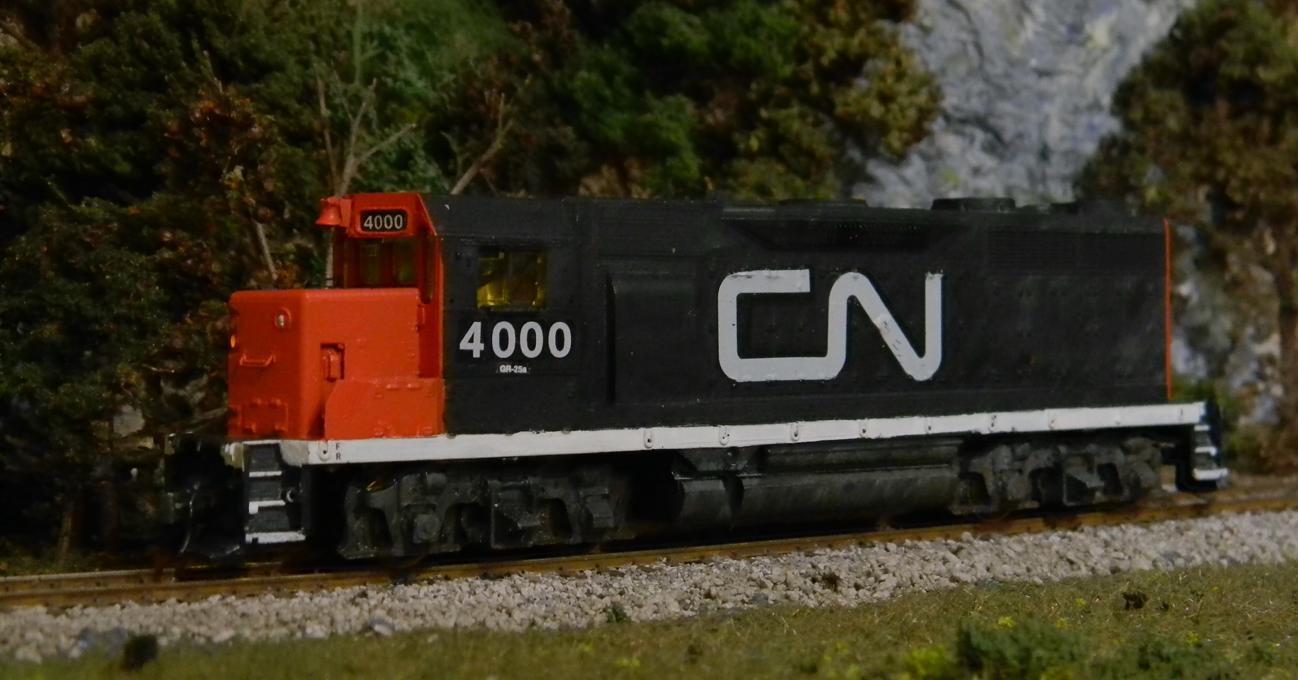
Little by little. Got the decals installed on the other side of the loco along with some base underframe weathering. Still a bubble to smooth out with some Micro Sol, but we're getting there. Got word today that more than a month after ordering it, the blessed plow has been shipped.
It's 3d printed, and I assume CMR figured that you would just glue it to the pilot, which would have been all well and good for an Athearn RTR unit with couplers secured from the underside, not one of the old blue box jobs with the coupler securing clip that secures from the top... Yeah, I've finagled a set of needle nose pliers in there to snap shut a coupler assembly after the locomotive's all together, but it's difficult. Additionally, the blue box shell still has the pilot steps on the bottom of the pilot, which are going to be in the way of the back side of the plow which is flat.
Rough cut was with a pair of track cutters to snap off most of each step,
then got the Dremel out with a cylindrical file barrel to grind off more plastic, hand file to finish.
But how to mount the plow to avoid having to wrestle with a coupler clip? Decided to install the plow with two screws (removeable) running through the back of the pilot and into each side of the plow. Best small screws I had were a little too long, so I'm going to install a couple of nuts on the back side to function as washers. Drilled two holes through the pilot and lined up the plow where I think it should reside and marked the two hole locations. Ran the screw into the back of the plow and then put everything together. I can now remove the plow and easily remove the shell.
Because the plow juts out in front of the pilot, I also replace the coupler with a long version so the coupler isn't impeded by the plow. Now she needs paint, and it get's the zebra stripe, which is going to be a challenge...
Hit the plow with some black paint out of my airbrush and then dulled it up a bit with some flat acrylic.
Debated on the best way to zebra stripe the plow. After a couple fits and starts I made my own rough sketch on top of some frogtape, intended to cut out the "white" sections (I cut the black ones out instead....
taped it to my plow
and handpainted the white. I could retouch each line by taping each one and hitting with the airbrush, but the plow's going to be getting a good bit of weathering, so I could probably get away with the un-evenness.
Before I put the railings on I hit the sides with some washes to dirty things up a bit. One thing I did find in my view of photos of this beast was the typical rustiness emanating from the battery box and a general dirtiness to the undercarriage, so I wanted to include that kind of stuff.
When I first started, I thought it was almost a trivial project, but the little nuances have certainly kept me thinking. I set out just to make something useful out of an old Athearn blue box unit. I think there's value in saving old stuff (there's a lot of it out there and for "bargain" prices) and maybe making it a little better along the way. One thing I have discovered is that the little stuff adds up, and it all has to be shipped to you. Paint, decals, bell, plow, grab irons, DCC decoder, a new motor, window louvers, a longer coupler... the list is fairly long and I know I've now spent more than $100 (with a good bit of leftovers), which sort of explains how a nice, new locomotive goes for $150 on up. I'm hopeful that I'll have humpty dumpty complete sometime soon (I would have thought today, but the bride informed me that we're going out to dinner with my son and his fiance for his birthday this afternoon and he's an hour away)...
Did a final install on all of the accessory parts - plow, railings, horns, etc. Did a bit more weathering - washes, paints, PanPastels. Ready and now rolling. More foreign power for Conrail. Hope to get this beast out with the coal train later this week to show off to my granddaughter who arrives on Wednesday.
(04-26-2026, 07:21 PM)TMo Wrote: Did a final install on all of the accessory parts - plow, railings, horns, etc. Did a bit more weathering - washes, paints, PanPastels. Ready and now rolling. More foreign power for Conrail. Hope to get this beast out with the coal train later this week to show off to my granddaughter who arrives on Wednesday.
Todd, in the rainbow years the foreign power could often be in the lead too.
Charlie
Everyone is probably pretty sick and tired about hearing about me rave about cardstock modeling. I often beat the Clever Models drum regarding their extensive list of kits. Most of them have a heavy industrial vibe or downtown storefront vibe. The guy that runs Clever ran out of steam a few years ago and hasn’t put out and new kits or freebies, but in his blog he said recently that he was retiring from his full time job and would have more time to resurrect Clever. In the meantime, I thought maybe someone else was selling a similar product….
The answer is at least one more “Yes!” - a company in California called Team Track Models. I am going to be purchasing some designs from them very soon at https://www.teamtrackmodels.com/. Vibe there (so far) is mostly trucking and trackside structures. Looks like they are energetic and will be putting out more cool stuff soon.
I've done it again... I recently decided to weather my D&H fleet of locomotives and put a cart together of Bowser parts.... Ran into the LV Hammerhead shell with the CR patchout and superdetailed to boot while I was scrolling through the parts catalog. Said to myself "If I could get a decent RS-3 chassis...." You know where this is going. \
I bought a Roundhouse Rock Island RS-3 with some broken steps for $18 plus shipping from evil bay. Now I'm committed - but take a look at a picture of this shell for $45... (and it's not the only roadname they have!!!!)
Well, that Roundhouse RS-3 I got for a song.... not so good. Opened up the shell and the driveline tumbled out. Defunct or half-missing motor mounts (Ok, I have spares) and a keyed driveshaft with a missing ear....
Anyone have a spare for purchase? I can furnish some dimensions on this piece... Only thing I can find currently on evil bay is a full set (two of each with the mating sockets) for a ridiculous price...
Todd, I will look and if I do have one you are welcome to it. I have at times used model airplane fuel hose for short drive shafts but I doubt that would work in this case. I will be looking in my parts later today because I need some odd ball parts for the last BP20 to raise the front truck an eight of an inch
Charlie
I appreciate the look, Charlie. If push comes to shove, I will adapt something, but it sure would be ideal to have the shaft designed to slide into the housing and allow for some movement fore and aft...
The seller did send me a full refund, so it could be a whole lot worse.
(08-08-2026, 03:16 PM)TMo Wrote: I appreciate the look, Charlie. If push comes to shove, I will adapt something, but it sure would be ideal to have the shaft designed to slide into the housing and allow for some movement fore and aft...
The seller did send me a full refund, so it could be a whole lot worse.
The one I found right away is approximately 9/16 inches long on the shaft only with a 1/8 (approx) diameter total length is 3/4 inches and the jaw with is slightly less than the shaft diameter. The spline is no more than 1/32.
The price (if it will work is 17$ but with the Big Blue member discount of $17 that makes it free. I hope it will work.