

Big Blue has inspired some purchases
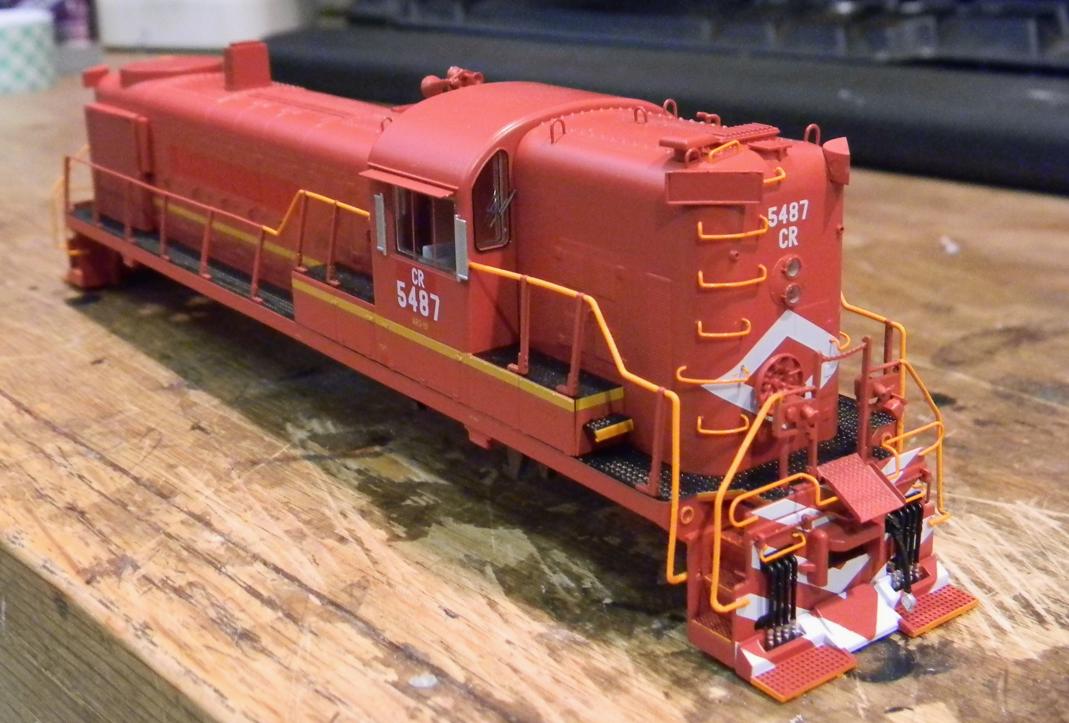
The package arrived from Bowser this afternoon...  The biggest (and most expensive) item by far was the RS3 Hammerhead shell that looks great right out of the shrink wrap.  There's something elegant about the RS2's and 3's - classic lines and rounded edges...  The paint job is really nice - looks like they used a faded red on the body and then were patches were applied, hit it with a more virgin Cornell red.  Eventually I'll weather it a bit more...  No light boards sent with this one (as opposed to the M620 that I worked on most recently), so a simple LED bulb on the front and rear is going to suffice once I work on putting in a decoder which is going to be conveniently mounted under the short hood.
   

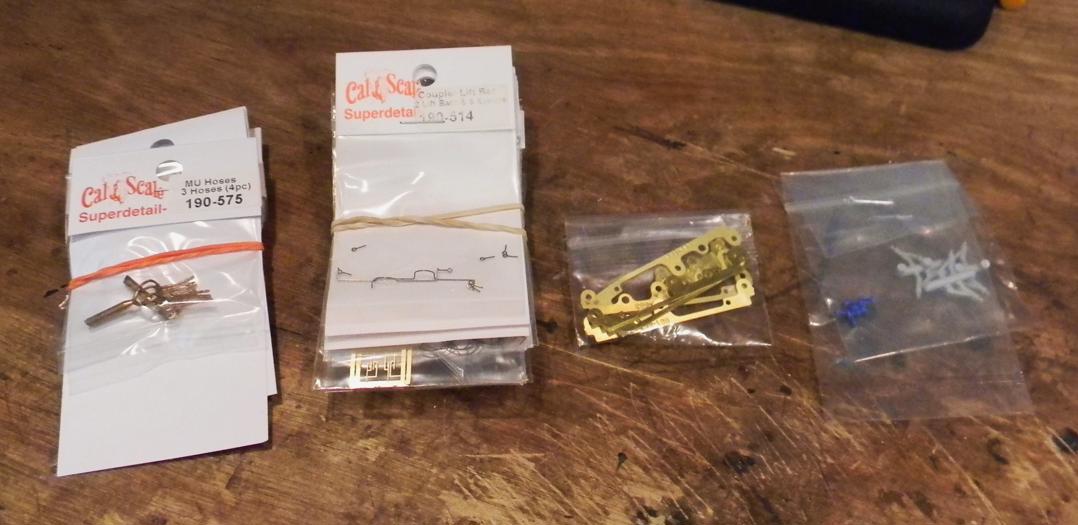
The other detail parts (grabs, coupler bars, horns, fuel fillers, lift rings, 3-axle wipers for the C628's, etc.) all seem to be present, so I can get back to detailing the three D&H locomotives at a minimum.
   

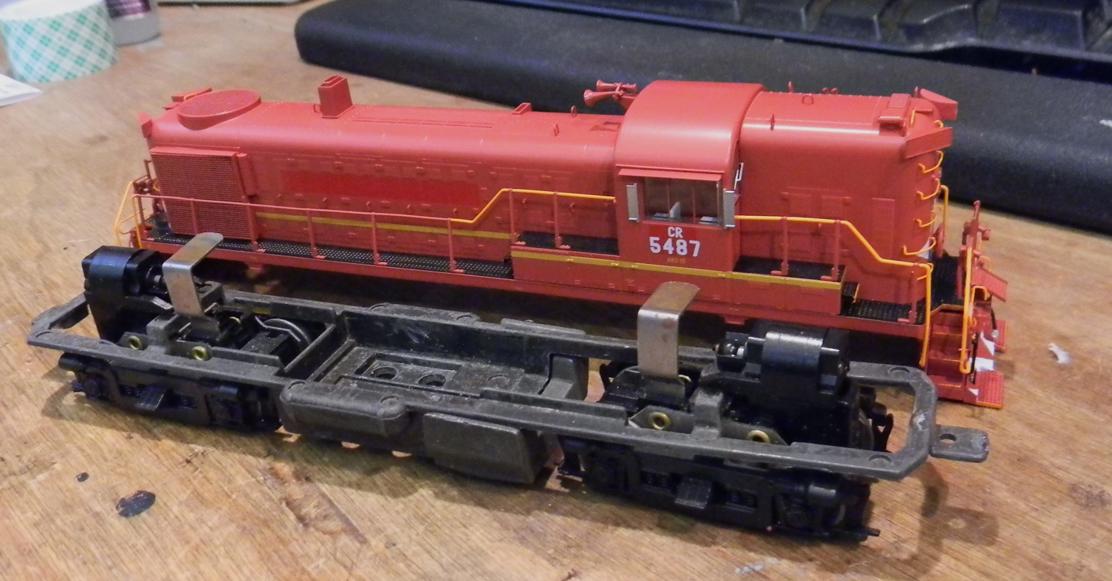
Since the Roundhous RS3 chassis was sitting on my desk anyway, I thought I'd check the fit, which was a little less than ideal.  I need to get the Dremel out and shave some metal off each coupler mount and about 1/16" off of the front and rear chassis faces to drop in to the shell.  Seems doable.


A lot more on my plate now!
Check out my "Rainbows in the Gorge" website: http://morristhemoosetm.wixsite.com/rainbows

Reply
Had a few minutes available - got the Dremel out and shaved off the end of the coupler "tongue" and cut into the front and rear faces of the shell to get the shell to fit over the chassis. Success.... initially in getting it to fit from front to rear. Getting the shell fully seated on the chassis was another story.

Got my mechanic's rule out and the inside edge to inside edge of the Bowser shell was 0.72"... The chassis dimension for seating the shell (or the inside edge to inside edge dimension of the Roundhouse shell) was 0.75". It looks like I'll need to carefully shave 0.03" (0.015" on each side) of chassis material (which includes the portions of the frame that hold the trucks). Again, it's doable and part of the joy of kitbashing.... The other option would be to cut the plastic shell, but I'd be dangerously close to going through portions of the shell.
Check out my "Rainbows in the Gorge" website: http://morristhemoosetm.wixsite.com/rainbows

Reply
I'm guessing that using a file would be the way to go, less chance of overdoing it.
I'm remembering my "feeler gauge" I use to gauge the gap on spark plugs, which I think is 0.030.
0.015 is not a lot of difference in a gap, but a lot of filing.

good luck!
: )
--Hillyard
Willamette City Belt Line: WCBL
Exchanging shipments via this:   Virtual Interchange 
Reply
Thanks, Hillyard!

Filing would certainly have worked, but I must confess I've gotten lazy in my later years....  Took the gear towers off to allow more space.  The photo below shows all of the mods (green arrows) I've made to the frame to get a good fit.


The Dremel with a cutting wheel used carefully with frequent fit checks worked like a charm!  The chassis is now a nice friction fit into the shell. The green arrows in the photo below show where the interference conditions used to exist.


...and here's a side shot with the frame secured in the shell.


Talk about timely, I got the Charlie Bowyer driveshaft in the mail today!  Many thanks, sir - you're a lifesaver!  Fits like a glove!  Next will be installing the decoder, adding lights, painting and weathering.  Eventually, I hope it looks something similar to this:


xlv5487ef.jpg (912×643)
Check out my "Rainbows in the Gorge" website: http://morristhemoosetm.wixsite.com/rainbows

Reply
Looking very interesting thus far. You really are the king of the Frankenstein locos. It is great to watch how you cobble them together.
Tom
Silence is golden but Duct tape is silver
Ridley Keystone & Mountain Railroad
My Rail Images Gallery
Reply
I LIKE that title!  I'll take it!

In all seriousness, I never would have taken on these last two locomotive projects unless there was something too good to pass up.  These extra shells that Bowser has on their site are special.  Even though this one doesn't have the light boards, it's a nicely detailed model.  Honestly, the shell makes the fuel tank, air tank and truck details look a bit shabby....  But, I ended up getting the chassis for free, so for $45?  STEAL....  Doc Frankenstein wins again!

Another update tonight.  The delivered motor mounts were toast...  the plastic was disintegrating.  I had some Athearn rubbery mounts that fit the holes in the chassis, BUT needed to be modified to fit the Roundhouse motor.  There are two pics below of a portion of the old mount and the Athearn mount before and after mod (accomplished with a sharp knife carefully applied):


Check out my "Rainbows in the Gorge" website: http://morristhemoosetm.wixsite.com/rainbows
Reply


Forum Jump:


Users browsing this thread: 2 Guest(s)