Posts: 1,229
Threads: 23
Joined: Dec 2008
 
I hear that. Wiring is not my favorite part either. DCC was supposed to 'simplify' wiring, right? "Just two wires to the track". IMO it just moved the complexity from the layout to the locomotive. Then a whole host of DCC accessories have come on line since the advent of the stationary decoder, bringing complexity back to the layout! What happened? Perhaps it's some sort of Jevons Paradox for model train complexity.
<!-- m --><a class="postlink" href="http://en.wikipedia.org/wiki/Jevons_paradox">http://en.wikipedia.org/wiki/Jevons_paradox</a><!-- m -->
Anyway, even in DC the wiring could get plenty hairy and scary. This is why I have been excited about manual turnout controls like the Blue Point and Bullfrog. Of course, a reduction in wiring complexity has been replaced by mechanical advantage and that has it's own issues as you were noticing.
One thing that looks promising is the new 'servo motor' controls. Yes, wiring, but also a very simple application.
Galen
I may not be a rivet counter, but I sure do like rivets!
Posts: 73
Threads: 5
Joined: Jul 2010
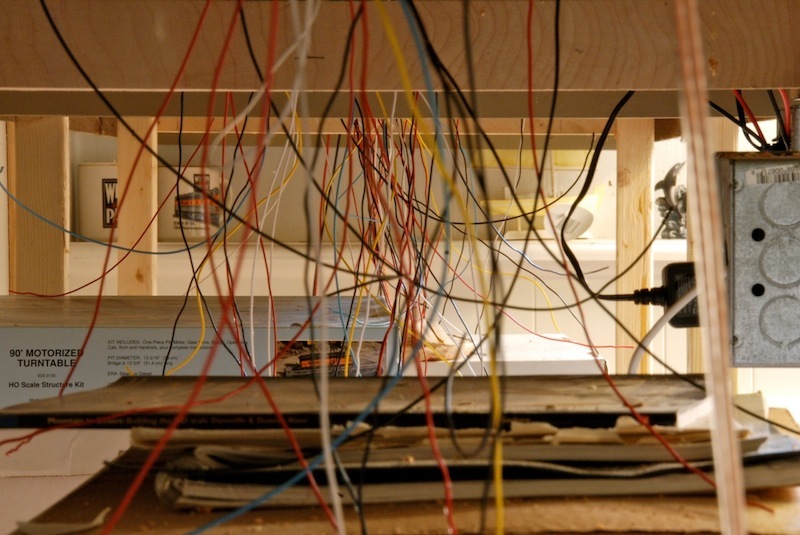
Here is a photo looking down the entire 13 foot run of the underside of the layout. All the rail feeders have been dropped and feeders to the tortoise switch machines installed. The track feeders will connect to the Free-mo dcc bus. I have built and installed a filtered voltage regulator that will hook up to the Free-mo accessory bus and power the tortoise switch machines. Now to run the bus wires and connect all the feeders......
John
Posts: 73
Threads: 5
Joined: Jul 2010
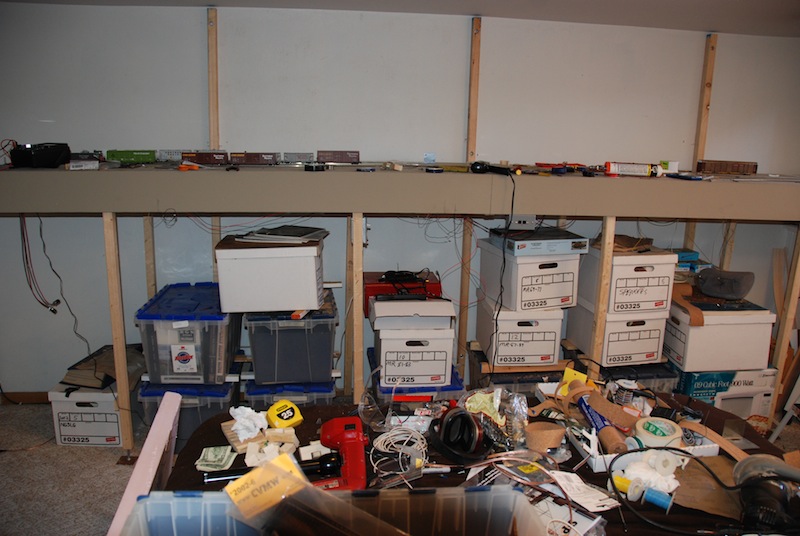
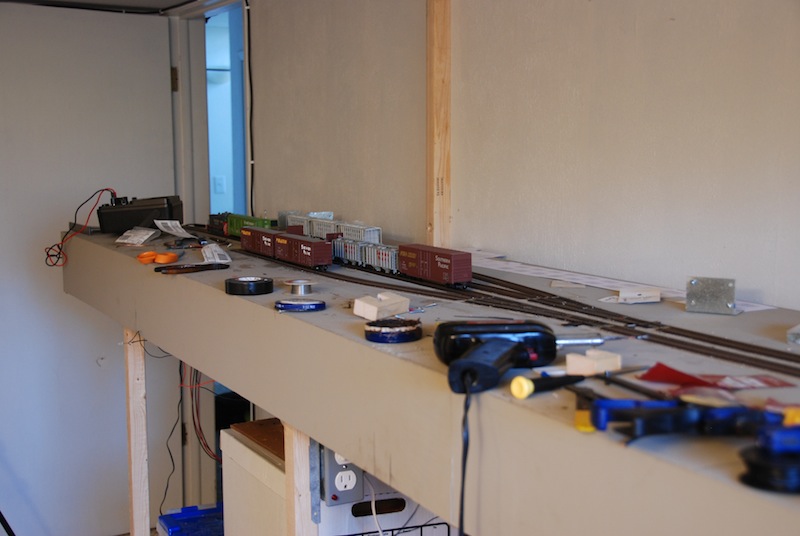
Sorry for so few posts guys, but I'm still stuck under the layout. I want everything to be bulletproof before coming back up topside. I have one more switch machine to install and 3 more to wire. I'm waiting for some laser cutting to be finished up, hopefully this week. I think the photos of the finished fascia will be worth the wait. Until then, Happy Halloween everyone.
And some shots of the mess in progress:
John
Posts: 3,683
Threads: 118
Joined: Jan 2009
Looking good Johnny. That's alot of wires you've terminated! Oh... awhile back, I left a big wad of cash in your layout room. Can you mail it to me? 
![[Image: image.php?album_id=170&image_id=3120]](http://www.the-gauge.net/forum/gallery/image.php?album_id=170&image_id=3120)
Three Foot Rule In Effect At All Times
Posts: 73
Threads: 5
Joined: Jul 2010
I'm sorry Gary S, your cash was within 300 feet of the layout and all unattended money in that radius is sucked into the layout.... I can send a picture of the freight car that showed up soon after your visit.
John
Posts: 3,683
Threads: 118
Joined: Jan 2009
JohnyBotto Wrote:I'm sorry Gary S, your cash was within 300 feet of the layout and all unattended money in that radius is sucked into the layout.... I can send a picture of the freight car that showed up soon after your visit.
Well, if the money went to rollingstock, then that's okay. But that big wad of money shoulda got you at least a couple nice Kadee bocxcars!
Three Foot Rule In Effect At All Times
Posts: 73
Threads: 5
Joined: Jul 2010
Posts: 5,263
Threads: 195
Joined: Apr 2009
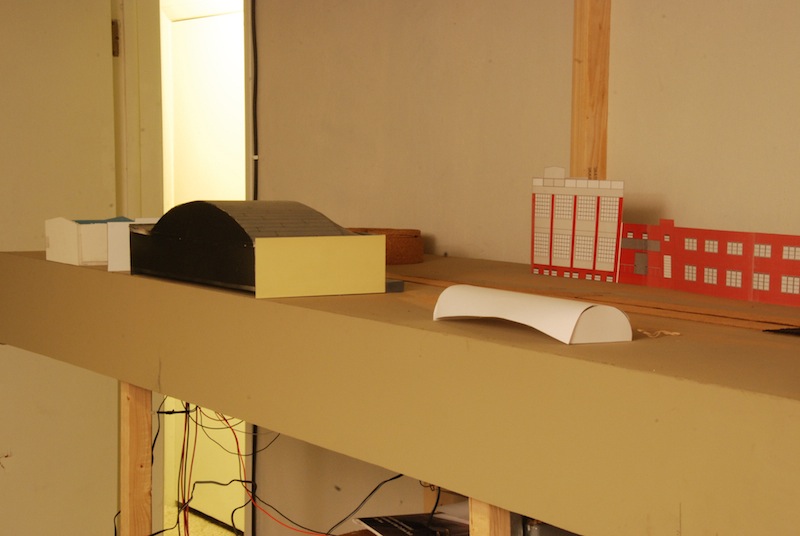
The building with the rounded gray roof looks interesting. How did you do the roof?
Reinhard
Posts: 73
Threads: 5
Joined: Jul 2010
Posts: 5,263
Threads: 195
Joined: Apr 2009
Thank you for the detailed explanation. I might want to "borrow" your method on some of my next roofs 
Reinhard
Posts: 1,817
Threads: 27
Joined: Dec 2009
JohnyBotto Wrote:... That is the Zero Corp. building. The front and side walls are styrene; the floor, back wall, and roof are made from foam core. The roof I modeled is called a bow truss roof. For the roof I cut 2 arches from 3/16 foam core then glued them on edge to a flat piece of foam core. I then covered the arch with thin balsa wood and worked it into the flat part of the roof. The assembly was covered with material used to cover model airplanes. It was applied over a thick coat of gray paint so the paint would glue it to the roof. I used a fine Sharpie marker to draw in the tar lines of the roof. I still have to weather the building and that will tone down the contrast between the tar lines and the gray roof. ...
HMmmmm! There were several materials used to cover model airplanes that I can remember from my days managing a hobby shop in the seventies ... tissue, silk, Monocote, Super Coverite ... I'm sure by this time there are at least a half-dozen more to choose from.
So ... which one did you use? I'm just curious.
By the way ... you did a very nice job on an interesting piece of architecture that, although uncommon in 12" = 1'-0" scale, I'm sure is downright rare in 3.5mm = 1'-0".
Kudos, young man!
biL
Lehigh Susquehanna & Western
"America will never be destroyed from the outside. If we falter and lose our freedoms, it will be because we destroyed ourselves." ~~Abraham Lincoln
Posts: 73
Threads: 5
Joined: Jul 2010
Thank you for the kind word biL! I have never seen it modeled before, but it's on many of the industries in the area I model so I just jumped in and did the best I could. I used Silk Span for the roof covering.
John
Posts: 1,817
Threads: 27
Joined: Dec 2009
I should have guessed that!
Nice job!
biL
Lehigh Susquehanna & Western
"America will never be destroyed from the outside. If we falter and lose our freedoms, it will be because we destroyed ourselves." ~~Abraham Lincoln
Posts: 73
Threads: 5
Joined: Jul 2010
Hey Everyone,
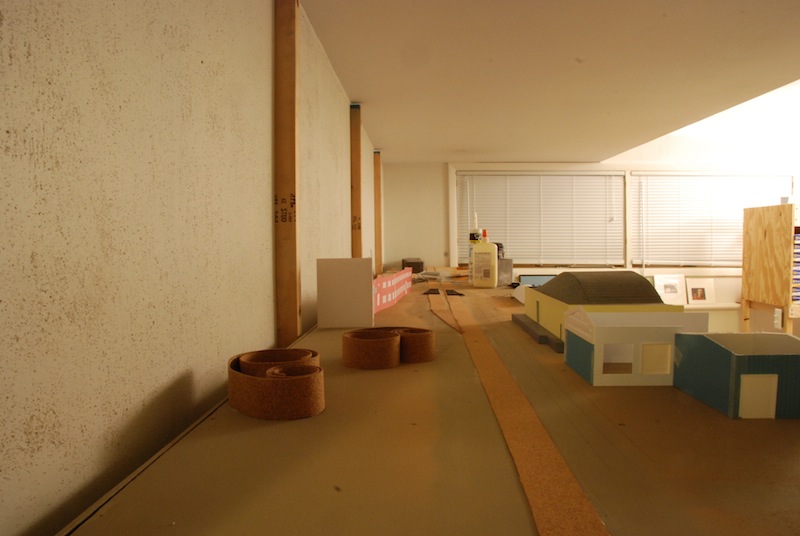
I have been recovering from the disaster of the buckled track work. (You can see that adventure here: <!-- l --><a class="postlink-local" href="http://www.the-gauge.net/forum/viewtopic.php?f=23&t=3803">viewtopic.php?f=23&t=3803</a><!-- l -->) The problem ended up being the 1/8 plywood I had nailed to the tabletop, so I had to start over from that layer up. I have got the roadbed for the main and passing siding down and am working on some Central Valley Turnouts.
I have made some progress on the Zero Corp annex building and am waiting for some parts to finish.
The progress has been slow because after 20 years I have decided to go back to school and get a degree in Communications. Don't know if it will help my employment situation but as they say it can't hurt.
So I'll leave you with some back to the future shots of the layout at this point. Also I don't think I have uploaded a track plan here so I will include that as well.
Have a great weekend!

John
Posts: 73
Threads: 5
Joined: Jul 2010
The Burbank Branch is ALIVE!
Hello all,
It has been a long while since I have posted here, for several reasons. I decided to go back to school and finally get a degree, a goal that will be accomplished May 19th. All that schooling sure cuts into the railroad time and as a non-traditional student (read older), it took all my concentration. I was also frustrated by the buckling of my benchwork and subsequent complete rebuild of the track work. My motivation was weak. (See this post: <!-- l --><a class="postlink-local" href="http://www.the-gauge.net/forum/viewtopic.php?f=23&t=3803&hilit=benchwork+buckle">viewtopic.php?f=23&t=3803&hilit=benchwork+buckle</a><!-- l -->) Well I finally got some time and inspiration over this spring break and the track work is back in place and functioning. This time I used Central Valley Turnout tie strips and hand built turnouts. To my surprise they seem to be working well.
I was so excited to be running trains again, I thought I would put a short video together to show where the layout stands at this point. It starts with an overview and ends with a run-by. Enjoy!
<!-- m --><a class="postlink" href="http://www.youtube.com/watch?v=_kbZy_b0s58">http://www.youtube.com/watch?v=_kbZy_b0s58</a><!-- m -->
Hope to be posting more after May.
John
John
|


