Posts: 12,037
Threads: 579
Joined: Nov 2008
Track work is my downfall, one thing that I don't particularly care to do, maybe because I'm so bad at it. Who knows. Anyway, on the "new" half of my layout, I've torn the tracks out three times already. The last time was about a year ago when Woodone (Jerry), came over to kick start me (or kick me in the rear). I've made progress since then, but it's slow and I've still got a bit of track to lay, wiring to do, manual ground throws to install and ballasting. One particular area that needs the most attention is the transition between the two sections. The old section is on a hollow-core door and is hinged to the base. I did it this way since I was having knee problems and wanted easy access to my wiring. I also have some storage space under there as well. The new section is fixed and I need a way to transition from one to the other while still having access to the underside of the old section. This has proven to be a real challenge since the slightest movement can cause the track to misalign. At one time I had three sets of tracks crossing, and that was just crazy. I now have one set and I have a solution that I started, now it's time to actually get working on it and this is my challenge. I'm going to try to finish up my trackwork, but especially, get that transition finished so I can run trains onto that half and back.
Here are some pics of what I have now:
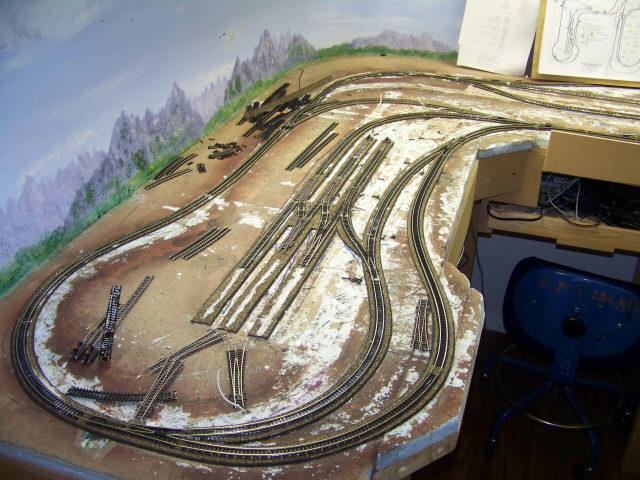
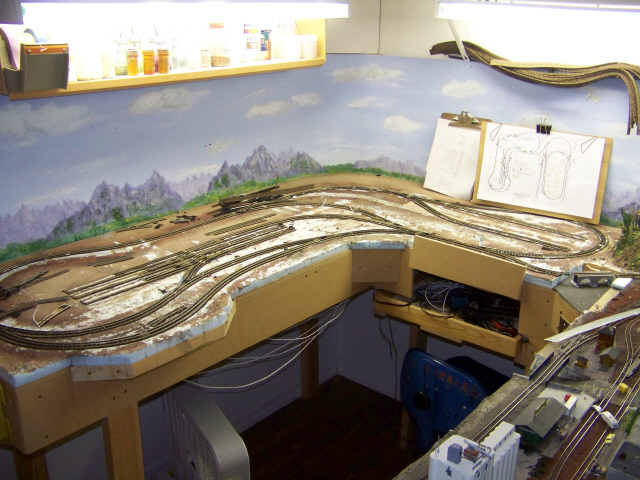
This is the overal view of the new section. The transition is to the lower right
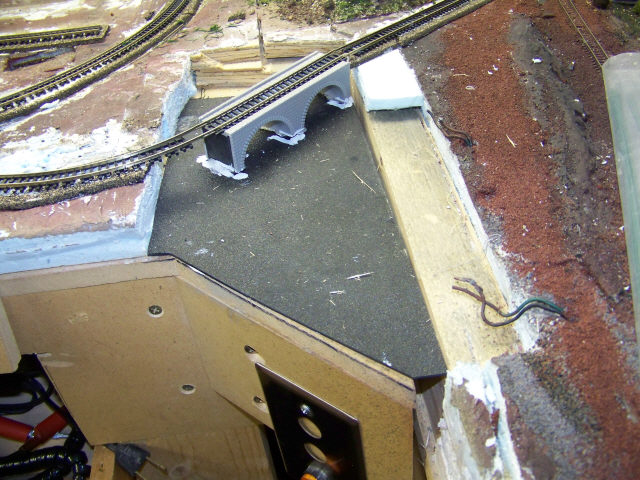
Another view of the trackwork. Messy at best, but it's been reworked beyond hope
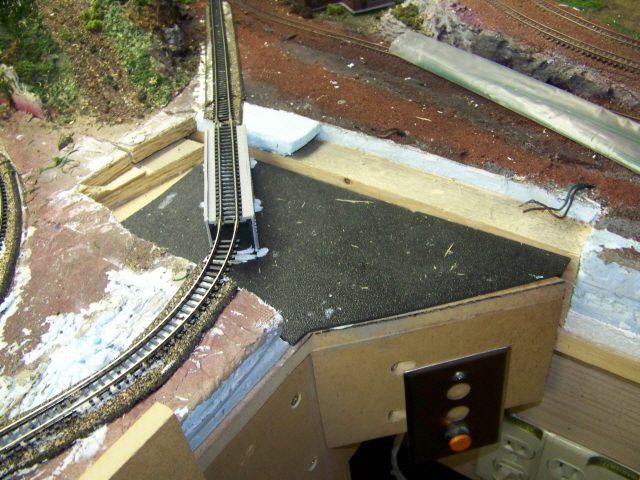
This is the transition, I was going to make it a water scene, and still may
Transition partially open
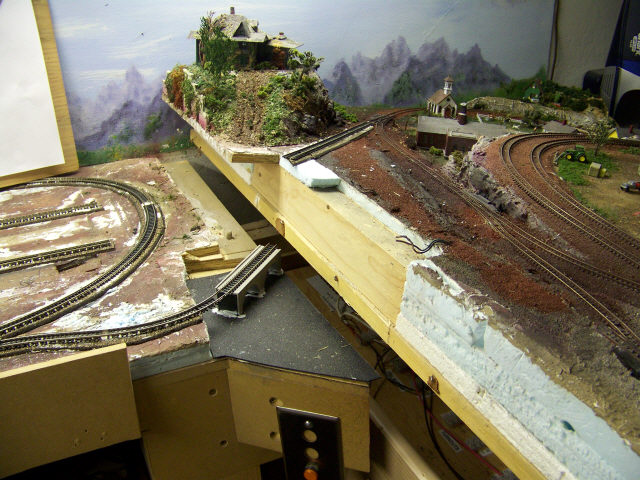
Transition closed
Don (ezdays) Day
Board administrator and
founder of the CANYON STATE RAILROAD
Posts: 1,229
Threads: 23
Joined: Dec 2008
I can see how that transition might cause you trouble. What is your solution?
Galen
I may not be a rivet counter, but I sure do like rivets!
Posts: 12,037
Threads: 579
Joined: Nov 2008
ocalicreek Wrote:I can see how that transition might cause you trouble. What is your solution?
Galen The rails on the movable side are free of the ties so they move from side to side. I have a couple of rail joiners that I can slide open when I want to open the lid and slide back to realign the rails. Right now it's there temporary just to see how it works and it seems to be OK. I think I'll probably clean off everything and start new since I have other alignment conflicts that need to be taken care of.
Don (ezdays) Day
Board administrator and
founder of the CANYON STATE RAILROAD
Posts: 12,037
Threads: 579
Joined: Nov 2008
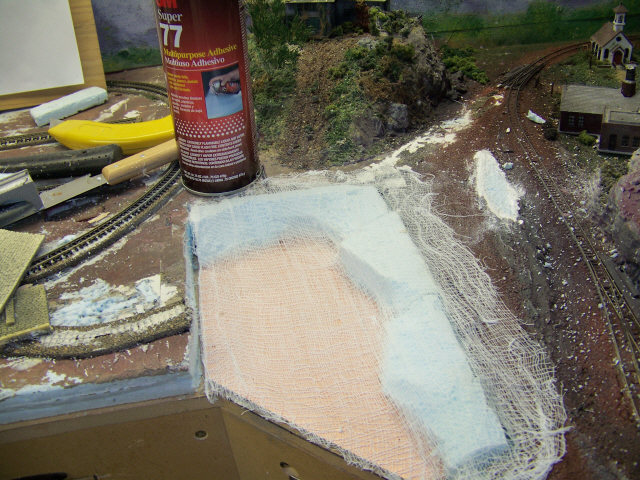
Hey, I made a bit of progress these past few days. I'm starting on the transition between the two sections of the layout. Remember, the section on the right is hinged to get access to the wiring. One problem I had with my initial though was that I had the bridge secure and there was an interference whenever I opened the swinging half of the layout. I cleaned everything off, cut the board on the movable side so it would be level with the other half and now I plan on having the bridge swing up along with the movable side and now all I have to do is to be sure the track of the fixed side can move from side to side to align properly with the bridge.
Here is the results of my work so far:
I cleared everything and cut the movable side level with the other side:
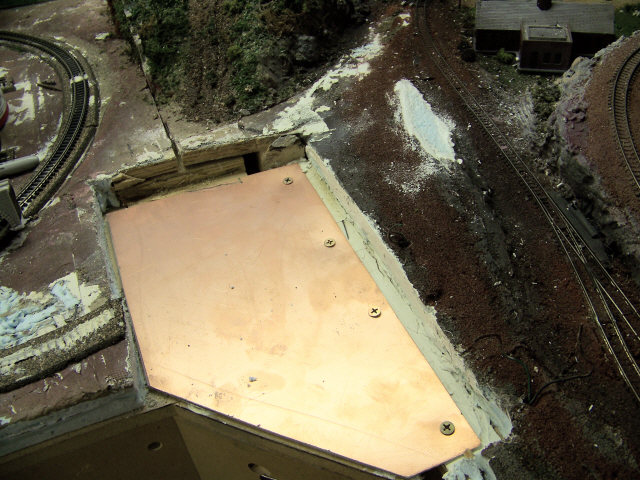
Next I leveled the rough edge of the board:
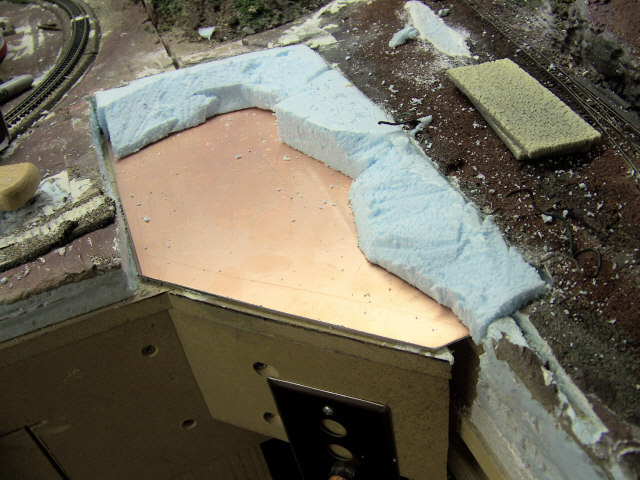
Then I added a piece of printed circuit board as movable stiffener to act as the base for the lake:
Then I added the blue foam that will also move:
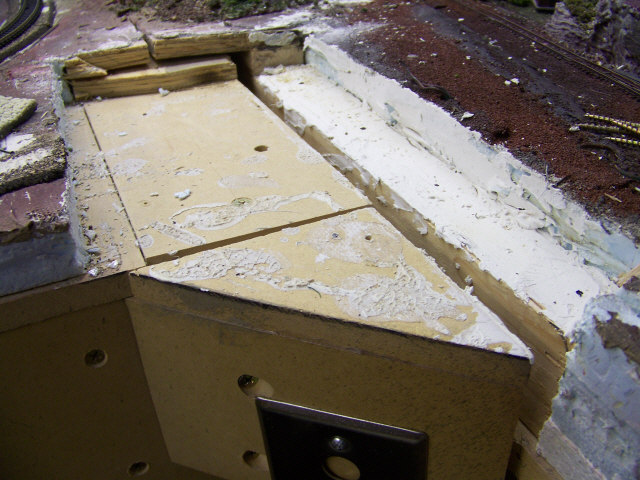
And finally I glued two sheets of cheesecloth to everything:
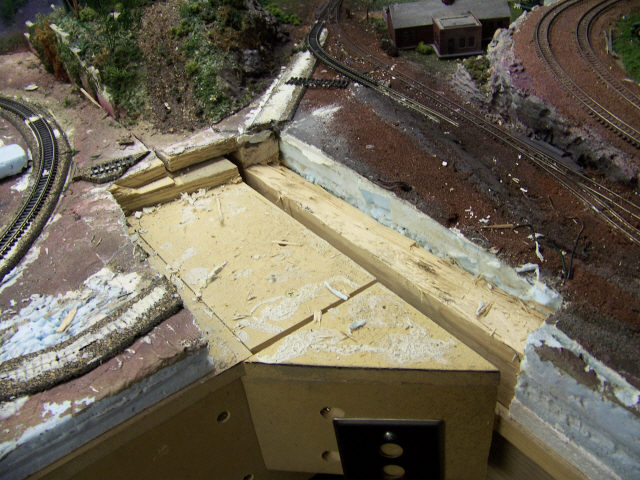
Don (ezdays) Day
Board administrator and
founder of the CANYON STATE RAILROAD
Posts: 12,037
Threads: 579
Joined: Nov 2008
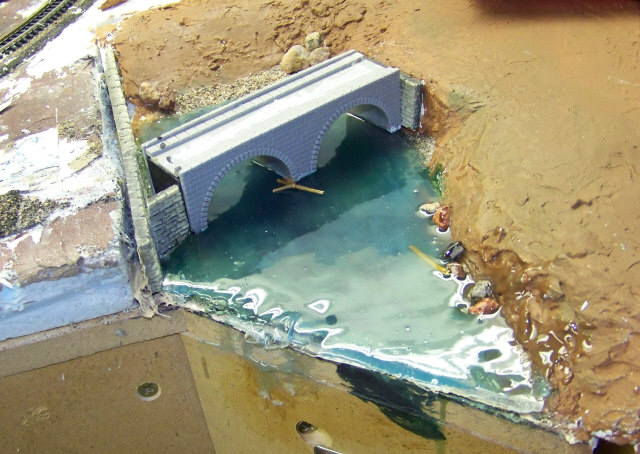
Some more progress. Actually got some work done this past week or so. I put on a second coat of joint compound, added the rock walls, painted on a base coat and painted the bottom of the pond. By today I got the pond water poured and the bridge set in place. The longest time was looking for something to use for the pond water. I had two quart cans of casting resin that I bought a few years ago, but didn't even open. Beware, they have a finite shelf life even if the can is sealed. Both cans were solid and unusable, and after looking all over I found that Hobby Lobby (craft stores) had cans of it on their web site, so I went to their local store to pick some up. They only had casting resin, but kind of like thin dark bondo, even Home Depot had that. Wrong for use as water and I didn't want to wait to order it so I experimented using white glue, and it didn't look bad. It dried clear but the coats were too thin and kind of dull and would take a long time to build up. I finally figured out that I didn't need that much resin and settled for about a 1/8" coat of two-part epoxy glue. I tinted it greenish-blue to give it some depth. With the green paint on the bottom, it turned out OK and now I don't have to waste most of a can of resin... if I could find any...
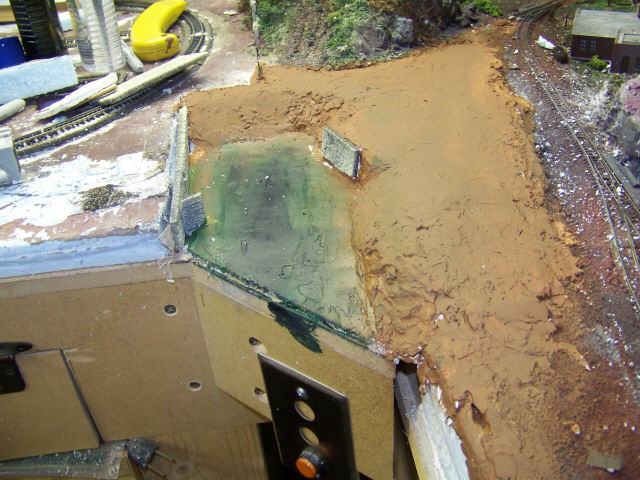
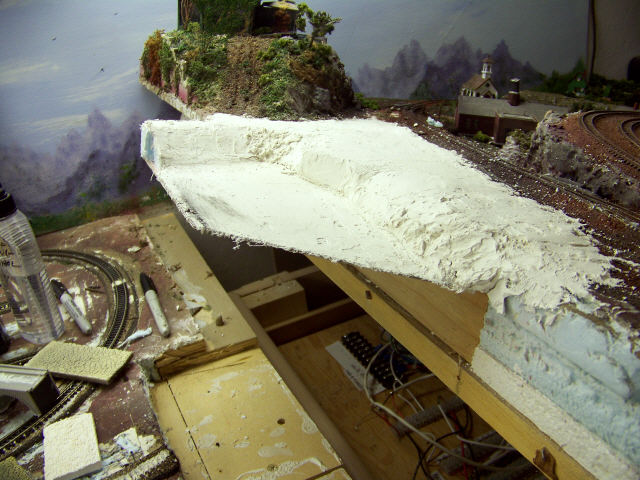
Here's everything with the first coat of joint compound:
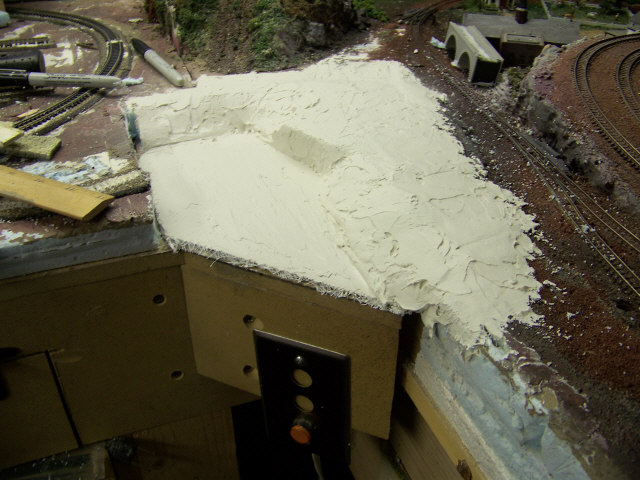
I had to test things to be sure everything opened without interference:
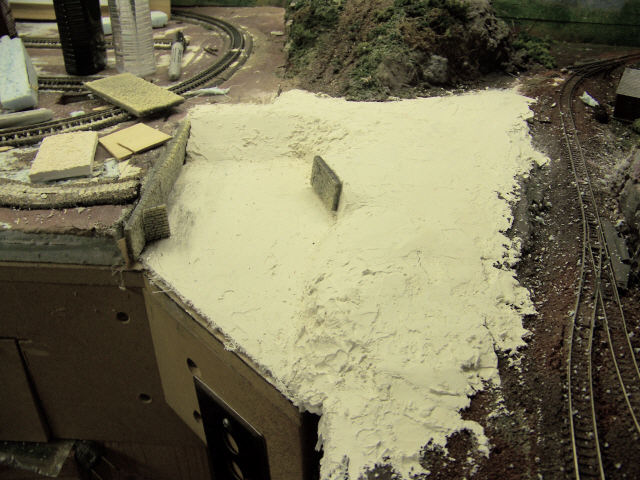
Next I put on the second coat of compound and added the stone walls:
Then I put on a base coat of paint, including the pond:
After that, I sealed the pond with a thick coat of white glue and added some rocks and sand:
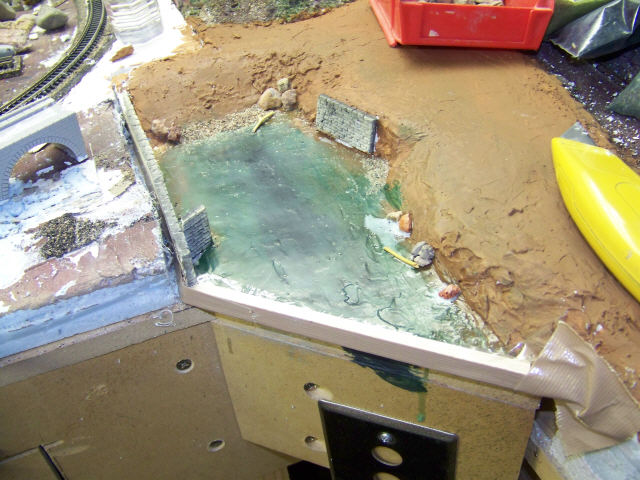
Finally, I poured the pond water and put the bridge in place:
Don (ezdays) Day
Board administrator and
founder of the CANYON STATE RAILROAD
Posts: 3,021
Threads: 160
Joined: Dec 2008
Hey, that looks all right! I'm surprised you could not find epoxy resin (such as envirotex) at Hobby lobby. I've used clear epoxy resin from HD before, from a shelf near where they put bondo. I've also used an epoxy resin used for making microscope slides (swiped from my former university  ) ANd you are definitely correct - it has a shelf life. I've had it go both ways - but usually after awhile it won't harden completely.
--
Kevin
Check out my Shapeways creations!
3-d printed items in HO/HOn3 and more!
<!-- m --><a class="postlink" href="https://www.shapeways.com/shops/kevin-s-model-train-detail-parts">https://www.shapeways.com/shops/kevin-s ... tail-parts</a><!-- m -->
Posts: 12,037
Threads: 579
Joined: Nov 2008
nachoman Wrote:Hey, that looks all right! I'm surprised you could not find epoxy resin (such as envirotex) at Hobby lobby. I've used clear epoxy resin from HD before, from a shelf near where they put bondo. I've also used an epoxy resin used for making microscope slides (swiped from my former university  ) ANd you are definitely correct - it has a shelf life. I've had it go both ways - but usually after awhile it won't harden completely. ) ANd you are definitely correct - it has a shelf life. I've had it go both ways - but usually after awhile it won't harden completely. I went to the Hobby Lobby on Bell Rd. and 75th Ave. and they had resin but it was a brownish color, HD had some in a quart can but they told me it dried a "light greenish color" and since it was made by Bondo, I backed off thinking it would be opaque. The epoxy worked well enough, I bought the 60 minute drying stuff so it's still a bit tacky after about seven hours. I used three-quarters of both tubes and still have some left over for touch-up. I even had to search for that until I found it at Ace.
BTW, it's not a really big area since this is N scale. The whole pond water area measures 7" x 4"
Don (ezdays) Day
Board administrator and
founder of the CANYON STATE RAILROAD
Posts: 4,161
Threads: 174
Joined: Dec 2008
That's very good looking water Don!  Nifty looking bridge too!
Ralph
Posts: 2,458
Threads: 57
Joined: Dec 2008
Don...How do you propose to attach the track to the transition section..?? Whatever the means, it should be "bullet-proof" as far as allowing for absolutely NO movement. I have two tracks (soon to have a third) on a lift-out section which are epoxied and spiked to the hardwood and cork roadbed at both the lift-out and the fixed ends. They were initially layed as one piece of track, glued and spiked, and after they were thorougly dried, I cut the tracks at allow for lifting. So the gap is the width of a cutting blade and the tracks can take considerable 'abuse" and not budge.
Gus (LC&P).
Posts: 12,037
Threads: 579
Joined: Nov 2008
Gus,
I have a slight alignment problem in that every time the sections meet, there can be a slight shifting in the movable section. It doesn't always come down in the same place, just off enough so that I can't have both sides fixed in place. I experimented with it and found if I have a slight movement on one side and the track on the other doesn't move, I'll be able to use sliding rail joiners to keep the two sections aligned. I'll have to see if that becomes a problem running over the joint, if so, I'll use another way to secure it. I kind of feel like I've painted myself into a corner, but so far this looks like it has the best chance of working.
Don (ezdays) Day
Board administrator and
founder of the CANYON STATE RAILROAD
Posts: 2,458
Threads: 57
Joined: Dec 2008
OK....To prevent the movable section from coming down and "wiggling" a bit, I used 1/4" steel rod pins on the lift-out, and 1/4" brass tubing in the fixed sections into which the pins slide. That way there is NO movement or misalignment once the lift out is in place. I suggest you do something similar to make sure the movable section comes down in the same spot EVERY time. I presume the bridge is pretty well fixed, so look for a way to make the matching track in the fixed section pretty much immovable. The tracks should line up without the need for rail joiners.
Here's a few pics...
An overall view of the lift-out section.
![[Image: DSCF2701.jpg]](http://i11.photobucket.com/albums/a200/titocast/LOMETA/DSCF2701.jpg)
A view of the supports. They are all glued and screwed in place
![[Image: DSCF2702.jpg]](http://i11.photobucket.com/albums/a200/titocast/LOMETA/DSCF2702.jpg)
A close-up of the steel pin used at both ends.
![[Image: DSCF2703.jpg]](http://i11.photobucket.com/albums/a200/titocast/LOMETA/DSCF2703.jpg)
And their corresponding alignment hole.
![[Image: DSCF2704.jpg]](http://i11.photobucket.com/albums/a200/titocast/LOMETA/DSCF2704.jpg)
A close up of the tracks....No need for rail joiners...
![[Image: DSCF2705.jpg]](http://i11.photobucket.com/albums/a200/titocast/LOMETA/DSCF2705.jpg)
I hope some of this helps...
Gus (LC&P).
Posts: 12,037
Threads: 579
Joined: Nov 2008
Gus,
That would work if my lift-out was a simple set of tracks on a narrow board and everything else was secured. My "lift-out" is a 34" x 80" door with lots of scenery, structures and track on it. The problem is that the frame is not secured to anything and it's possible to get a slight misalignment simply by accidentally bumping into the other end. Woodone came over to the house a while back and suggested that I secure that end to the fixed section with a wood strap since that half of the layout is screwed to the wall. I would do that, but I'm afraid that it could be a tripping hazard if it were permanent. If the strap were removable, then I would still have the problem of bumping against the layout and moving it slightly. Securing it to the floor is not an option, so making one end of the track loose in case there is some movement on the other end of the layout frame (which usually happens when I open the swinging section), is the only way I can think of to deal with this. You are right though, I could have problems running trains if some part of the track is loose, but one step at a time. 
It's a wonder that I'm dealing with this at all since I've been avoiding this for a very long time. I guess secretly in the back of my mind, that's the reason I started this challenge in the first place. I knew it would get me off my duff and I'd have to rise to the occasion. 
Thanks for the advice, If I can think of a way to secure the other end of that section without going into the floor, then I could use the pins to keep the tracks aligned. 
Don (ezdays) Day
Board administrator and
founder of the CANYON STATE RAILROAD
Posts: 12,037
Threads: 579
Joined: Nov 2008
A little more progress this week. I was able to get the trackwork done plus a bit of scenery added. I left about an inch and a half of track to the bridge approach free to move. There's enough play in it so that if there is any movement in the swinging section, I can compensate for any misalignment. I have enough room to slide the rail joiners clear, and I made this tool, (thanks to Woodone for his suggestion, it works just great   ) that makes it easy to move the rail joiners. So far, I'm happy with the results.
Here's the overall progress so far:
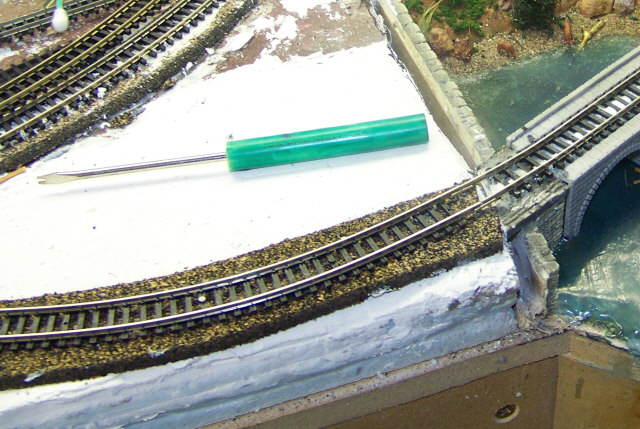
This is a shot with the rail joiner tool that Woodone (thanks Jerry) showed me how to make:
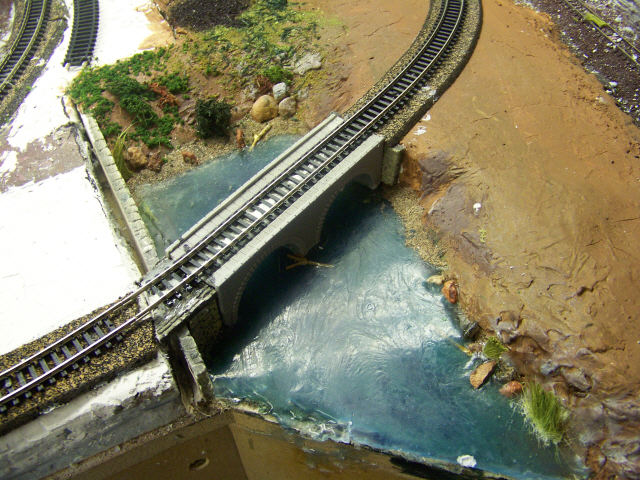
And a close-up of a few deer that stopped by the pond:
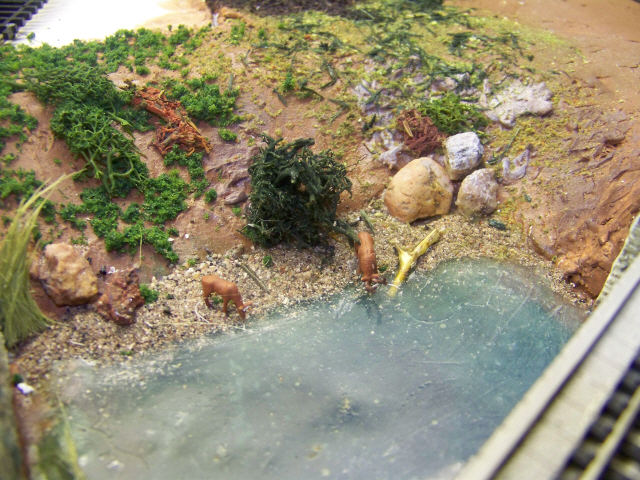
Don (ezdays) Day
Board administrator and
founder of the CANYON STATE RAILROAD
Posts: 4,553
Threads: 100
Joined: Dec 2008
That's lookin' good Don!, and that's a neat tool for the rail joiners.
We always learn far more from our own mistakes, than we will ever learn from another's advice.
The greatest place to live life, is on the sharp leading edge of a learning curve.
Lead me not into temptation.....I can find it myself!
Posts: 12,037
Threads: 579
Joined: Nov 2008
Sumpter250 Wrote:That's lookin' good Don!, and that's a neat tool for the rail joiners.
Thanks Pete. I just took a mini-screwdriver, put a slight bend in the tip and filed a v-groove in it. It works great for laying track, but works even better in this application. 
Don (ezdays) Day
Board administrator and
founder of the CANYON STATE RAILROAD
|


 ) ANd you are definitely correct - it has a shelf life. I've had it go both ways - but usually after awhile it won't harden completely.
 Nifty looking bridge too!
![[Image: DSCF2701.jpg]](http://i11.photobucket.com/albums/a200/titocast/LOMETA/DSCF2701.jpg)
![[Image: DSCF2702.jpg]](http://i11.photobucket.com/albums/a200/titocast/LOMETA/DSCF2702.jpg)
![[Image: DSCF2703.jpg]](http://i11.photobucket.com/albums/a200/titocast/LOMETA/DSCF2703.jpg)
![[Image: DSCF2704.jpg]](http://i11.photobucket.com/albums/a200/titocast/LOMETA/DSCF2704.jpg)
![[Image: DSCF2705.jpg]](http://i11.photobucket.com/albums/a200/titocast/LOMETA/DSCF2705.jpg)

