Posts: 2,724
Threads: 160
Joined: Dec 2008
To start this off ezdays started a few threads on your likes & dislikes in the hobby,, Well I got to say that track work is the thing that I really don't like to do, but doing Steam builds has got to be my #1 favorite of all the model railroading activities. That being said I was looking for a signature locomotive for my freelanced road, something unique to SH&D. Almost all steam era roads had at least one locomotive type that personified the character of that road; the NYC had it's Mohawks and Hudson's, the PRR had K-4's, and when you hear big boys you think UP. The CNJ had it's 4-8-0's, Reading it's T-1's, N&W J's & Y-6's; So I did some thinking and came up with the idea of a decapod camelback, As far as I know no other road had them. I wanted something that could be of 1880's/90's vintage that through several rebuilds would have survived till the end of steam, like the CNJ k-1's, witch this steamer will be loosely based on. Over the last year or so I was able to acquire two Spectrum Russian decapods at reasonable prices, so I didn't feel bad about cutting them up  . The drives were the selling point of the model, they are smooth runners, with low drivers, exposed valve gear, and decently proportioned cylinders. That is the overall look of what I am going for. That will be the basses for this build. The first step was to remove all the parts that i didn't need for this build, witch amounts to most of the model. I will mainly just be using the drive and probably the tender frame. I may salvage some of the detail parts from the boiler and tender as needed.
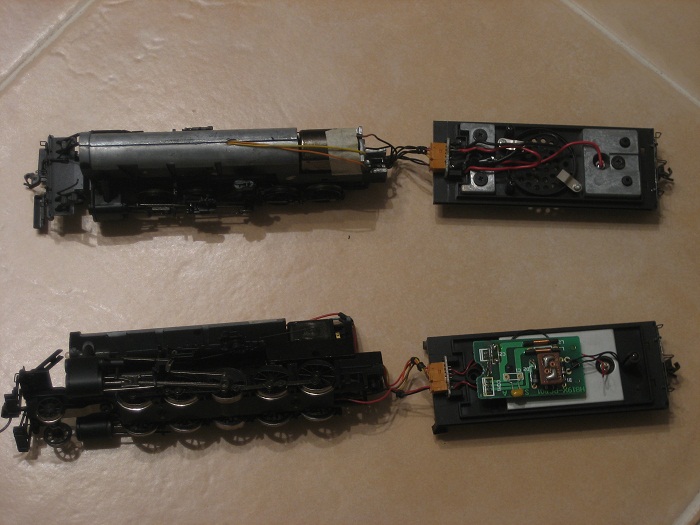
One of the models was a DCC version, so the decoder and sound board had to go, as I am a DC hold out.
I will have a lot of leftover parts when I'm finished so when It's completed let me know I you need any of them.
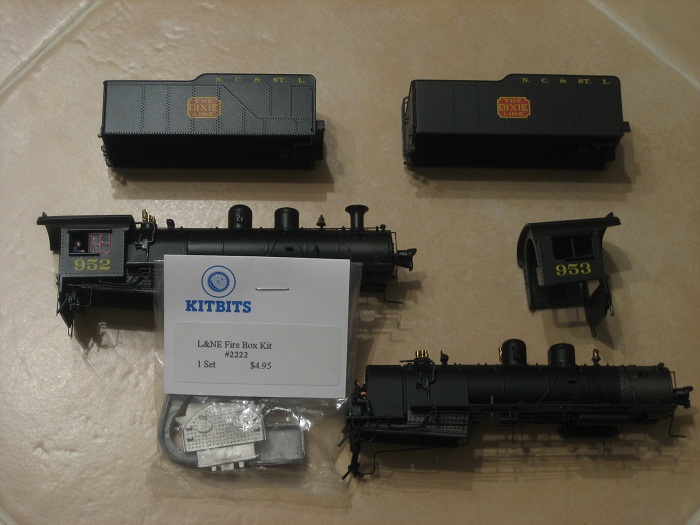
In this pic you can seethe boilers and tender shells along with an out of production BCW firebox casting, perfect for camelbacks that will be used in this build.. As long as I don't get held up at work tomorrow, I'll start on the boiler and fireboxes.
My other car is a locomotive, ARHS restoration crew
Posts: 720
Threads: 53
Joined: Dec 2008
Interesting project!
If I may humbly suggest a build date closer to 1920, as 2-10-0s didn't really begin to become common until WW1...and non-Stephenson's gear didn't become common in the US until the 20th century (steam pressure was the driving force in the change) ...but then again, who's to say that your railroad's operating department wasn't ahead of the curve? The first 2-10-0 was built long before then and Mason Bogies used Walschertes Valve Gear in the 1870s (Stephenson gear wasn't conducive to the bogie design).
I'm looking forward to more pics and background on the locomotives!
Michael
My primary goal is a large Oahu Railway layout in On3
My secondary interests are modeling the Denver, South Park, & Pacific in On3 and NKP in HO
<!-- m --><a class="postlink" href="http://thesouthparkline.blogspot.com/">http://thesouthparkline.blogspot.com/</a><!-- m -->
Posts: 2,724
Threads: 160
Joined: Dec 2008
Good points, but I should have stated that this will be a circa 1940 ish version of the locomotive that I am building. So the valve gear and cylinders would have been replaced as one of the rebuilds that I was talking about. As for the wheel arrangement, I'd like to think that the Anna lines were early pioneers of the 2-10-0 type 
My other car is a locomotive, ARHS restoration crew
Posts: 720
Threads: 53
Joined: Dec 2008
Ah! Perhaps she was a very early example of the Vauclain Compound? Say, 1892? Because of her 10 drivers, they thought she'd need to be a compound. Like almost all Vauclain Compounds, she was simpled around 1910ish. They received piston valves and appropriate valve gear due to the roads belief that higher pressure would be needed to compensate for the lack of compound steam usage.
I'm looking forward to the build! 
Michael
My primary goal is a large Oahu Railway layout in On3
My secondary interests are modeling the Denver, South Park, & Pacific in On3 and NKP in HO
<!-- m --><a class="postlink" href="http://thesouthparkline.blogspot.com/">http://thesouthparkline.blogspot.com/</a><!-- m -->
Posts: 1,215
Threads: 89
Joined: Dec 2008
Dang Steve, you're on fire, when you gonna operate all these toys you make? 
Tom
Model Conrail
PM me to get a hold of me.
Posts: 88
Threads: 1
Joined: Oct 2010
Awesome! As a Reading guy, one of my dreams was to do a version of their one off 0-10-0 (originally a 0-12-0) camelback out of one of those Bachmann decs. Now I can vicariously here. Cool!
Posts: 2,724
Threads: 160
Joined: Dec 2008
Well Tom ya just got ta stop by & we'll run some more stuff again. I got a few more pics to post of the firebox when I Get home later too.

My other car is a locomotive, ARHS restoration crew
Posts: 4,553
Threads: 100
Joined: Dec 2008
Well, if a shipyard can build an outside frame 3' gauge 2-4-4-2 compound articulated, out of an outside frame 2-8-0, I can't see any reason for the Anna lines, to not be the early pioneer of the 2-10-0 Camelback type.
This should be an interesting build............you're not done yet ?  
We always learn far more from our own mistakes, than we will ever learn from another's advice.
The greatest place to live life, is on the sharp leading edge of a learning curve.
Lead me not into temptation.....I can find it myself!
Posts: 157
Threads: 31
Joined: Dec 2010
Very nice to see a Camelback build thread!
I don't want to hi-jack the thread, but I made a 2-8-0 Camelback myself during the Christmas holiday.
The drawing I used:
![[Image: %25C3%25BF%25C3%25BEl-1-20%2520Dec%25202...520GMT.png]](https://lh3.googleusercontent.com/-0IRkTOpK9LE/Tv7yuVMfuVI/AAAAAAAAEMQ/8lwpRgFez_w/s640/%25C3%25BF%25C3%25BEl-1-20%2520Dec%25202011%252016-10-00%2520GMT.png)
I started with a Spectrum 2-8-0.
![[Image: DSC04059-enhanced.JPG]](https://lh4.googleusercontent.com/-SanHJORE2rs/Tv70f3cOjaI/AAAAAAAAEMo/Am3plzFZCGE/s640/DSC04059-enhanced.JPG)
The finished loco:
![[Image: DSC04078-1.jpg]](https://lh3.googleusercontent.com/-MzGg7KTTOc0/TwHSq3kab8I/AAAAAAAAEQs/CjdF_EhrvjU/s640/DSC04078-1.jpg)
![[Image: Sketch6519133.jpg]](https://lh5.googleusercontent.com/-kFeL6dtj8o8/Twc7HcO4qbI/AAAAAAAAERg/N_fbAYBwYp8/s640/Sketch6519133.jpg)
I managed to use many of the Spectrum parts in the build, it isn't totally accurate in any way, but I think it captures the essence of the Camelback.
I really like the loco type 
I look forward to see more of the 2-10-0 Camel! 
Posts: 5,859
Threads: 175
Joined: Dec 2008
Hi Graffen, and  to Big Blue - good to see you over here.
That's a good-looking loco and nicely photographed, too.  
Wayne
Posts: 5,263
Threads: 195
Joined: Apr 2009
Welcome! A beautiful engine. I have got a technical question, how did they sand all four axis? Must be cumbersome to run the sand pipes from the sand dome in front of the cab bypassing the cab to the last axis.
Reinhard
Posts: 2,724
Threads: 160
Joined: Dec 2008
looks good Graffen  ..Got home late today and didn't get anything done today :x . But I can show you the work I did yesterday.
Here's the firebox from Bethlehem Car works <!-- m --><a class="postlink" href="http://www.bethlehemcarworks.com/Products/index.html">http://www.bethlehemcarworks.com/Products/index.html</a><!-- m --> . They no longer sell this line of parts :evil: . The entire line was sold to Dan Hicks trains except the Camelback parts, BCW has lost the molds and has no plans to produce anything similar. ( If any Gauge members ever come across them at a hobby shop PLEASE pm me ).
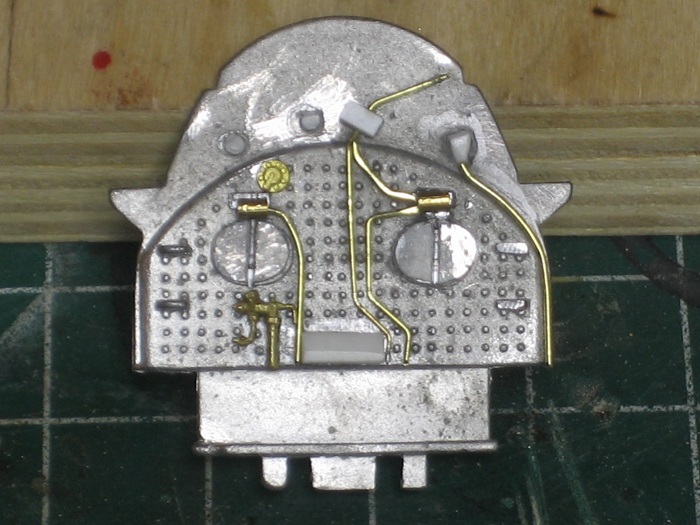
You can see the three parts that are included in the firebox kit, you have to make the rest. There's a backhead, awning, and front sheet. I will be modifying all these parts to use as masters to cast others from.
I looked at all my pics of camelback backheads and came up with a composite of details that seamed common to them all.
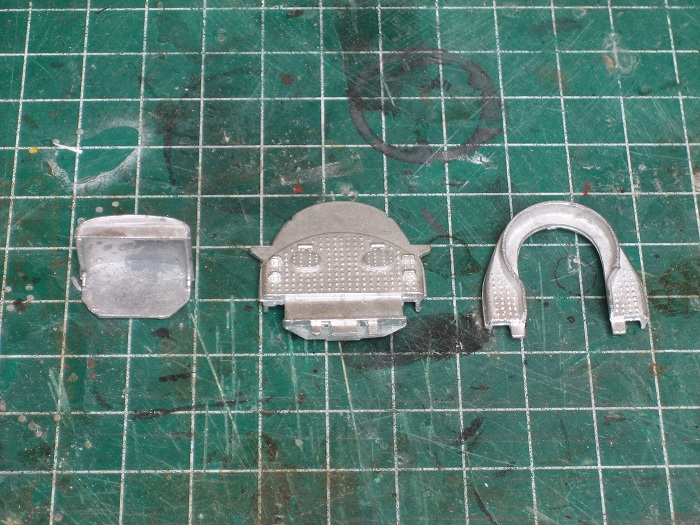
Most of the work is finished here. I tried to make the firebox doors more like the butterfly type with air actuated openers. Some clean outs, injector controls and other plumbing were also added. An air brake control and a few other things are still needed. I was going for a generic look, some thing that looks right more than a copy of any particular prototype.
My other car is a locomotive, ARHS restoration crew
Posts: 931
Threads: 68
Joined: Dec 2008
Welcome Graffen - Glad to see you followed my link
Posts: 2,724
Threads: 160
Joined: Dec 2008
Today I started on the boiler. I going to use the same technique that I used when I built my K-1as.
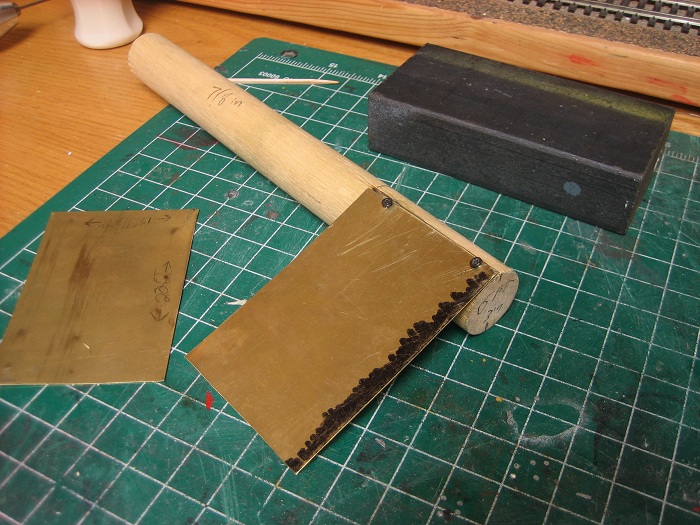
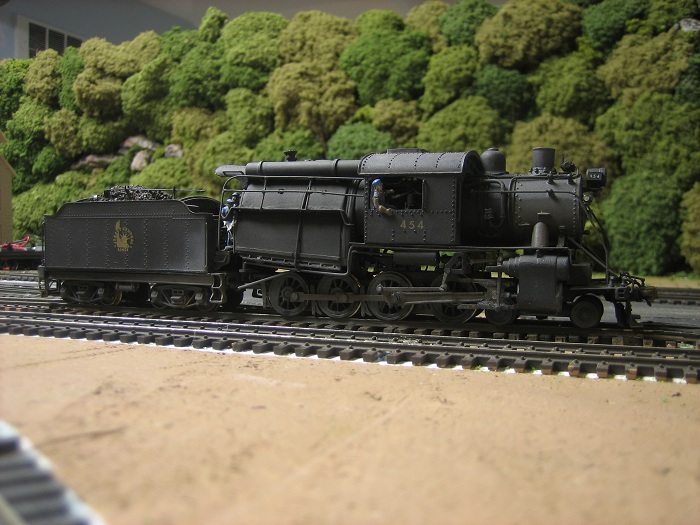
So lets roll a boiler..to start I needed some dimensions. Once again I turned to 454 as a guide to proportions.
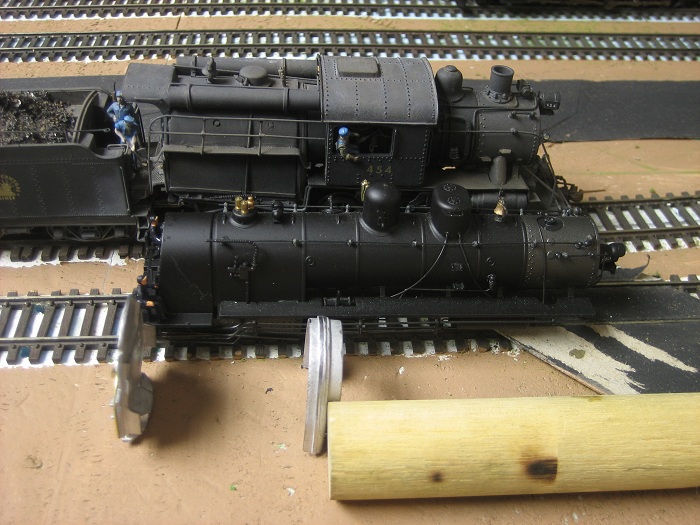
I lined up the firebox castings and a 7/8 in dowel until the lengths looked right & took some measurements.I found that the boiler from the front of the firebox to the rear of the smoke box is a scale 15 feet 3in. Two sections of thin brass were cut to a scale 15 ft 3 x 22 feet. The 22 feet is slightly larger that the total circumference of the 7/8 th's dowel, the overlap gives me a good surface to solder. All this will give a total diameter of about 6 foot 3 inch.
I carefully lined up the square end of the dowel with the long side of the brass sheet, drilled holes into the brass, and with small wood screws fastened it in place. all the while making that it all remained square. This will make it easier to attach the boiler front latter.
My other car is a locomotive, ARHS restoration crew
Posts: 2,724
Threads: 160
Joined: Dec 2008
After I was satisfied with the fit it's time to roll. I just kept working the brass around the dowel by hand to keep the edge even with the end of the dowel, sometimes rolling the dowel on a hard surface when necessary. Next I removed one screw, re drilled the brass and resecured the now round sleeve to the dowel as shown here.
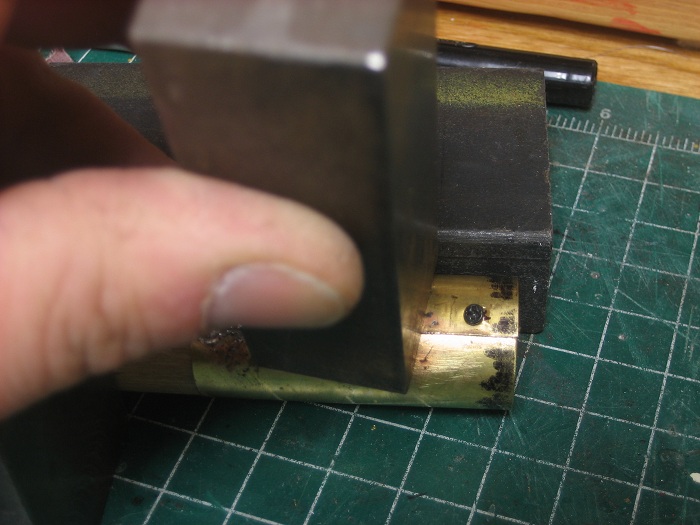
This method works well for Camelback boilers because they and normally straight boilers with out any changes in diameter like a wagon top boiler.
With this step finished it's time to break out the solder.
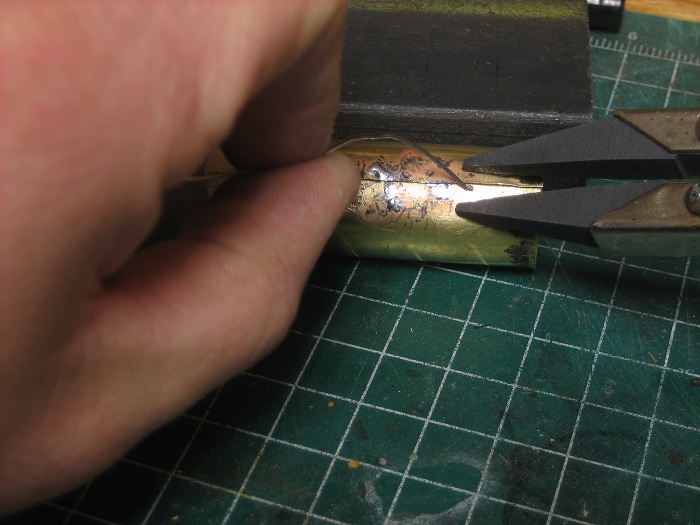
Here a resistance soldering rig really shines. It could also be done with a torch or heavy iron, but I love my rig. I applied a generous amount of flux to the seam, got the brass nice and hot, and ran a bead of solder down the seam. This was done in sections so that the while the solder was still in a liquid state I could apply pressure with a piece of steal bar stock.
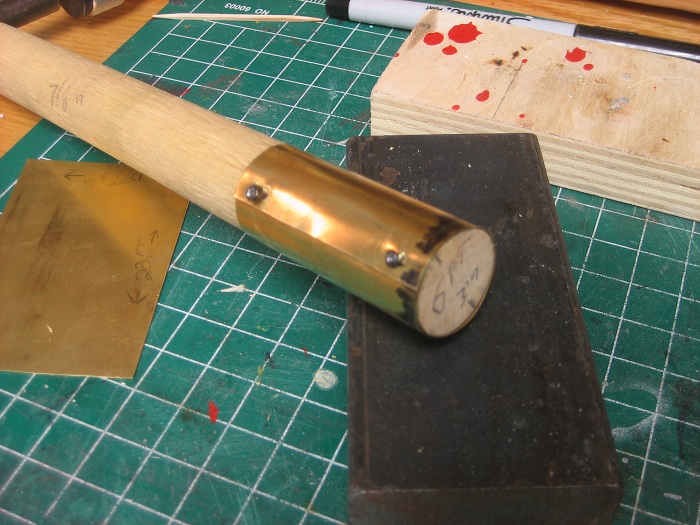
Just make sure that you keep pressure on it till the solder hardens.
My other car is a locomotive, ARHS restoration crew
|
 . The drives were the selling point of the model, they are smooth runners, with low drivers, exposed valve gear, and decently proportioned cylinders. That is the overall look of what I am going for. That will be the basses for this build. The first step was to remove all the parts that i didn't need for this build, witch amounts to most of the model. I will mainly just be using the drive and probably the tender frame. I may salvage some of the detail parts from the boiler and tender as needed.
 One of the models was a DCC version, so the decoder and sound board had to go, as I am a DC hold out.
 In this pic you can seethe boilers and tender shells along with an out of production BCW firebox casting, perfect for camelbacks that will be used in this build.. As long as I don't get held up at work tomorrow, I'll start on the boiler and fireboxes.
 . The drives were the selling point of the model, they are smooth runners, with low drivers, exposed valve gear, and decently proportioned cylinders. That is the overall look of what I am going for. That will be the basses for this build. The first step was to remove all the parts that i didn't need for this build, witch amounts to most of the model. I will mainly just be using the drive and probably the tender frame. I may salvage some of the detail parts from the boiler and tender as needed.


![[Image: %25C3%25BF%25C3%25BEl-1-20%2520Dec%25202...520GMT.png]](https://lh3.googleusercontent.com/-0IRkTOpK9LE/Tv7yuVMfuVI/AAAAAAAAEMQ/8lwpRgFez_w/s640/%25C3%25BF%25C3%25BEl-1-20%2520Dec%25202011%252016-10-00%2520GMT.png)
![[Image: DSC04078-1.jpg]](https://lh3.googleusercontent.com/-MzGg7KTTOc0/TwHSq3kab8I/AAAAAAAAEQs/CjdF_EhrvjU/s640/DSC04078-1.jpg)
![[Image: Sketch6519133.jpg]](https://lh5.googleusercontent.com/-kFeL6dtj8o8/Twc7HcO4qbI/AAAAAAAAERg/N_fbAYBwYp8/s640/Sketch6519133.jpg)


 to Big Blue - good to see you over here.