Posts: 1,210
Threads: 125
Joined: Dec 2008
I used photo paper then glued it to the card stock. I formed the card stock the way I wanted the finished shape. Then printed the walls. I also made the front wall a little bit wider than needed. folded it at the corner giving it a nice sharp crease. Then the sides I made a little bit short. I mean 1/16 or 1/32 inch. The side wall went over the front folded edge to make the corner. That made a good corner for me. I used a spray on glue to make sure there were no loose places.(spray the back of the photo paper)
Posts: 1,548
Threads: 99
Joined: Jan 2012
Hmmm , back to the drawing board ....Epson printer just grenaded ...bought it march 7th ....looks like I'll have to visit the 'ol Wall Fart to get the situation corrected . Geez 
T
To err is human, to blame it on somebody else shows management potential.
Posts: 5,859
Threads: 175
Joined: Dec 2008
I've not printed my own buildings, but I have used the ones from KingMill Enterprises.
I mount them on .060" sheet styrene, using gelled contact cement. The styrene is braced with strips of the same material, allowing the low-relief building to stand otherwise unsupported. The background flats generally need to lean against something, and I've noticed some warping of them, too. :?
Here's the braced rear face of a flat:
![[Image: Augustphotos041.jpg]](http://i23.photobucket.com/albums/b399/doctorwayne/Various%20how-tos/Augustphotos041.jpg)
To apply the paper, first the styrene is prepped with a coat of lacquer thinner - this prevents the plastic from drawing too much thinner out of the contact cement:
![[Image: Augustphotos042.jpg]](http://i23.photobucket.com/albums/b399/doctorwayne/Various%20how-tos/Augustphotos042.jpg)
![[Image: Augustphotos043.jpg]](http://i23.photobucket.com/albums/b399/doctorwayne/Various%20how-tos/Augustphotos043.jpg)
After it's been coated, it's set aside while the contact cement is applied to the backs of the cut-out paper images. Then, the prepped styrene surface is coated with contact cement:
![[Image: Augustphotos044.jpg]](http://i23.photobucket.com/albums/b399/doctorwayne/Various%20how-tos/Augustphotos044.jpg)
Here's some styrene flats and their corresponding paper images, all sitting while the contact cement dries:
![[Image: Augustphotos031.jpg]](http://i23.photobucket.com/albums/b399/doctorwayne/Various%20how-tos/Augustphotos031.jpg)
To apply the paper to the styrene (this will work for almost any sheet material application to a large surface using contact cement), first cover the styrene with a sheet of waxed paper, then lay the paper in its approximate position:
![[Image: Augustphotos033.jpg]](http://i23.photobucket.com/albums/b399/doctorwayne/Various%20how-tos/Augustphotos033.jpg)
Align the edges: here, the bottom edge is aligned, while the paper still needs to be slid to the left somewhat. Note that the waxed paper isn't covering the bottom edge of the styrene, but its thickness is preventing the paper from touching the glued surface:
![[Image: Augustphotos035.jpg]](http://i23.photobucket.com/albums/b399/doctorwayne/Various%20how-tos/Augustphotos035.jpg)
With everything lined-up, the bottom edge of the paper is pressed onto the styrene - bonding is immediate on contact and is permanent. :
![[Image: Augustphotos037.jpg]](http://i23.photobucket.com/albums/b399/doctorwayne/Various%20how-tos/Augustphotos037.jpg)
With the lower edge secured, the waxed paper can be slowly withdrawn, making sure to follow along with finger pressure to prevent trapped air bubbles between the paper and the styrene:
![[Image: Augustphotos038.jpg]](http://i23.photobucket.com/albums/b399/doctorwayne/Various%20how-tos/Augustphotos038.jpg)
![[Image: Augustphotos039.jpg]](http://i23.photobucket.com/albums/b399/doctorwayne/Various%20how-tos/Augustphotos039.jpg)
...and finally, the paper image secured:
![[Image: Augustphotos040.jpg]](http://i23.photobucket.com/albums/b399/doctorwayne/Various%20how-tos/Augustphotos040.jpg)
The next step is to paint any exposed styrene edges on the top or sides. I use a brush and PollyScale paint, mixed to match the printed image.
Here are a few of them, mostly just set onto the layout to see how they look:
![[Image: KingMillEnterprisesbackgroundstructures001.jpg]](http://i23.photobucket.com/albums/b399/doctorwayne/structures%20and%20a%20few%20b%20and%20w%20photos/KingMillEnterprisesbackgroundstructures001.jpg)
![[Image: KingMillEnterprisesbackgroundstructures002.jpg]](http://i23.photobucket.com/albums/b399/doctorwayne/structures%20and%20a%20few%20b%20and%20w%20photos/KingMillEnterprisesbackgroundstructures002.jpg)
![[Image: KingMillEnterprisesbackgroundstructures005.jpg]](http://i23.photobucket.com/albums/b399/doctorwayne/structures%20and%20a%20few%20b%20and%20w%20photos/KingMillEnterprisesbackgroundstructures005.jpg)
![[Image: KingMillEnterprisesbackgroundstructures008.jpg]](http://i23.photobucket.com/albums/b399/doctorwayne/structures%20and%20a%20few%20b%20and%20w%20photos/KingMillEnterprisesbackgroundstructures008.jpg)
![[Image: KingMillEnterprisesbackgroundstructures010.jpg]](http://i23.photobucket.com/albums/b399/doctorwayne/structures%20and%20a%20few%20b%20and%20w%20photos/KingMillEnterprisesbackgroundstructures010.jpg)
Wayne
Posts: 1,210
Threads: 125
Joined: Dec 2008
Dr Wayne it appears that homes in your area sell for about the same as here.
Posts: 234
Threads: 4
Joined: Oct 2010
Wayne,
 That is a great tutorial, thanks for posting it.   In seeing pictures of your layout posted here, I was wondering how you created the background buildings.
I have one observation and some questions.
I know that you already know this, but for everyone else who might not know, when working with lacquer thinner and solvent based contact adhesive (especially in large quantities), provide adequate ventilation and /or wear a solvent type of respirator. The solvents are flammable and not very good to breathe. 
And now the questions.
What’s the closest that you would mount one of these building flats to the edge of the layout before they wouldn’t look good? Would they be appropriate on a narrow shelf type of layout? I would assume that the closer to the edge that you get, you would have to add more stand-off detail to make it look better. Do you add a lot of detail to yours?
Mark
Posts: 5,859
Threads: 175
Joined: Dec 2008
Yeah, I probably should have mentioned the dangers of lacquer thinner and many other solvents, and the need to provide adequate ventilation. I was doing the illustrated work in my garage, unheated and about 100' behind the house. Even with the door open (and it's a pretty "airy" building even with all of the doors closed - over 100 years old  ) I wore a two-stage respirator, the same as I use when airbrushing. These remove particulate matter (good for any kind of sprayed paint) and also fumes from organic solvents - lacquer thinner, alcohol, acetone, MEK, etc., etc.
As for placement of the structures, most of my layout is only 30" deep, and the pictures showing the structures on the layout were taken from less than 20" away. I haven't added much in the way of three-dimensional details, but that's because I needed these to fill-in specific areas in the background.
One structure, which I didn't show because I'm not decided on which foreground structures to be placed in front of it, has printed detail which is not shown as a strictly head-on view. I had initially thought that re-doing those "suggested" 3-D features with actual 3-D details would be necessary, but controlling the viewing angle through placement of foreground structures gives, I think, a very convincing representation. Here it is in place, viewable only from the left:
![[Image: KingMillEnterprisesbackgroundstructures022.jpg]](http://i23.photobucket.com/albums/b399/doctorwayne/structures%20and%20a%20few%20b%20and%20w%20photos/KingMillEnterprisesbackgroundstructures022.jpg)
Even from up close (about 10", and only 15" from the front of the layout, it still looks pretty good:
![[Image: KingMillEnterprisesbackgroundstructures018.jpg]](http://i23.photobucket.com/albums/b399/doctorwayne/structures%20and%20a%20few%20b%20and%20w%20photos/KingMillEnterprisesbackgroundstructures018.jpg)
...however, in that locale, it's also viewable from the right:
![[Image: KingMillEnterprisesbackgroundstructures019.jpg]](http://i23.photobucket.com/albums/b399/doctorwayne/structures%20and%20a%20few%20b%20and%20w%20photos/KingMillEnterprisesbackgroundstructures019.jpg)
Even once the second level of the layout is installed above this area, it would still also be viewable from above:
![[Image: KingMillEnterprisesbackgroundstructures020.jpg]](http://i23.photobucket.com/albums/b399/doctorwayne/structures%20and%20a%20few%20b%20and%20w%20photos/KingMillEnterprisesbackgroundstructures020.jpg)
The low-relief stone building shown earlier is actually the two bottom storeys of this structure, which I had thought to be too tall for its small-town setting:
![[Image: KingMillEnterprisesbackgroundstructures025.jpg]](http://i23.photobucket.com/albums/b399/doctorwayne/structures%20and%20a%20few%20b%20and%20w%20photos/KingMillEnterprisesbackgroundstructures025.jpg)
I added a gabled half-roof, sheathed with Campbell corrugated siding, to make it a totally different looking structure:
![[Image: KingMillEnterprisesbackgroundstructures028.jpg]](http://i23.photobucket.com/albums/b399/doctorwayne/structures%20and%20a%20few%20b%20and%20w%20photos/KingMillEnterprisesbackgroundstructures028.jpg)
...it still looks acceptable when viewed from an angel:
![[Image: KingMillEnterprisesbackgroundstructures026.jpg]](http://i23.photobucket.com/albums/b399/doctorwayne/structures%20and%20a%20few%20b%20and%20w%20photos/KingMillEnterprisesbackgroundstructures026.jpg)
...or even from up-close, about 6" here (the apparent curve in the roof is imparted by the camera's lense):
![[Image: KingMillEnterprisesbackgroundstructures029.jpg]](http://i23.photobucket.com/albums/b399/doctorwayne/structures%20and%20a%20few%20b%20and%20w%20photos/KingMillEnterprisesbackgroundstructures029.jpg)
Some of these, with the photograph of the prototype taken at a right angle, would withstand scrutiny almost at the front of the layout, in my opinion. If you added three dimensional details: for instance, the loading dock in the last photo, many viewers would likely see it as a fully-modelled structure.
Wayne
SO OK, you've sold me, I just put in an order for Kingmill -- there are several layouts that regularly appear here where the Kingmill background flats seem to add a great deal, and I have some areas that need something like that. I tend to favor illustration board and white glue, though, for the backing -- will probably brace it with wood.
Posts: 234
Threads: 4
Joined: Oct 2010
doctorwayne,
Thanks for the additional information on this technique. I can see some real potential with these "structures" and it's nice to know how they were put together.
Mark
Posts: 24
Threads: 4
Joined: Apr 2012
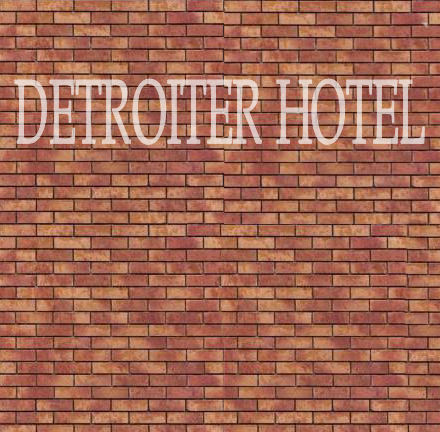
Wayne, Outstanding job on those buildings. If anyone is PC smart, Evans has the Model Builder and Brickyard Programs that I found to be rather good. I aslo have downloaded a lot of Bricks, windows and doors from CG Textures on line and with my Coral Paintshop pro have done some interesting sheets as well to upload into Model Builder.
Example of CG brick with Faded Lettering

Member of: GRAND TRUNK WESTERN HISTORICAL SOCIETY
![[Image: image.php?mode=thumbnail&album_id=229&image_id=4521]](http://www.the-gauge.net/forum/gallery/image.php?mode=thumbnail&album_id=229&image_id=4521)
Posts: 3,733
Threads: 44
Joined: Dec 2008
Nice work Doc! 
Mike
Sent from my pocket calculator using two tin cans and a string
I received my order from Kingmill -- two days via Priority Mail -- and am looking it over. There's a warning in big letters on the sheets not to use white glue. I may experiment, though, on scrap material from the sheets. I think they advise against white glue because full strength it will cause wrinkles and bulges in the surface. Diluted, though, I think it will be much better. This has been my experience with Paper Creek paper, which is thinner.
Another point, which I didn't see on their web site (it's probably there, but I missed it) is that they have two series: Commercial Street, which are reduced-scale images designed to attach directly to the backdrop, and Jefferson Street, which are HO scale images designed to be low relief. Dr Wayne has been working with the Jefferson Street ones. I got one of each, which is perfect for my experiments!
Posts: 5,859
Threads: 175
Joined: Dec 2008
Actually, I used examples from both Jefferson Street and Commerce Street: the illustration showing the use of contact cement is on a Commerce St. flat, and others are shown in the last two photos of that same post. I have quite a few more Commerce St. flats already built, and a couple of Jefferson St. ones yet to be done. Most will be used on the still-unbuilt second level of the layout, and a couple on the layout now need to have foreground structures and scenery added to bring them to their full potential.
As for the white glue issue, I think that its use is not recommended mainly because the inks used are water-soluble. Thinning the glue may acerbate the problem, so it may be best to test somewhere inconspicuous. Spray adhesive, such as used for mounting photographs, should work, and perhaps those rub-on glue sticks, too. After the paper was mounted on the styrene, I oversprayed all of the paper with Dullcote, as I don't want to watch the images run or disappear if I'm applying scenery or ballast nearby.   
Wayne
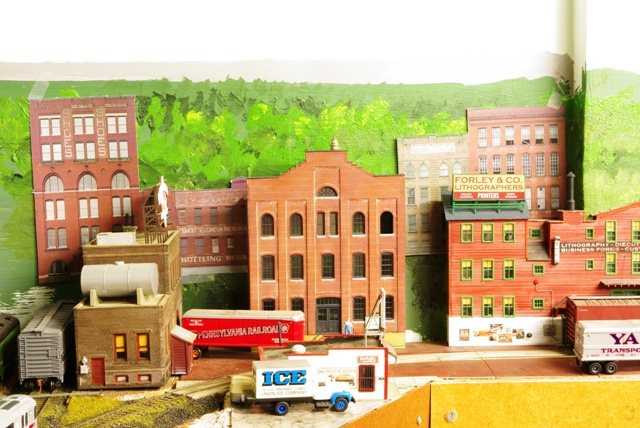
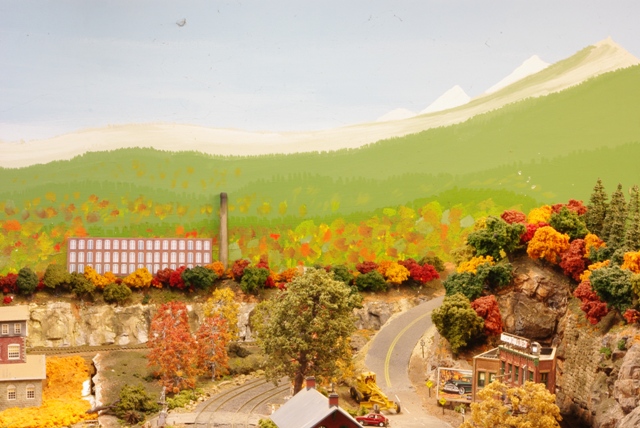
Here's a first hack with the Commerce St flats I ordered, simply cut from the sheet and tacked up with tape, the edges not yet touched up with a felt-tip:
Mill building with a Walthers N scale smokestack:

Flats behind low-relief buildings in Manhattan Transfer:

These are pretty inexpensive, and they have enormous potential.
I'm running an experiment with white glue and illustration board -- there's a lot of scrap material with just lettering and instructions on the Kingmill sheets, and I cut two rectangles from that and glued one to a piece of illustration board with full-strength white glue swabbed out to a uniform, thin coverage, and the other to illustration board with diluted white glue. The ink didn't run in either case. The paper did tend to curl when it was first applied to the white glue, both full strength and diluted, but after a minute or so I could press it down again, and it stuck just fine. In my experience, spray adhesive has just as much of a tendency to lump and wrinkle, and with it you don't get a second chance. We'll see how the test looks after it's dried overnight.
You know what Kingmill needs to bring out? Church steeples in all different styles, and in fact all kinds of neat stone and brick church buildings themselves. Check out all the Emery Gulash vids where he gets an urban church in the background!
|


![[Image: Augustphotos041.jpg]](http://i23.photobucket.com/albums/b399/doctorwayne/Various%20how-tos/Augustphotos041.jpg)
![[Image: Augustphotos042.jpg]](http://i23.photobucket.com/albums/b399/doctorwayne/Various%20how-tos/Augustphotos042.jpg)
![[Image: Augustphotos043.jpg]](http://i23.photobucket.com/albums/b399/doctorwayne/Various%20how-tos/Augustphotos043.jpg)
![[Image: Augustphotos044.jpg]](http://i23.photobucket.com/albums/b399/doctorwayne/Various%20how-tos/Augustphotos044.jpg)
![[Image: Augustphotos031.jpg]](http://i23.photobucket.com/albums/b399/doctorwayne/Various%20how-tos/Augustphotos031.jpg)
![[Image: Augustphotos033.jpg]](http://i23.photobucket.com/albums/b399/doctorwayne/Various%20how-tos/Augustphotos033.jpg)
![[Image: Augustphotos035.jpg]](http://i23.photobucket.com/albums/b399/doctorwayne/Various%20how-tos/Augustphotos035.jpg)
![[Image: Augustphotos037.jpg]](http://i23.photobucket.com/albums/b399/doctorwayne/Various%20how-tos/Augustphotos037.jpg)
![[Image: Augustphotos038.jpg]](http://i23.photobucket.com/albums/b399/doctorwayne/Various%20how-tos/Augustphotos038.jpg)
![[Image: Augustphotos039.jpg]](http://i23.photobucket.com/albums/b399/doctorwayne/Various%20how-tos/Augustphotos039.jpg)
![[Image: Augustphotos040.jpg]](http://i23.photobucket.com/albums/b399/doctorwayne/Various%20how-tos/Augustphotos040.jpg)
![[Image: KingMillEnterprisesbackgroundstructures001.jpg]](http://i23.photobucket.com/albums/b399/doctorwayne/structures%20and%20a%20few%20b%20and%20w%20photos/KingMillEnterprisesbackgroundstructures001.jpg)
![[Image: KingMillEnterprisesbackgroundstructures002.jpg]](http://i23.photobucket.com/albums/b399/doctorwayne/structures%20and%20a%20few%20b%20and%20w%20photos/KingMillEnterprisesbackgroundstructures002.jpg)
![[Image: KingMillEnterprisesbackgroundstructures005.jpg]](http://i23.photobucket.com/albums/b399/doctorwayne/structures%20and%20a%20few%20b%20and%20w%20photos/KingMillEnterprisesbackgroundstructures005.jpg)
![[Image: KingMillEnterprisesbackgroundstructures008.jpg]](http://i23.photobucket.com/albums/b399/doctorwayne/structures%20and%20a%20few%20b%20and%20w%20photos/KingMillEnterprisesbackgroundstructures008.jpg)
![[Image: KingMillEnterprisesbackgroundstructures010.jpg]](http://i23.photobucket.com/albums/b399/doctorwayne/structures%20and%20a%20few%20b%20and%20w%20photos/KingMillEnterprisesbackgroundstructures010.jpg)
 That is a great tutorial, thanks for posting it.

 ) I wore a two-stage respirator, the same as I use when airbrushing. These remove particulate matter (good for any kind of sprayed paint) and also fumes from organic solvents - lacquer thinner, alcohol, acetone, MEK, etc., etc.
 ![[Image: KingMillEnterprisesbackgroundstructures022.jpg]](http://i23.photobucket.com/albums/b399/doctorwayne/structures%20and%20a%20few%20b%20and%20w%20photos/KingMillEnterprisesbackgroundstructures022.jpg)
![[Image: KingMillEnterprisesbackgroundstructures018.jpg]](http://i23.photobucket.com/albums/b399/doctorwayne/structures%20and%20a%20few%20b%20and%20w%20photos/KingMillEnterprisesbackgroundstructures018.jpg)
![[Image: KingMillEnterprisesbackgroundstructures019.jpg]](http://i23.photobucket.com/albums/b399/doctorwayne/structures%20and%20a%20few%20b%20and%20w%20photos/KingMillEnterprisesbackgroundstructures019.jpg)
![[Image: KingMillEnterprisesbackgroundstructures020.jpg]](http://i23.photobucket.com/albums/b399/doctorwayne/structures%20and%20a%20few%20b%20and%20w%20photos/KingMillEnterprisesbackgroundstructures020.jpg)
![[Image: KingMillEnterprisesbackgroundstructures025.jpg]](http://i23.photobucket.com/albums/b399/doctorwayne/structures%20and%20a%20few%20b%20and%20w%20photos/KingMillEnterprisesbackgroundstructures025.jpg)
![[Image: KingMillEnterprisesbackgroundstructures028.jpg]](http://i23.photobucket.com/albums/b399/doctorwayne/structures%20and%20a%20few%20b%20and%20w%20photos/KingMillEnterprisesbackgroundstructures028.jpg)
![[Image: KingMillEnterprisesbackgroundstructures026.jpg]](http://i23.photobucket.com/albums/b399/doctorwayne/structures%20and%20a%20few%20b%20and%20w%20photos/KingMillEnterprisesbackgroundstructures026.jpg)
![[Image: KingMillEnterprisesbackgroundstructures029.jpg]](http://i23.photobucket.com/albums/b399/doctorwayne/structures%20and%20a%20few%20b%20and%20w%20photos/KingMillEnterprisesbackgroundstructures029.jpg)

