Posts: 61
Threads: 4
Joined: Jun 2011
Posts: 2,964
Threads: 158
Joined: Dec 2008
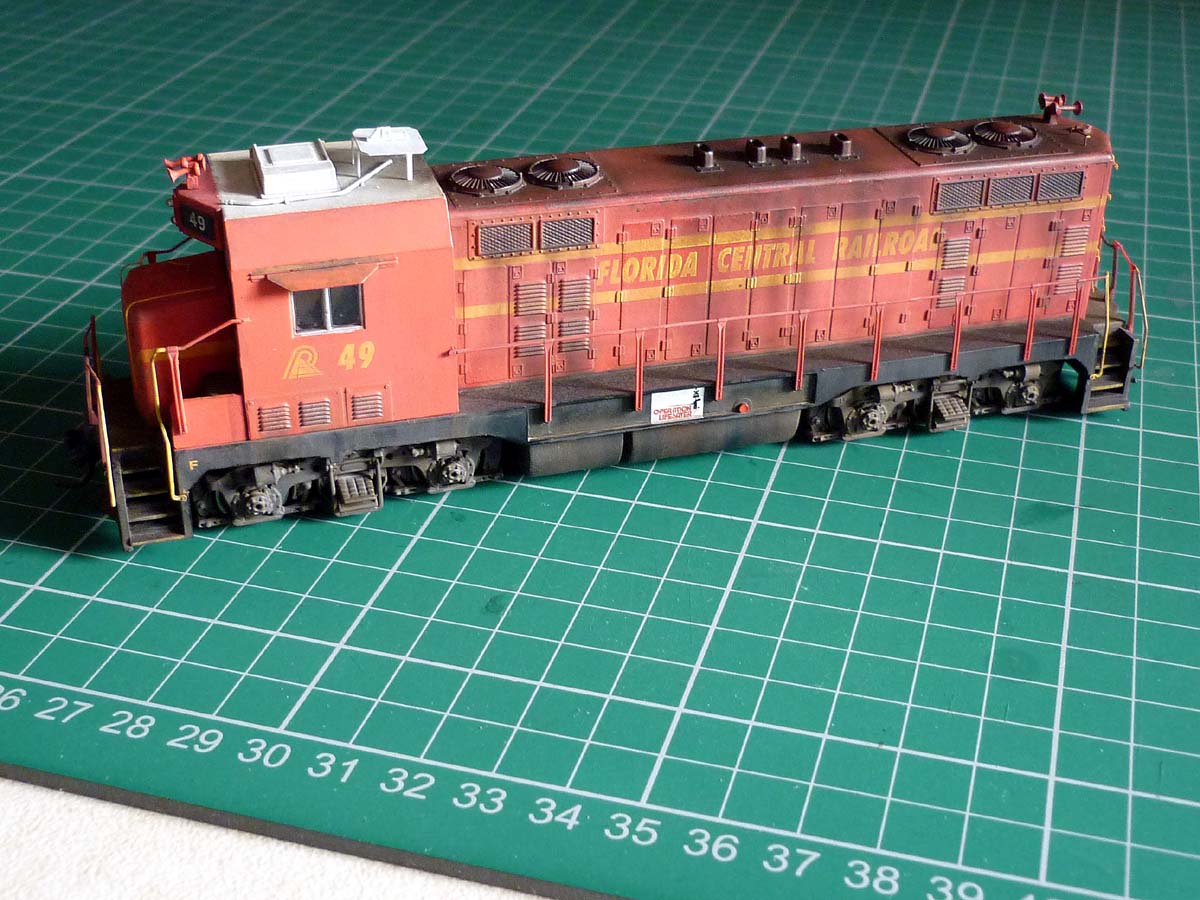
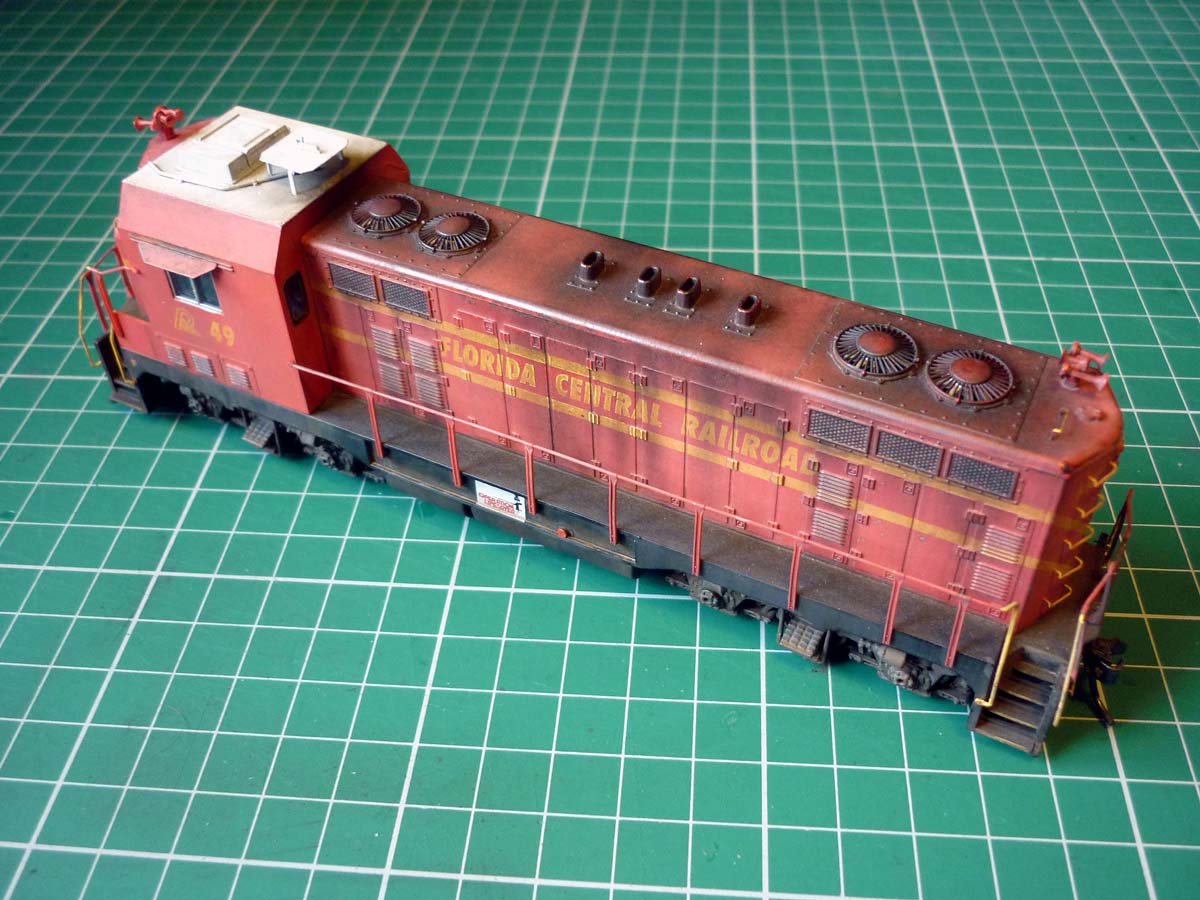
very convincing!

--
Kevin
Check out my Shapeways creations!
3-d printed items in HO/HOn3 and more!
<!-- m --><a class="postlink" href="https://www.shapeways.com/shops/kevin-s-model-train-detail-parts">https://www.shapeways.com/shops/kevin-s ... tail-parts</a><!-- m -->
Posts: 854
Threads: 52
Joined: Nov 2009
I like it, also like the extra details like the antennae platform etc.
Nice job!
Koos
Be sure to visit my model railroad blog at <!-- m --><a class="postlink" href="http://www.namrr.blogspot.com">http://www.namrr.blogspot.com</a><!-- m -->
Posts: 774
Threads: 24
Joined: Dec 2008
Very good job

. This engine really looks like it is earning its keep.
Kurt
Posts: 5,263
Threads: 195
Joined: Apr 2009
Steve Williams Wrote:All completed.....
I watched you carefully and will try to copy your skillful weathering on my FCEN CF7 some times later. Thanks a lot for the perfect inspiration.
Reinhard
Posts: 100
Threads: 8
Joined: Sep 2010
Great results! Thanks for posting your photos.
Posts: 61
Threads: 4
Joined: Jun 2011
Thanks for the positive comments fellas. It is always nice (and useful) to get feedback, especially if positive

. One has an idea about what one is trying to achieve, but there needs to be independent assessment as to how successful the attempt has or has not been. Self-delusion can be very convincing!
Once again, many thanks.
Posts: 1,682
Threads: 101
Joined: Dec 2011
Steve, you did a wonderful job on this locomotive. What did you use exactly to fade the paint in the first step? It's quite effective.
Matt
Posts: 61
Threads: 4
Joined: Jun 2011
sailormatlac Wrote:Steve, you did a wonderful job on this locomotive. What did you use exactly to fade the paint in the first step? It's quite effective.
Matt
Thanks Matt. I just gave it a wash of pale cream. It was Humbrol 121 which is 'Matt Pale stone'. Then washed most of it off with a flat brush and white spirit. it later got another wash of Precision 'Dirty Black , again with most of it removed, but it remained in the detail areas and the paleness of the red still came through the darker wash. The sooty stains were done with weathering powders.
Posts: 348
Threads: 25
Joined: Dec 2008
Hi Steve:
I go between Ft. Myers, Fl and Orlando periodically and noticed the Florida Central locos just south of Winter Haven
in an industrial area.
I was finally able to take a picture....it wasn't what I had hoped for as in previous trips they had
two locomotives out near the highway where great pictures could be taken. I will be going back in about
10 days and will try to take some more pics.
But what you see and what you are modeling are very very very close.....you are doing a great job.
dwight77
![[Image: DSC00584_zpsfb0ef6f7.jpg]](http://i1143.photobucket.com/albums/n624/dwight3477/DSC00584_zpsfb0ef6f7.jpg)
Posts: 61
Threads: 4
Joined: Jun 2011
dwight77 Wrote:Hi Steve:
I go between Ft. Myers, Fl and Orlando periodically and noticed the Florida Central locos just south of Winter Haven
in an industrial area.
I was finally able to take a picture....it wasn't what I had hoped for as in previous trips they had
two locomotives out near the highway where great pictures could be taken. I will be going back in about
10 days and will try to take some more pics.
But what you see and what you are modeling are very very very close.....you are doing a great job.
dwight77
Thank you. That's very much appreciated.
Posts: 61
Threads: 4
Joined: Jun 2011
Posts: 5,263
Threads: 195
Joined: Apr 2009
I find it more difficult to weather a dark/black engine. Your "trick" worked very well to first light it up to simulate bleached out paint and dust and than apply black from the stacks. The engine looks very good!
Reinhard
Posts: 1,682
Threads: 101
Joined: Dec 2011
faraway Wrote:I find it more difficult to weather a dark/black engine. Your "trick" worked very well to first light it up to simulate bleached out paint and dust and than apply black from the stacks. The engine looks very good!
Reinhard, that remembers me an old folk who always told me to NEVER use real black. Almost impossible to weather. What applies for steamers applies for any other balck carbody. Steve's technic works nice because you get at least 3 color hues: the original paint, the faded paint and the darkened paint. Add rust and dust and you've got a 5 tones color variation bringing life to the model. When I was doing model figure, it was habitually recommended to use 5 different tone to make a realistic flesh color.
Matt
Posts: 61
Threads: 4
Joined: Jun 2011
faraway Wrote:I find it more difficult to weather a dark/black engine. Your "trick" worked very well to first light it up to simulate bleached out paint and dust and than apply black from the stacks. The engine looks very good!
Glad you like it, thanks. I agree, they are a right pain to do. It helps if you can put a nice layer of dust or rust on the roof as well. It doesn't show too well, but there is evidence of that on the Florida Midland roof. The muck around the stacks has an element of Humbrol Metalcote to give a bit of a greasy sheen, but right by the stacks I put in weathering powder whilst still tacky to try and give a more matt sooty effect.


 . One has an idea about what one is trying to achieve, but there needs to be independent assessment as to how successful the attempt has or has not been. Self-delusion can be very convincing!
![[Image: DSC00584_zpsfb0ef6f7.jpg]](http://i1143.photobucket.com/albums/n624/dwight3477/DSC00584_zpsfb0ef6f7.jpg)