01-18-2009, 01:23 PM
I keep seeing comments about people dreading having to ballast their tracks, or, from people who've tried and not had success, what a crummy task it is. What follows is my procedure for ballasting - there are others that work as well, but this one uses tools and materials which are cheap and readily available.
The choice of ballast is up to you - I use Woodland Scenics Fine Ballast on much of my HO scale layout, but used real limestone "fines" on much of the upper level.
To ballast your track, I find that a small paper cup (such as those kitchen or bathroom Dixie cups) gives you great control over where the ballast goes. I usually move the cup along the centre of the track, tapping it as I go, to keep the ballast flowing. Less than you need is better than too much, although a soft 1/2" brush is useful for pushing around the excess or levelling what's in place. Then go back and do both roadbed shoulders in turn. Use the brush to level and re-arrange things as required, making sure to keep the ballast away from the throwbar area and the flangeways of the guardrails. When using the brush, drag it over the ballast with the handle almost parallel to the track - this gives more control over where the ballast goes. If you use the brush as you would a paintbrush, the ballast will scatter when the bent bristles flex.
To remove stray ballast from the tie tops, lightly grasp the metal ferrule of the brush between the thumb and forefingers of one hand, laying the handle across the rail tops, then, as you move the brush along the tracks, lightly and rapidly tap the brush handle with the fingers of your free hand. The stray ballast will "magically" bounce off the ties and into place between them.
If you're also ballasting turnouts, make sure to keep the level of the ballast below the tops of the ties, and don't place any ballast between the ties surrounding the throw bar.
To avoid gluing the points to the ties, place two drops of plastic-compatible oil atop each tie over which the point rails move, one next to each point rail, then flip the points back-and-forth several times to spread the oil. Parking the points in mid-throw will also help to ensure that they don't get glued to the stock rails, either.
You can mist the contoured ballast using either water and alcohol, or water with a few drops of dish detergent added. Either should work, although I prefer the detergent, as it's cheaper and works just as well. (I save my alcohol - not the denatured kind - for a nice drink after I've completed the ballasting.) Use a sprayer that will allow you to spray a fine mist. To avoid having the force of the spray dislodge loose ballast all over the landscape, aim the first few spritzes upward, letting the droplets fall like rain. Once the surface has been wetted, you'll be able to spray it directly. Make sure to thoroughly wet the ballast right down to the base. Not doing so is probably the main reason that many people have trouble getting a decent-looking and durable ballasting job.
To apply the glue/water mixture (white glue works just as well as matte medium and is way cheaper, especially if you buy it by the gallon. Those who claim that white glue dries shiny are not using sufficient wetting agent. The proportions should be about 50/50 water/glue, although a little heavier on the water will still work well). To apply the glue mixture, don't ruin a perfectly good spray bottle (and while doing so cover your rails and anything else nearby in glue, too): instead, use a dropper. An eyedropper will work, but a plastic squeeze bottle with a small nozzle will be much faster. Simply move along the track, as quickly as necessary, allowing the glue mixture to drip onto the ballast (or ties - you won't see it once it dries). You should be able to see it being drawn into the ballast, due to the wetting agent. I usually do the area between the rails first, then the sides in turn. The glue mixture will spread throughout the ballast and down to the roadbed, so make sure to apply enough to allow this to occur. The result will be ballast bonded solidly in place, yet with the appearance of loose, individual pieces.
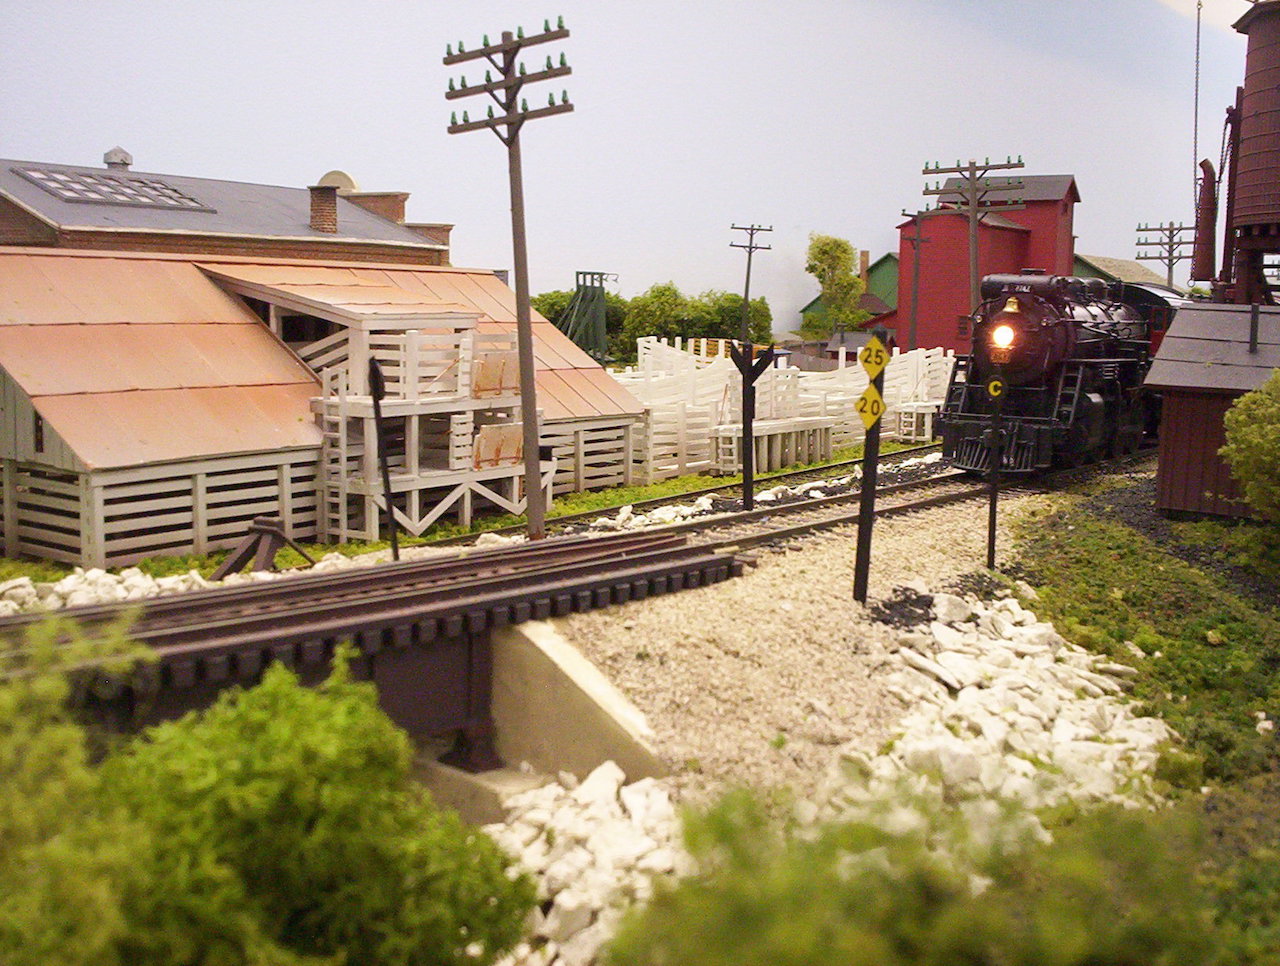
Where I have scenic areas adjacent to, but below the level of the track, I also apply the basic ground cover, which also helps to soak up the excess glue that spreads out from the ballast line. If you're applying ballast (or ground cover) to steeply sloped areas, use a suitable-width brush to apply undiluted white glue to the slope before applying the ballast or ground foam, which will help to hold everything in place while you apply the wetting agent and the dilute white glue (these steps help to bond the top layers of material to those in contact with the unthinned glue, and also help to draw that glue up into the top layers). In the photo below, the ballast, sub-ballast, and rock fill, along with the trackside weeds, was all applied and secured in the same step.
The pictures below show the sequence of operations to ballast your track.
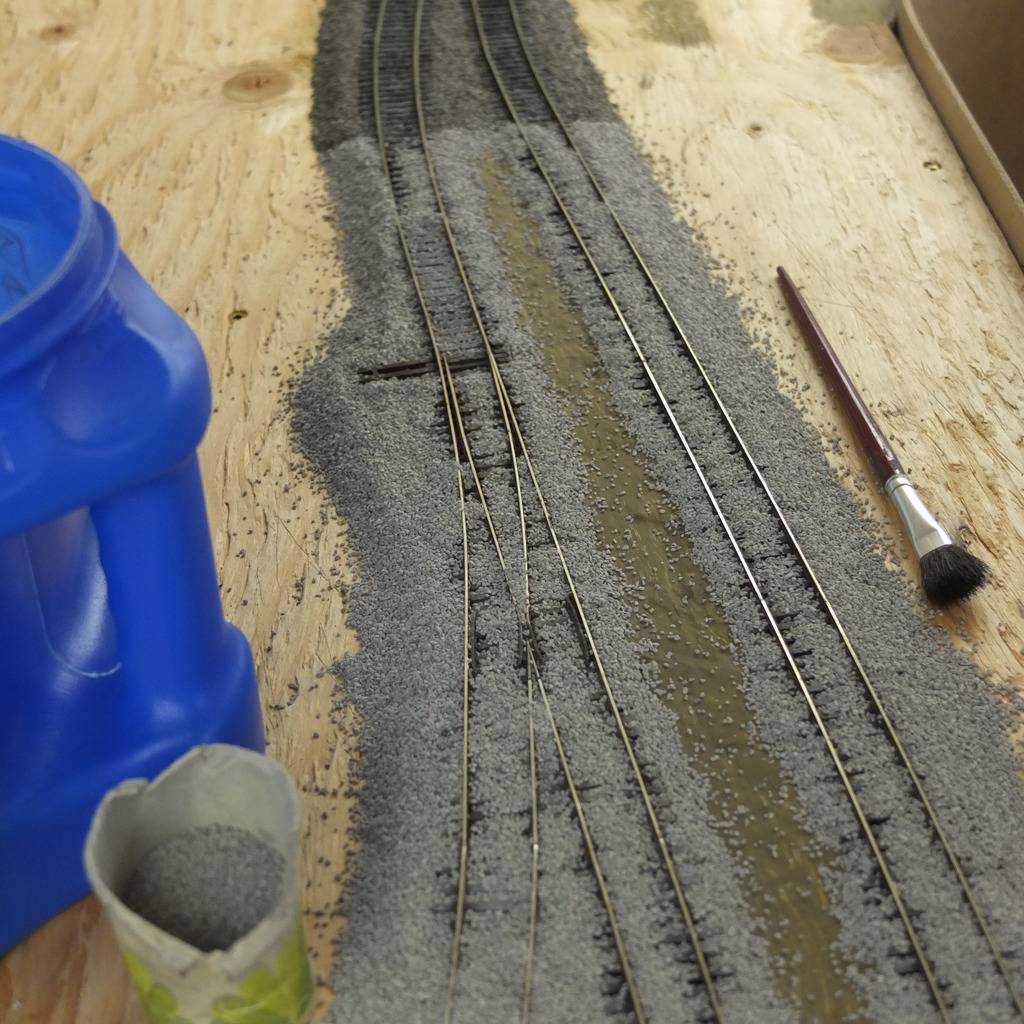
First, add the ballast. Here it's been generously applied from a paper cup...
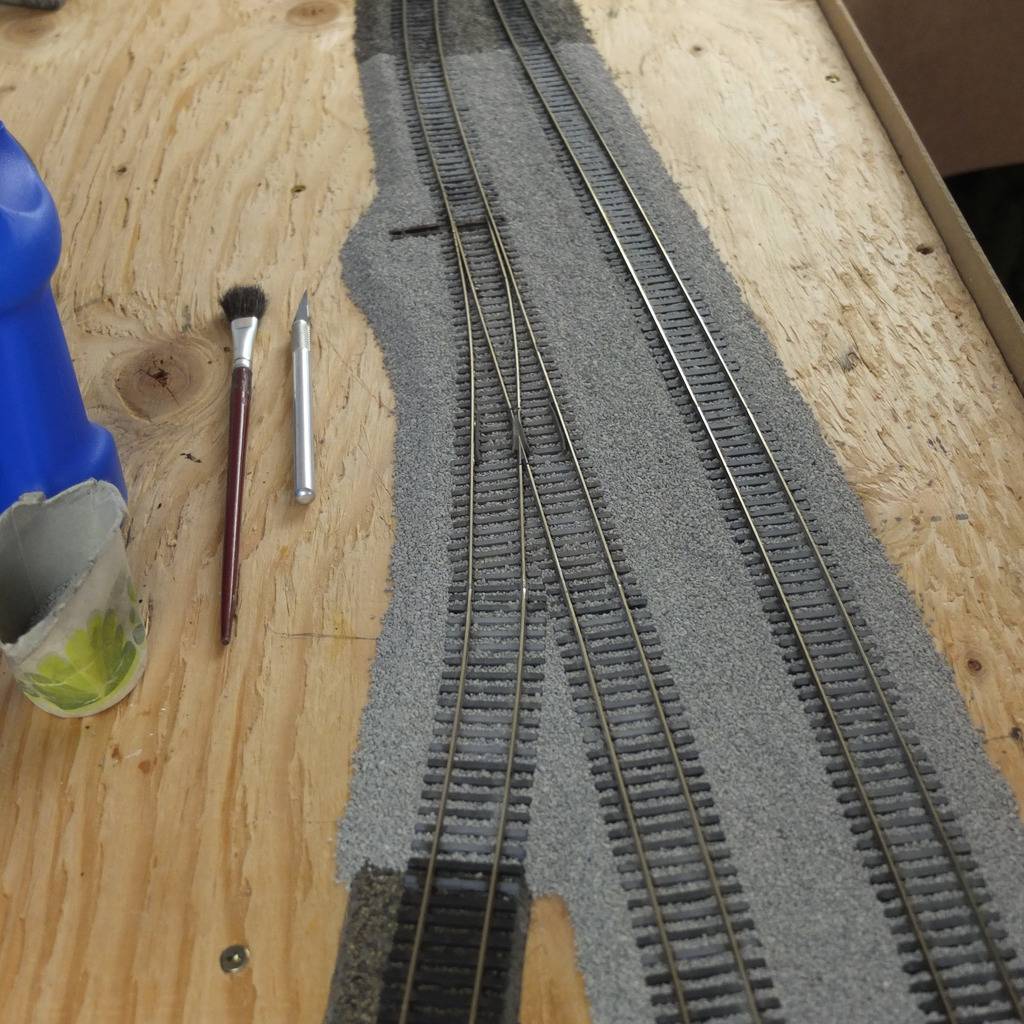
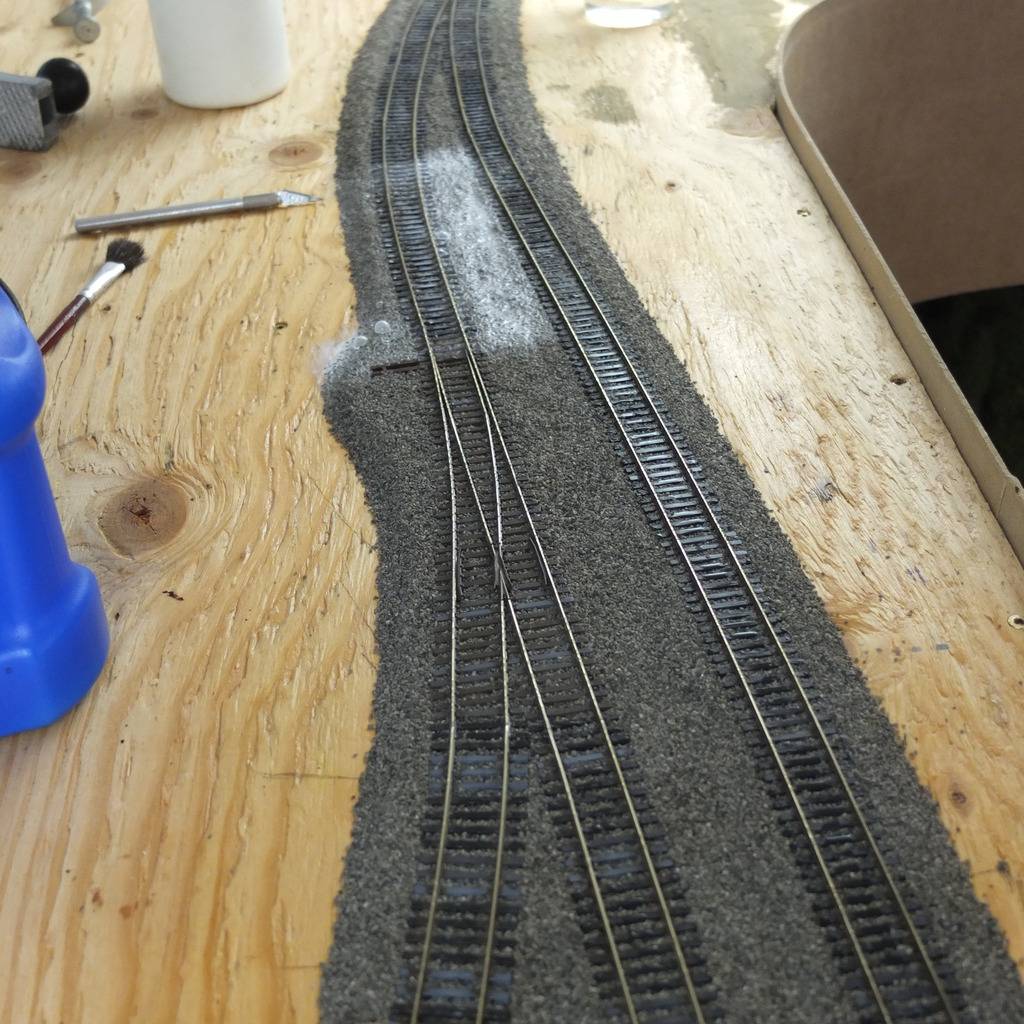
Here's the ballast after it's been groomed....
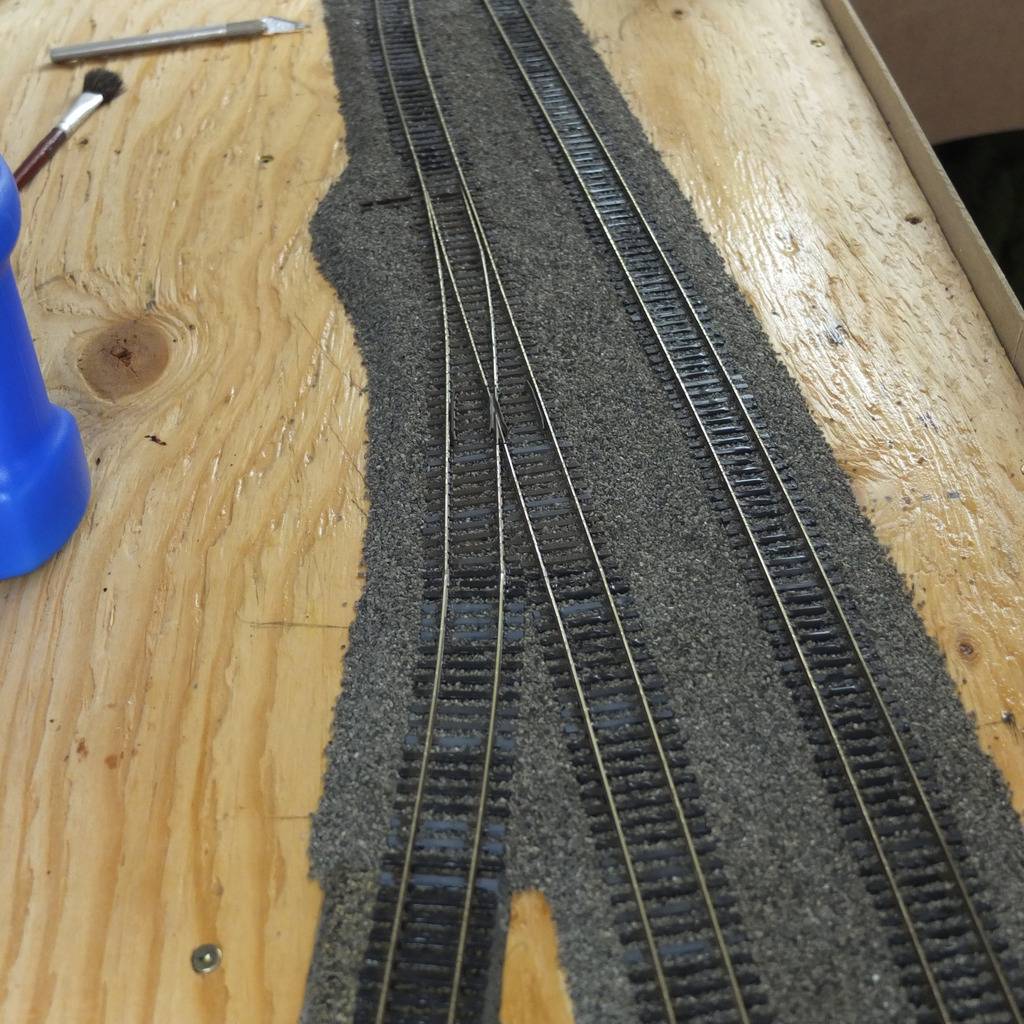
The area has been sprayed liberally with wet water.....
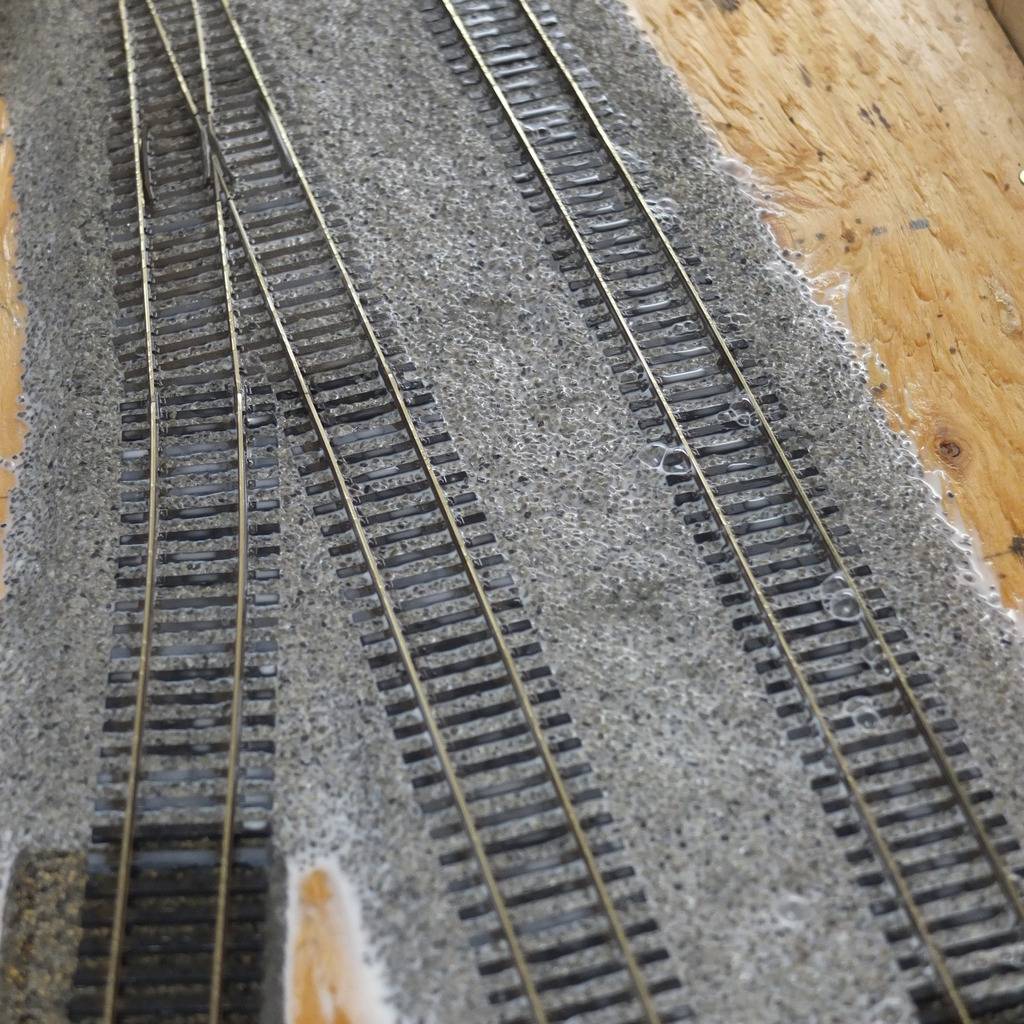
Don't be stingy with the glue/water mixture either:
When it's dry (it may take several days), the ballast will appear loose, but will withstand most non-contact vacuuming...
Wayne
The choice of ballast is up to you - I use Woodland Scenics Fine Ballast on much of my HO scale layout, but used real limestone "fines" on much of the upper level.
To ballast your track, I find that a small paper cup (such as those kitchen or bathroom Dixie cups) gives you great control over where the ballast goes. I usually move the cup along the centre of the track, tapping it as I go, to keep the ballast flowing. Less than you need is better than too much, although a soft 1/2" brush is useful for pushing around the excess or levelling what's in place. Then go back and do both roadbed shoulders in turn. Use the brush to level and re-arrange things as required, making sure to keep the ballast away from the throwbar area and the flangeways of the guardrails. When using the brush, drag it over the ballast with the handle almost parallel to the track - this gives more control over where the ballast goes. If you use the brush as you would a paintbrush, the ballast will scatter when the bent bristles flex.
To remove stray ballast from the tie tops, lightly grasp the metal ferrule of the brush between the thumb and forefingers of one hand, laying the handle across the rail tops, then, as you move the brush along the tracks, lightly and rapidly tap the brush handle with the fingers of your free hand. The stray ballast will "magically" bounce off the ties and into place between them.
If you're also ballasting turnouts, make sure to keep the level of the ballast below the tops of the ties, and don't place any ballast between the ties surrounding the throw bar.
To avoid gluing the points to the ties, place two drops of plastic-compatible oil atop each tie over which the point rails move, one next to each point rail, then flip the points back-and-forth several times to spread the oil. Parking the points in mid-throw will also help to ensure that they don't get glued to the stock rails, either.
You can mist the contoured ballast using either water and alcohol, or water with a few drops of dish detergent added. Either should work, although I prefer the detergent, as it's cheaper and works just as well. (I save my alcohol - not the denatured kind - for a nice drink after I've completed the ballasting.)
 Use a sprayer that will allow you to spray a fine mist. To avoid having the force of the spray dislodge loose ballast all over the landscape, aim the first few spritzes upward, letting the droplets fall like rain. Once the surface has been wetted, you'll be able to spray it directly. Make sure to thoroughly wet the ballast right down to the base. Not doing so is probably the main reason that many people have trouble getting a decent-looking and durable ballasting job.
 To apply the glue/water mixture (white glue works just as well as matte medium and is way cheaper, especially if you buy it by the gallon. Those who claim that white glue dries shiny are not using sufficient wetting agent. The proportions should be about 50/50 water/glue, although a little heavier on the water will still work well). To apply the glue mixture, don't ruin a perfectly good spray bottle (and while doing so cover your rails and anything else nearby in glue, too): instead, use a dropper. An eyedropper will work, but a plastic squeeze bottle with a small nozzle will be much faster. Simply move along the track, as quickly as necessary, allowing the glue mixture to drip onto the ballast (or ties - you won't see it once it dries). You should be able to see it being drawn into the ballast, due to the wetting agent. I usually do the area between the rails first, then the sides in turn. The glue mixture will spread throughout the ballast and down to the roadbed, so make sure to apply enough to allow this to occur. The result will be ballast bonded solidly in place, yet with the appearance of loose, individual pieces.
Where I have scenic areas adjacent to, but below the level of the track, I also apply the basic ground cover, which also helps to soak up the excess glue that spreads out from the ballast line. If you're applying ballast (or ground cover) to steeply sloped areas, use a suitable-width brush to apply undiluted white glue to the slope before applying the ballast or ground foam, which will help to hold everything in place while you apply the wetting agent and the dilute white glue (these steps help to bond the top layers of material to those in contact with the unthinned glue, and also help to draw that glue up into the top layers). In the photo below, the ballast, sub-ballast, and rock fill, along with the trackside weeds, was all applied and secured in the same step.
The pictures below show the sequence of operations to ballast your track.
First, add the ballast. Here it's been generously applied from a paper cup...
Here's the ballast after it's been groomed....
The area has been sprayed liberally with wet water.....
Don't be stingy with the glue/water mixture either:
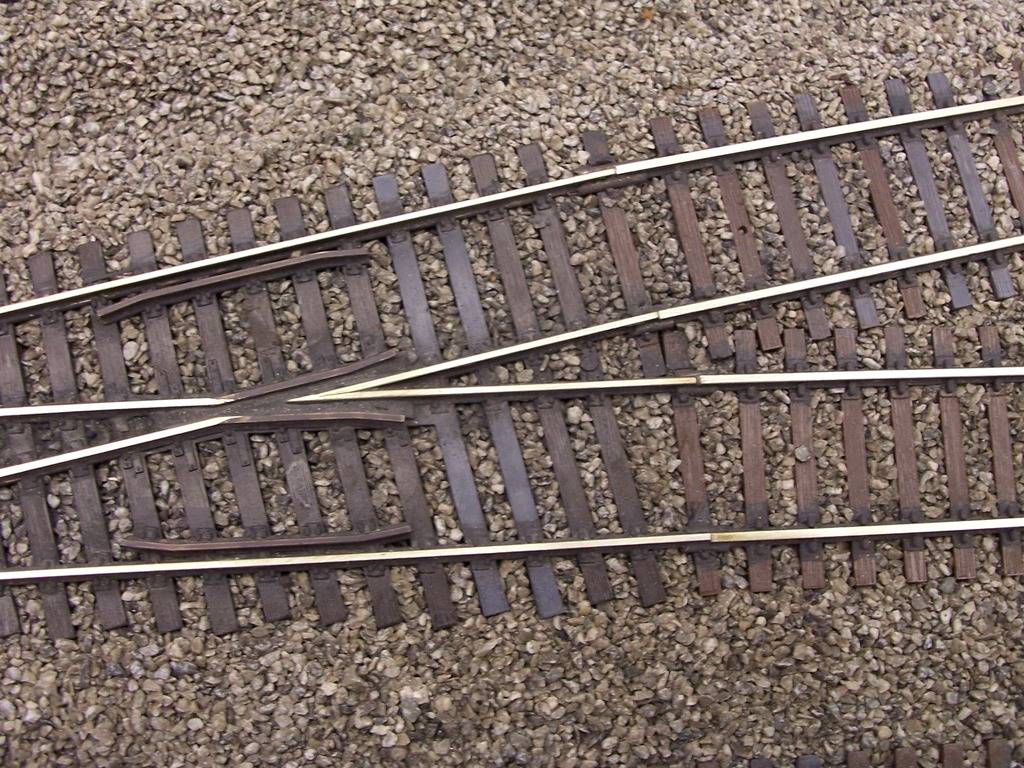
When it's dry (it may take several days), the ballast will appear loose, but will withstand most non-contact vacuuming...
Wayne


