Posts: 2,724
Threads: 160
Joined: Dec 2008
Now for part 2.
For part two, I will be getting this years Christmas train ready for it's round and round trip under the tree.
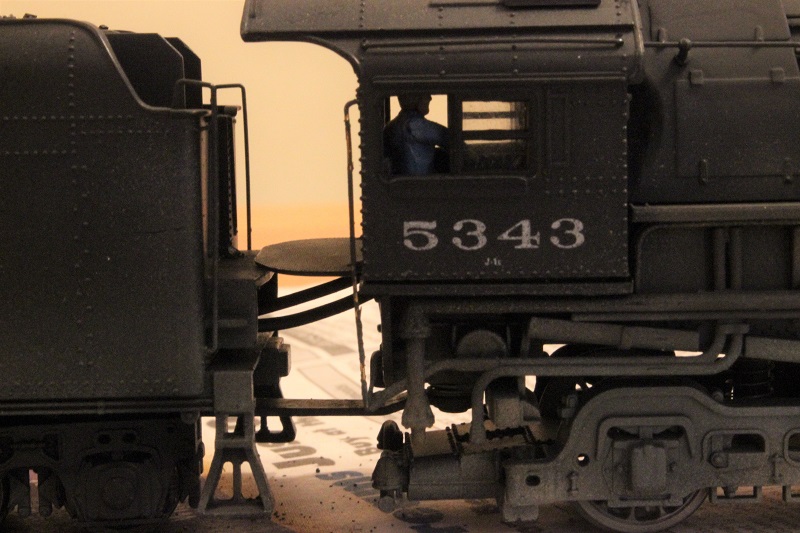
This years power will be a BLI New York Central Hudson. I bartered Toptrain out of this one over Thanksgiving, he got it as a parts engine from a hobby shop for next to nothing. The sound unit, DCC equipment, and smoke unit had been removed in order to repair another one by the hobby shop where he got it from. So now she is a silent, straight DC unit with out any of the BLI goodies.
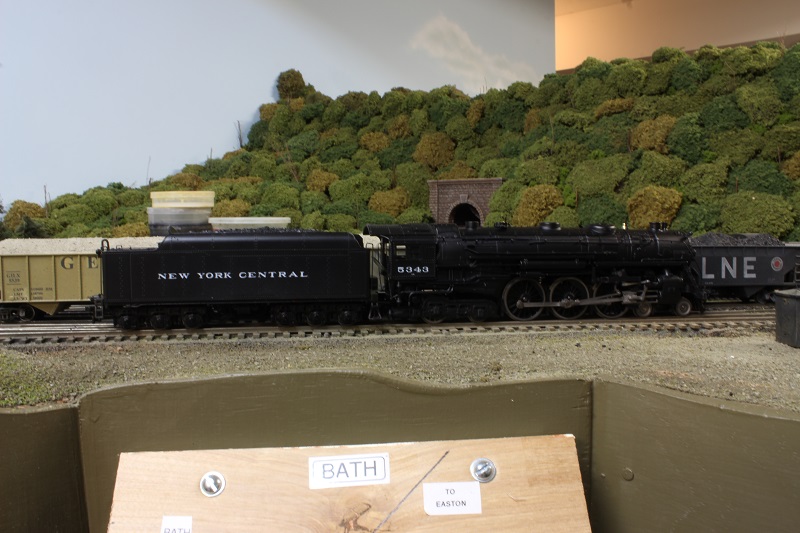
I gave the J-1 a test run this morning and discovered a few issues with it.
-First off she had a terrible squeak coming from her drivers, some oil took care of that.
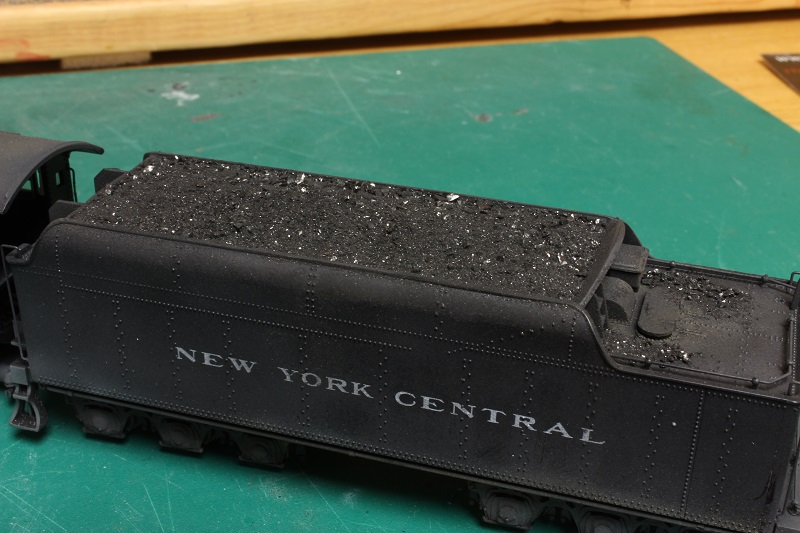
-The plastic coal load looks like it was modeled after one found on O-gauge Lionel tender, that will have to go.
-The tenders pick-up for power was removed with the other guts when she was parted out. This leaves only the drivers grabbing power from the rail. This system is lackluster at best. she stalled repeatedly on good clean track, where other engines with dirty wheels ran without problems.
-Both the headlight and backup lighting were also removed, this will have to be replaced.
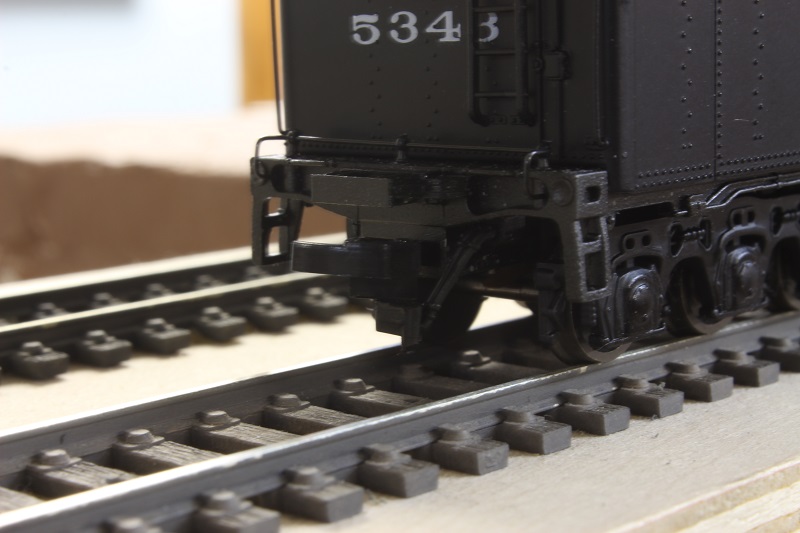
-And she had a HORN HOOK on the tender! That will have to go.
- A crew may be in order as well as some weathering.
Then I will also get the passenger equipment ready.
My other car is a locomotive, ARHS restoration crew
Posts: 2,724
Threads: 160
Joined: Dec 2008
To get this one off the ground I started on the tender wiring. This includes the lighting, pickup, and loco connection. It will also get some weight, as it's a little on the light side. So, out came the soldering iron and I got to it. This shot shows the bi-pin connector that will become the connection between the tender and engine.
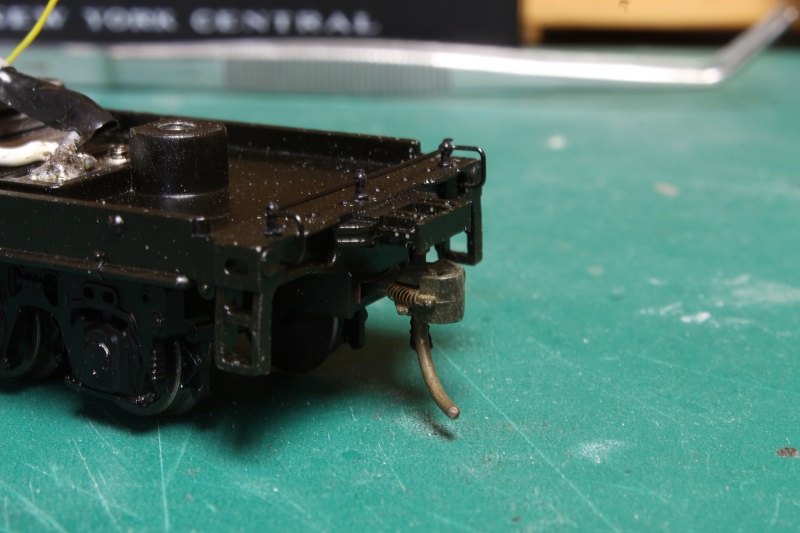
It was soldered to the integrated pickup pads on the tender frame, along with a grain of wheat bulb and diode for directional lighting. I did check of the proper polarity before I soldered it in place. 
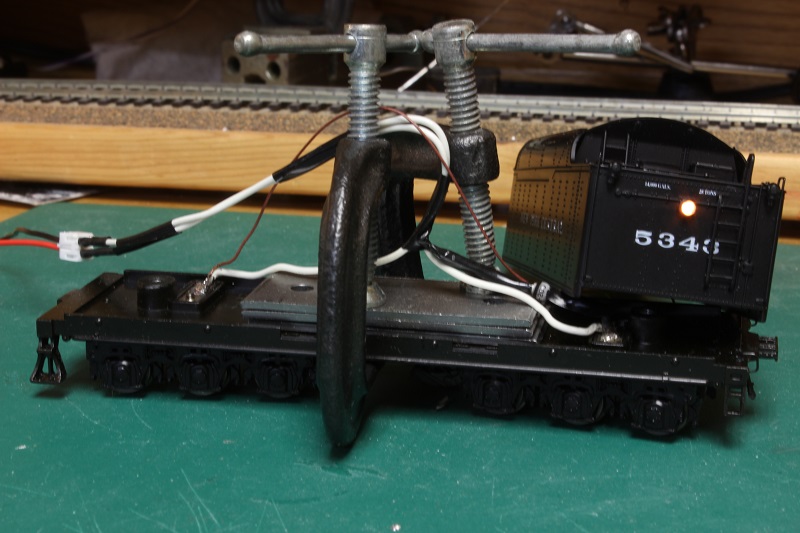
Although I don't see this engine running in reverse for long periods of time, I did install a small section of brass tube to act as a heat sink. This will keep the bulb from getting too hot and melting the plastic, and it also helps to funnel the light to where it needs to go.
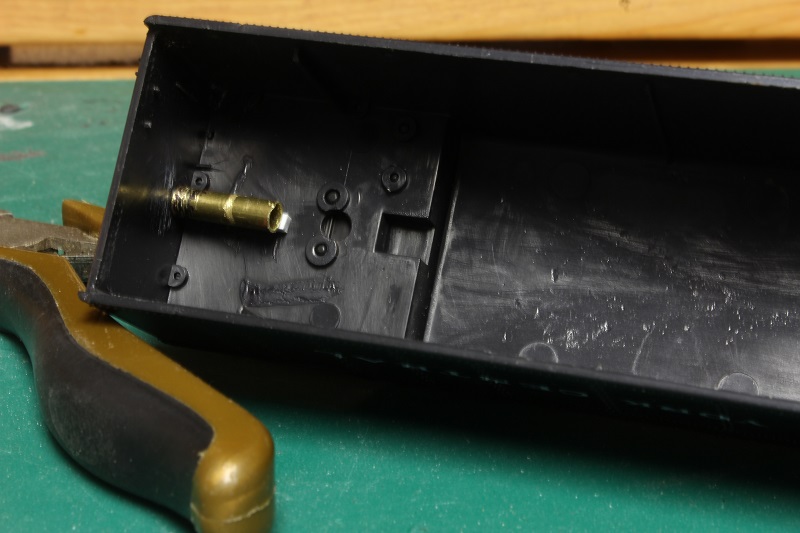
A few flat pieces of steel were glued to the tender floor to bring up the weight up to something a little more reasonable. I also checked the back up light while I had the chance. The clamps will have to stay in place until the glue dries.
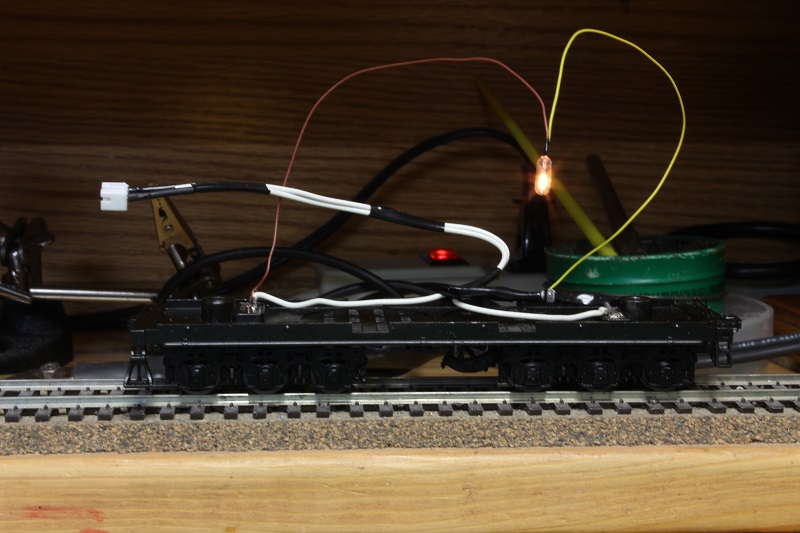
A kadee #5 was installed on the rear end and the horn hook was sent to the blast furnace. I will have to wait till I can remove the clamps to check the height and operation of the knuckle. All those little white specks are some kind of overspray. They only show up on the tender frame, and will have to be dealt with.
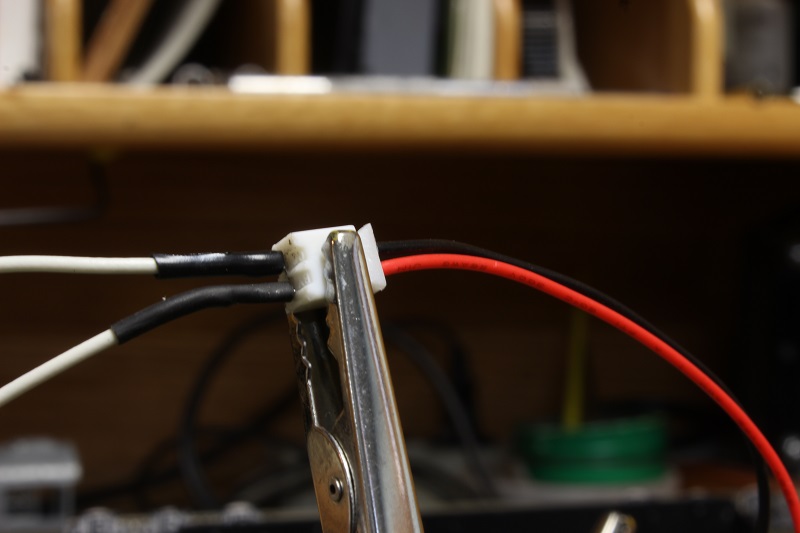
My other car is a locomotive, ARHS restoration crew
Posts: 2,724
Threads: 160
Joined: Dec 2008
With that out of the way I took apart the engine. I found a large cavity where the smoke generator must have been located. This gave me an excellent spot for the LED, resistor, and diode. I will work out the polarity when I am ready to install the boiler.
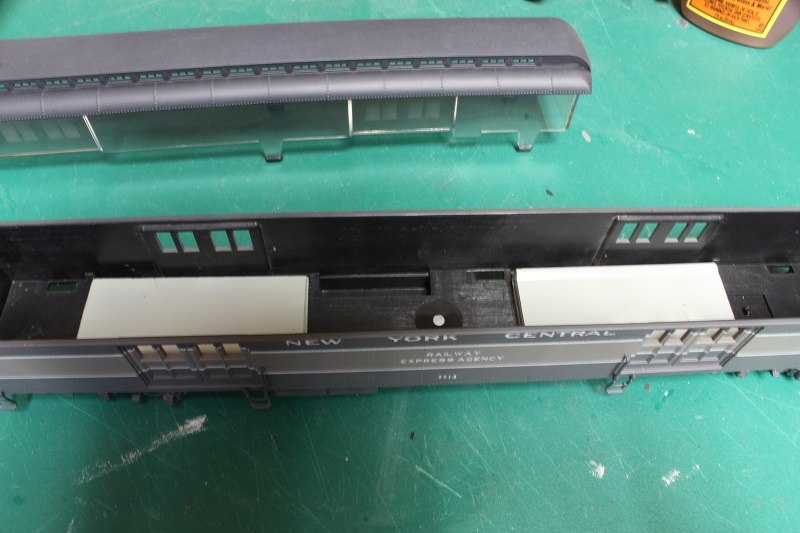
Then it was onto the varnish, I believe they are a set of AHM cars. I don't know how accurate they are the NYC but, it's a Christmas train.
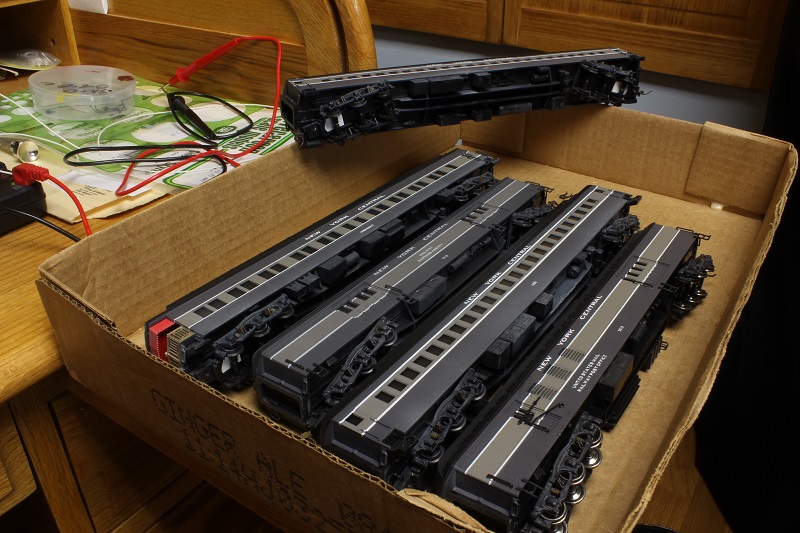
I have had these six cars for years and they have never tracked right. I re-gauged all the wheels and checked the coupler height, so now time to add some weight.
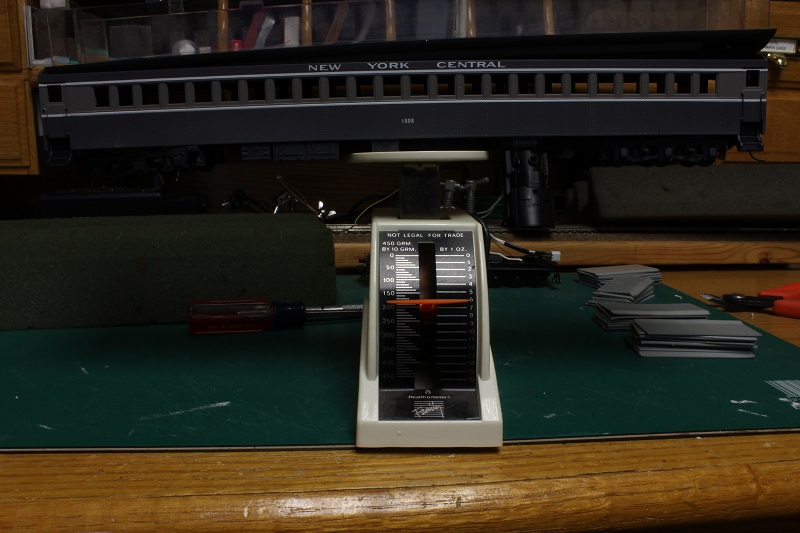
With an extra 3 ounces added to each car I have doubled the heft of each car. This is still a little more than an ounce short of what the NMRA recommends, but I am happy with that. "I even got a little fish eye effect on that one"
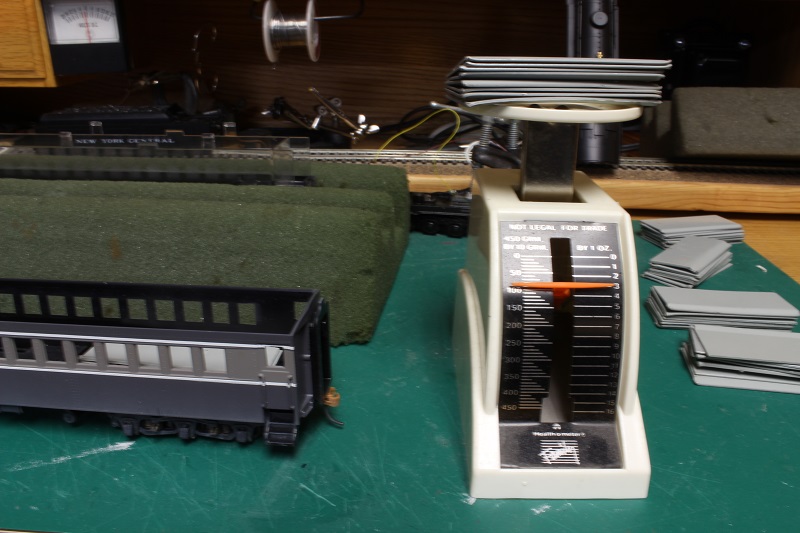
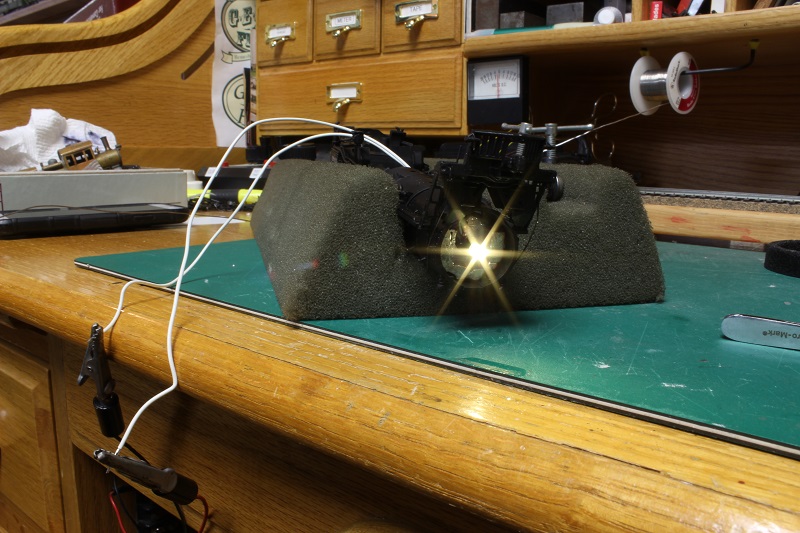
My other car is a locomotive, ARHS restoration crew
Posts: 2,724
Threads: 160
Joined: Dec 2008
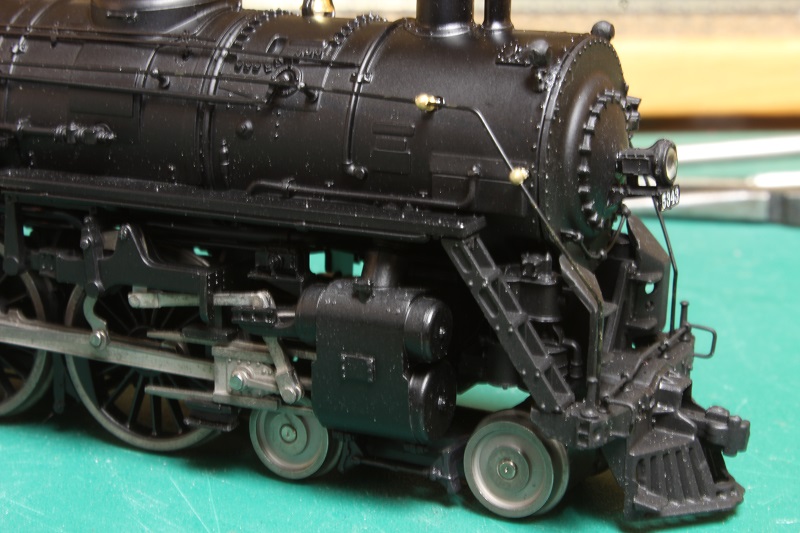
This afternoon's progress was to reassemble, test and weather the J-1. As I was putting it all back together something caught my eye,,, two of the handrail stations were missing!!! I matched them the best I could with what I had. Once painted I doubt anyone would notice.
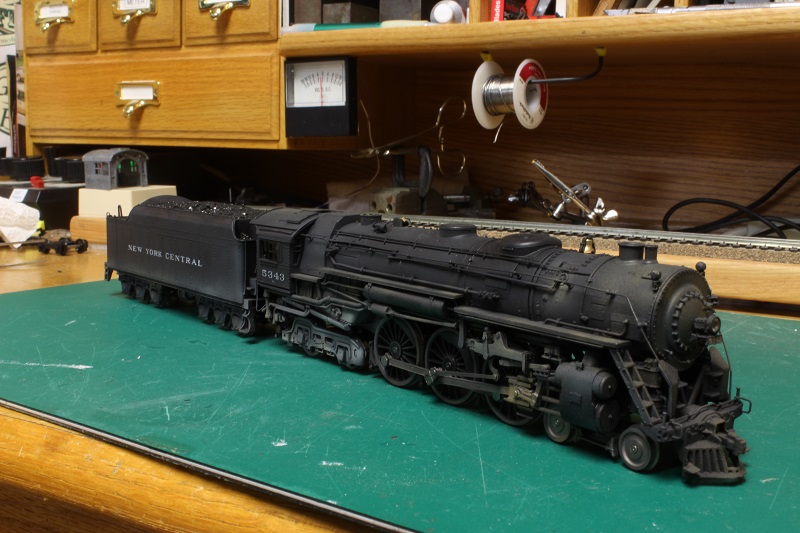
She was then test run, coupler height checked, and double-checked for proper headlight polarity. Now that I am happy with all that, she is off to the paint shop for some weathering.
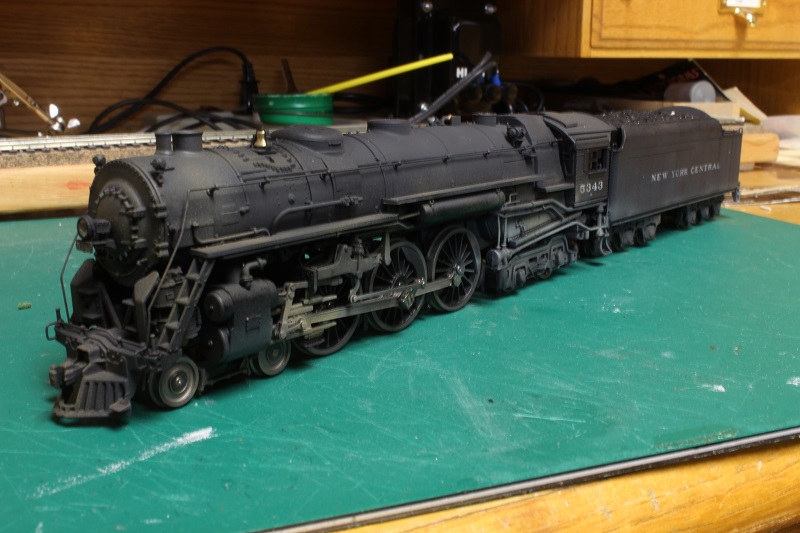
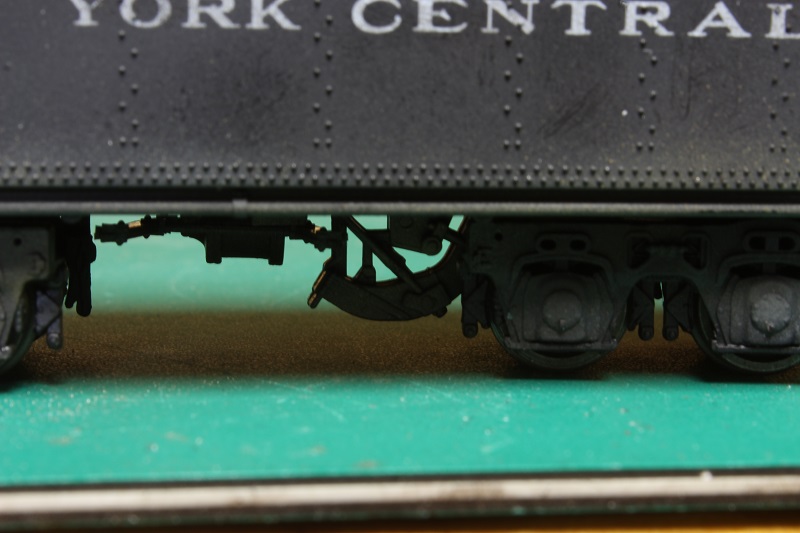
I looked at as many color prototype photos as I could find during my breakfast and noticed a few similarities in the weathering. Most had a dull, dusty appearance. The ones with water scoops had messy tender trucks, the ones with out had almost shiny ones. and they all seemed to suffer from a steam leak near where the throttle linkage entered the boiler. The amount of sand deposits varied with each engine. I tried to keep this in mind while I applied the various weathering colors. I used my stockpile of Poly-Scale water based paints for this part of the project.
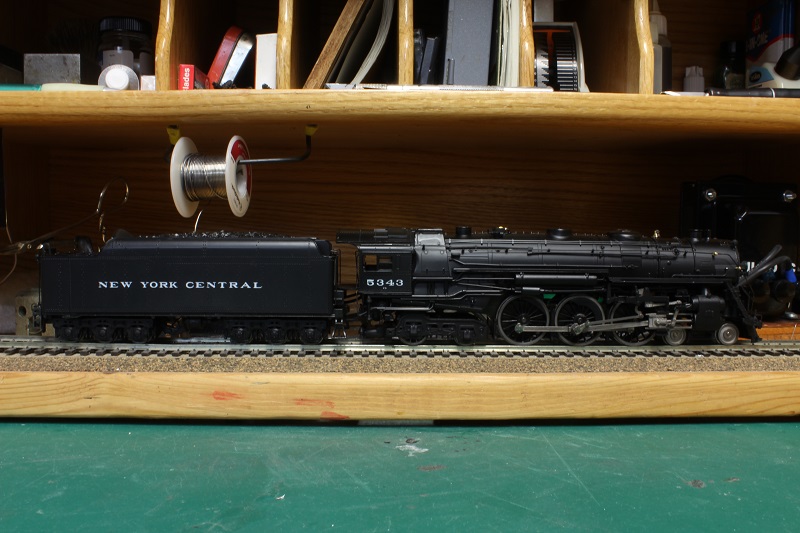
I tried to highlight the water scoop so it would not be lost in the shadows under the tender.
My other car is a locomotive, ARHS restoration crew
Posts: 5,859
Threads: 175
Joined: Dec 2008
That looks good, Steve, and it doesn't hurt that it's one of my all-time favourite steam locomotives.  
Wayne
Posts: 2,724
Threads: 160
Joined: Dec 2008
Thanks Doc, I've always been a fan of your work.
I forgot to post a shot of the coal load yesterday.  But, I can fix that now. 
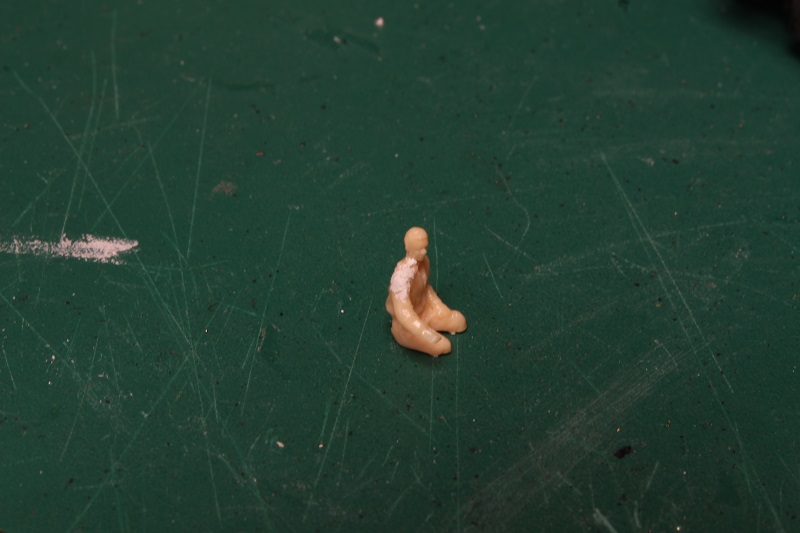
Got home from work a little early today, so I removed the cab and did some highlights to the valves, gauges, and sight glasses. I also chopped of the legs of a standing fireman and glued him into his seat. And EUUUU, do I need to clean my lens.
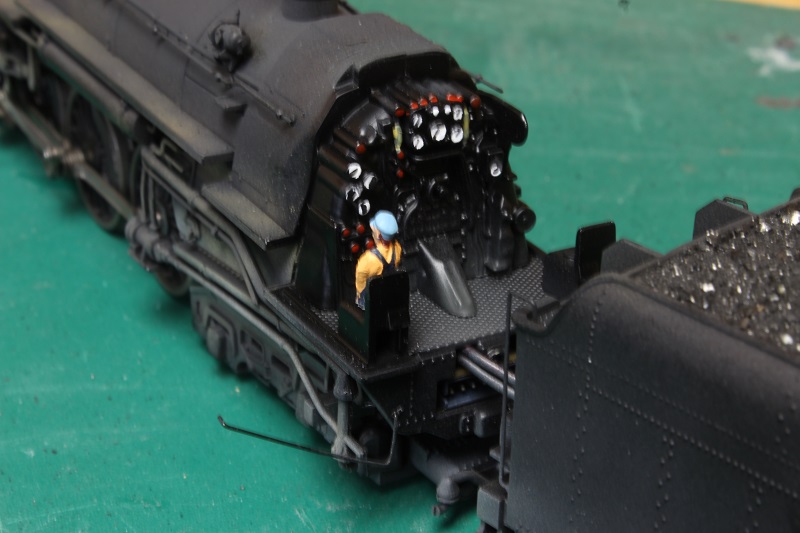
All right, with than done I started on the engineer. He also had his legs removed and his arm reattached. He will also need a hat :wait:
I must be sensitive to the needs of disabled workers, I just realized that most of my cabs are manned by amputees.
My other car is a locomotive, ARHS restoration crew
Posts: 5,859
Threads: 175
Joined: Dec 2008
e-paw Wrote:....I just realized that most of my cabs are manned by amputees.
Yeah, working on the railroad, especially during the steam era, was a dangerous job. Most workplace amputees, if they were lucky, got jobs as watchmen or as guards at level crossings. On my road, short legs or no legs rate a seat in the cab, and it's not a problem even if you're on the large side for HO, as we can cut you down to size....
![[Image: NewcrewsfortheGrandValley010.jpg]](http://i23.photobucket.com/albums/b399/doctorwayne/Get%20a%20load%20of%20this/NewcrewsfortheGrandValley010.jpg)
....and what's left is the start of a gondola load for the rendering plant:
![[Image: NewcrewsfortheGrandValley005.jpg]](http://i23.photobucket.com/albums/b399/doctorwayne/Get%20a%20load%20of%20this/NewcrewsfortheGrandValley005.jpg)
Even the bus company in Dunnville employs the disabled as drivers, and apparently most stores are handicap accessible:
![[Image: Layoutviewsetc1-033B.jpg]](http://i23.photobucket.com/albums/b399/doctorwayne/Get%20a%20load%20of%20this/Layoutviewsetc1-033B.jpg)
I suppose, too, that the local shoe stores aren't doing too well, and it's difficult to know how well this lobotomised driver knows the rules of the road...
![[Image: Layoutviewsetc1-032B.jpg]](http://i23.photobucket.com/albums/b399/doctorwayne/Get%20a%20load%20of%20this/Layoutviewsetc1-032B.jpg)
...but one thing for sure, with no foot on the gas, he - can't - drive - 55!
Wayne
Posts: 2,724
Threads: 160
Joined: Dec 2008
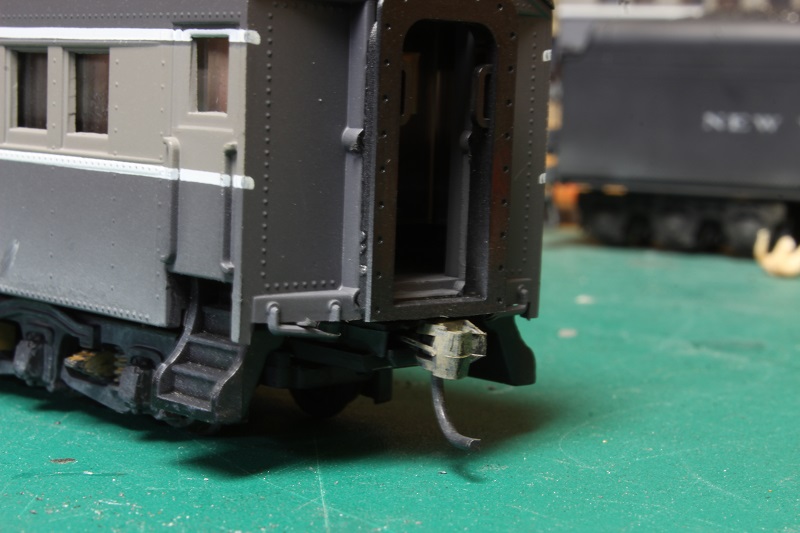
On to the next thing to do. I adjusted the height of the couplers to fit the NMRA gauge, but this caused another problem. Some of the couplers have very little clearance between them and the diaphragms. This causes the coupler to snag and derail the car in turns. I kept the couplers as a truck mounted, Talgo type in order to be able to negotiate the tight turns under the Christmas tree. Body mounting them would solve this problem, but that is not an option here.
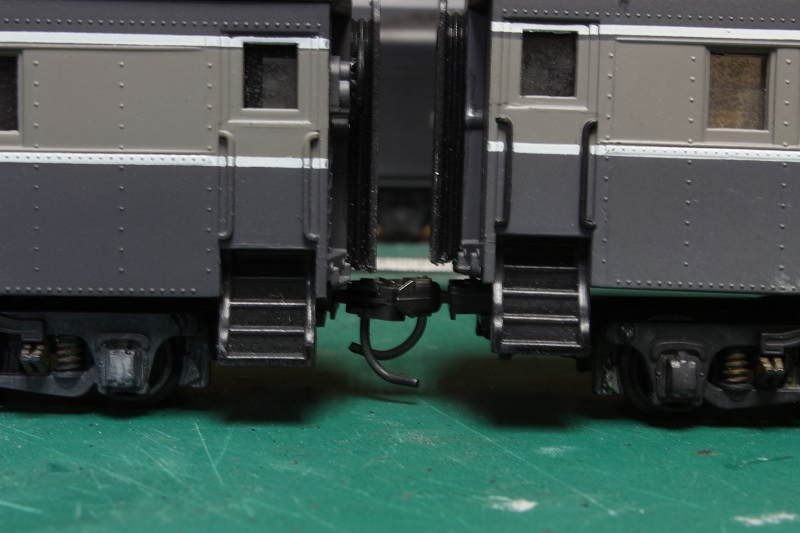
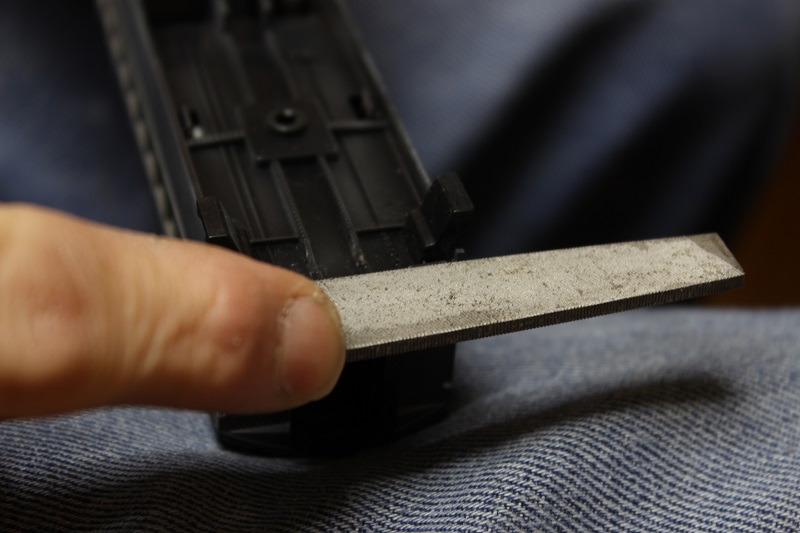
So I filed down the bottom edge of the diaphragms to create some clearance.
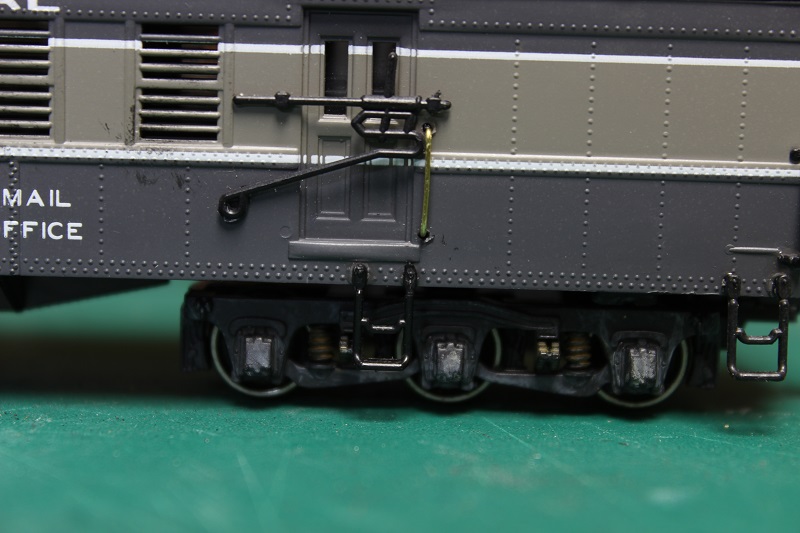
Works good now.
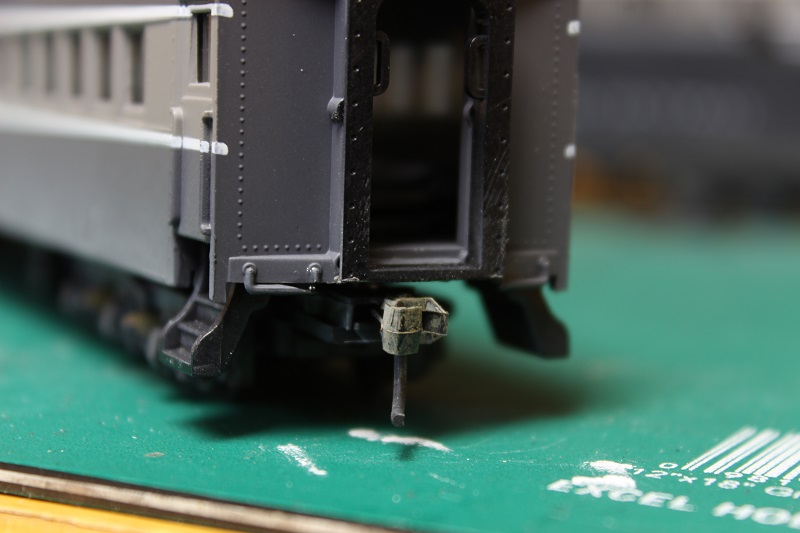
I also replaced a missing grab iron, it will get painted in a bit.
The last thing for today was to paint some of the molded on hand rails to make them stand out, and look a little less toy like. Here's a before and after pic.
My other car is a locomotive, ARHS restoration crew
Posts: 1,548
Threads: 99
Joined: Jan 2012
I'm really enjoying the little details on all your l.p. s 
To err is human, to blame it on somebody else shows management potential.
Posts: 305
Threads: 13
Joined: Sep 2013
Gee I like that weathering, I keep coming back for another look. 
Cheers the :mrgreen: Bear
"One difference between pessimists and optimists is that while pessimists are more often right, optimists have far more fun."
Posts: 2,724
Threads: 160
Joined: Dec 2008
Thanks all...
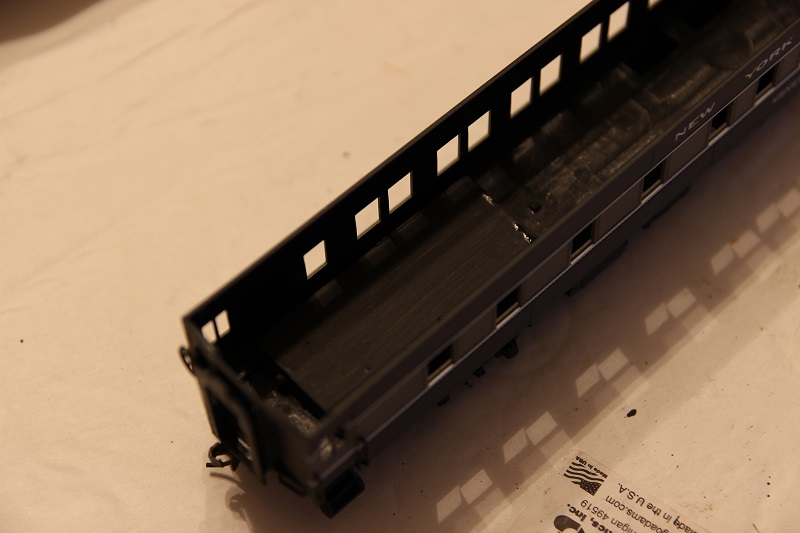
Yesterday I squeezed in a bit of modeling time, I started off by painting the weights black to make them less noticeable. I used some cheepo craft paint for this.
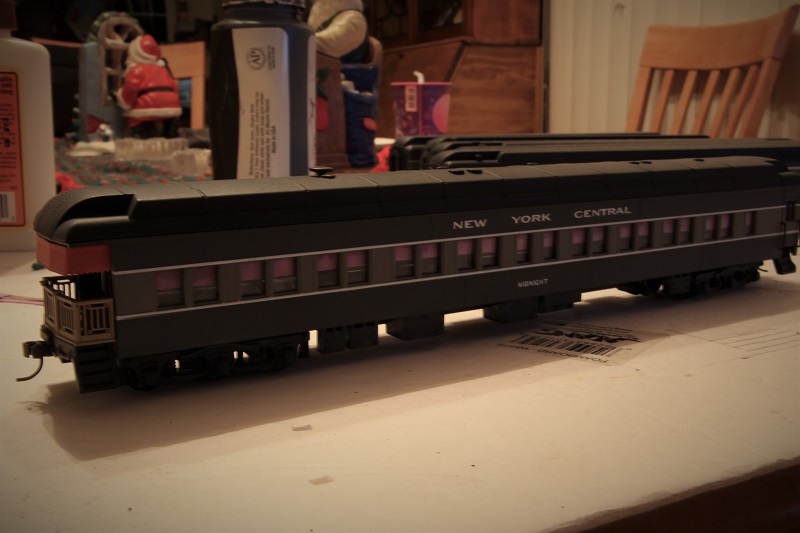
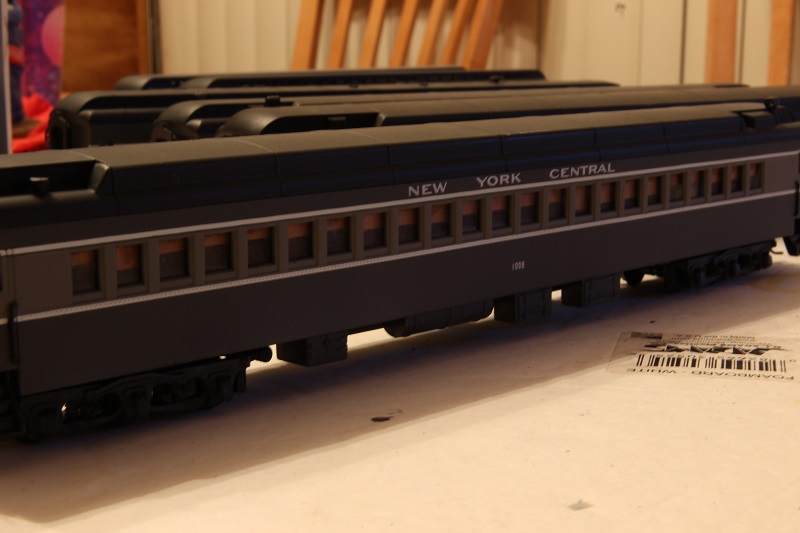
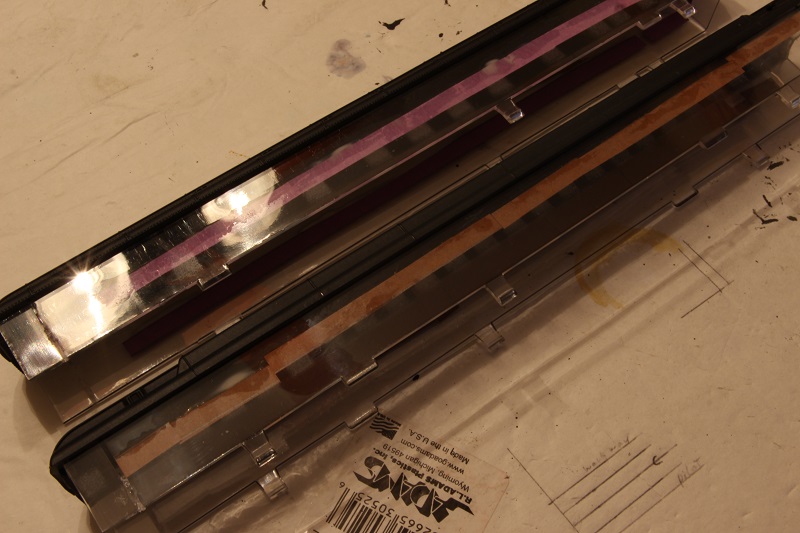
I also added some window shades by cutting some strips of colored paper and gluing them to the insides of the window glass. I used a basic brown color for the coaches, white for the RPO, and a purple/blue for the business car. Basic white (school glue) was used to hold them in place.
My other car is a locomotive, ARHS restoration crew
Posts: 2,724
Threads: 160
Joined: Dec 2008
Well last week I was sick as a dog and hurt my back. By the time I would get home from work, doing anything other than sitting with a heating pad and lots of medication was out of the question. So neither of my challenge projects were touched.
Today I was well enough to finish my Part 2. The engineer was painted and installed, cab closed up and under the tree she went.
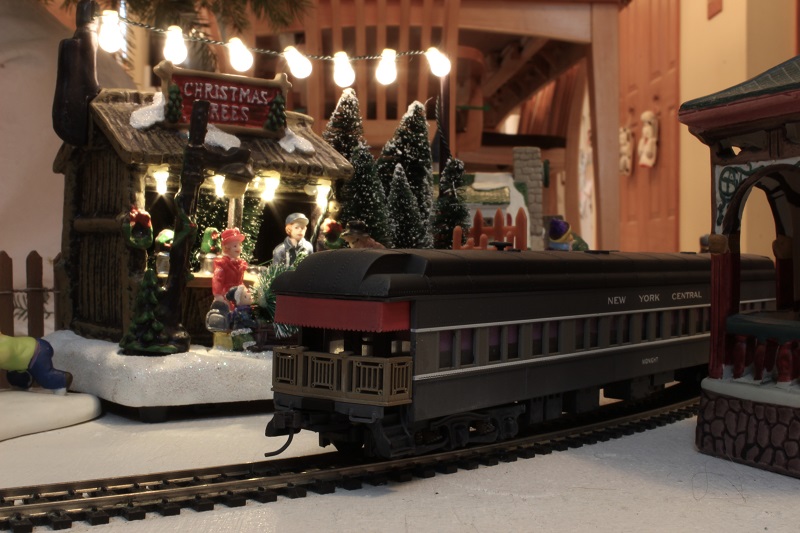
I estimate the turns under the tree to be about a 20 inch radius, even with that, these coaches just make it. The roofs almost touch and the couplers strain to stay together as they navigate the wildly out of scale landscape.
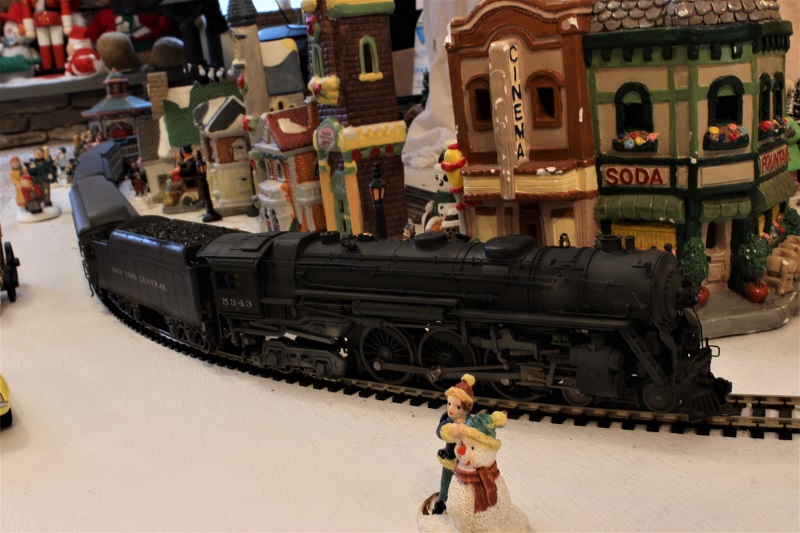
Maybe I should employ a few of these giants to re-rail that rear truck.
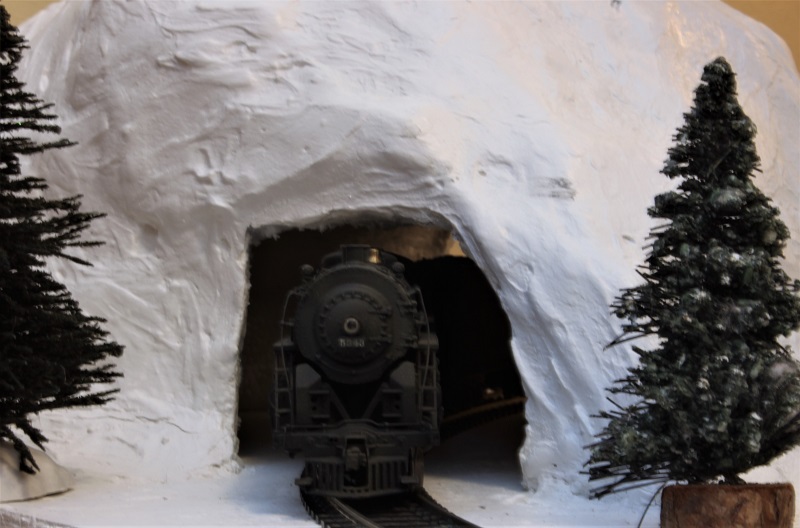
Poking out of the tunnel.
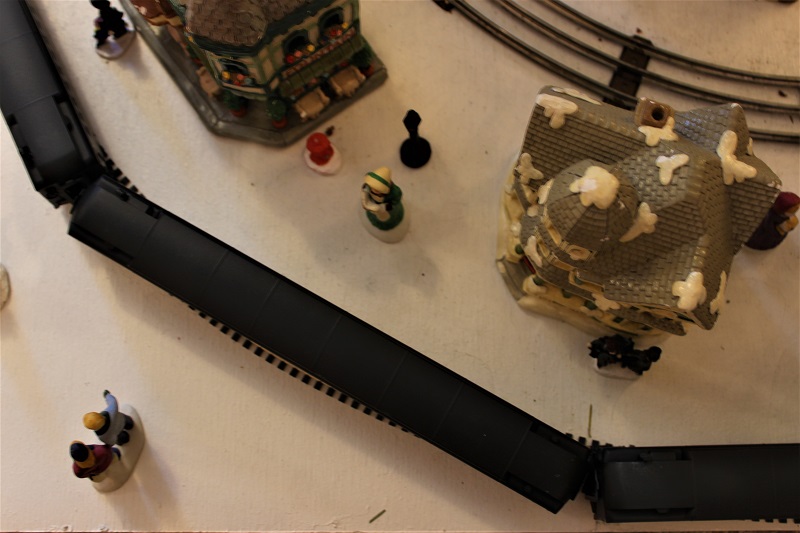
And off to the north pole.
My other car is a locomotive, ARHS restoration crew
Posts: 5,859
Threads: 175
Joined: Dec 2008
Good-looking results, Steve.  
Hope you're feeling better soon.
Wayne
|


 But, I can fix that now.
![[Image: NewcrewsfortheGrandValley010.jpg]](http://i23.photobucket.com/albums/b399/doctorwayne/Get%20a%20load%20of%20this/NewcrewsfortheGrandValley010.jpg)
![[Image: NewcrewsfortheGrandValley005.jpg]](http://i23.photobucket.com/albums/b399/doctorwayne/Get%20a%20load%20of%20this/NewcrewsfortheGrandValley005.jpg)
![[Image: Layoutviewsetc1-033B.jpg]](http://i23.photobucket.com/albums/b399/doctorwayne/Get%20a%20load%20of%20this/Layoutviewsetc1-033B.jpg)
![[Image: Layoutviewsetc1-032B.jpg]](http://i23.photobucket.com/albums/b399/doctorwayne/Get%20a%20load%20of%20this/Layoutviewsetc1-032B.jpg)

