CN Blackwater division
#1
After working on my layout for 15 years, I'm thinking a tearing it down and starting over. I've started to realize the track plan's  limitations and I think I can do better.
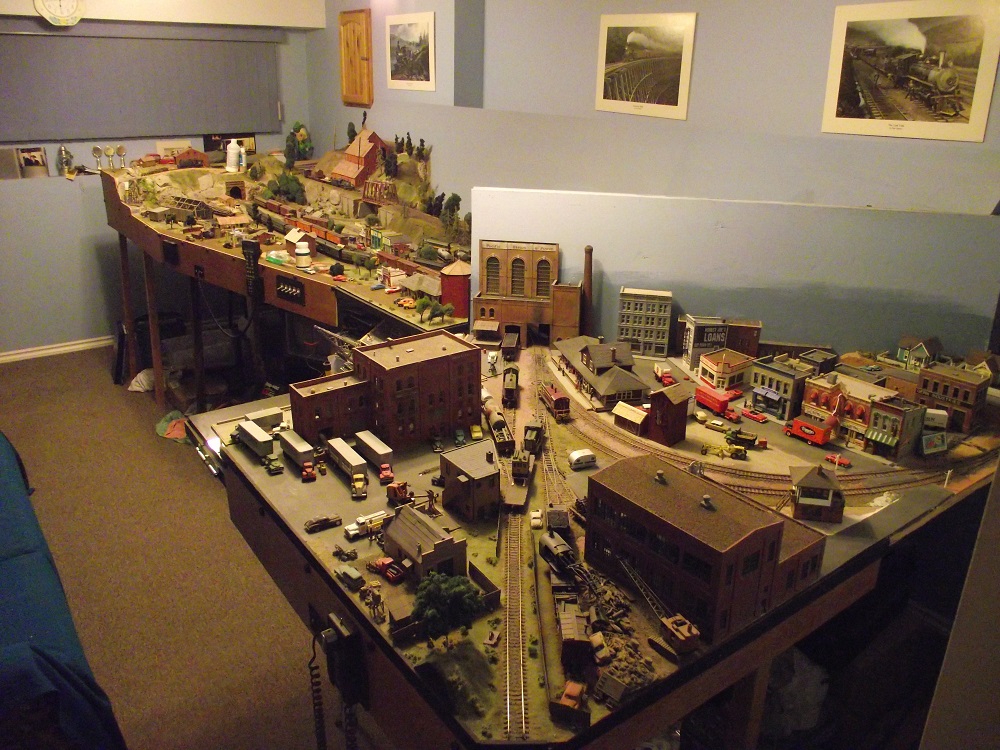
First a few pictures on the current layout.

   
Reply
#2
The layout is 14" long and 5'4" wide on the one end and 7'4" wide on the other.  The basic mainline is a loop with the return hidden behind the backdrop.


This is the city section. I used a scenic divider to separate it from the more rural areas. It includes a small harbour and some industrial.


The other side of the scenic divider. this is the smaller town/rural area. Unfortunately there's only about a foot separating the two stations.
      
The other part of the rural area. you can see my stamp mill in the background. It's accessed by a switchback along the rear of the scene. This is one thing I'd like to remove with a  single incline to the mill. In the foreground is the very small yard that holds only 5 cars and my sawmill.
   

Finally this is my short HOn3 logging section. I handlaid the track (with the exception of the turnouts) This spring. this is the one part that I would like to salvage to install on the new layout.

   
Reply
#3
Those of you with a good eye with recognize the switchback from the Gumstump and Snowshoe trackplan from Model railroader. Originally this layout was only 8' X 2'. I built that part almost 30 years ago when that was all the room I had.

Now there are a few thing's I'd like to change.
1) Make the layout more open without the hidden return track. I think it's a big waste of space and operating possibilities
2) widen the mainline curves. The section through the city is 22 and 24" radius which isn't bad but the part through the tunnel under the logging area is 19" radius which I won't even attempt with my passenger cars.
3) eliminate the switchback. It was a novelty that has pretty much run it's course.
4) more separation from the larger city and small town.

I do want to keep the stamp mill, turntable, roundhouse and the harbour if I can.
Reply
#4
Well if that is the "Before" layout I can't wait to see what comes!

Very nice work there but I can understand your desire....... any track plans in mind yet?
ratled
Modleing the Jefferson Branch in HO  on the Southern Pacific
Reply
#5
Most of us have started over at some time or other (including me). Your current layout looks very nice but I understand your concerns with the track plan. Looking forward to your new ideas.
Mike

Sent from my pocket calculator using two tin cans and a string
Reply
#6
I can understand your desire to start anew, not that there's anything wrong with what you've already done, but once your layout is "finished", where do you go from there? Fantastic job with your current layout, I'm sure your new one will be as exciting to build as well.
Don (ezdays) Day
Board administrator and
founder of the CANYON STATE RAILROAD
Reply
#7
This is what I have so far:
   

The new layout has pretty much the same footprint as the original, with the exception that the one side is now a straight line. My plan is to have a 2' aisle inside and probably a lift gate to access it. The new mainline radii would be 24 and 30".  I'll probably move the loop closer to the couch  side so I can have room for a incline to the stamp mill and logging area.
Reply
#8
Looking forward to seeing how this comes along. I assume the opening in the middle will serve as an operating pit of sorts? I guess it would make sense to move the oval closer to couch edge in order to allow more room for spurs and industries or allow a more "comfortable" fit for your logging layout. To be honest, track planning is not my forte. My own track plan was graciously designed for me by another member here which I've modified slightly. So, I'm curious to see what you come up with and how it all fits together. The work you've done on the current layout looks great though. Nice work.
Reply
#9
Track planning isn't my Forte either, but I'm learning as I go. 
I did update my sketch:
   

I moved the loop closer to the couch side as I mentioned, still keeping the 30 and 24" radius curves. I also added the incline spur that will serve both the stamp mill and the logging area, but adding a turnout so the stamp mill will have it's own siding. I also added passing sidings to both longer legs, each about 8 feet long if my measurements are correct. 
Yes the middle will be the operating 'pit' I'm also considering making the layout higher this time around. The current layout is 3'6" and I think it would be better if I gave it an even 4 feet in height.  I'm not adding any sidings or yards quite yet. I'm thinking of building what I have drawn first, then seeing how things will fit. I have allot of buildings on the current layout that I hope will make the journey to the new. I do suspect the I'll be sacrificing the turntable but I don't see myself missing it if it comes to that.
Reply
#10
After getting the go-ahead from my wife, the 'land manager'. I started taking things off the layout this morning, starting with the rolling stock and engines. I never really kept an inventory of my rolling stock but I was surprised how much room it took to store it all:
   

The wall shelves are now full


My Canadian National engine fleet


My Canadian Pacific engine fleet


And these boxes contain the more fragile (Italian!) rolling stock. Mostly tichy, wood and resin craftsman kits and some specially modified pieces.
Now that those are off the layout, it looks pretty empty


Reply
#11
The current layout does look very nice.  It's interesting to see it without all the rolling stock etc. cluttering up the view.  357

Nice to hear you received formal approval from the Land Manager in your district for the go ahead
 I report to the General Superintendent around these parts.  She can be a real pain in my ...I mean, a generous and understanding boss when it comes to request from the rail road.  Wink
Reply
#12
Thanks but the layout looks even emptier now:


It took a few nights and allot of boxes but I cleared the layout of all the structures, trees, figures and other details. all the structures were boxed up with their details packed with them in zip-lock bags. I also took pictures of some of the structures so I will remember where all the details went.
When this was done I started pulling the scenery up around the Narrow gauge line 
     

I'm trying to be as careful as possible as I want to save the hand-laid trackwork. Fortunately most of the roadbed is screwed onto risers so I'll have minimal action with a saw, at least on this part.
To begin with I un-soldered all the track wiring and removed the control panel, throttle and power supply so I can use them later.
   

I hope to get the trackwork out shortly.
Reply
#13
More demolition 

   
I took out the rest of the the scenery around the narrow gauge and then proceeded to unscrew the roadbed risers.


I had to use a jigsaw to cut the narrow gauge section away from the rest of the layout in one spot but the rest lifted away easily. I hope that it will be fairly straight forward to re-attach it to the new layout. You can now see the 19" radius curve that was under the scenery. That part hasn't been visible for almost 15 years.


With that out of the way I pulled down the rest of the mountain scenery and the backdrop. You can now see the entire trackplan with the return and storage track that was hidden behind the backdrop. I can see a trip to the dump when I finish the dismantling, I've almost filled two large garbage bags with scenery debris and I'm not done yet.
Reply
#14
I pretty much have the layout taken down now. A couple days ago I removed everything from under the layout and cut out all of the wiring. Then I started to pull up the track
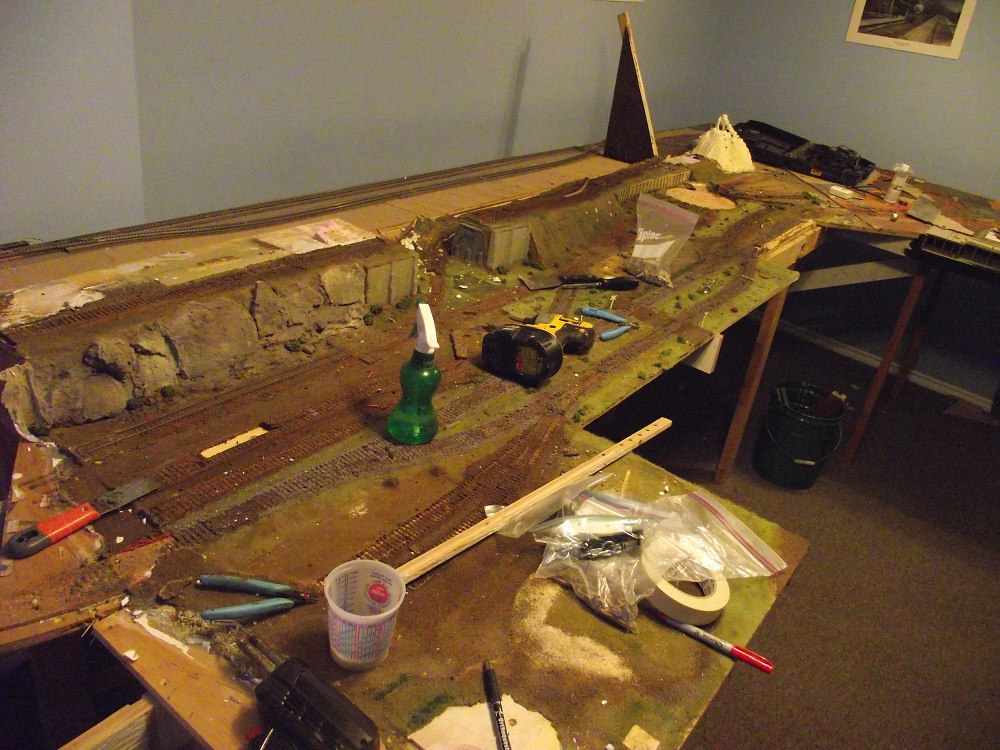
   

I also started to remove the small sections that I had added over the years such as the sawmill area.
all the visible track had been ballasted so I soaked to down with water to loosen the glue and gently pried up to track. I managed to salvage all of it with minimal damage. After I removed a section of track, I gave it a bath in the laundry tub to remove the rest of the ballast.
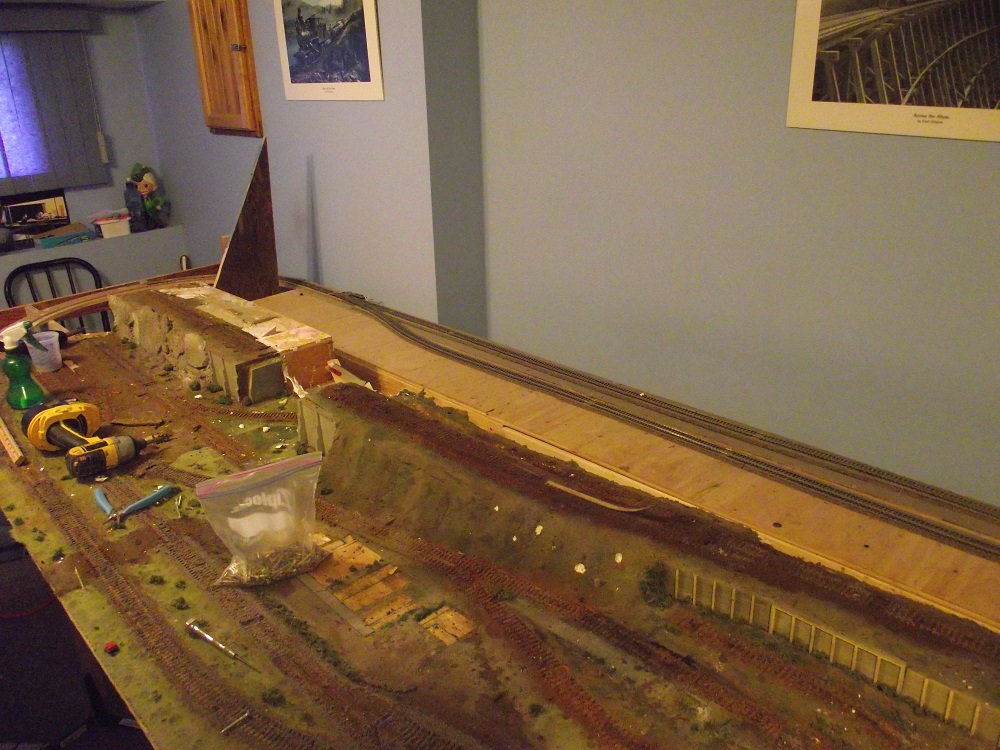
   

Here all the track has been removed except for the rear run-around and the storage track. You will also notice the small 6" jog in the wall, when I rebuilt the layout I plan to follow that jog to utilize that to get all the room I can.
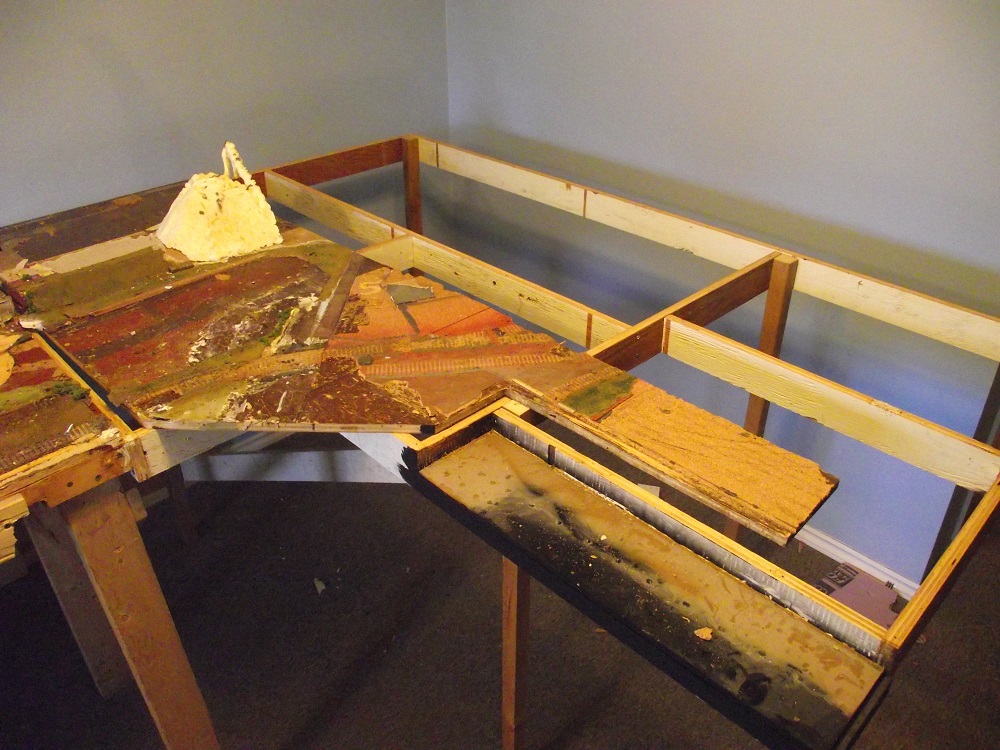
   

With that done I started to disassemble the benchwork.  The benchwork was an open grid with plywood roadbed on top. I had thought that it would be easy to salvage the roadbed but 15 years ago I glued cork on top of it all so I figure it will just be easier to buy a couple new sheets of 1/2 plywood and throw the old stuff away.
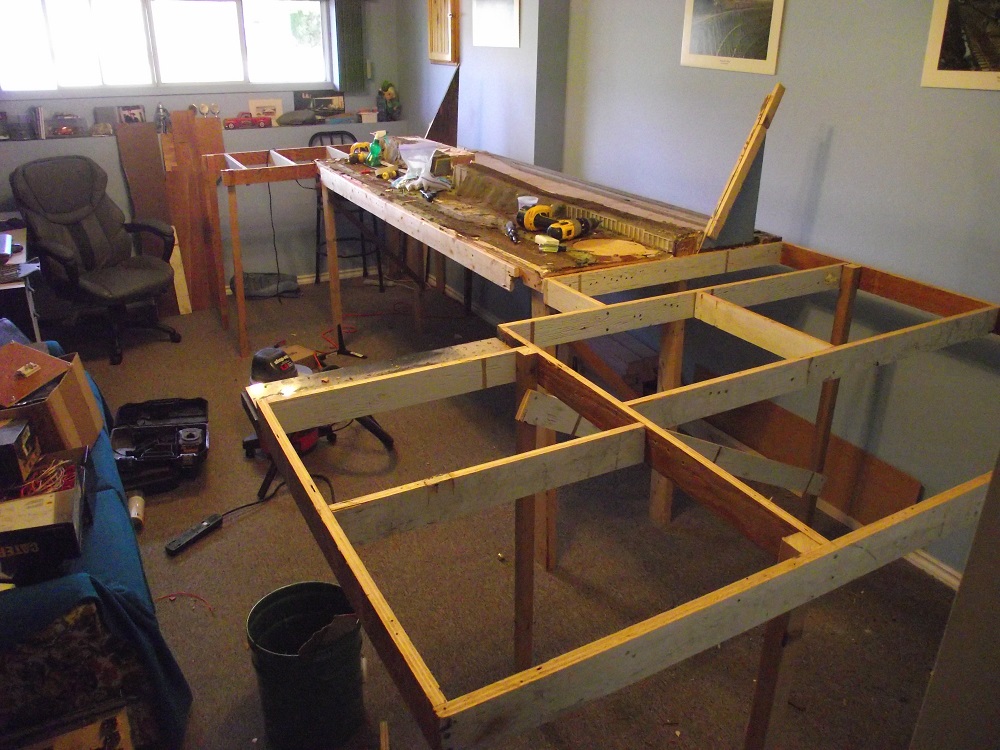
     

Then I pulled the open frame work apart. This I am reusing, or at least as much as I can. It's made of 3/4" fir plywood cut into 3" strips. the rear run around was build in the same way. The layout was built someway modular-style, in 4 main parts with a few add ons over the years. I plan to build the new layout in a similar fashion.
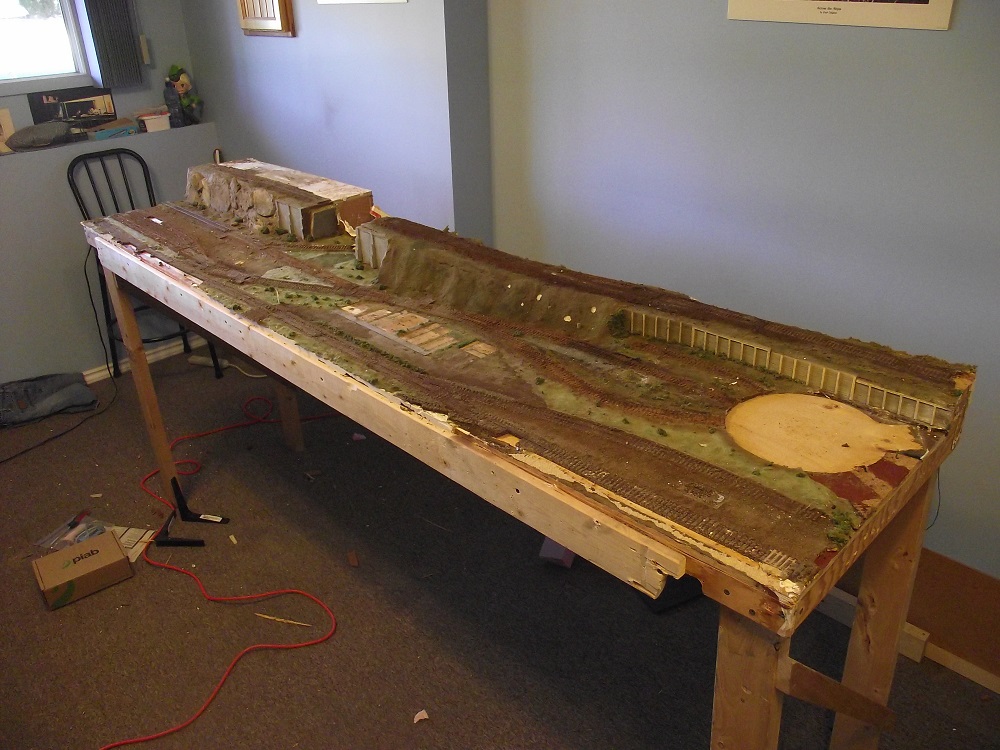
   

And then I'm back to the original Gumstump and Snowshow layout that I built almost 30 years ago. I was think of seeing if anyone wanted this part. It can be refurbished and made into a nice little switching layout like I started with.
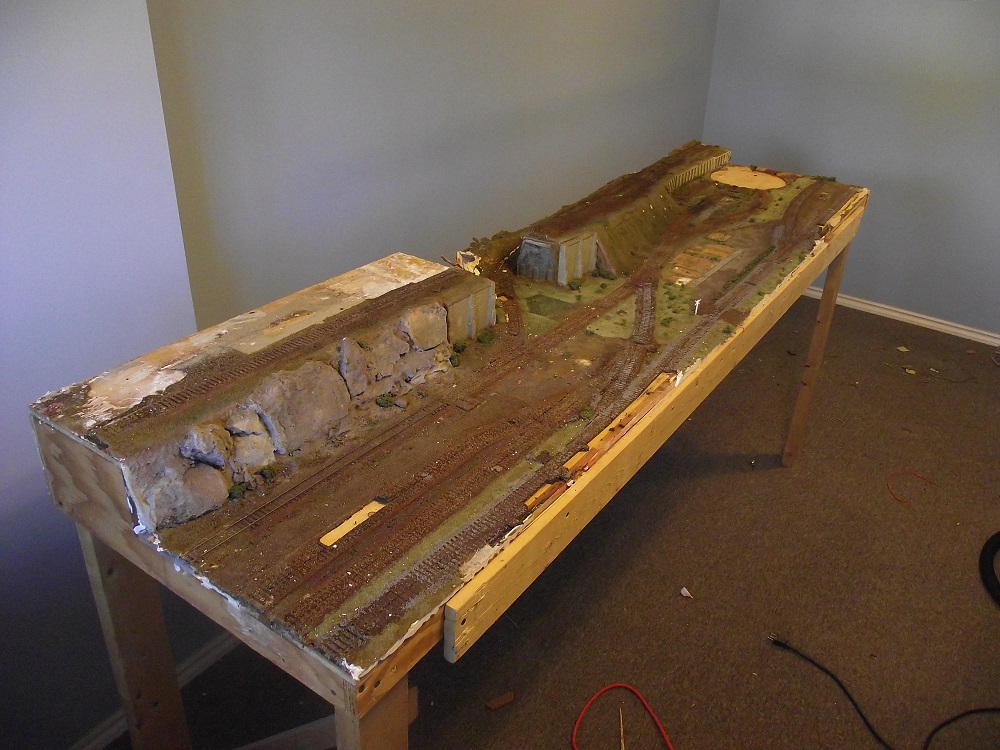
   

Next it the final dissassembly and the room cleanup.
Reply
#15
It's amazing that a layout that took years and years to build can be completely torn down and packed away in so little time. I had a pretty sizable N scale layout when I lived in Phoenix and when my wife and I decided to move across the country, it was down and packed in a matter of a couple days. Heartbreaking but exciting all at the same time.
Reply


Forum Jump:


Users browsing this thread: 1 Guest(s)