Canfor SW1200
#1
Thought I would share another project I'd doing for another modeler. On Vancouver Island Canadian Forest Products (Canfor) had a logging railway line and used modified SW1200 engines.
CANFOR Englewood Logging Division 303 (trainweb.org)

The large box in front of the cab is the EMD installed dynamic brakes. They also added extra air tanks on the hood due to the steep grades these units ran over.
The fellow that want this model started with a Proto2000 engine but didn't really know how to modify the shell. 
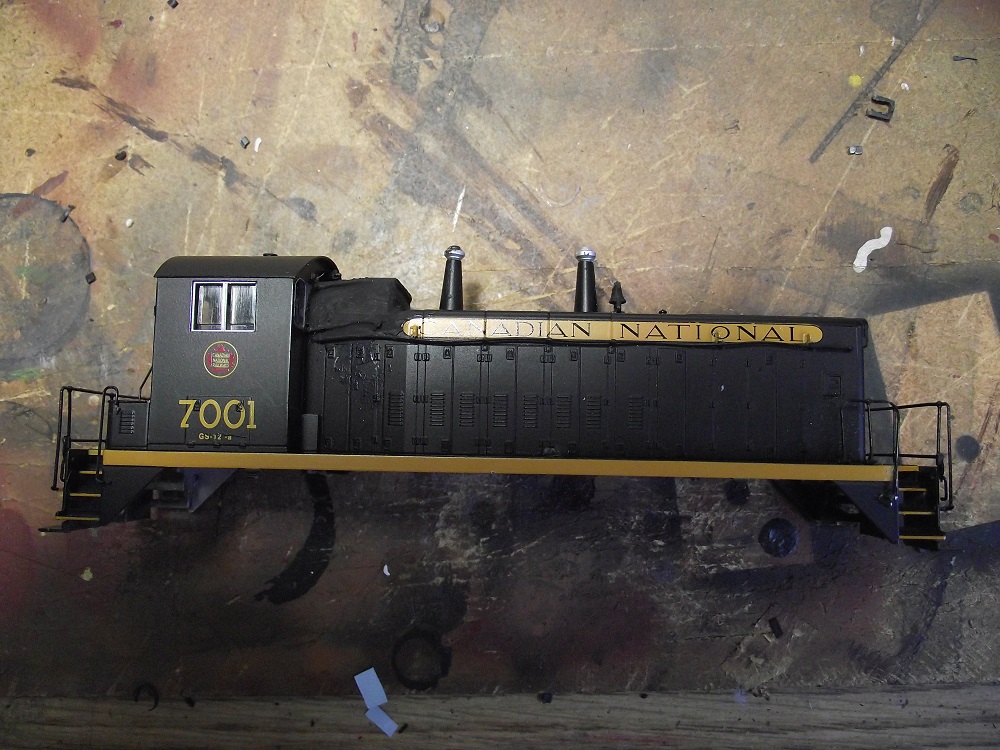
   

To make the 'box' he simply made it out of cardboard and white glued it to the shell. This is how I got the model.
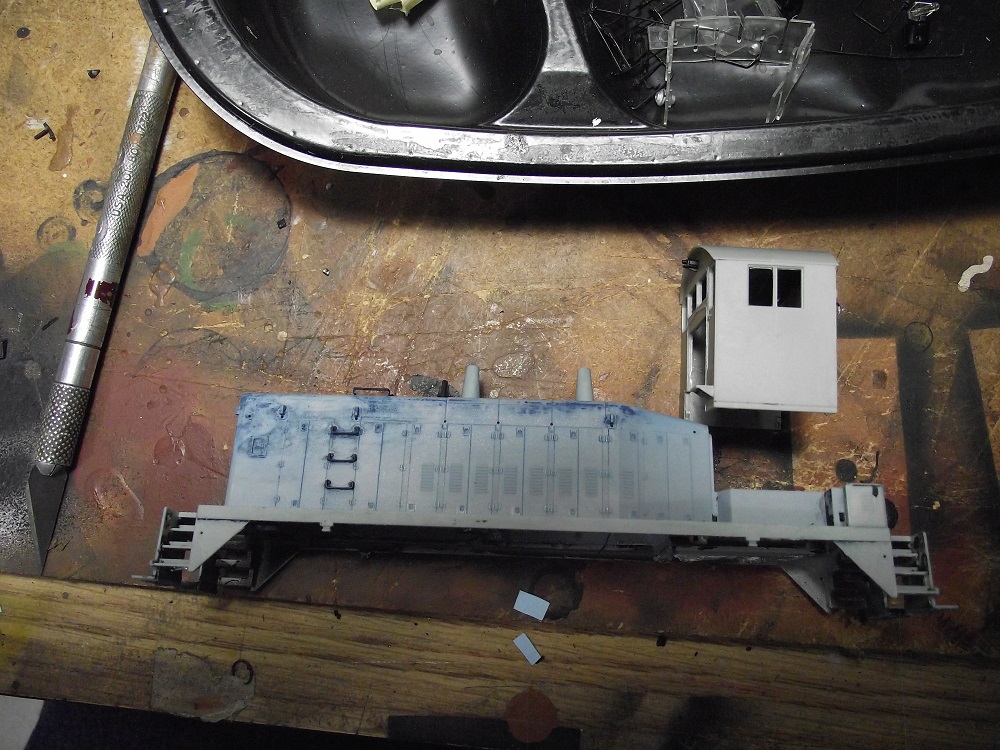
   

I was able to remove the box and strip the shell. Then came the modifications.


I made a new dynamic brake box out of sheet styrene and a 36" fan I got for an old F-unit shell. I also had to cut the hood down to accommodate the new 'box' this had to be done very carefully as the original circuit board lies just under the hood.
I should also note that I'm building a representation of the Canfor engine, not an exact replica. I'm guessing most of the parts dimensions by studying the photos that I have found.
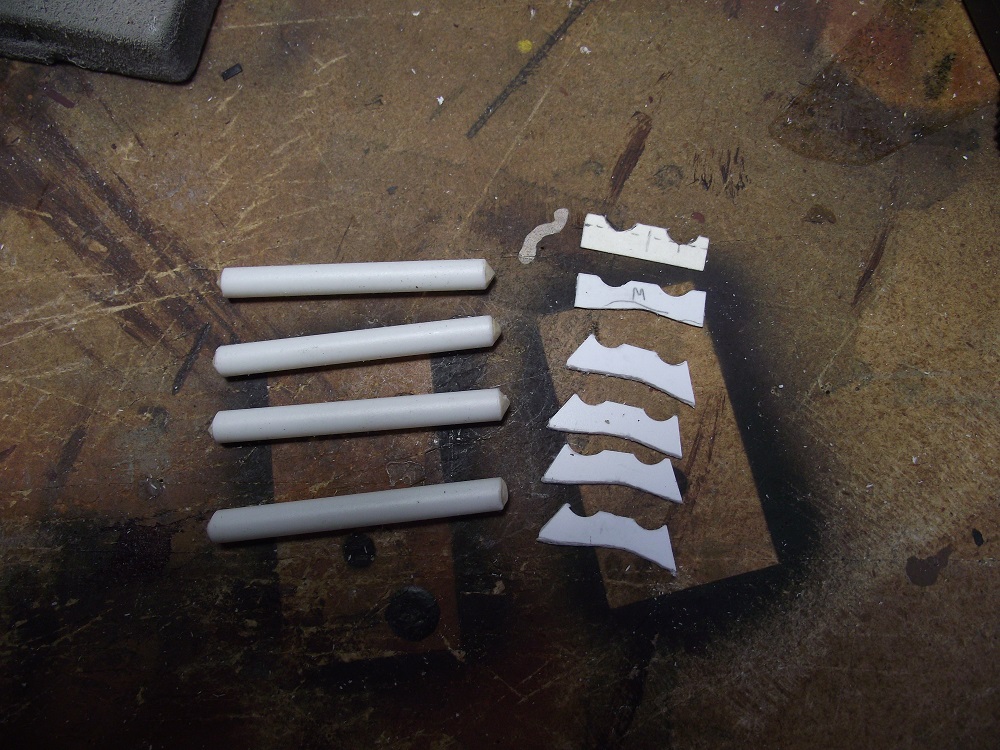
     

Then I had to fabricate the air tanks and their mounts. The tanks are styrene tubing, filled with putty. I sanded the ends round. I had a bit of a challenge with the mounts as the tanks straddle the exhaust tanks and the top of the hood is slightly round. I made a card pattern, followed by a styrene master. 
Now you may wonder why four tanks and mounts? Well another modeler saw the project and now I'm building a second unit. It was just easier to build all the parts at the same time.
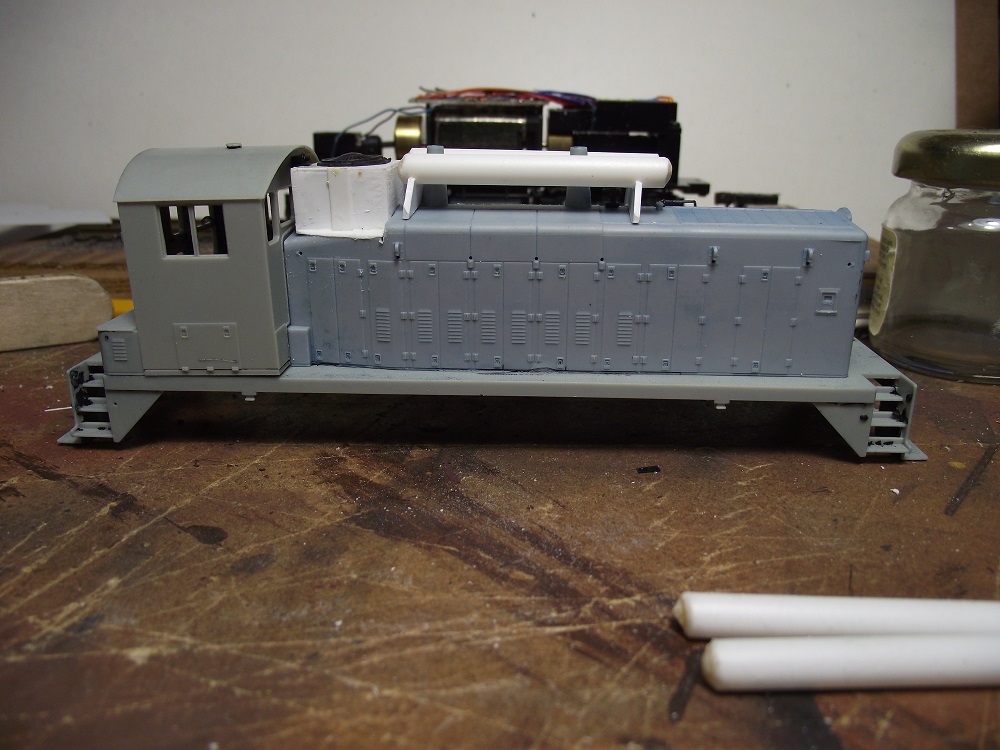
   
Ready for paint. The air tank assembly is just loose for now.


This is how it sits now, very yellow. It took 4 coats of Model master acrylic yellow to cover
Reply
#2
The photo of the real one is an interesting-looking locomotive, Glen, and your model of it is a very nicely-done representation of it, although I think that some wire handrails might stand up a little better than the original plastic ones...Tichy's .015" phosphor-bronze wire would work well.  

The prototype EMD/GMD SW1200RS diesels are my all-time favourites of all the various models they've constructed over the decades.
If I were modelling the diesel era, I'd have a bunch of them, along with a lot of ALCo and MLW diesels.

Wayne
Reply
#3
Thanks Wayne. I'm going to stick with the original handrails on the first one. The fellow that I'm building it for doesn't want me to go hog-wild on the project. That being said, I'm now waiting for the custom decals that he's ordered so I can complete the project.
I did get the other engine this morning, but haven't done anything with it yet. That will get some handrail replacements because the previous owner mis-handled it and broke allot of the handrails off.

I already have a rapido CN SW1200RS in my collection as well as a CP and CN SW1200, both from Proto.
Reply
#4
I did start work on the second engine this afternoon. It's handrails were in considerably worse condition than the first:


Any that weren't damaged broke when I tried to remove them. looks like I'll be bending wire to fabricate most of the handrails when this goes back together.
The Body parts are soaking in an Iso Alcohol bath to remove the paint.
Reply
#5
Great projects Glen.
Guy from Southern Quebec.
Reply
#6
Thanks Guy. 
I have made progress on the second unit:
   
I've replaced all the original grabs and handrails with either tichy parts or I bent my own out of .015" wire.
I also started on the dynamic brake box, cutting the hood down and fitting the platform that it will sit on. The walkway part is back in an Iso bath after I scraped some CA glue off and hopefully the paint underneath will loosen up. The previous owner tried to fix the broken grabs  by gluing them and made a mess.
Reply
#7
I built up the second engine's dynamic brake box
   
I learned a few lessons from the first build and applied them to the second. This one's box is made from slightly thicker styrene  and a bit more square. I also decided to detail it a bit better.
   

The Prototype has a set of louvers centered on each side, flanked by two vents. I figured I could get the parts from an old F-7 shell by cutting them out and sanding them thin before attaching them to the model.
   

I did end up doing that with the louvers, but I used some Tichy metal roofwalk material for the vents. Again I used an Athearn GP-7 fan for the top. When I finished this one, I decided to add the same detail to the first. I'll just airbrush those details when I paint the second engine.
Reply
#8
That thing is weird. I love it.
————————————————————————————
Modeling the East Broad Top as it was between 1937-1942
~Amanda
Reply
#9
It's weird, but EMD built.
I painted the second unit in all it's yellow glory this afternoon.
   
While I was at it I painted the vents and louver panels in the first unit. Just like the first, it took a several light coats over an hour to cover properly. 
I do have a crazy idea of building one for myself but using an Athearn shell, outfitting it with a Juneco CNR SW1200rs conversion kit and converting it to HOn3 for my logging line. Just a thought.


One other thing that I did was to paint the center-front windows of the cab yellow. From the prototype pictures it looks like these were plated over since the dynamic brake box would have been in their way anyhow.
Reply
#10
I completed the painting and lettering of the two locomotives this weekend. 
   

I painted the cab roof, walkways, steps and front Radiator opening with engine black. I managed to mask and airbrush everything except the stairs, those were brush painted.


The decals were custom made by Black Cat Decals. One of the fellows that I'm building these for contacted the owner and had them made up. The cost was fairly reasonable too, he tells me. They went on just like the other Black cat decals that I've worked with.


I used microscale's Micro-Sol decal setting solution to get the decals to lay flat when dry. Some were more fragile than others, like the Canadian Forest Products LTD. broke twice when I applied it. It's better to soak the larger and longer decals in water until they just slide off the backing. Fortunately , the fellow ordered 8 sets of decals so I was able to repair the broken ones .


Now it's time for the re-assembly. One will be fairly easy, the other will need most of the handrails to be fabricated.
Reply
#11
Very well done Glen, you are doing great work.
Charlie
Reply
#12
You did a great job.  Applause Applause Applause
Guy from Southern Quebec.
Reply
#13
Great job Glen Worship
Serge
Reply
#14
Thanks everyone. I finished the two engines last night.
   

I bent new handrails for both. I knew I had to make new ones for one but the other's handrails, while them came off in one piece, were too warped to re-use. My replacements might be a bit crude, but they are straighter than the originals.
     

and the family portrait:
   

From the bottom, P2K Sw1200's in CN and CP, Rapido SW1200rs in CN,  P2K Canfor sw1200, and in the rear is my upcoming Athearn HOn3 SW1200rs using a Juneco conversion kit.
Reply
#15
Guy,

Worship Applause  Thumbsup

Lutz
Reply


Forum Jump:


Users browsing this thread: 2 Guest(s)