Posts: 612
Threads: 12
Joined: Jun 2022
Thanks Charlie! Still not sure about the talent part - if I have a recommendation on scenery, I'd say try something and try to improve on it, but never give up the notion of saying "Why don't I just remove it all and start over!" and knowing the second time will be better because you would have learned from mistakes. Maybe the talent comes more from seeing a blank canvas and visualizing the way I want it (eventually) to look. For Mud Run, it was seeing the aerial photos and tagging things I wanted to include in the scene. Since I had a prototype scene, I had a basic premise of where everything goes and where I needed to place scenic emphasis. For freelanced railroads, I think placement and emphasis might be tougher, and I might fall back on finding some real-life scenes to mimic.
As far as time goes, it's really only done in spurts of a few hours, and (just as in any project), breaking the thing down into logical and manageable chunks. It is cool though to go back and time and see the progress. Mud Run's been cool because I get to share progress with people other than my wife and my father-in-law who are typically the only ones that visit more than occasionally. I get charged to finish this project and move on to new stuff similar to what other Big Blue members are focused on. As much as I have pooh-poohed the internet over the years, there are occasionally good things you run into that make the nuisances worthwhile.
Posts: 612
Threads: 12
Joined: Jun 2022
Moss has been growing on me. Literally. As I write this, my fingers are a combination of wood glue and a variety of green stuff. Mostly bagged moss, some ground foam, etc.
I decided that the rock surfaces around the Mud Run curve needed to feature moss. My dog and I take weekly hikes through Rocks State Park here in Maryland which is only about 3 miles from my house as the crow flies. The Ma and Pa once ran through it on its way between Baltimore and York. I-83 has taken its place. Rocks is aptly named, with a lot of boulders strewn throughout the property, put there through scouring of the land through the Deer Creek watershed. Most of these boulders have their fair share of moss built up on them, especially those on the north side of the park. Taking notice of the moss must have "rubbed off" on me, because I suddenly wanted to add it to my scenery in Mud Run.
I tried a lot of paint techniques, and I could have settled for that finish. Here's an example of painting one of the rock walls facing north:
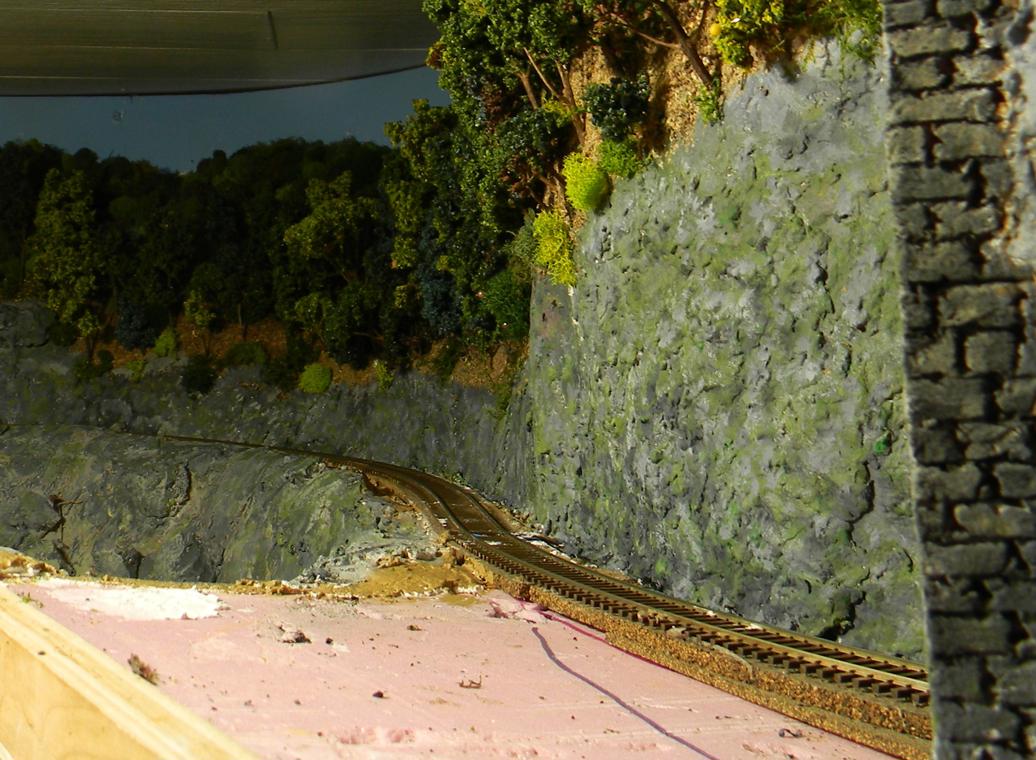
The paint used was just a variety of greens. I'd load my brush (darkest greens first) and take most of the paint off of it by dabbing on my pallette disk. I then dabbed on the stone, picked the next lighter shade of green and added it to the area that I'd just done. Layers of different greens followed, finishing off with a very apple green mixed with white. If you look at moss on stone, you can see a lot of color representation in a very small area.
The painted moss was nice, but I was missing what I thought was something essential - especially on rocks in shade on the north side - the stuff had Depth! You'd poke at it, and it was almost like the stone was covered by a blanket. I decided I wanted to give added depth with a bunch of "green stuff"
Got my bags of moss out and picked a bunch of different color combos. I'd grab a clump and my scissors and gave the stuff a haircut. I ended up with a tray filled with the stuff.
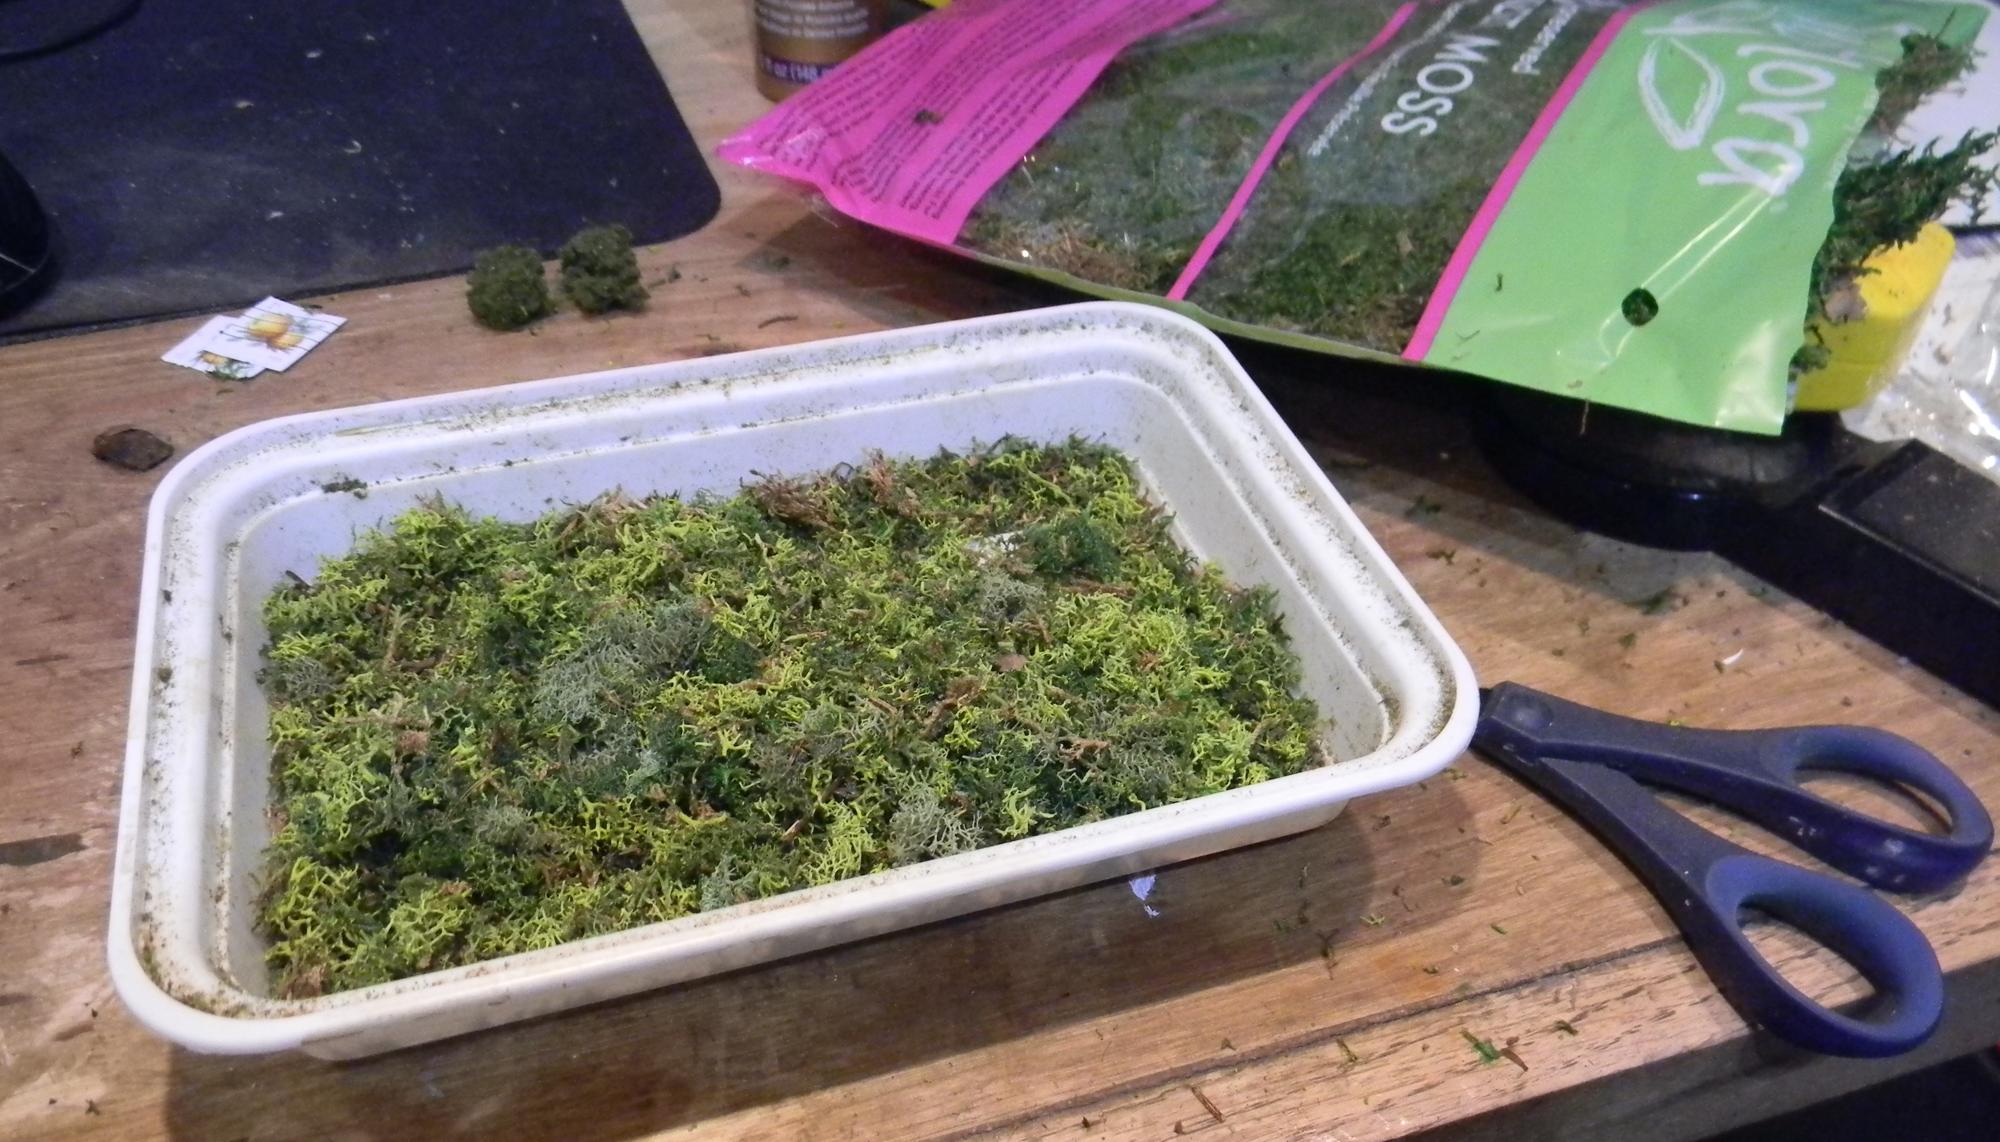
Took a little wood glue and dabbed it on the surface of my rocks and picked up a pinch of moss and ground it into the glue and let go. Stuck real nice, but it looked too much like a plant. You see, moss is tiny in structure and I'd missed that in shearing my moss.
Thursday night on my way home from work there was an accident that forced everyone to detour to a side road that dumped you out on another road altogether. I pulled up behind a bunch of red taillights to wait my turn. Wham! The Honda Civic behind me fared a lot worse than the bumper of my pickup, and since then I've been on the phone trying to line up an estimate, a rental, a place to fix my bumper, etc. After my initial lack of success with the moss project, I called my insurance company and while I was on hold, began taking that tray of mixed moss and cutting it up into much smaller pieces. I'd grab a pinch and cut, cut, cut it. Pick up the next pinch and cut, cut, cut. Ended up with a much better product and ironed out the arrangements for my truck.
This afternoon I decided to see how the fruits of my labor looked. I may add some tweaks or do some subtraction, but here's a couple of shots:
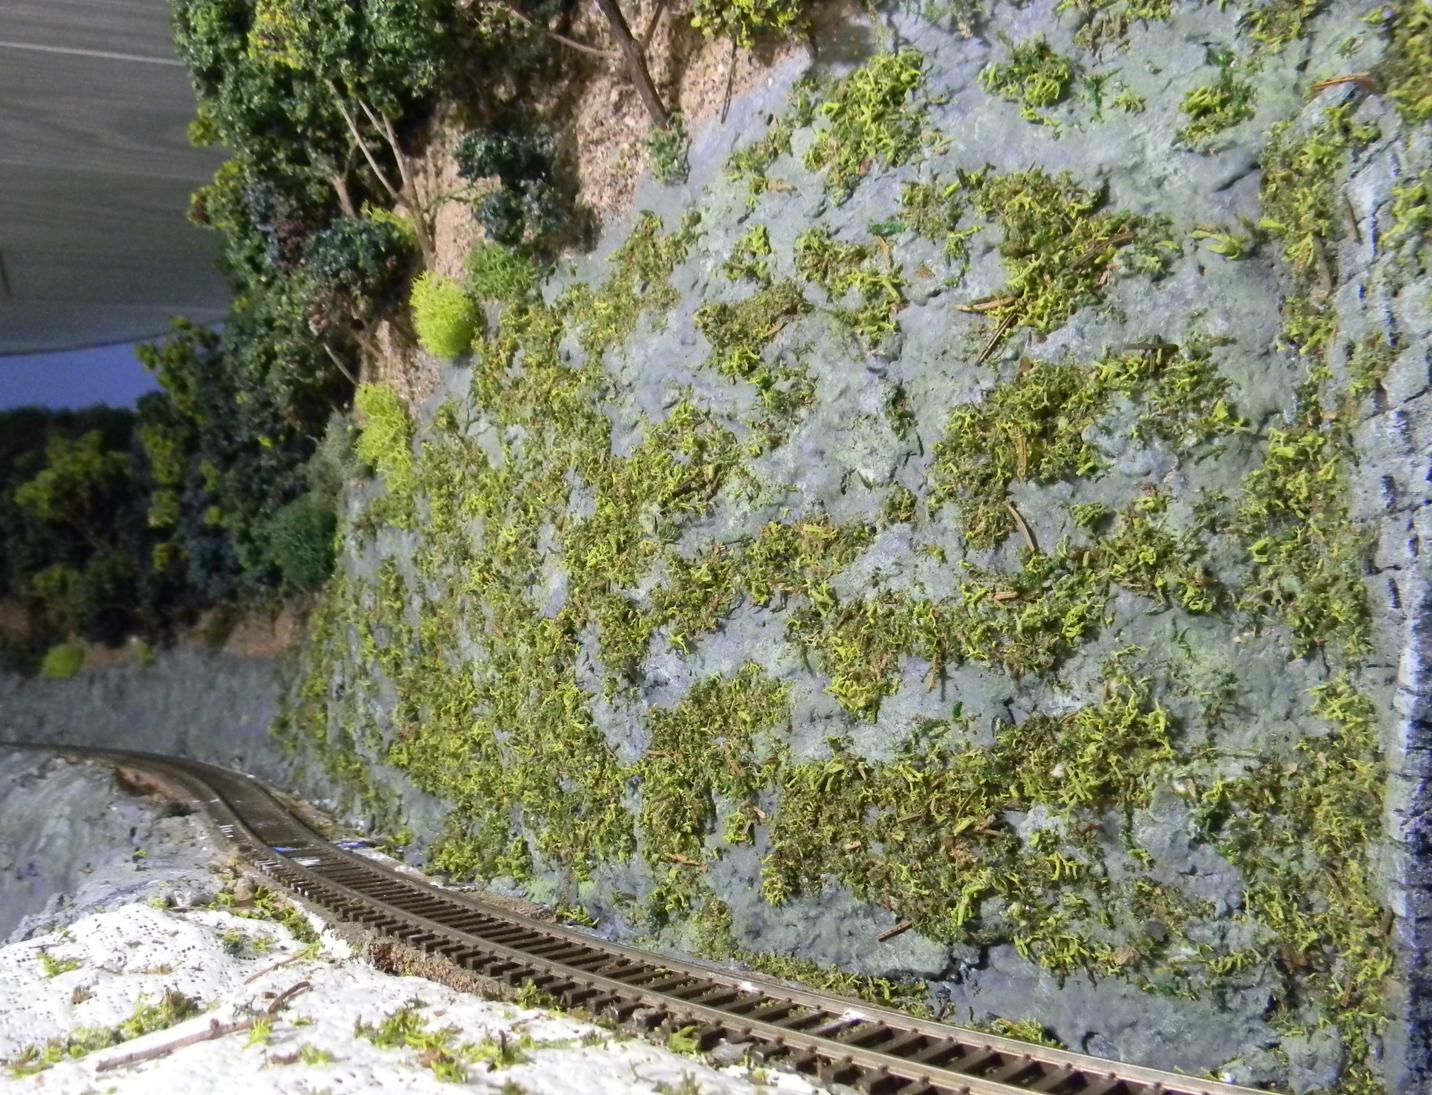
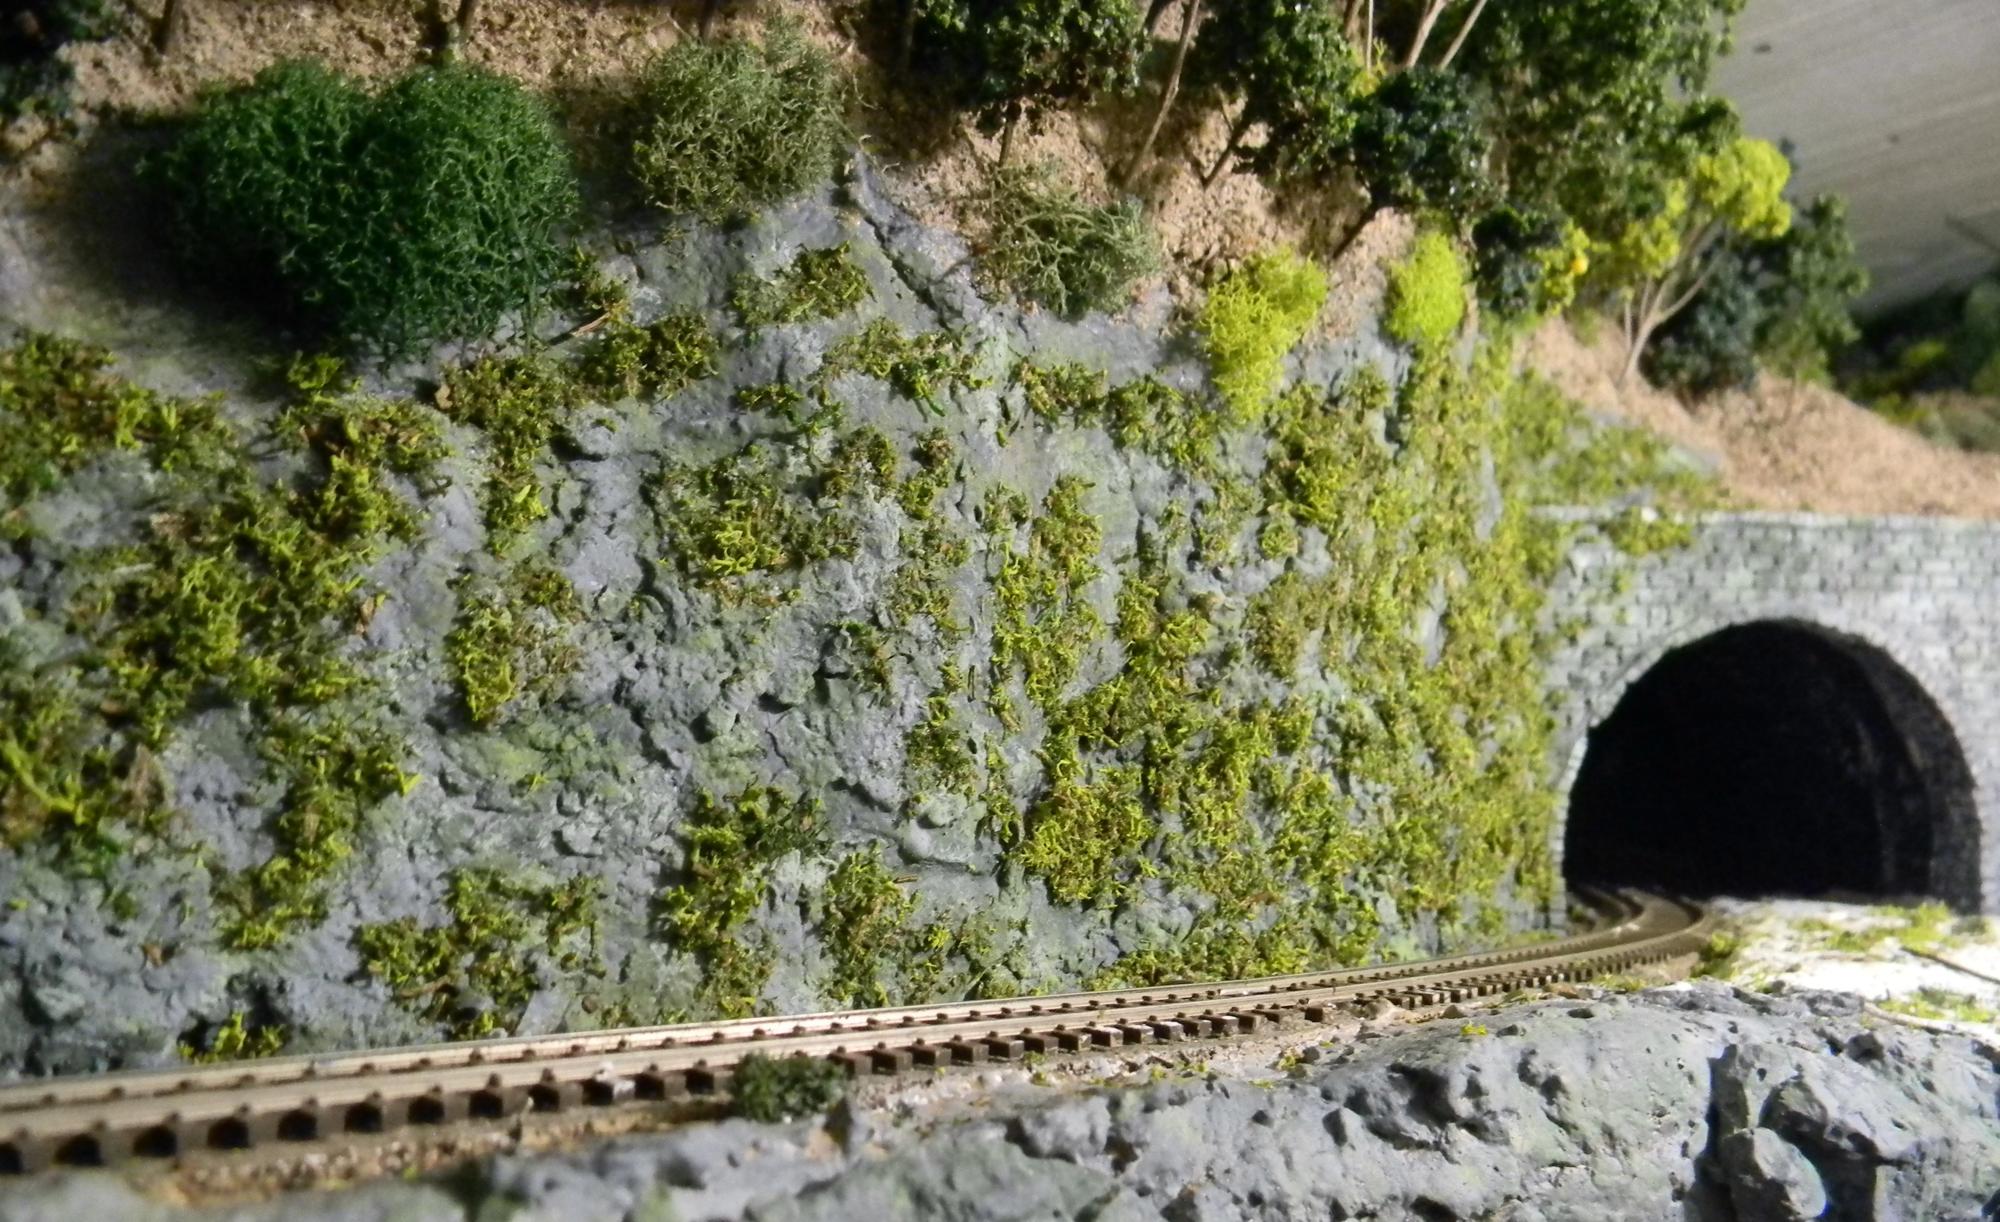
Have some thought about adding some "brown stuff" as well in select areas. It's amazing how leaves and dirt cling to crevices in rock surfaces and almost vertical natural elements. More on that soon I hope.
Posts: 2,100
Threads: 41
Joined: Dec 2008
Excellent job on the moss.
Posts: 612
Threads: 12
Joined: Jun 2022
Thanks Tom! Glad to hear your back is feeling a lot better.
I'm working the south side of Mud Run now. Rather than moss on that side (as I did in the north), I've decided to mimic a photo found of the old, abandoned tunnel entrance upstream from Jim Thorpe at the start of the gorge. Almost vertical rock with a variety of plant life and small trees anchoring themselves to bits and pieces of dirt. Demonstrates some of the wildness of the gorge - hard to believe a canal and then two railroads would occupy space with this wild section of the Lehigh River.
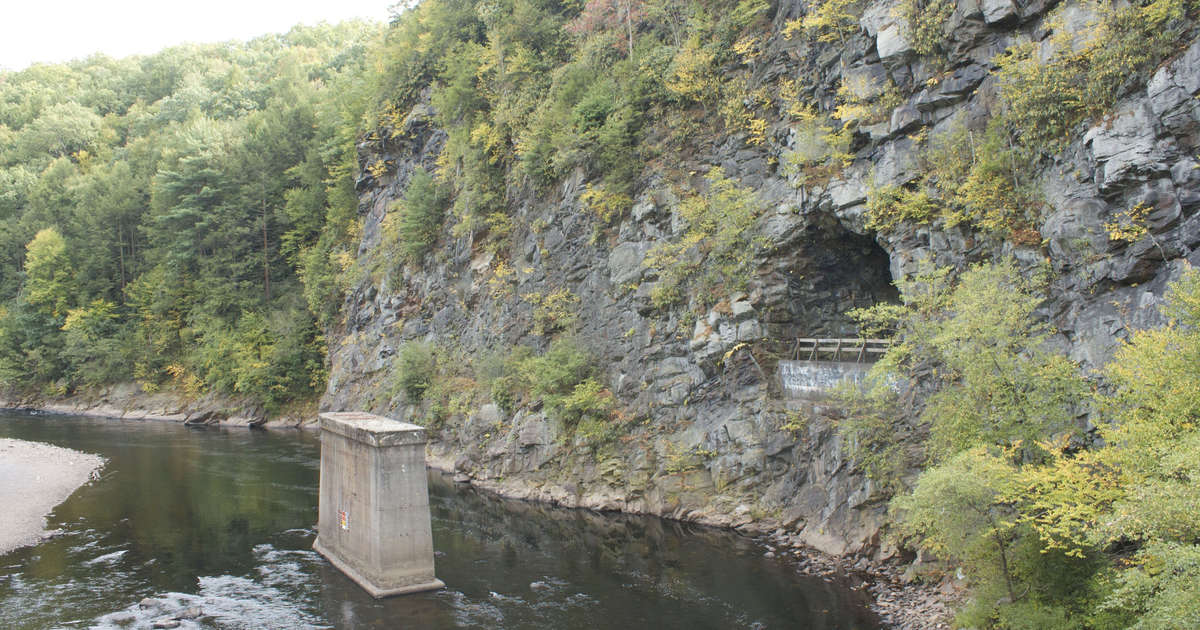
It's surprisingly hard to emulate this effect, and I guess it's because I lack some small, spindly trees with a minimum of leaf cover to add to the rock face. I've been applying moss as shrubs directly to the rock face and adding some brown stuff for dirt. Another case of "if at first you don't succeed...." Another challenge, and what's life without those!
Posts: 612
Threads: 12
Joined: Jun 2022
Won an ebay auction for an Athearn GP38 today.
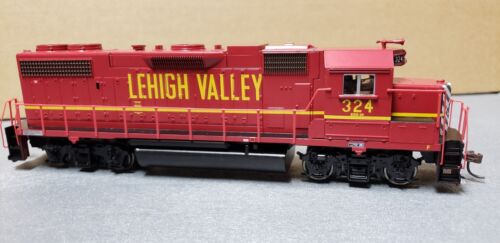
Looks to be a straight DC model from the early 2000's in Lehigh Valley Cornell Red. A bunch of these were sent to the Delaware and Hudson on Conrail Day 1, so I'm going to patch this unit. They typically got a yellow "7" in front of the 3-digit LV road number, a smattering of red paint over the giant yellow "LEHIGH VALLEY" lettering on the long hood, and some script "D&H" logos were added to the sides and front and rear diamonds. (Found a nice example photo on RailPictures.Net, but it's copyrighted, and I dare not upload it here, but here's the link 2415.1300928201.jpg (1024×704) (railpictures.net)). Bought some decals as well to make the transformation happen. I'll be converting to DCC as well with a Digitrax DH126P. The end state will probably mean the retirement of my two C628's in D&H Lightning Stripe, which pretty much coincides with what happened on the real D&H in 1976. The big six-axles were sent to Mexico. I'll probably be putting them up for sale as well....
My D&H consist would then consist of 2 RS36's in lightning stripe, a ex-Reading GP39-2 in green, and then this unit. It wasn't just Conrail that ran colorful stuff during the Rainbow Years!
It's funny to see the evolution of the paint on these units through the remaining years of the D&H. The short hoods were painted yellow, the rest of the bodies deep blue. The blue eroded pretty fast, leaving the Cornell Red and the "LEHIGH VALLEY" prominent with the yellow on the short hood (link: 24de954213d6f29ad34090ea9dbf2ea6--delaware-choo.jpg (735×512) (pinimg.com). Replicating that paint job would be a real test!
Posts: 2,100
Threads: 41
Joined: Dec 2008
It is going to be fun watching the evolution of the loco.
I will be following. I am beginning to think it is time to start converting some locos over to DCC so I will be very interested in that part.
Posts: 612
Threads: 12
Joined: Jun 2022
I'll probably pick up that loco on Monday, Tom and I'll take plenty of pictures. Until then, back to the south-facing side of Mud Run.
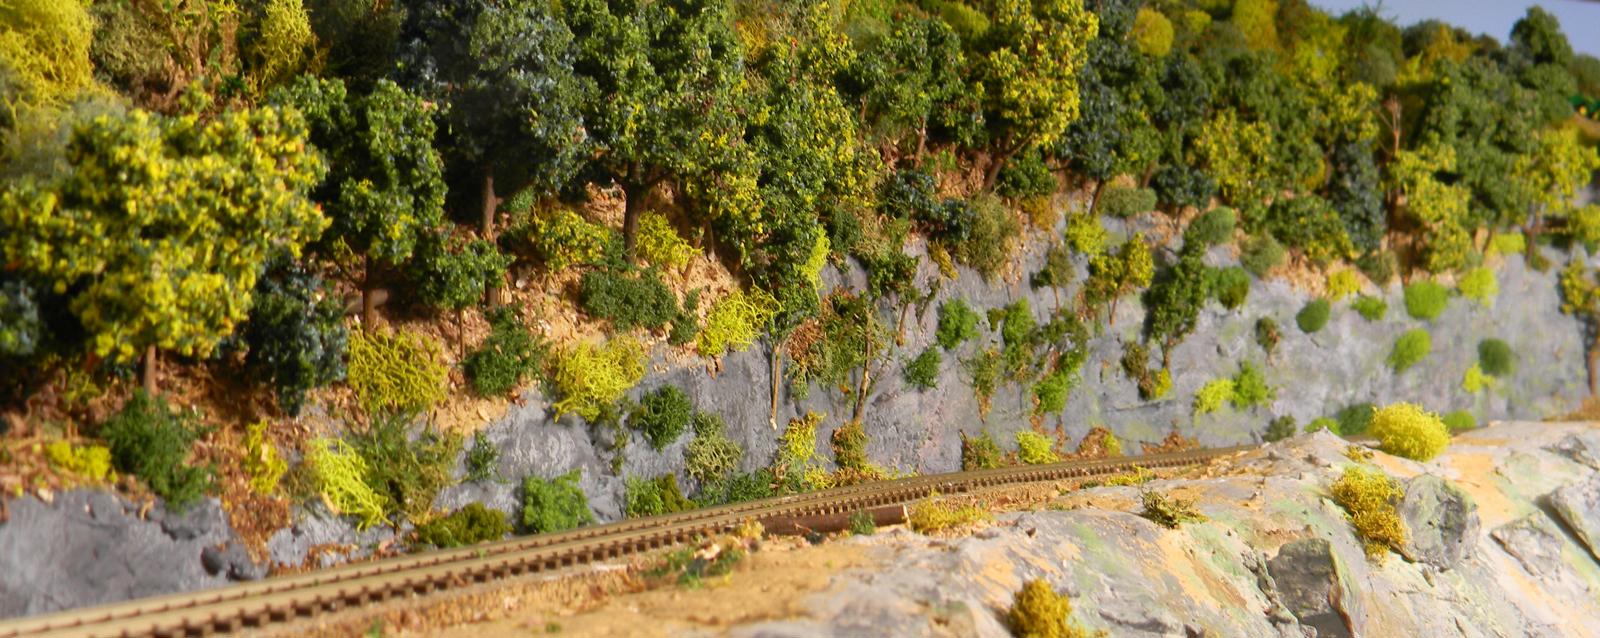
I figured that the south face would have a decent amount of flora - it doesn't take much dirt to allow something to grow on that rocky slope, and if there is some sun, stuff will grow. I started to plop some smallish shrubs on the rock face spaced sporadically - and that's just what it looked like - it did not look natural.
I experimented with some polyfil stretched to a gauzy film, but I thought, close up, this is just going to look like polyfil.
Then I looked back at my moss experiment and looked at my initial pile of cut moss material in the white plastic tray in the photo above from 1/15 and thought - "I really like that look". Multiple colors and textures, and the individual "plants would be about the right size for what I was looking to create. Only trouble was that I'd taken the stuff that was in that tray and cut it up until it was suitable for the moss I applied on the north side of Mud Run - I didn't have that material anymore, but I could create a new stock of it without too much trouble. Thus armed with a decent pile after about 15 minutes of cutting, I applied some areas of the rock with a liberal amount of glue and forced my plants into the glued areas.
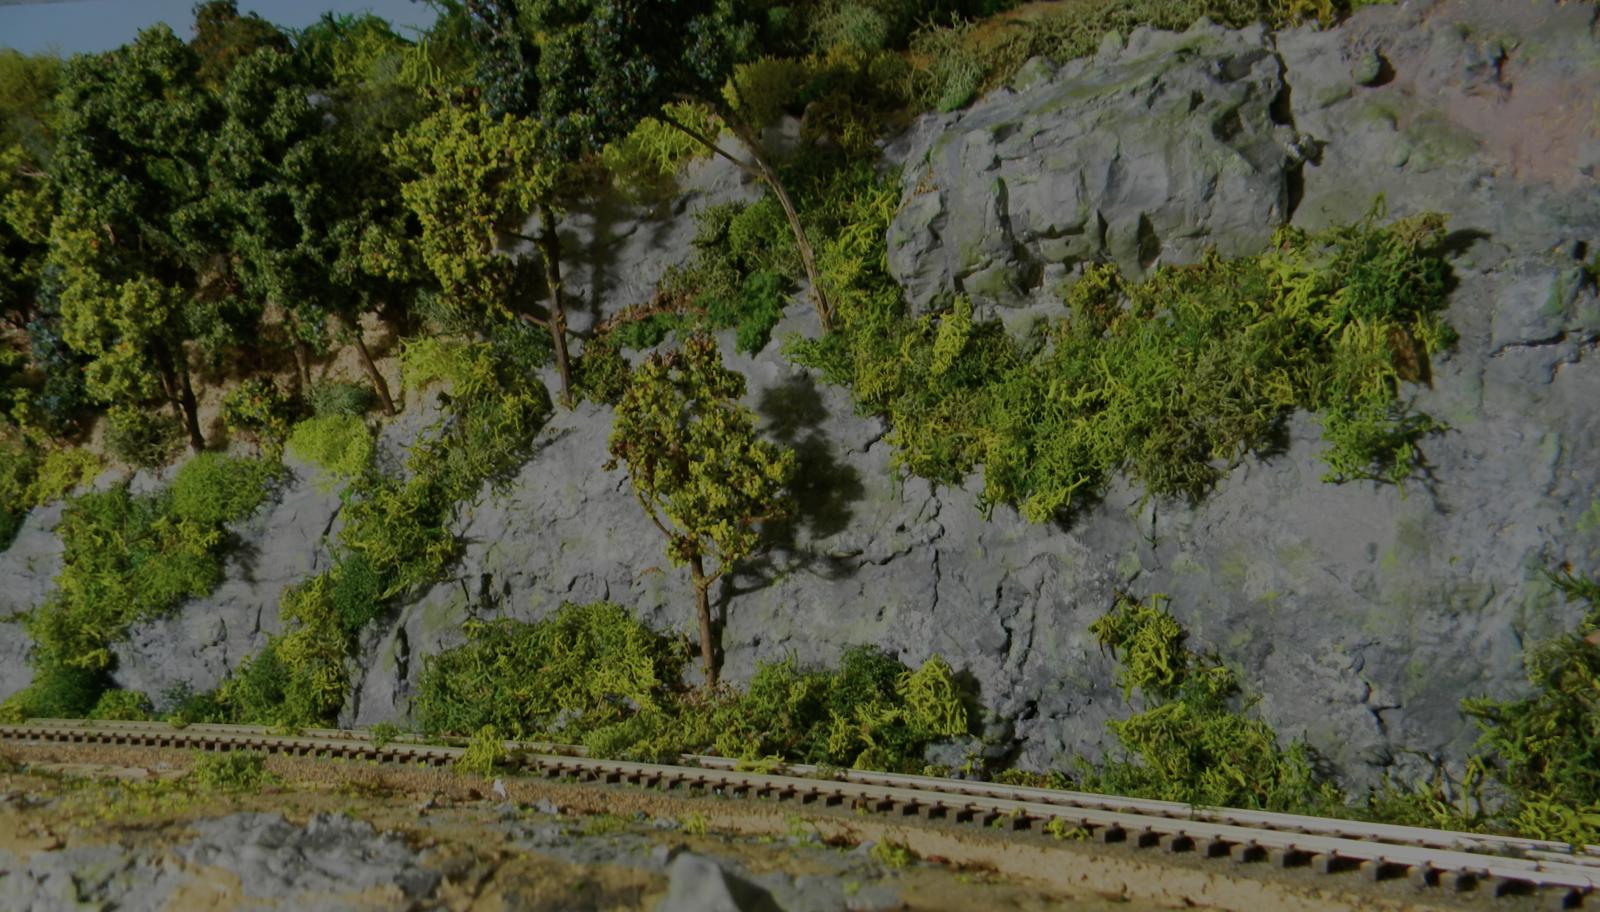
Did some cleanup to get the stray plants off of the tracks and ties, ran some trains through the area to see if I got some snagging. Did a bit of trimming, and I think we'll now transition efforts to weathering and ballasting track tomorrow.
Posts: 612
Threads: 12
Joined: Jun 2022
I'd noticed all of Ed's shots were done on weathered and painted track a few weeks ago, which reminded me that I was getting to the point in Mud Run where I'd need to attend to ballasting the track there. Before I commenced to dump gravel in and around the track, I figured it would be a good idea to weather the track.
Some things you end up learning only after experience. Here's today's bit of knowledge and experience. "IF I WERE SMART.... I would have weathered the track and it's ties PRIOR to putting the track down." If I were starting a layout from scratch, and PRIOR to putting the track on the roadbed, I would paint the track and ties. It's much easier to do so while sitting in the comfort of your chair. Once you have the track and some of the scenery down? Much tougher. Even if I would have hit everything with a base coat and highlighted after the track were installed, I'd be far ahead.
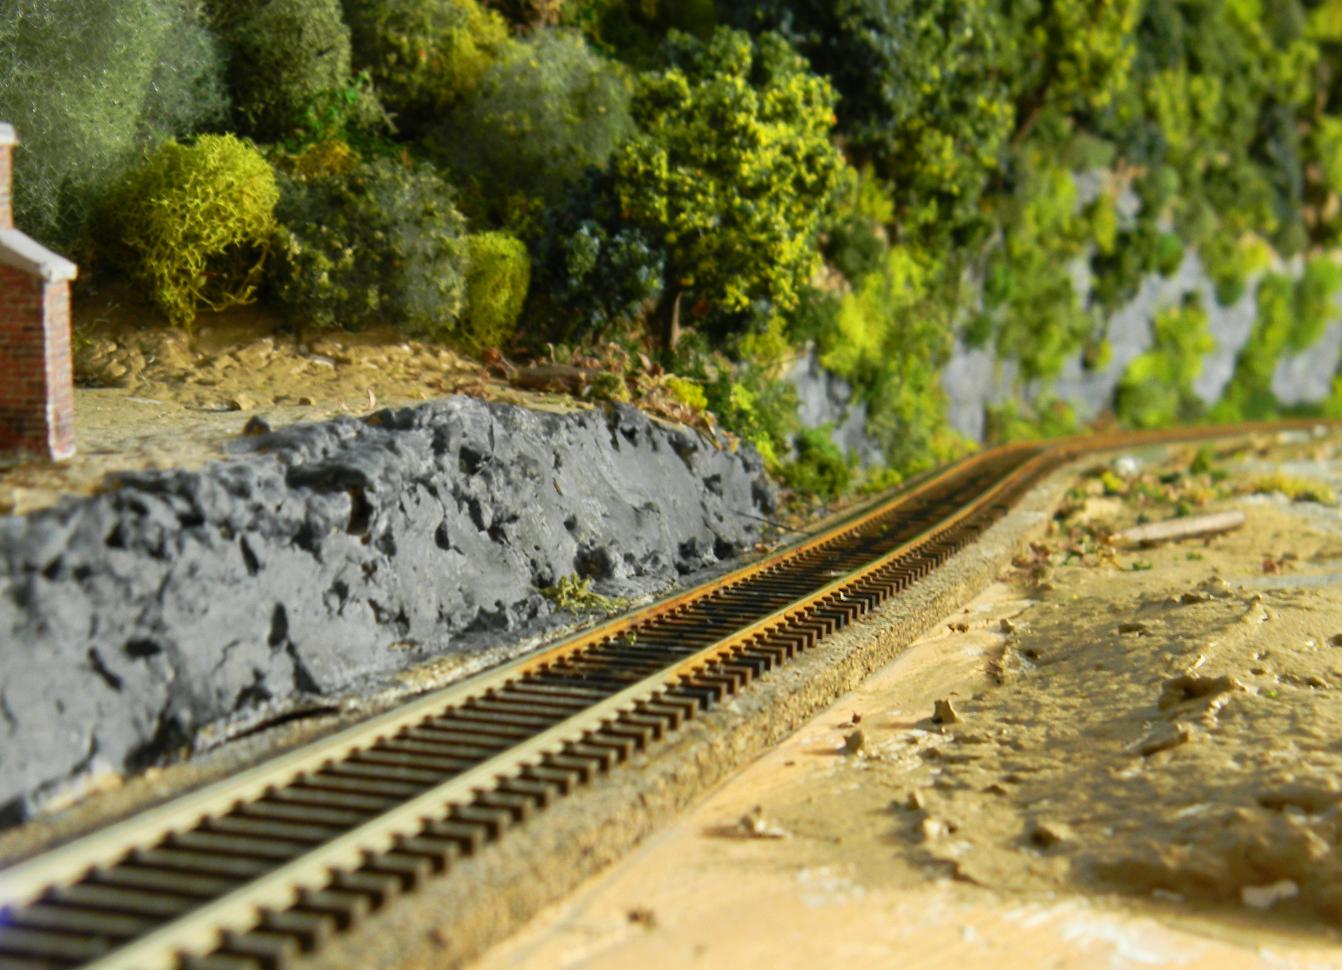
I'm painting the rails and ties by hand. I could probably get the airbrush out, but I'd still be standing on a working surface and using my Optivisor to ensure I got good coverage. It's slow business, but I have to admit, the results are dramatic. The photo below points that out. The track in the foreground is straight out of the box, the stuff receding into the distance was painted today. I can only really see to get to the outside of the inner rail and the inside of the outer rail, which will be good enough for me.
Posts: 612
Threads: 12
Joined: Jun 2022
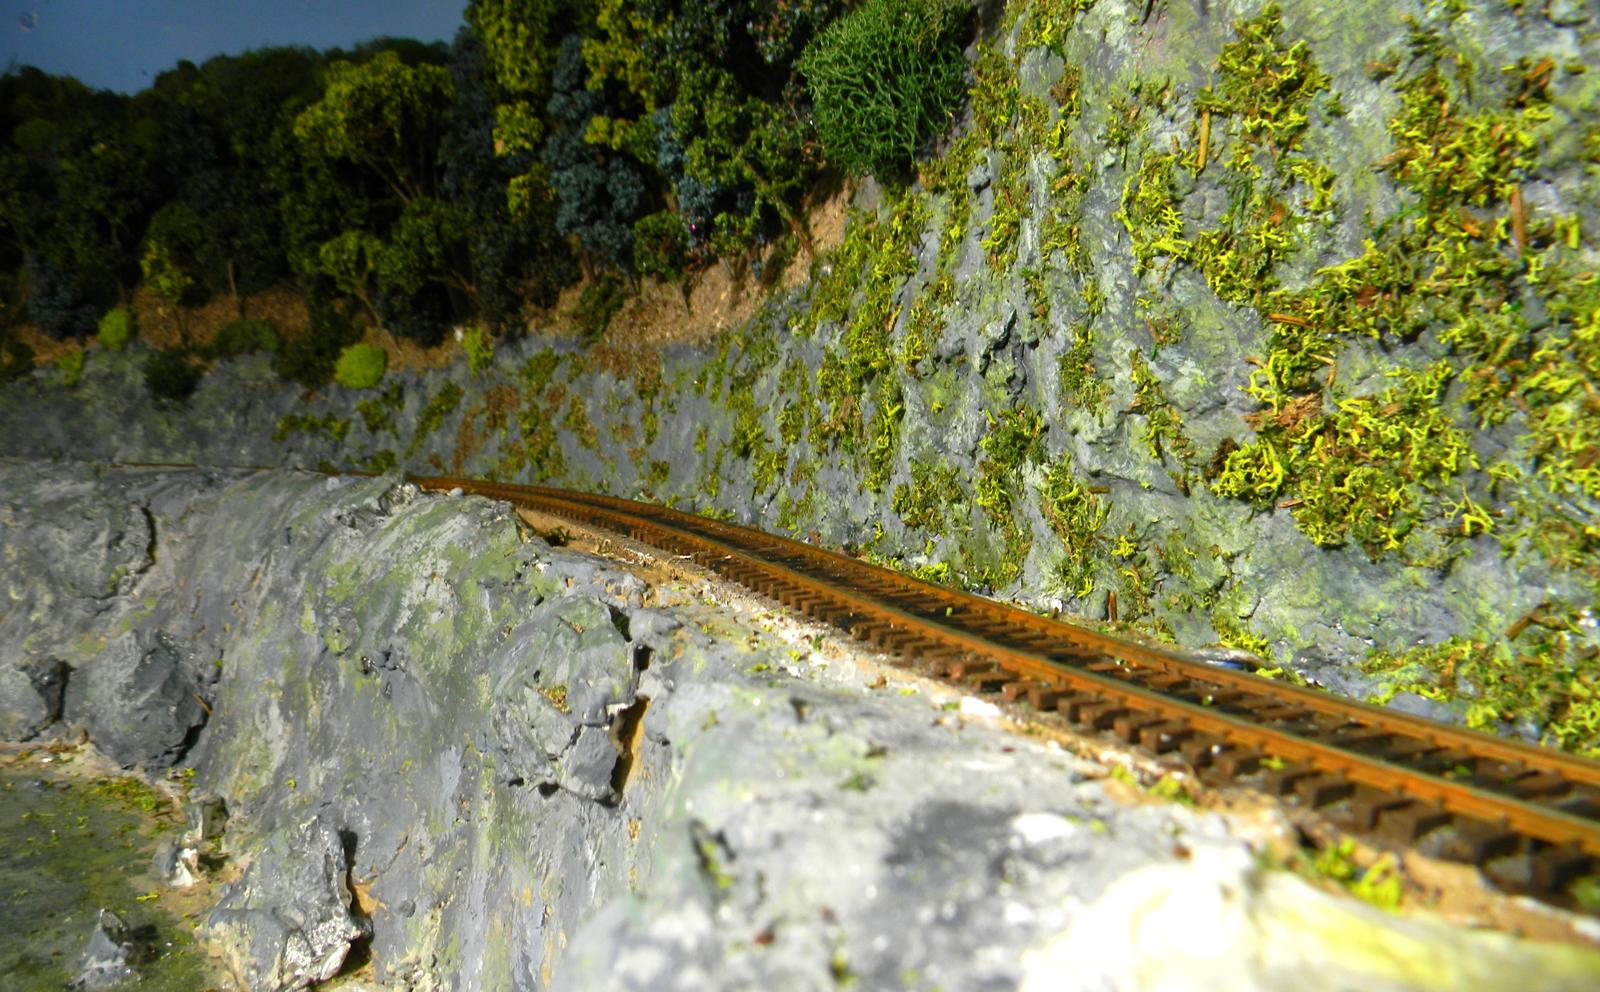
Made it around to the tunnel, roughly 10 feet of track in about 3 hours of paint time. Not for the faint of heart armed with just a brush and a palette of paint, but it does transform the track to something more realistic. I'm too pooped to ballast tonight.
Posts: 2,100
Threads: 41
Joined: Dec 2008
Painting/weathering the track makes the whole pop in my opinion. You are right, however, about the effort that goes into it. I feel your pain since I do it the same way.
Posts: 2,724
Threads: 160
Joined: Dec 2008
Looking good.. Nice to see another modeler of the Anthracite region.
My other car is a locomotive, ARHS restoration crew
Posts: 5,166
Threads: 100
Joined: Dec 2008
Hi Todd---I've been following the progress on your modelling from the beginning---keep up the great work.As Tom indicated those painted rails really do add another level to your scenes---it may seem like tedious work but in the end it will be well worth the time and effort.
Posts: 250
Threads: 12
Joined: Dec 2008
Hi Todd, a great thread right from the start. It seems to me you have come a long way in a very short time...... and the scenery! I seem to be on my own when it comes to scenery, Not Much of it, that is. I think you nailed the water, very impressive. Keep us posted please.
Jack 
LIFE....
..... Abandon the search for truth
Look for a good fantasy
Posts: 612
Threads: 12
Joined: Jun 2022
Thanks Ed and Jack. Always good to hear encouragement.
This was one railroad where the scenery is the "thing". There are (to date) no industries, and a run through a town along the tracks. So, I pretty much had to learn to deliver Mother Nature. Were there growing pains? Of course! However, I've been inspired by what others have done. The internet's great for that, and I'm glad to share what I've learned (the good, the bad and the ugly).
Posts: 612
Threads: 12
Joined: Jun 2022
Started ballasting Mud Run until I ran out of glue.
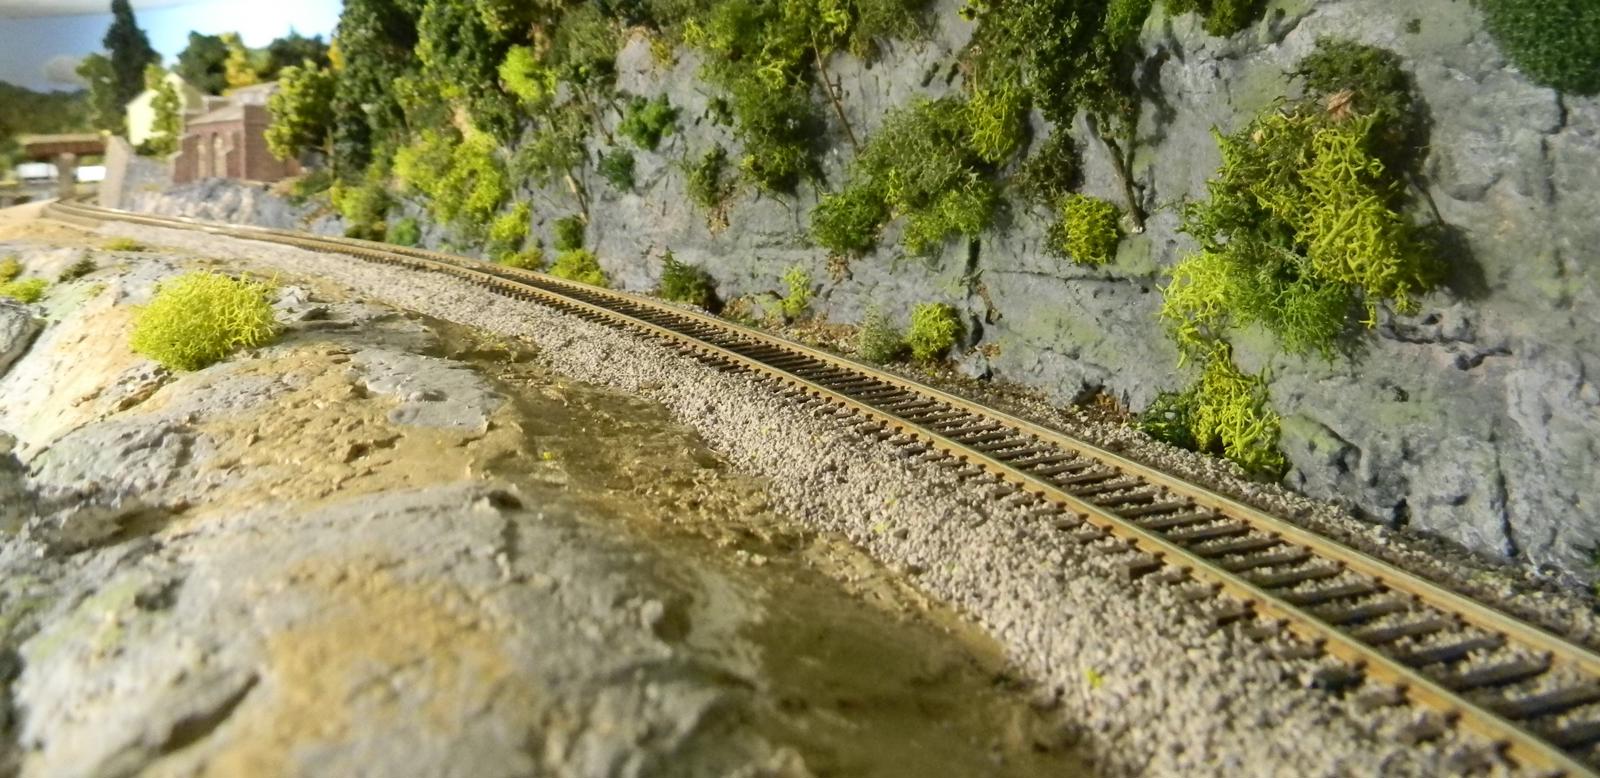
First used full strength glue on the edges of the cork roadbed and got a good "tooth" on that edge by applying ballast into that glue, letting it dry and then vacuuming up the extra into a sock in the end of my Shop Vac. I then applied liberally over the ties and tried to level it all to the tops of the ties and having the extra migrate off the edge of the roadbed.
I'm using Woodland Scenics ballast, that I think is made from walnut hulls, so it tends to float when you apply the whetting agent or the glue. So, even if you spend a good bit of time leveling out the ballast and getting it where you want it, it can migrate and stick in all the wrong places. In "How to Build Realistic Model Railroad Scenery", Dave Frary cautions us to use only ballast made out of rock, and the floating is the reason. However, I think I have 4 bags of this stuff to get rid of before I order something else. So, after it full dries and I can get my ShopVac on it, it'll be time to pick and poke stray pebbles off of the ties and rail flanges with my Xacto knife while wearing my Optivisor. Fun times indeed!
|


