PART 2, Scene 3 Continued
Full disclosure - if you're not impressed with my soldering skills, don't worry, you're not alone. I work with a bunch of professional electronic technicians, and they have banned me from picking up a soldering iron. My work is not pretty - I go for functional and call it a day. Speaking of things I need, some very small zip ties are on the list of things to procure tomorrow. There are a couple of areas where they'd come in handy on this project to clean up some wire runs.
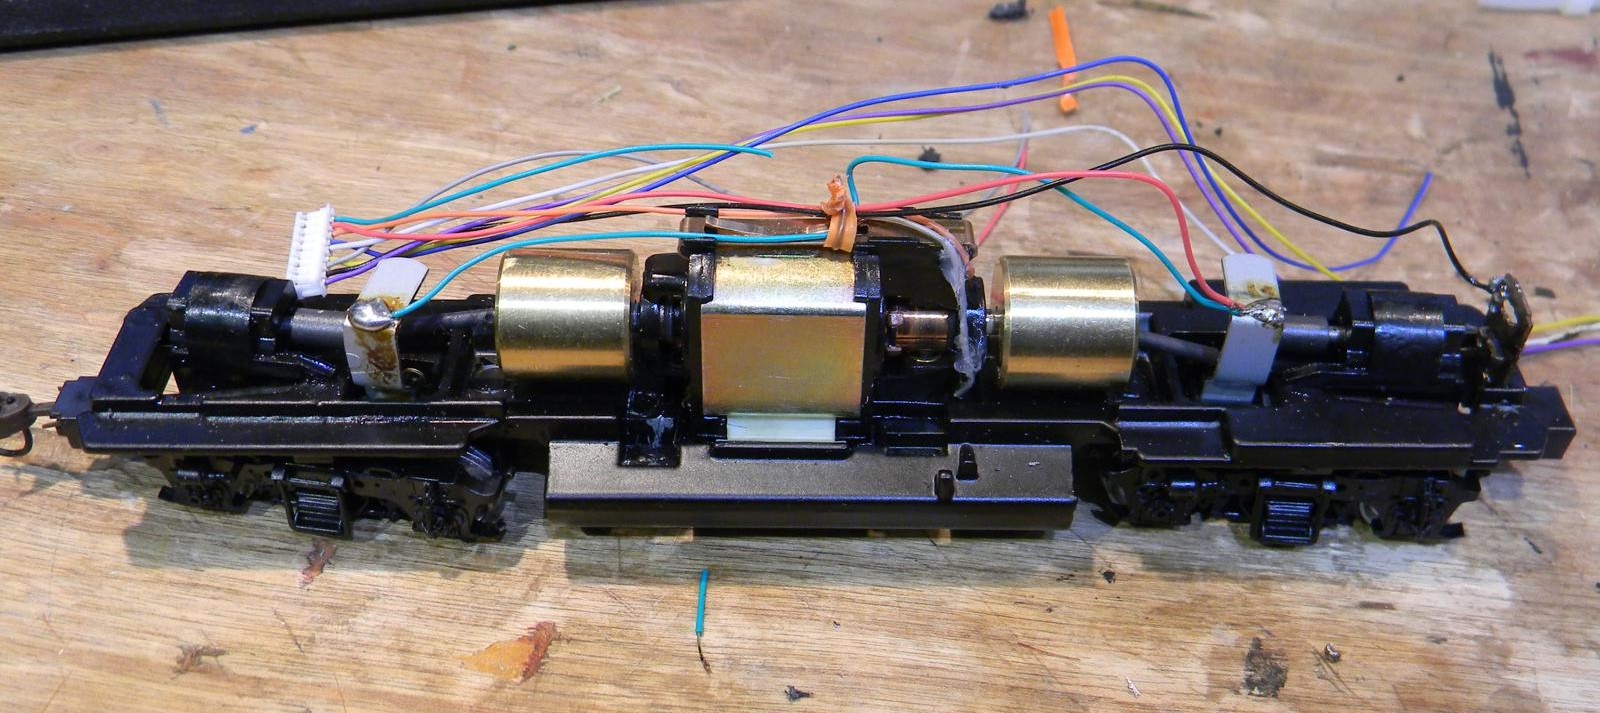
Tonight was spent attaching to the two track pickups. The high side (right side wheels) is attached to the posts on both trucks. I ran a wire (that's the green one, cut off the harness since this decoder does not use either the green or purple wires) to connect them, hit the top of the posts with some paste flux (need to get some flux cleaner as well tomorrow), tinned them and the ends of the wire and connected the red wire in the wiring harness to the front post. The two posts rotate with the trucks, so the wire between them has to have a bit of slack at all times. It's only necessary to attach to one of them, but if you've ever had a locomotive cut out in the frog of a switch, you'll realize there is value in being connected to both trucks - one of which will probably always be clear of the frog. (Another soldering recommendation - it's best to rough up the surface at the top of those posts prior to applying flux and solder).

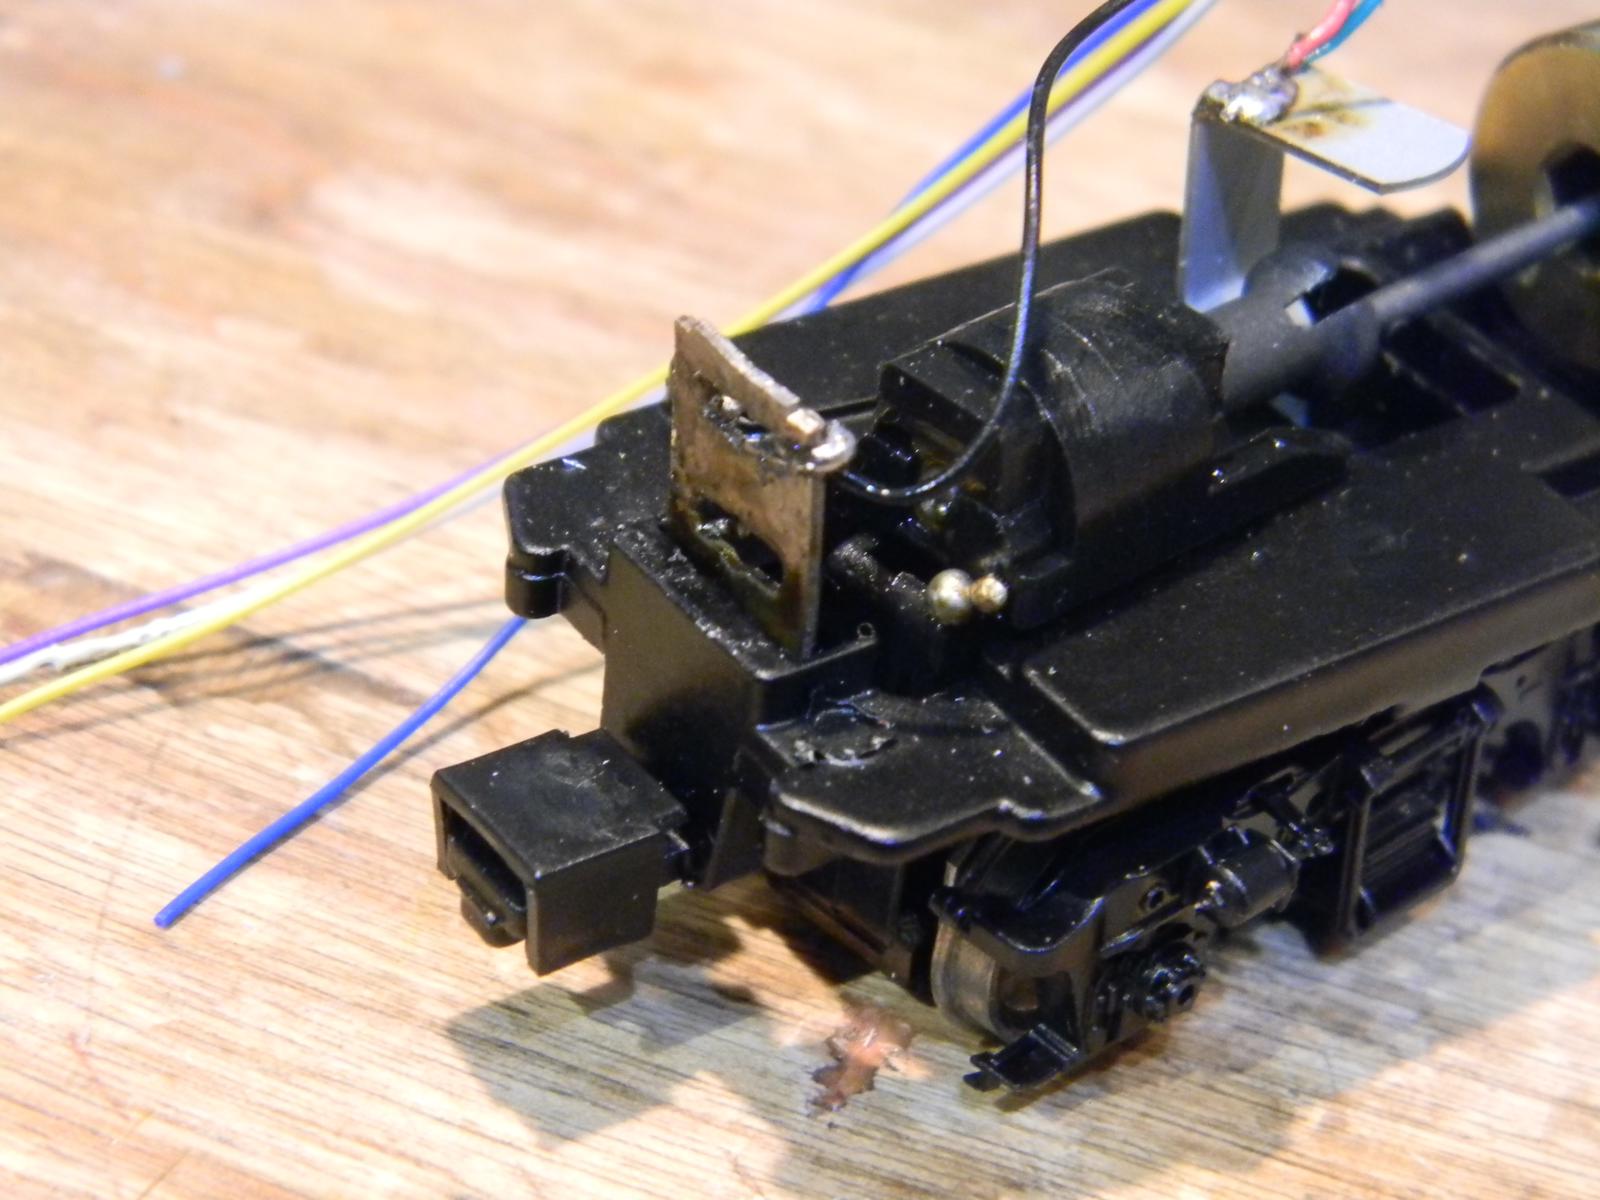
The low side (left-hand wheels) can be picked up anywhere on the chassis. I elected to wrap the end of the black wire around the post for the front headlight mount and hit the wire with solder. If you do want to solder directly to the frame, you'll probably need a solder gun to lay a good bit of heat into the thick metal of this post.

Time to check the install - I hooked up the decoder to the wiring harness (making sure no wire (except for the black) was touching chassis), put the loco on my programming track and just programmed the address (7324, the road number that'll eventually be on it). Read the address on the programming track to ensure it took, and then put the loco on the main track and tried out the motor functions (forward and reverse). Had a small snag with one of the driveshafts popping out of the truck, but after adjusting that, the motor works just fine in both directions. Nirvana!
Next tasker is forward and reverse lighting. I'll be installing LEDs with 1000 Ohm resistors in line with the positive terminal. Rear headlights have always been aggravating for me trying to secure the LED in the narrow part of the long hood. I'm thinking about designing an assembly that mounts over the rear light holes and the area behind the number boards with a hole in it to accept the LED to ease the job of installing and removing the LED. I'm also thinking of installing a ceiling in the cab to which the front LED will be anchored. I'm thinking sheet polystyrene will probably do the trick for both, but there's going to be some cutting and fitting involved.
As far as wiring the lights go, the white wire in the harness with be soldered to the resistor for the front light, yellow for the back light. Since they only provide one wire for the common low side for both lights, I'll probably run the blue wire up to the front and solder a pigtail that'll connect to the rear light as well.
Full disclosure - if you're not impressed with my soldering skills, don't worry, you're not alone. I work with a bunch of professional electronic technicians, and they have banned me from picking up a soldering iron. My work is not pretty - I go for functional and call it a day. Speaking of things I need, some very small zip ties are on the list of things to procure tomorrow. There are a couple of areas where they'd come in handy on this project to clean up some wire runs.
Tonight was spent attaching to the two track pickups. The high side (right side wheels) is attached to the posts on both trucks. I ran a wire (that's the green one, cut off the harness since this decoder does not use either the green or purple wires) to connect them, hit the top of the posts with some paste flux (need to get some flux cleaner as well tomorrow), tinned them and the ends of the wire and connected the red wire in the wiring harness to the front post. The two posts rotate with the trucks, so the wire between them has to have a bit of slack at all times. It's only necessary to attach to one of them, but if you've ever had a locomotive cut out in the frog of a switch, you'll realize there is value in being connected to both trucks - one of which will probably always be clear of the frog. (Another soldering recommendation - it's best to rough up the surface at the top of those posts prior to applying flux and solder).
The low side (left-hand wheels) can be picked up anywhere on the chassis. I elected to wrap the end of the black wire around the post for the front headlight mount and hit the wire with solder. If you do want to solder directly to the frame, you'll probably need a solder gun to lay a good bit of heat into the thick metal of this post.
Time to check the install - I hooked up the decoder to the wiring harness (making sure no wire (except for the black) was touching chassis), put the loco on my programming track and just programmed the address (7324, the road number that'll eventually be on it). Read the address on the programming track to ensure it took, and then put the loco on the main track and tried out the motor functions (forward and reverse). Had a small snag with one of the driveshafts popping out of the truck, but after adjusting that, the motor works just fine in both directions. Nirvana!
Next tasker is forward and reverse lighting. I'll be installing LEDs with 1000 Ohm resistors in line with the positive terminal. Rear headlights have always been aggravating for me trying to secure the LED in the narrow part of the long hood. I'm thinking about designing an assembly that mounts over the rear light holes and the area behind the number boards with a hole in it to accept the LED to ease the job of installing and removing the LED. I'm also thinking of installing a ceiling in the cab to which the front LED will be anchored. I'm thinking sheet polystyrene will probably do the trick for both, but there's going to be some cutting and fitting involved.
As far as wiring the lights go, the white wire in the harness with be soldered to the resistor for the front light, yellow for the back light. Since they only provide one wire for the common low side for both lights, I'll probably run the blue wire up to the front and solder a pigtail that'll connect to the rear light as well.
Check out my "Rainbows in the Gorge" website: http://morristhemoosetm.wixsite.com/rainbows


