01-27-2023, 02:49 PM
And we fast forward.... (temporarily)
Parts 5 &6 - Redefining Greatness thru Roadnumbers
3:00. PM. So much for model railroading in daylight hours. Got a couple of taskers this morning and just freed myself up.
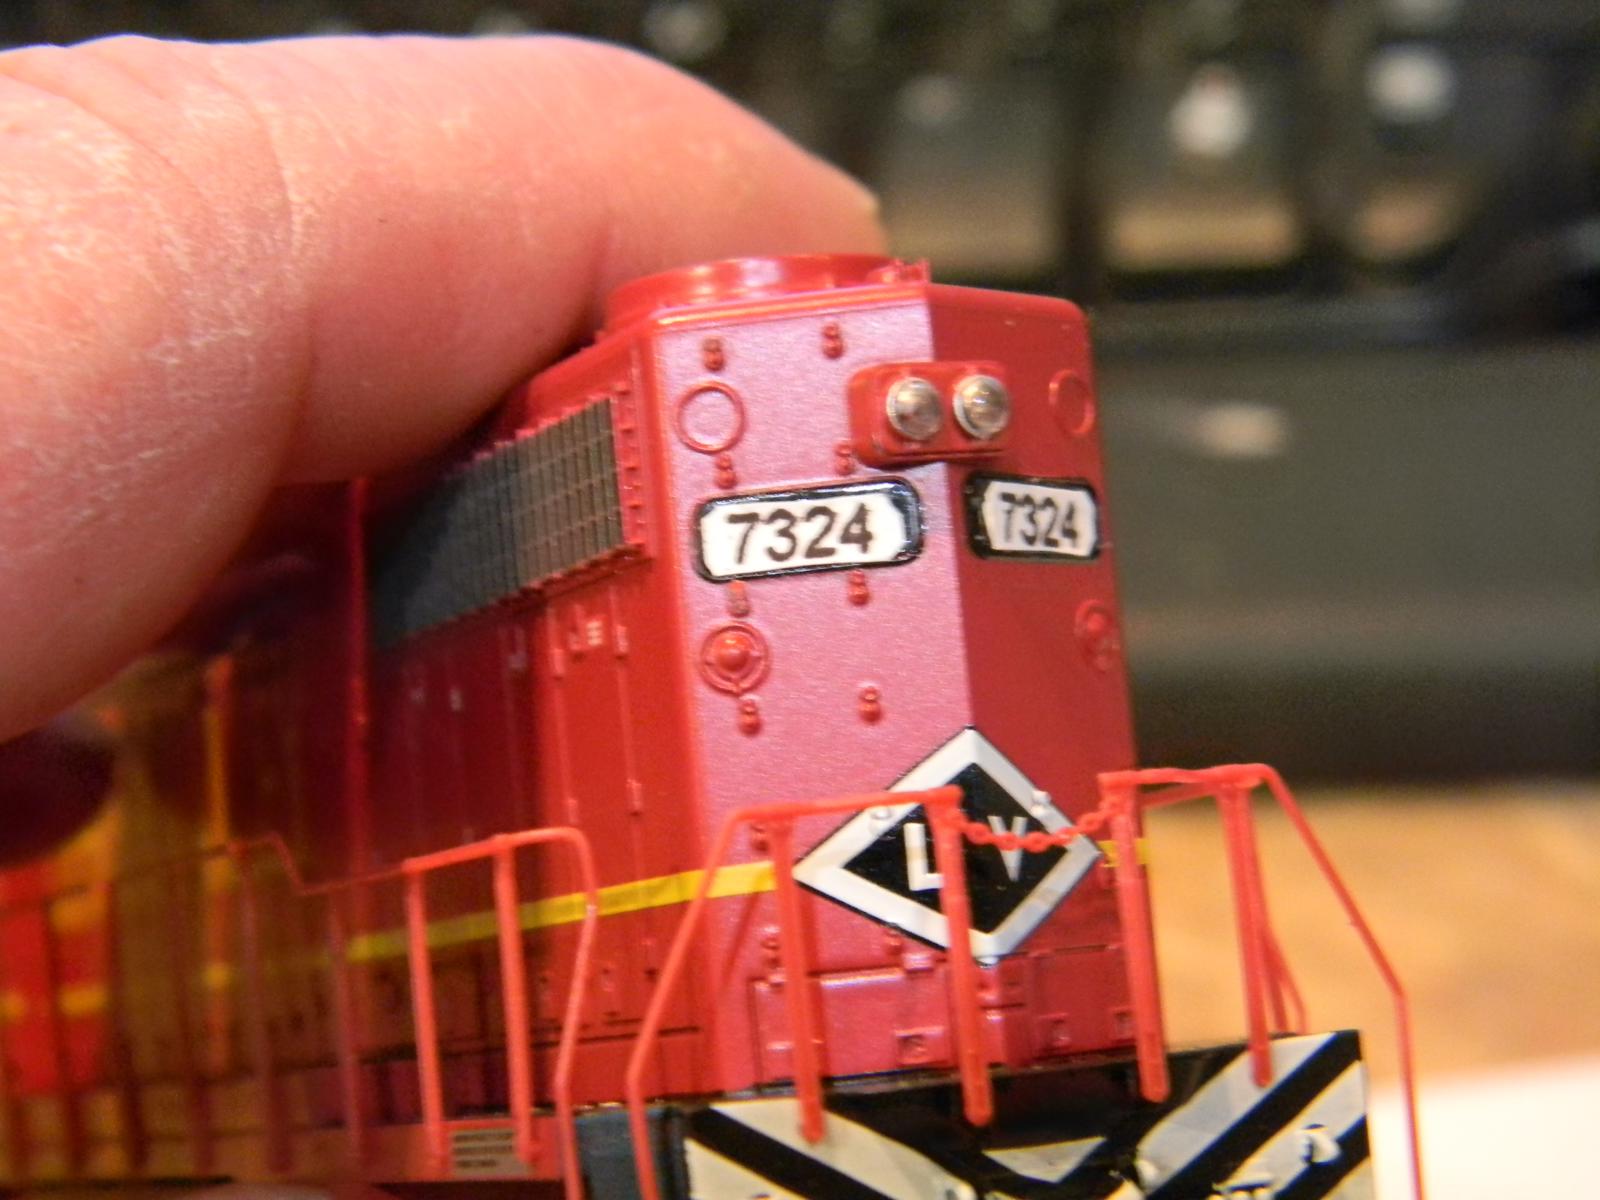
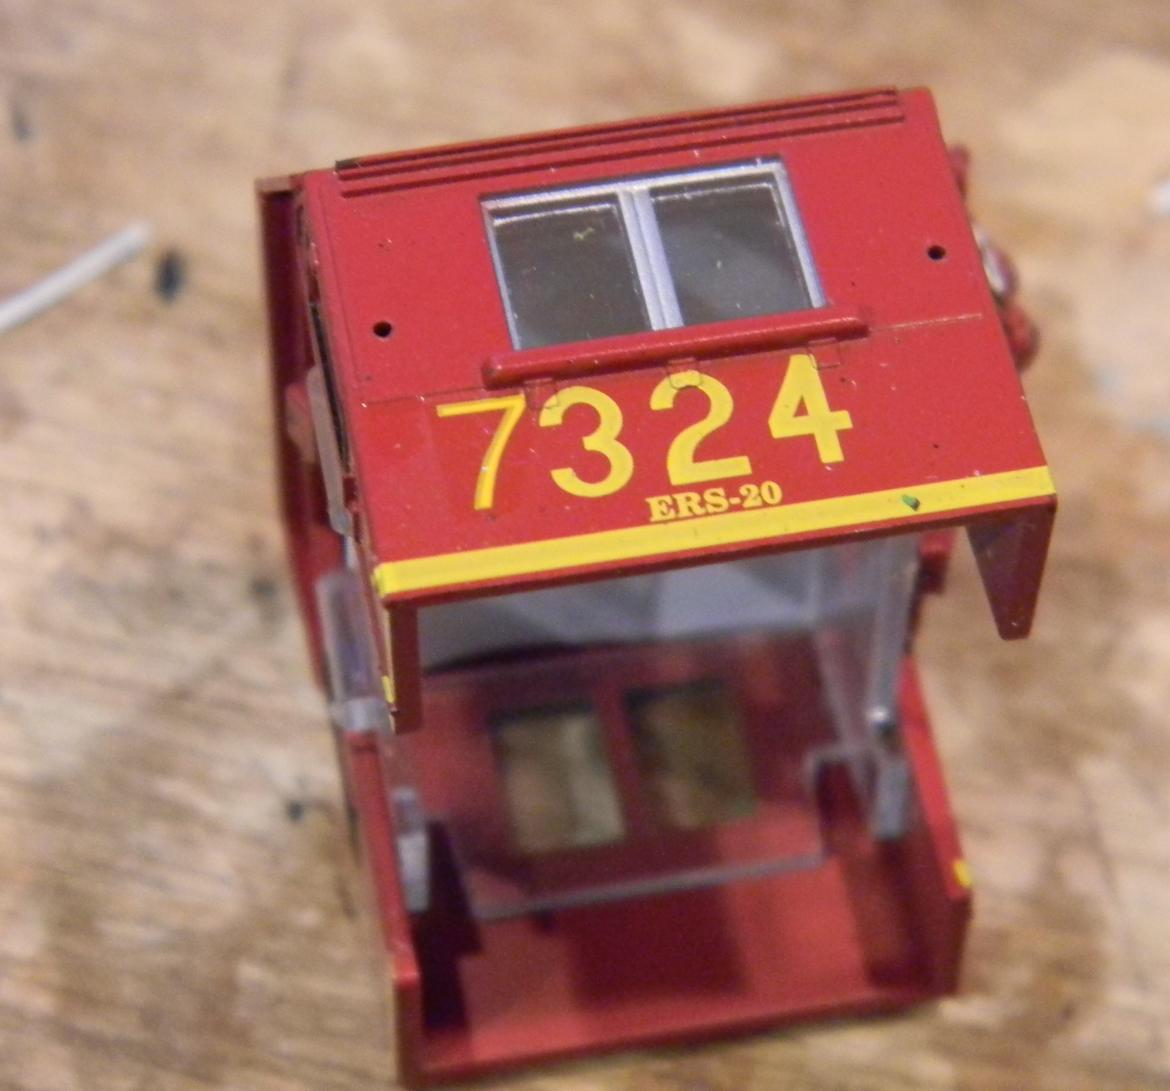
When the D&H received the GP38s from LVRR and the GP39's from RR, no extra effort was expended in inserting these locomotives onto the D&H roster, which ended in the 5000 series. Both sets of locomotives were inserted into the new 7000 series. In the case of the RR, a white "7" was applied over the RR "3" on the long hood. Sometimes they didn't even paint over the 3. Sometimes they painted a black square over the "3" and applied the white "7". For the LV units (which were previously in the 300-325 series), a yellow "7" was added right next to the 3. Thus 324 became "7324" under the window of the cab. The number boards on each end underwent a much more radical change. The black number boards were replaced with white and the numbers were black instead of white.
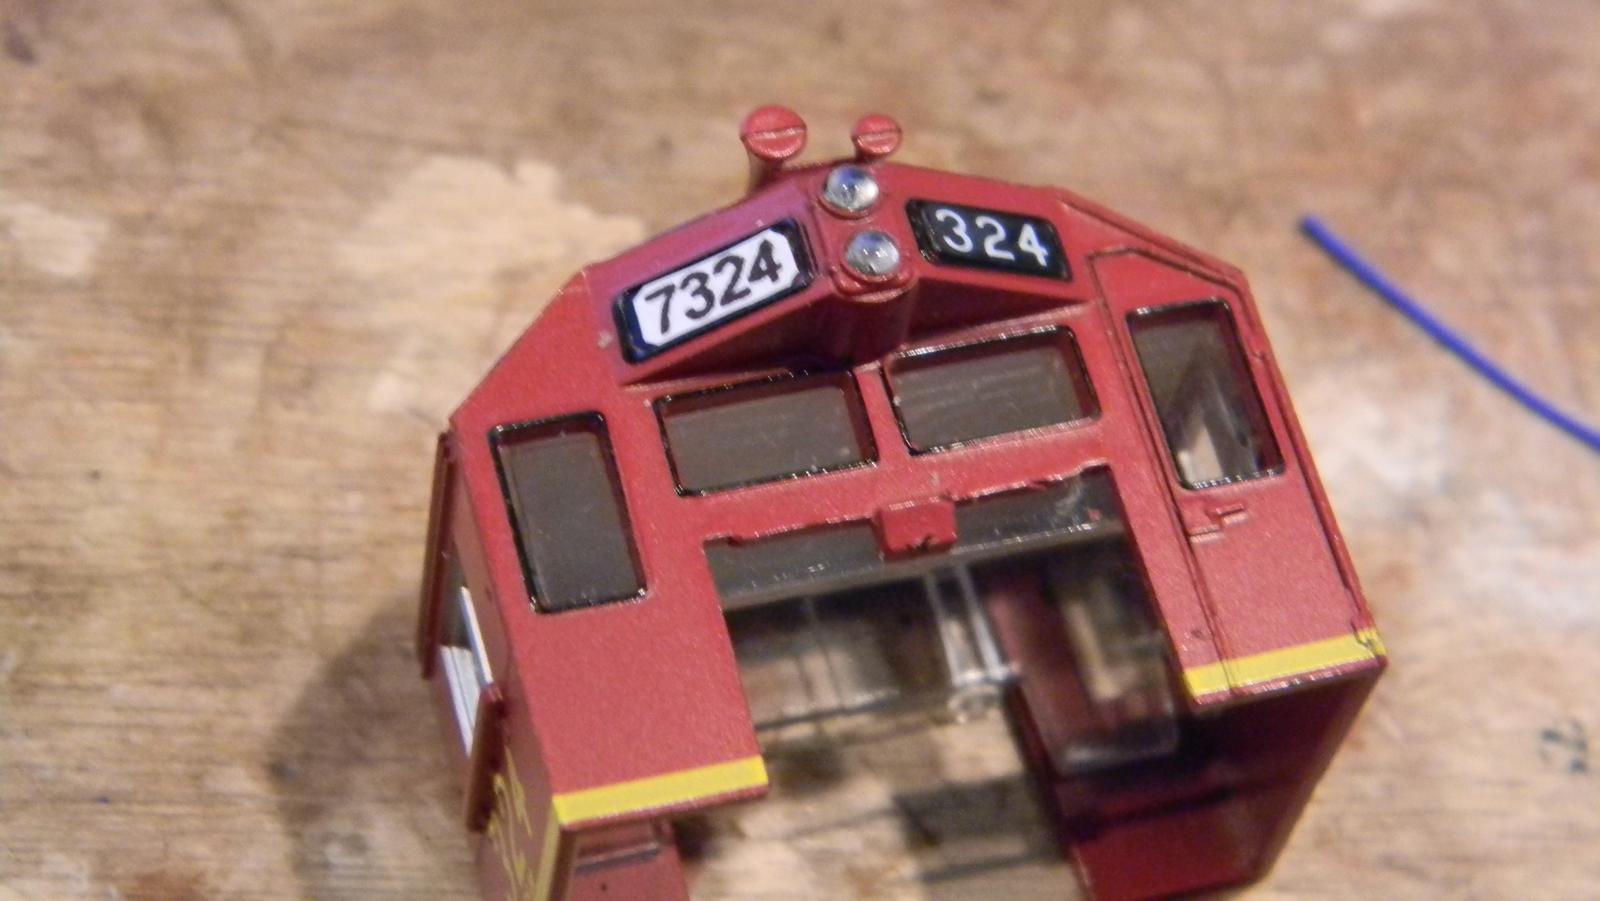
I elected to remove the cab to install the lighting, so I figured, while we're in this state, this was an excellent time to address the number changes on the cab, and I might as well do the tail end as well.
With previous locomotives, I would have painted out the number boards in white and then added number decals or dry transfers. Here's my problem with that. For the life of me, I cannot align multiple numbers on those tiny number boards. With decals, I'm lucky to get them to stick in place and stay. Dry transfers are tough on such a tiny surface. I started thinking about my laser printer. Even if I printed to paper and glued that in place, it would probably be better than my usual efforts. Then I remembered I had some CD labels. They're made for applying a nice label to burned CDs and have decent stickiness to plastic.
One of my taskers this morning took me into Home Depot where I procured some heat shrink tubing of the appropriate size for the tiny wires running out of this decoder. After this brief hiatus in dealing with numerology, it's back to burning things with the soldering iron. The previously scheduled program therefore resumes......
Played around with fonts and font sizes before just settling for Arial 8 pt. Printed on one of those stickers, used my Olfa knife to carefully cut them down to the appropriate size and stuck them right over the old "324". They look fantastically better than any numbers applied with decals or dry transfers. One thing I'm considering doing is removing all vestiges of the "324" and the black number boards and putting the sticker back over them (ended up doing that for the rear and eventually did the same for the front boards). I think they'll look better with light coming from behind them.


Got my decal supplies out (Micro Set and Micro Sol), and cut two yellow "7's" off of the set of Lehigh Valley Diesel decals that arrived in the mail this week (Microscale 87-855). I was delighted to notice that this same decal set has a decal for the snowplow (which also gets the white and black chevrons that are on the front hood). That snowplow is going to look pretty snappy when I get to it. Applied the Set to the area where I'm going to put each 7, slid the 7 on and hit it with another coat of Set. After some time to dry, I hit the area with some Sol to make the decal fade into the paint. The fact that the "7" I put on is not quite the same size or thickness or font of the Athearn applied LV numbers bothers me not one bit - it's completely appropriate for this D&H patch out.

Parts 5 &6 - Redefining Greatness thru Roadnumbers
3:00. PM. So much for model railroading in daylight hours. Got a couple of taskers this morning and just freed myself up.
When the D&H received the GP38s from LVRR and the GP39's from RR, no extra effort was expended in inserting these locomotives onto the D&H roster, which ended in the 5000 series. Both sets of locomotives were inserted into the new 7000 series. In the case of the RR, a white "7" was applied over the RR "3" on the long hood. Sometimes they didn't even paint over the 3. Sometimes they painted a black square over the "3" and applied the white "7". For the LV units (which were previously in the 300-325 series), a yellow "7" was added right next to the 3. Thus 324 became "7324" under the window of the cab. The number boards on each end underwent a much more radical change. The black number boards were replaced with white and the numbers were black instead of white.
I elected to remove the cab to install the lighting, so I figured, while we're in this state, this was an excellent time to address the number changes on the cab, and I might as well do the tail end as well.
With previous locomotives, I would have painted out the number boards in white and then added number decals or dry transfers. Here's my problem with that. For the life of me, I cannot align multiple numbers on those tiny number boards. With decals, I'm lucky to get them to stick in place and stay. Dry transfers are tough on such a tiny surface. I started thinking about my laser printer. Even if I printed to paper and glued that in place, it would probably be better than my usual efforts. Then I remembered I had some CD labels. They're made for applying a nice label to burned CDs and have decent stickiness to plastic.
One of my taskers this morning took me into Home Depot where I procured some heat shrink tubing of the appropriate size for the tiny wires running out of this decoder. After this brief hiatus in dealing with numerology, it's back to burning things with the soldering iron. The previously scheduled program therefore resumes......
Played around with fonts and font sizes before just settling for Arial 8 pt. Printed on one of those stickers, used my Olfa knife to carefully cut them down to the appropriate size and stuck them right over the old "324". They look fantastically better than any numbers applied with decals or dry transfers. One thing I'm considering doing is removing all vestiges of the "324" and the black number boards and putting the sticker back over them (ended up doing that for the rear and eventually did the same for the front boards). I think they'll look better with light coming from behind them.
Got my decal supplies out (Micro Set and Micro Sol), and cut two yellow "7's" off of the set of Lehigh Valley Diesel decals that arrived in the mail this week (Microscale 87-855). I was delighted to notice that this same decal set has a decal for the snowplow (which also gets the white and black chevrons that are on the front hood). That snowplow is going to look pretty snappy when I get to it. Applied the Set to the area where I'm going to put each 7, slid the 7 on and hit it with another coat of Set. After some time to dry, I hit the area with some Sol to make the decal fade into the paint. The fact that the "7" I put on is not quite the same size or thickness or font of the Athearn applied LV numbers bothers me not one bit - it's completely appropriate for this D&H patch out.
Check out my "Rainbows in the Gorge" website: http://morristhemoosetm.wixsite.com/rainbows


