Interaction Hobbies Santa's Workshop
#1
Well it looks like Interaction Hobbies is continuing with it's tradition of a free Christmas themed kit. Last year I built their Christmas Tree dealer kit. This Year they have introduced their Santa's Workshop kit. It's a free kikt that you get when you purchase 70$ or more of their products. I had a few kits on my wish list so this made me press the order button.
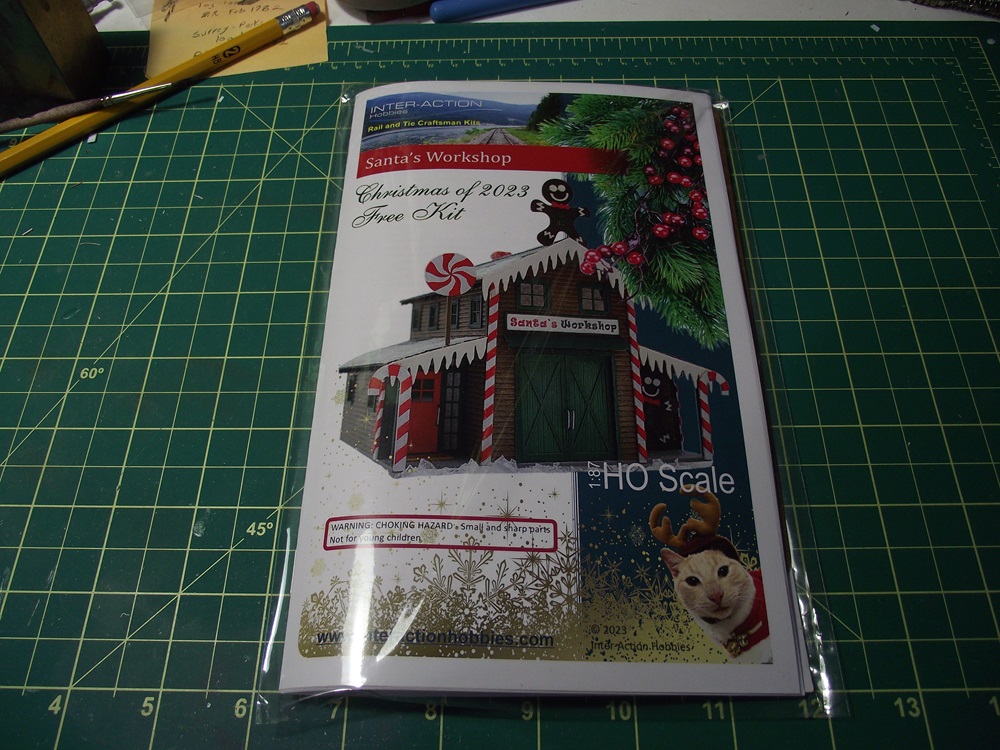
   

It's a cute little kit whose footprint is 3 3/8 X 3 5/8" and apox 2 stories high. 
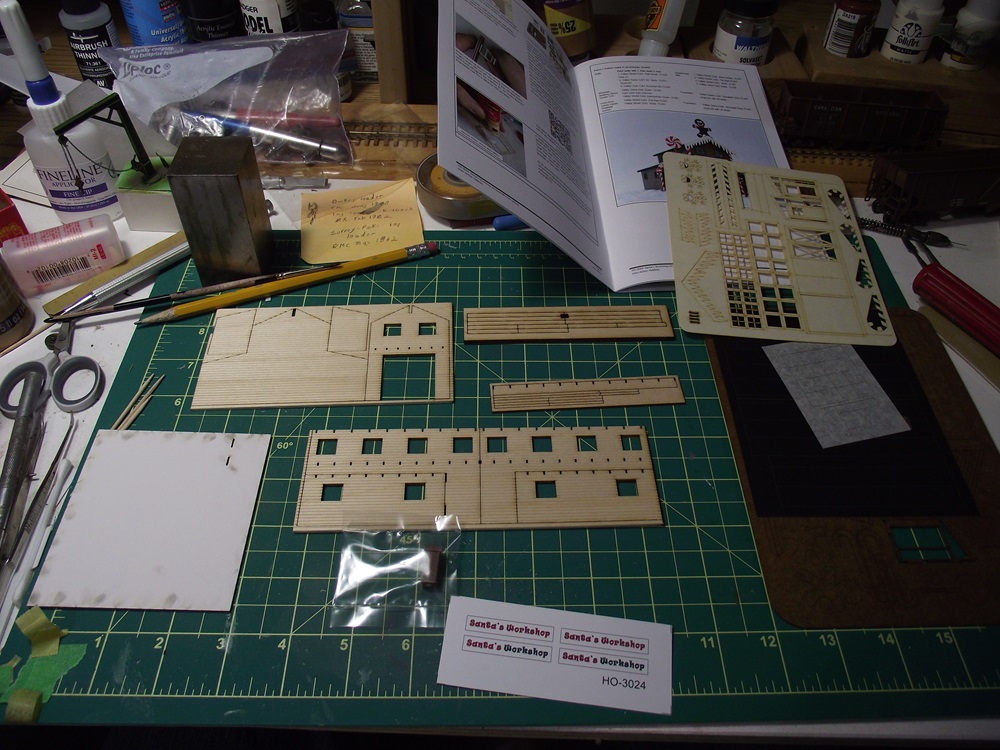
   

So what you get is laser cut walls, windows, foundation, doors glass and a whole bunch of Cristmas add-ons. I suppose that if you just wanted the building to be a regular shop or garage, you could just leave the Christmas themes off (but what fun would that be?)
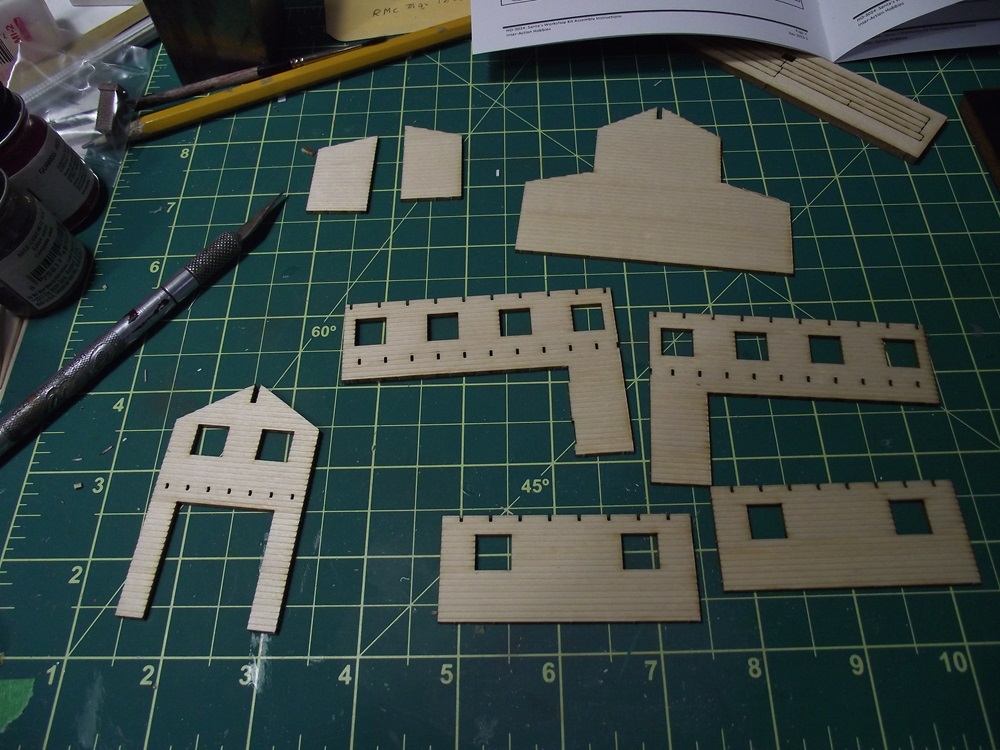
   

I started with cutting the walls out of the clapboard siding sheet.
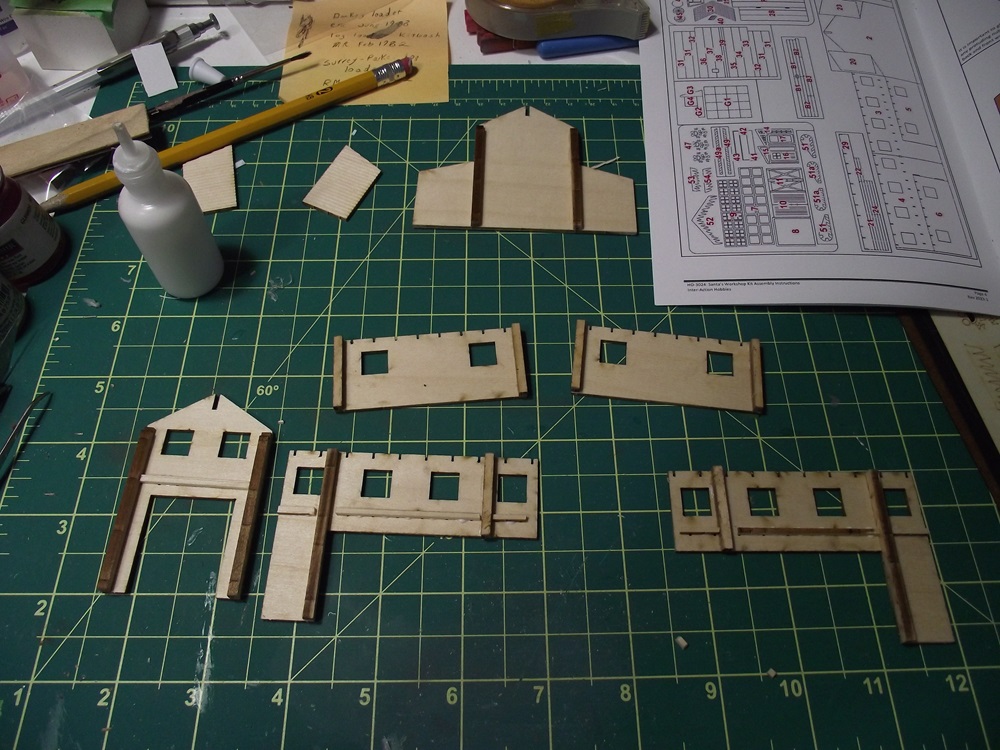
   

Then I added the wall bracing. It's all laser cut as well. On the instructions recomendations, I added some scrap stripwood to block off the lower rafter holes. This makes adding the rafter tails to the right depth easier later.
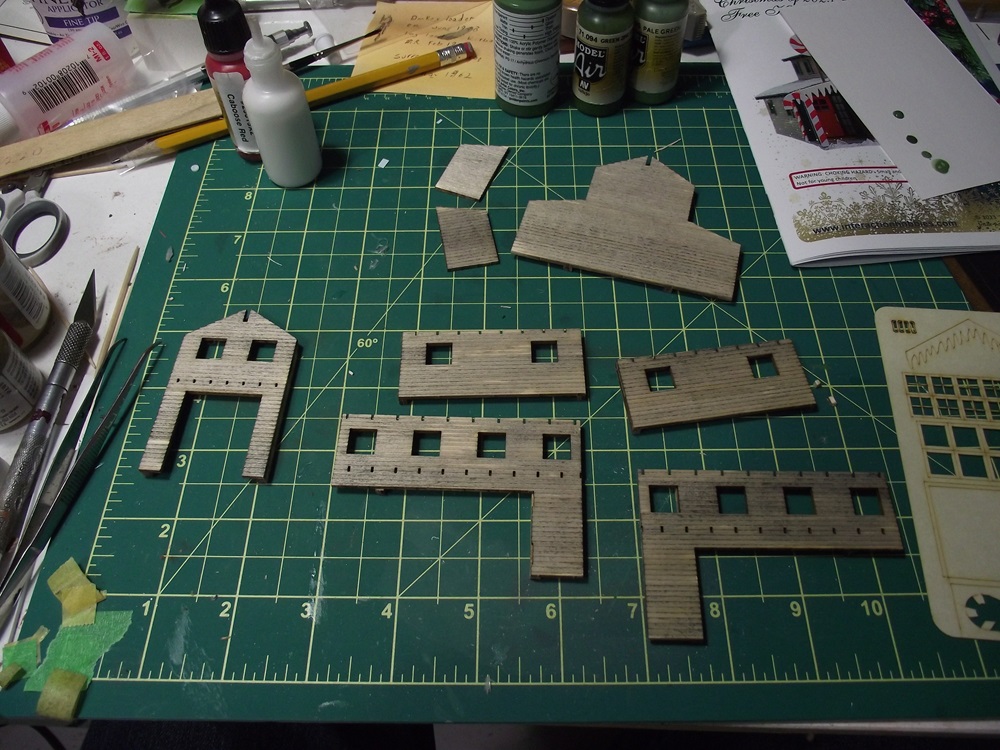
   

Then I brushed the walls in A&I and I'm letting them dry before painting. The instructions have very good painting suggestions, but I'm doing it a bit differently.
Reply
#2
Painting day.


I airbrushed Depot Buff over the A&I stained walls, not enough to cover completely though, I just want a bit of the staining to show from underneath to give it some texture. 


The window frames, trim and rafters were airbrushed in Chromate green. The door is Caboose red.


With the paint dry, I assembled the windows and sarted on the large double doors. I'm thinking of adding red blinds to the windows for some contrasting color.
Reply
#3
Continuing with the project


I assembled the doors amd added the red blinds to the windows. Breaks up the tan/green motif a little bit.
   
Then I started to put the walls up . When I glued the rear wall to the foundation I noticed that the foundation was slightly bowed. Gluing a couple of 1/8" basswood stiffeners fixed the problem.
Reply
#4
More walls going up.


The small door wall inserts into slots in both the floor and the side wall, keeping everything in alignment. Then the rest of the walls are built off of that. I did find that the foundation got a little crowded with the front wall going over by about 1/16".  Not a huge problem though.


Then I added the side annexes and all the corner posts. Next will be the rafters and roofs.
Reply
#5
Looking good. It is coming out great.
Tom
Silence is golden but Duct tape is silver
Ridley Keystone & Mountain Railroad
My Rail Images Gallery
Reply
#6
That's one nice kit! Love the look of the siding and the window mullions are really nice.
Check out my "Rainbows in the Gorge" website: http://morristhemoosetm.wixsite.com/rainbows
Reply
#7
Thanks. I got the building finished up to adding the Christmas decorations today.


The kit comes with a welcome mat for the front door. It's a nice touch.


So the two anexes have their own rafters. I installed them using the blocks that I added to the inside of the walls to make them a uniform length.


Then I added the roof sections to the anexes and the rafters to the main structure. Everything fit together perfectly.


The roofing comes as a thin black paper but I airbrushed mine in green. I used Scotch double sided tape to install the roofing. I'll be adding some other tones and weathering to the roof later.


The last thing I did was add the small eve over the two main doors. I still have to add the door handles but the building itself is now finished. Next is the addition of all the Christmas Decorations.


Reply
#8
I got on a bit of a tear today and finished the structure, starting with the Christmas decorations


I started with the 'Santa's Workshop' sign, three pieces easy to build.


Then I made the striped posts and Candy canes. The way they are built is pretty smart. You have the candy cane and the stripes on seperate cards. I painted the cane white and the stripes red.


Then you glue the stripes, in their carrier, to the posts and canes and wait for the glue to dry. Then just cut the stripes loose of their carrier.


There are also two gingerbread men that have to be cut out and detailed.


And with that I glued the details to the building. I also re-did the roof coloring and texture. I first tried dry-brushing some lighter greens into the roof but then pulled out Deco-Art's 'snow-tex' which gives you a thicker snow-like look. This was after the first application of two that I've added.


There were a few things I left off. There is a large loli-pop detail that I decided not to use as well as some laser-cut icicles that I didn't care for. I replaced the door handles that came in the kit with some brass wire  as well.


I used two of the candy canes and the other Gingerbread man on the rear wall.
Next I'm going to work on a diorama base for it.
Reply
#9
That looks fantastic! Great work. One question: What’s the A&I product you used? I have not heard of that
————————————————————————————
Modeling the East Broad Top as it was between 1937-1942
~Amanda
Reply
#10
Thank you.
A&I is short for Alcohol and India Ink. You mix the Alcohol and india ink at a ratio of two teaspoons of ink to one pint of Alcohol. You can adjust the ratio lighter or darker if you want. Then you just use it as a stain to weather wood.
Reply
#11
I built a new diorama base for the two Christmas kits:
   

The Christmas tree dealer on the left was last year's kit and I had made a small base for that but I figured it would be better to put both kits together. The base is and artist's painting panel, originally 12X12". I cut it down to 12X8". The Snow is the same Snow-tex that I used on the workshop roof. I made a drive way and added more shoveled snow on the edges as well as some sand on the drive itself. The pine trees are cheap dollar store trees. I bit tacky I guess but it goes with the whole 'Santa's Workshop theme. Woodland Scenics' Snowball throwers as the finishing touch.


Reply
#12
I appreciate the work your have done on showcasing your diorama, nicely done.

Bruce
Reply
#13
Glen, very nice work on Santa's workshop and on your entire scene!
Merry Christmas to you and your family!

Greg
Reply
#14
I have to disagree with you on the dollar store trees, the snow on the tips is a nice touch that fits very well with the snowscape!

I have the Christmas Tree Dealer kit, and now I know where I want to place it on my layout once it gets built!
Check out my "Rainbows in the Gorge" website: http://morristhemoosetm.wixsite.com/rainbows
Reply
#15
Thank You everyone and Merry Christmas to all.

I have built two of the Christmas tree dealer kits, one for a friend last year. I believe he might be using is as a coffee shop beside a station as he wanted to be able to use it year-round.
Reply


Forum Jump:


Users browsing this thread: 1 Guest(s)