Posts: 118
Threads: 9
Joined: Dec 2008
Well after few days recovering from a reaction to some medication I was prescribed for my back I have finally been able to get some work done on the ten wheeler and get some photos resized.
The front of the tender at one time had a small deck plate on the front of it ( between loco and tender ). When I got the locomotive this part was missing as the photo below shows.
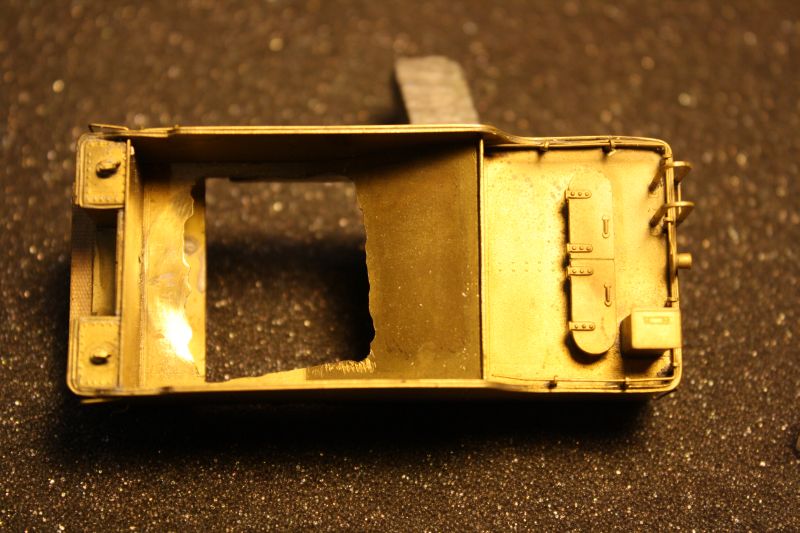
I had some 0.025" thick etched brass tread plate made by Precision Scale Co. so I cut out a small rectangular section and filed the back side so it had a couple of small tabs that would fit in the small slots on the tender front. ( sorry no photo ). I solder the new piece in place and then made some new front legs from a piece of small brass flat bar and soldered it in place as well.
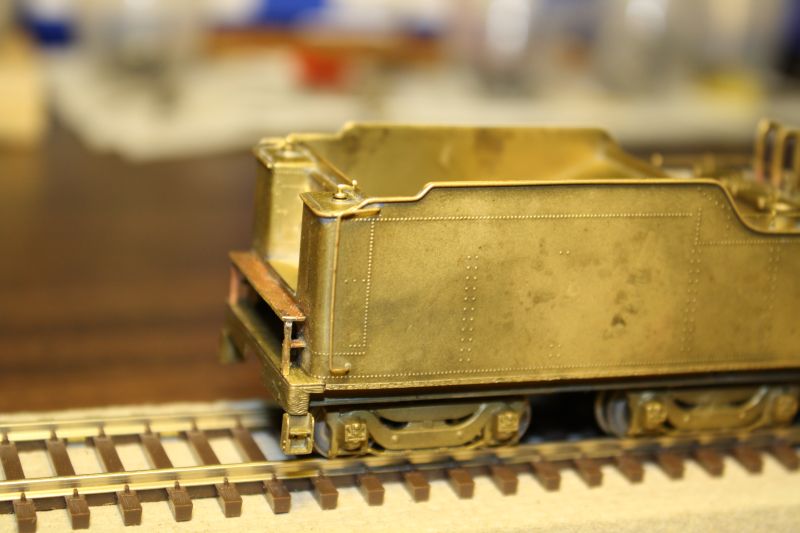
For now I will be using a Digitrax decoder in the tender but I do plan on adding a Tsunami sound decoder later so deciding on how to add a speaker to the tender now will save possible damage to the paint later. The tender floor was cut out by one of the past owners most likely so for sound as well.
I am not sure why it was hacked up the way it is but seeing as the speaker box I plan to add and the coal load will hide the mess I am going to leave it alone.
Wayne Reid
Posts: 118
Threads: 9
Joined: Dec 2008
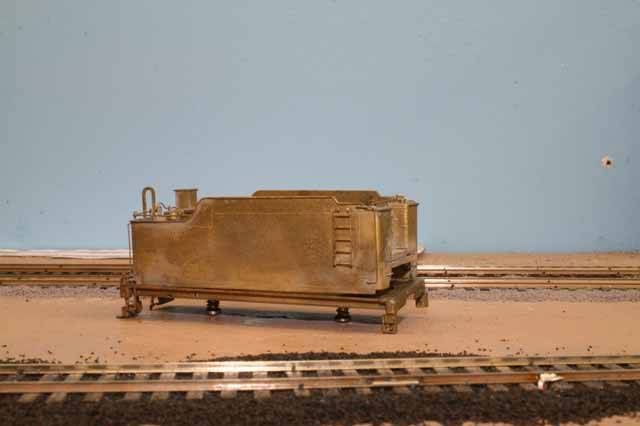
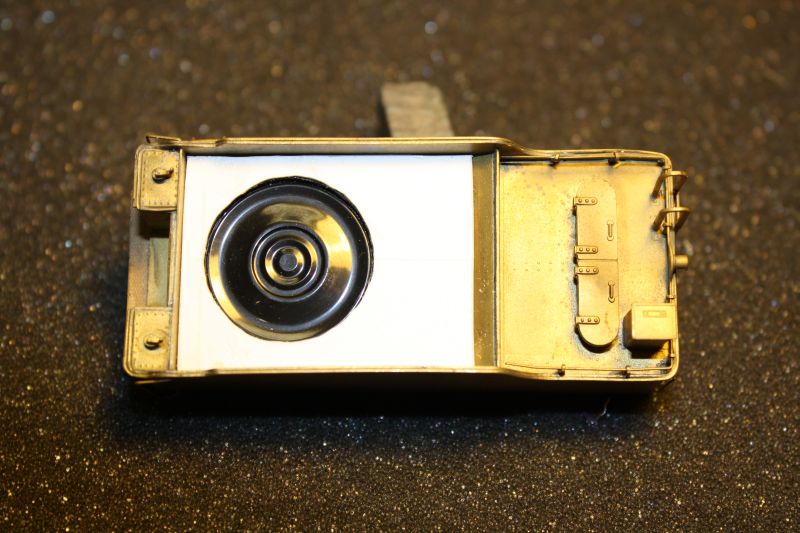
When I set up the tender on my 2-8-0 and 4-6-2 for sound I drilled some holes in the tender floors where the speaker was going to be mounted. The bottom shot of the 4-6-2 tender below shows what I did.
The 2-8-0 has a oil tender so a down firing speaker was the only option. For the 4-6-2 I could have went with a upward facing speaker through the coal load but seeing as the tender was so small and the decoder was going in the boiler I went with another down facing speaker and used as big a speaker as possible. I would have prefered to have a down firing speaker in the ten wheeler tender but it would mean cutting up the coal bunker floor some more and the speaker box would cause problems with pushing the wiring harness connector through the front of the tender. With a little 0.025" styrene sheet I built a custom speaker box that fits in the coal bunker.
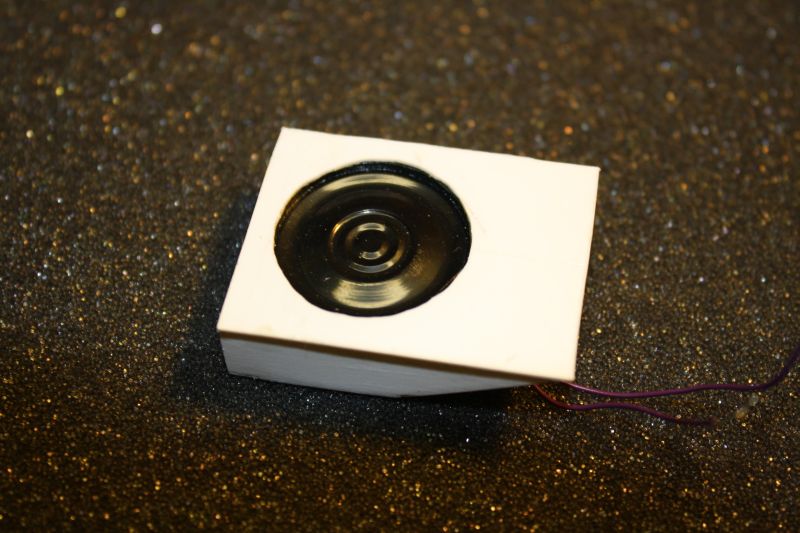
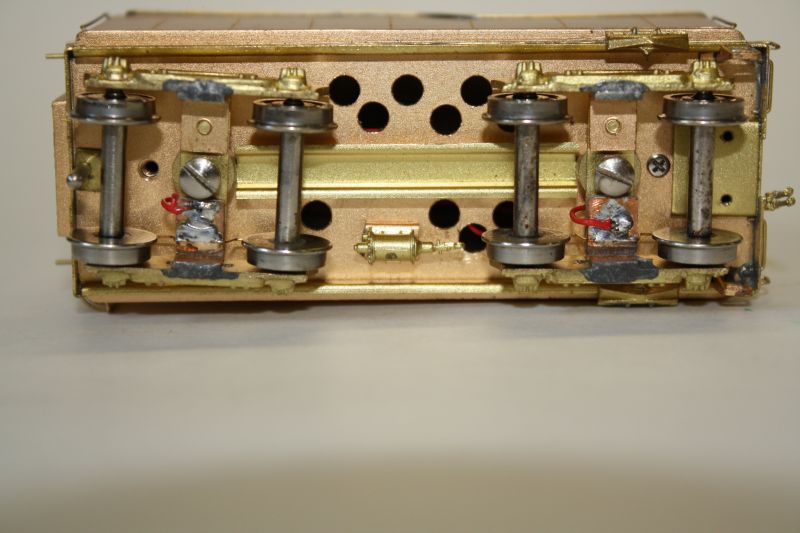
I prefer to use sealed plastic speaker boxes over using the tender body as it can be hard to seal all the air leaks in the tender. Most of all on this tender as it has a slot in the front so the wiring harness plugs can be shoved into the tender. I also find a sealed speaker box gives much better sound.
Wayne Reid
Posts: 118
Threads: 9
Joined: Dec 2008
A few shots of the new speaker box in the coal bunker.
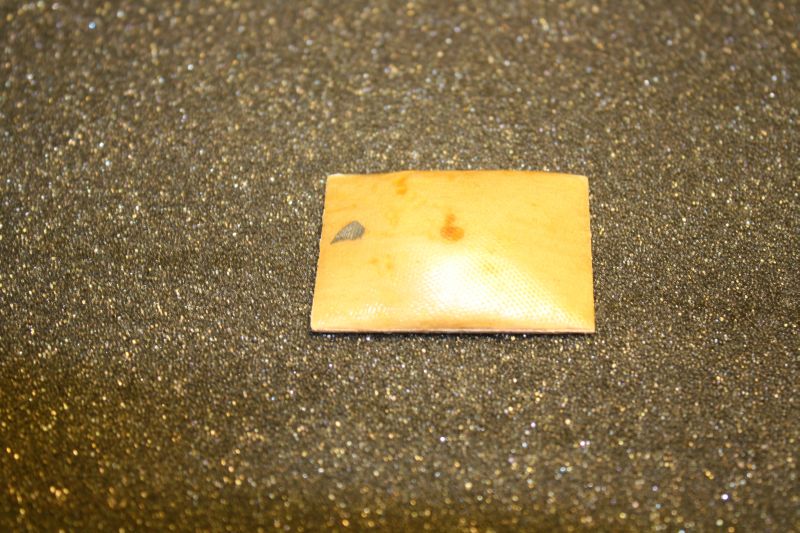
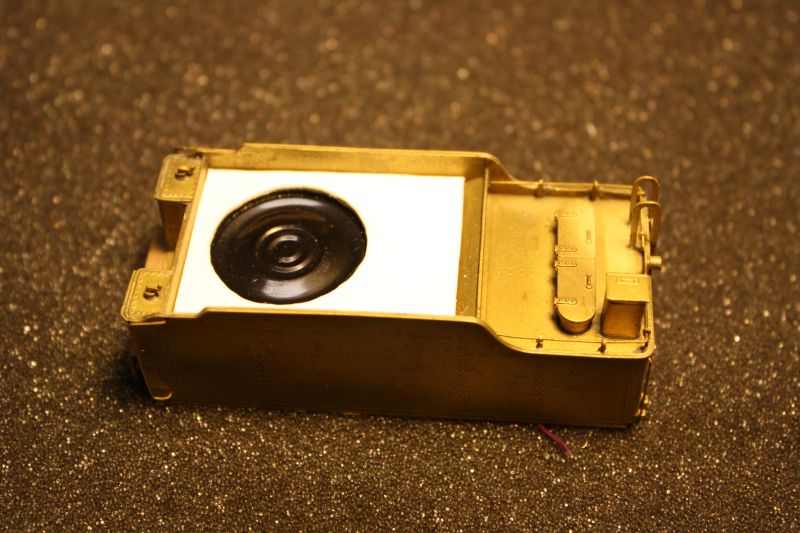
With that done I now needed to come up with some sort of coal load that would fit over the speaker box but still let the sound out. My first ideal was a piece of soft black foam ( stuff with lots of holes in it ) carved to shape with some coal glued to it. After spending an hour making it and a few hours waiting for glue to dry I soon realized it was not going to work as good or look as good as I hoped. After thinking about it for a little while I came up with an idea that borrows on some of my RC airplane building days.
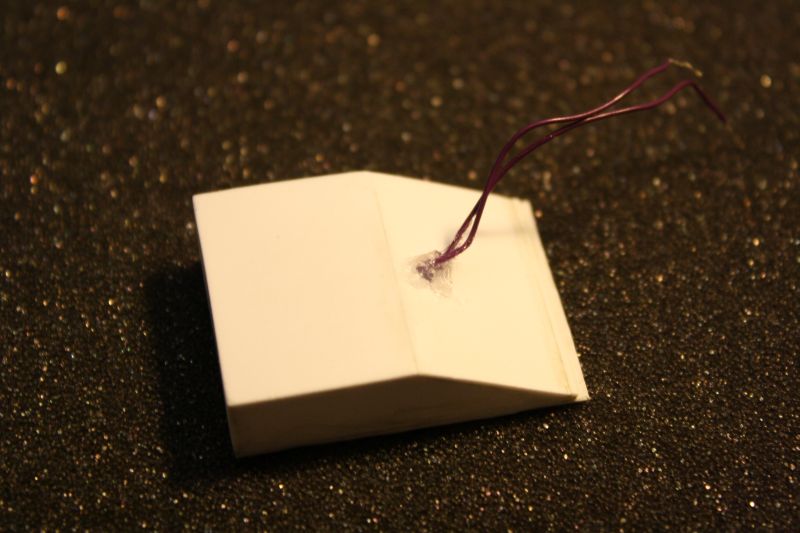
I cut a piece of 1/16 thich plywood for model airplanes and glued some pink styrofoam to it. The plywood was cut so it fits snuggly in the coal bunker on top the speaker box. I then carved and sanded the pink foam in the shape of a coal pile. Once I had a shape I was pleased with I fiberglassed over the foam with 6 layers of 3/4 ounce glass cloth using epoxy. Once it was dry I sanded it a bit and sliced the plwood base of the foam.
The finished fiberglass coal pile.
Wayne Reid
Posts: 118
Threads: 9
Joined: Dec 2008
Now that I had shaped coal pile I just need to remove the pink foam from the bottom of it. I could have carved it out but I used some lacquer thinner to remove the foam. Faster and less messy.

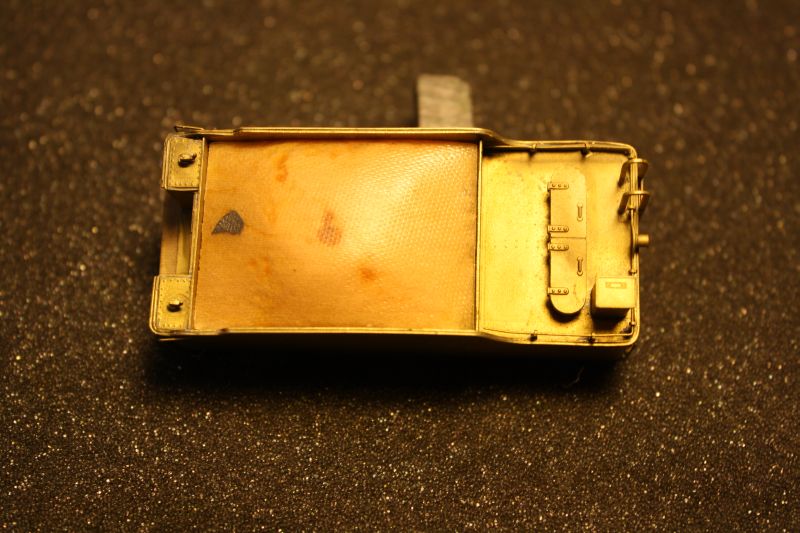
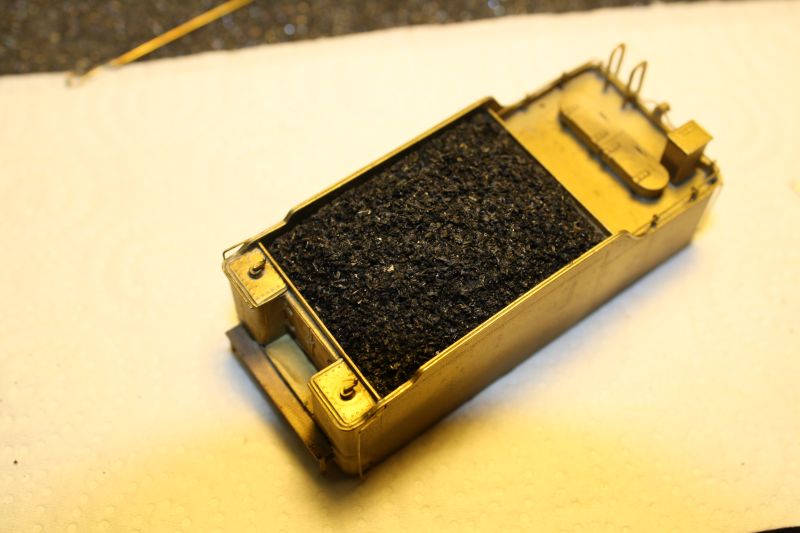
A few shots of the fiberglass coal load fitted in the tender. It is just a slight snug fit in the coal bunker.
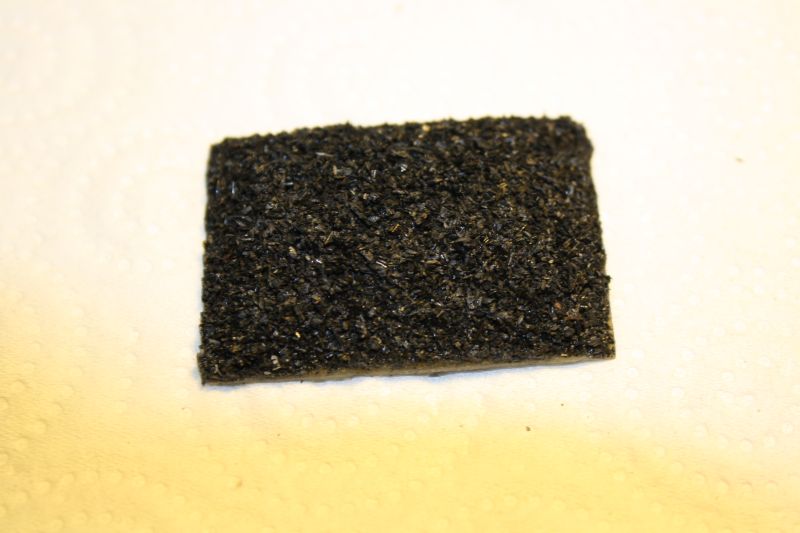
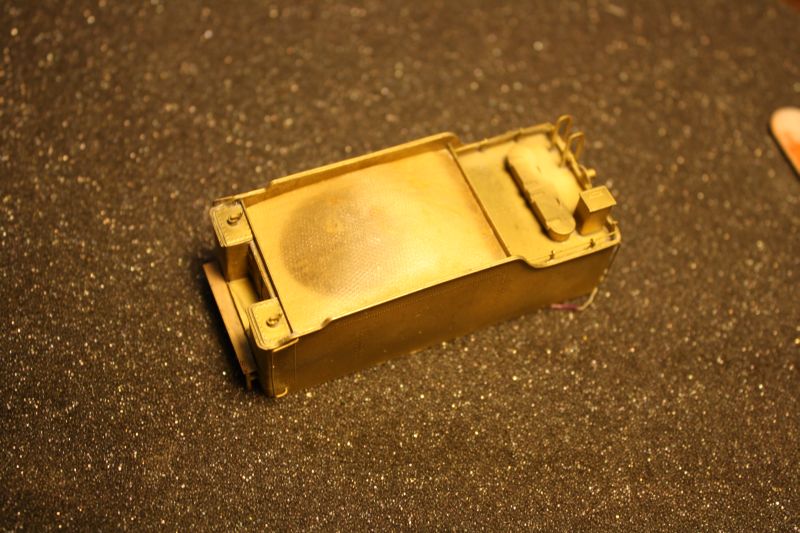
With that done I glued some coal to the fiberglass shape using some Titebond white glue and some thinned white glue.
Wayne Reid
Posts: 605
Threads: 27
Joined: Dec 2008
I only know what I know, and I don't understand very much of it, either.
Member: AEA, American Legion, Lions Club International
Motto: "Essayons"
Posts: 118
Threads: 9
Joined: Dec 2008
To get the sound out from under the coal load I drilled some random holes through the fiberglass and coal. As for the drill bit size I just picked on that looked good.

More holes may be needed but until I order a micro Tsunami sound decoder and get to hear how things sound the ones I drilled will do for now.
A few shots of the finished coal load in the tender covering up the speaker box.
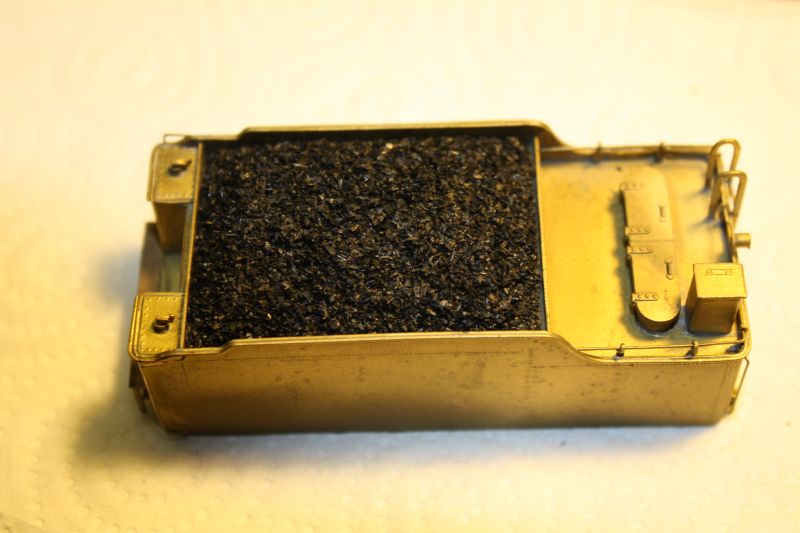
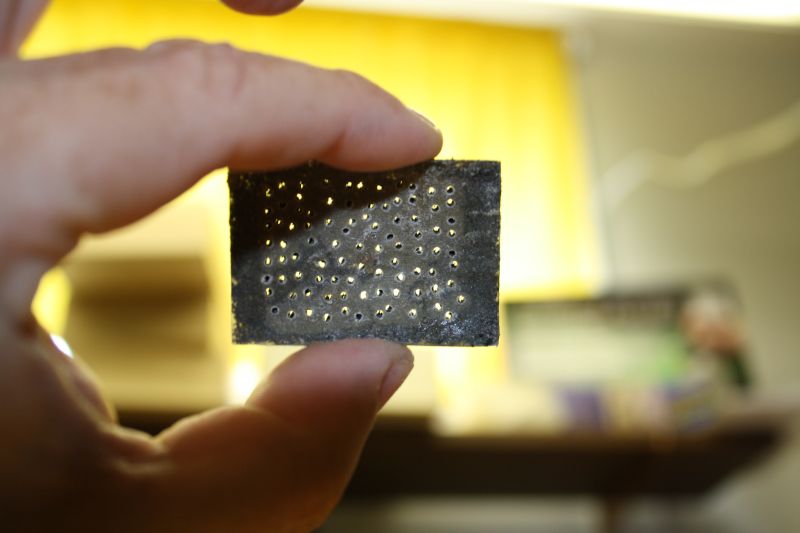
When it is in place in the coal bunker the holes I drilled cannot even be seen. I am happy with it and the idea of the fiberglass coal pile shape will be used again when I add sound to my 4-8-2 vanderbilt tender.

More photos on the ten wheeler build as soon as my camera battery finishes charging.
Wayne Reid
Posts: 5,859
Threads: 175
Joined: Dec 2008
Nice work, Wayne, and that fibreglass "bubble" is a neat idea to accommodate the speaker.
Wayne
Posts: 118
Threads: 9
Joined: Dec 2008
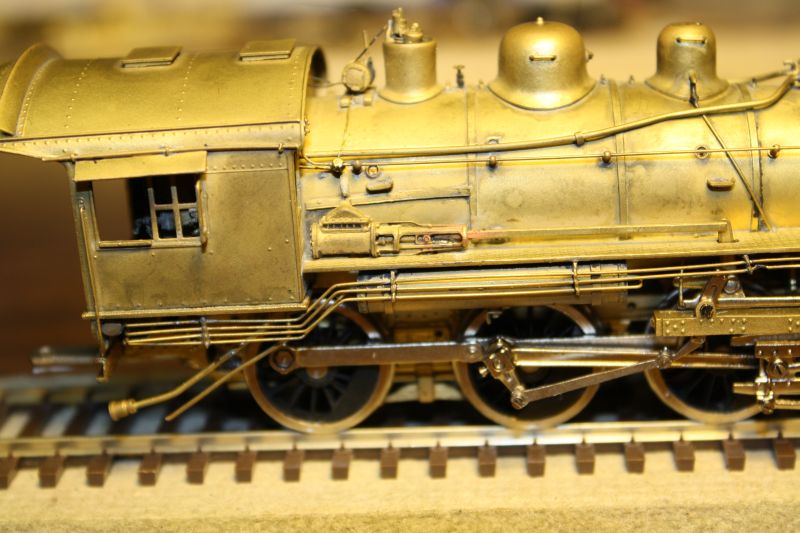
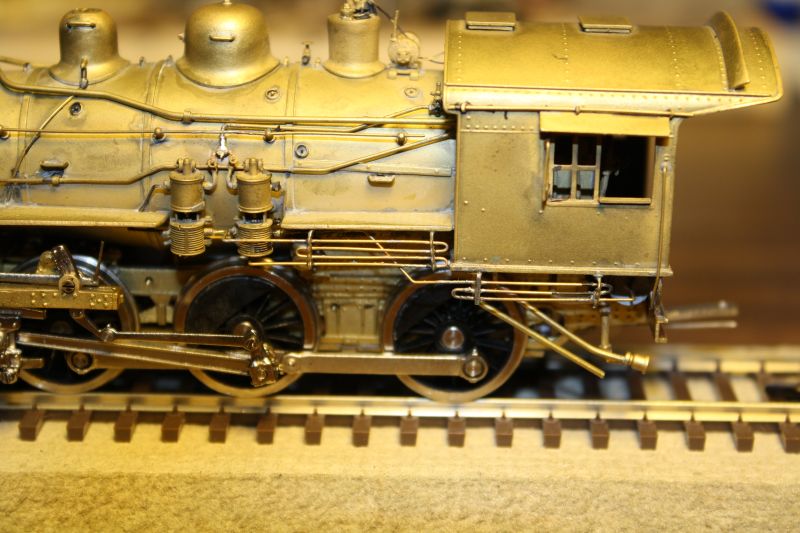
With the tender all done it was time to work on the boiler. For the most part all that was wrong was a bent up headlight and a number of loose pipes as well as some small bends in the handrails here and there. It took me about an hour to fix all the broken solder joints and take the minor bends out of the handrails.
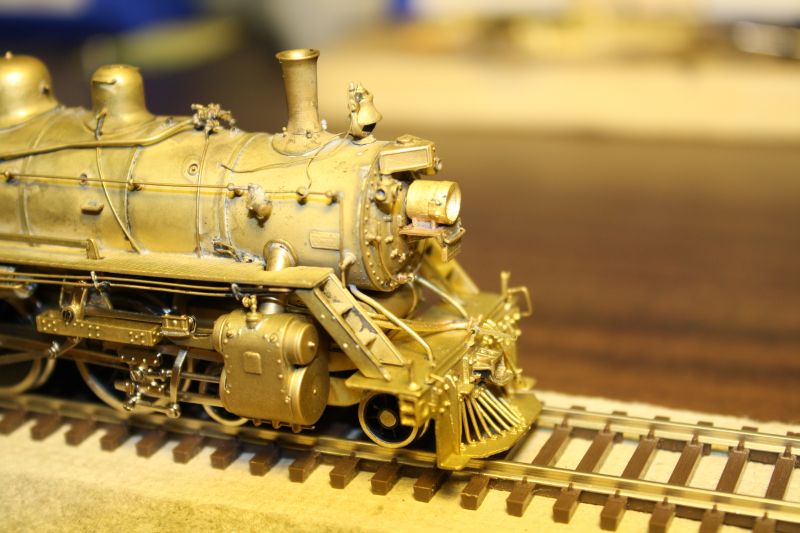
The pipes on this side were missing one pipe bracket just under the front edge of the cab so I made one from some very small flat brass bar stock. The pipes in front of the cab running to the air pumps were broken off so they had to soldered back on.
On the right side the pipes were hanging on by one solder joint so I fixed all the broken joints. I also had to solder the shaft from the power reverser back on.
The headlight bracket and headlight were off the smokebox front when I received the locomotive. The bracket was actually bent a little bit but I was able to rebend it. The original headlight was in bad shape. Someone drilled it for a light bulb but when doing so drilled the whole back out of it and also made the headlight casting egg shaped in doing so. I ended up replacing the headlight casting with a Cal-Scale #207. It is a little bigger than the original one but I did not want to put the whole project on hold and wait for a new headlight to arrive. The slightly bigger headlight is actually a good thing as the micro LEDs I use for headlights would not have fit the original casting.
Wayne Reid
Posts: 118
Threads: 9
Joined: Dec 2008
With all the repairs done and the locomotive test run with the tender on DCC it is now ready for the paint shop. I forgot to take some pictures of the wiring setup and the drive with the motor and gearbox in place but I will take some when I reassemble the locomotive and tender after painting.
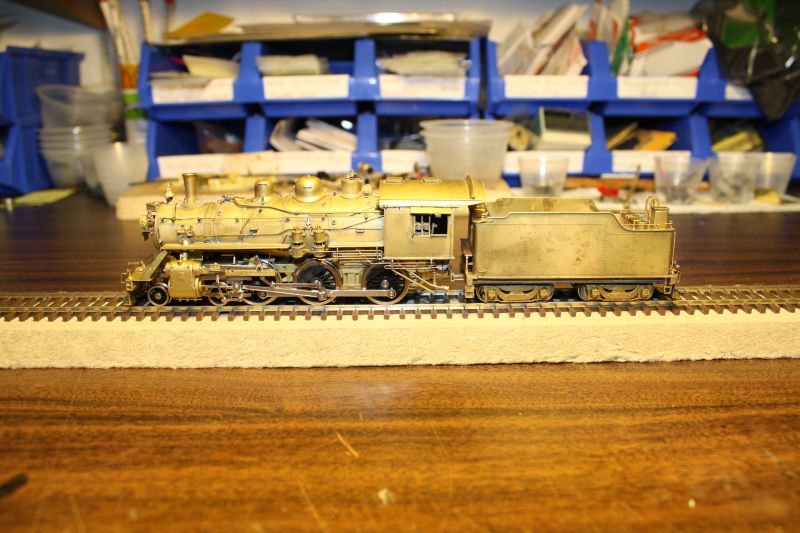
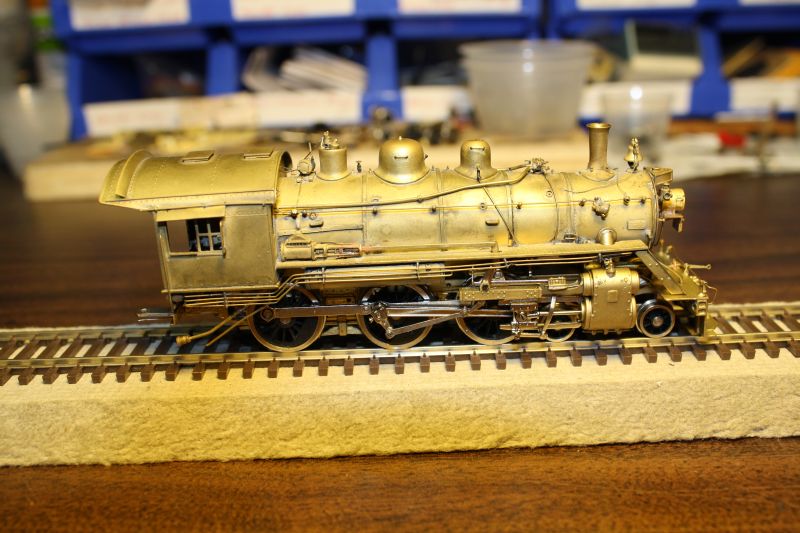
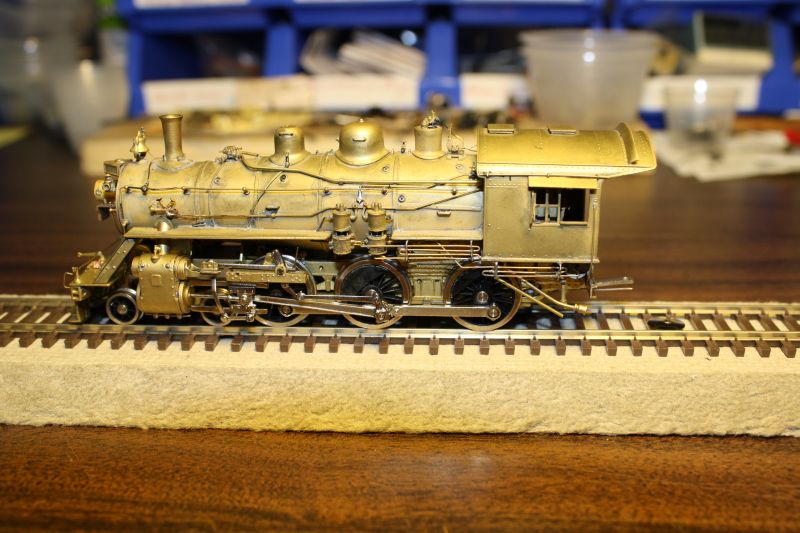
When I received this locomotive and seen how bad it looked I had figured it would be a big project to restore it back to running shape. The fact the drive was in great working shape helped speed things along but I have to say that all the other repairs went real well and were not all that hard. In the end I would say it looked a lot worse than it really was.
The last thing I did was glue some etched brass cab numbers on each side of the cab with epoxy. It was originally number #1383. Well at least that is what is written on the inside of the Van Hobbies box in marker but as I did with my other two rebuilds it got a new road number. It is now #1402.
It is supposed to rain here for a couple of day so sandblasting it with baking soda will have to wait for a nice day as I do it outside. If things go good I am hoping to paint it next weekend. I am looking forward to seeing this one done.

Wayne Reid
Posts: 2,458
Threads: 57
Joined: Dec 2008
WoW...!! Great work....I like how you did that coal load for the sound...

How is it that you do "sandblasting" with baking soda..?? Is there a special rig for that..??
Do show us some pics of the finishing process....
Gus (LC&P).
Posts: 118
Threads: 9
Joined: Dec 2008
The sandblasting is done with a Badger 260 abrasive gun. More info here: <!-- m --><a class="postlink" href="http://www.badgerairbrush.com/Badger_260.asp">http://www.badgerairbrush.com/Badger_260.asp</a><!-- m --> .The abrasive gun normally uses 220 grit fine sand. I find it is to abrasive and can damage the brass if one is not carefull. The sand also will strip the solder away from areas very easy which can be a problem if it is solder you do not want removed.

I use baking soda as it is just abrasive enough to take the paint off and and tarnish but does not damage the brass. Even if you keep the jet of baking soad in one place for a few minutes. I have used it to remove baked on Scale Coat paint and the paint came of like nothing.
My routine for painting is to sandblast everything ( except drivers, any other wheels, valve gear and side rods ) with baking soda to remove any left over paint and clear lacquer. I then wash the parts in soapy water and rinse. Then everything except the above listed parts gets a dip in lacquer thinner to remove any oil or grease that the soapy water missed. I then let the parts dry and then dip the brass parts in vinegar for 15 to 20 minutes. This etches the brass just a little bit and helps the paint get a good hold and removes any stubburn tarnish that the sanblasting missed. The parts are then rinsed in cold water. Just before painting I wash the parts in 99% alcohol and blow dry with a hair dryer. Then it is straight to the paint booth.
It may seem like a lot of cleaning steps but seeing as I use water based acrylics I like to make sure everything is good and clean. I also do not use primer if the locomotive will be all black as it is one or two less coats of paint to obscure the details. So far I have ended up with durable paint jobs without using smelly paints and having to bake the parts to dry them. Unfortunatly when it comes time for the clear coats I still use testor Dullcoat and Glosscoat. I have not had much luck with the water based clear coats.

I will be sure to post pictures of the finished locomotive. I may end up having two to paint as while I am waiting for the rain to go away I am going to install a can motor and NWSL gearbox in the CNR 2-8-2 I bought and get the wiring done on itas well as set up for sound. It will needed to be painted with the same warm black paint so maybe I can get two done in one painting session.
Wayne Reid
Posts: 2,458
Threads: 57
Joined: Dec 2008
It's hard to think of baking soda as abrasive...but at a "teensy-winsy" level, I guess it is....
Sounds like a lot of work....but the finished results make it worthwhile..!!

Gus (LC&P).
Posts: 2,271
Threads: 155
Joined: Dec 2008
Wayne,
That's an absolutely fantastic roster you are building there! A question and a comment if I may...
Which sound decoder(s) are you using? I know you said Tsunami, but do you have a specific preference for your ten-wheeler?
The fibreglass bubble was a great solution for the coal load over the speaker. One of the guys at our modular club uses a fine aluminum mesh shaped appropriately and then covered with coal. He did not need to drill it out so much as simply flick off bits of coal to let the sound out.
Fantastic work - hope to see more!
Andrew
Posts: 118
Threads: 9
Joined: Dec 2008
Andrew
I will be using the TSU-750 ( micro Tsunami ) light steam decoder. I would have prefered the regular TSU-1000 light steam decoder but it is to big to fit in the tender or the boiler. The down side to the TSU-750 micro sound decoder is it is only rated for 750 mah for the motor control compared to 1 amp for the TSU-1000. I have not done a stall test on the can motor in the ten wheeler but I would guess it most likely will draw more a little than 750 mah when stalled at 12 volts. The good news is it is not to often a steam locomotive stalls out without the drivers slipping first. I am also making sure the ten wheeler is weighted in such a way it will pull train lengths that will suit my needs up a 1.5% grade. Anything more than that the drivers will slip. I did the same thing for my CNR pacific which has a TSU-750 micro Tsunami medium steam in the boiler ( small tender and no room in the boiler for a regular Tsunami ) and so far after several hours running on a friends layout the decoder has preformed just fine. If by some chance the locomotive stalls out with no driver slip and the decoder blows the motor circuit I will just have to either replace the decoder or have it fixed.
Thanks for the tip about using metal screen to make a coal load shape and covering it with coal. I never even thought about using metal screen. I will have to give it a try as it sounds a little easier to do than the fiberglass bubble I made.
Wayne Reid
Posts: 118
Threads: 9
Joined: Dec 2008
Steamtrains Wrote:It's hard to think of baking soda as abrasive...but at a "teensy-winsy" level, I guess it is....
Sounds like a lot of work....but the finished results make it worthwhile..!! 
I also found it hard to believe baking soda would work instead of the sand when I first read about it. When I went to try it I was so unsure it would work I ordered 20 pounds of the Badger 220 grit sand.

To my surprise the baking soda had no problems removing the paint and tarnish.

The good news is the 220 grit sand comes in handy when I get some solder in a spot where I did not want it. A little burst of the sand removes it right down to bare brass again.
I have also read that the baking soda can be used to remove paint from plastic shells. I have not tried it but I would think it would pit the plastic some as it is softer than brass. I have an old boxcar shell I used to test a custom mixed color using acrylic paint some time back. I have been meaning to try the baking soda on it and if I can remember to do so I will give it a try when I sandblast the ten wheeler.
Wayne Reid


 A few shots of the fiberglass coal load fitted in the tender. It is just a slight snug fit in the coal bunker.


