Posts: 57
Threads: 5
Joined: Dec 2008
Actually, once that section is completed, I will only be about 15-20% done with the total benchwork... it is moving at a decent clip and I probably would have gotten much more done this weekend, however, I had to shut down the build for today to move breakable objects out of the way as I am having a backup sump pump installed tomorrow (the sump closet is in the train room, stupid waste of a good 8 square feet, LOL!)... I've been playing Russian Roulette with that sump hole since the addition was put on 2 years ago and for my sanity and peace of mind, I want to know that my train room won't get destroyed if there is an extended power outage and the ground happens to be to over saturated.
Anyways, even though I don't really enjoy the benchwork part of it, it doesn't bother me to have to do it, I know it is a part of the build... thanks all for the compliments on it... I think part of that is my career is software development and I am very aware of the importance of building strong foundations. When developing code, the attention to detail tends to pay off in a superior end product, and I view the benchwork the same way... I want a good, solid foundation that I can build on top of and have something to be proud of once it is done.
Back to the real world tomorrow... is it Friday yet? 
--Rob.
Posts: 57
Threads: 5
Joined: Dec 2008
Hello everyone (again)... man, it has been quite awhile since I've been here... long story short, in August while on vacation my back really started to act up on me (I've had lower back issues for quite some time), upon returning and hitting up the chiropractor, he took an x-ray and my L4 disc was at about a 45 degree angle pushing into the nerves (yum)... it took about 3 months of adjustments and patience to get it "fixed", and even today it still bothers me a bit, but I am back to working out, playing hockey, and of course, back to the train room.
One thing I did when I finally walked back into the room was took a good hard look at the layout and asked a simple question: if my back is bothering me, can I still work on this thing? based on the way things were going, the answer was a big fat no... there were a couple spots that required me to crawl under the board to get to... my being stubborn wanting to put "more layout" in "less space" was showing its ugly face... due to the layout of the room (no pun intended) along with my lack of thinking about my back forced me to do some things in two corners that I should have not done...
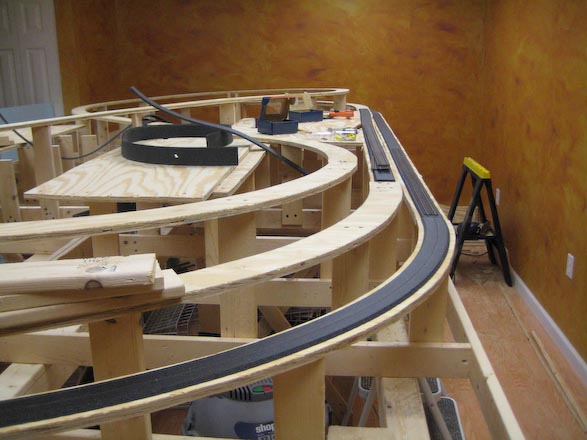
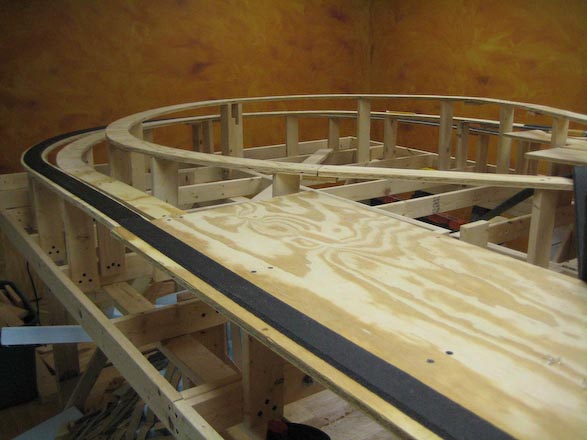
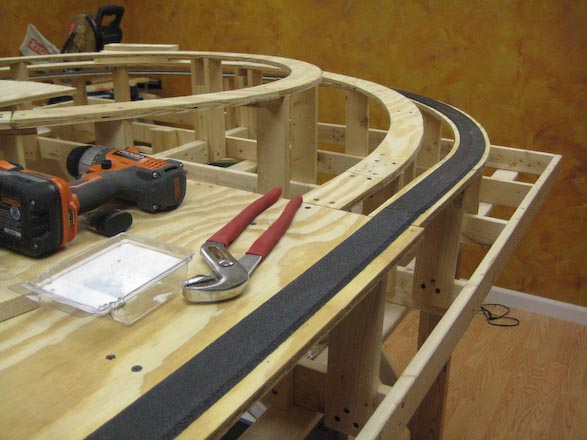
So... about 3 weeks ago I went downstairs with my screwdriver set to reverse and starting dismantling... I had to be realistic about two things: the size of the room, and the occasional wonkiness of my lower back. The net result is that I built some new benchwork that centers the layout in the room, basically a big old rectangle that I can access all sides without the need to crawl under a table. The centermost part of the layout is reachable with one of those little kitchen step ladders, so I totally eliminated the "crawl under"... we ain't getting any younger, and I'm only 40, but I'd hate like hell to have to abandon the hobby due to some bad design decisions...
OK, to the "new" design: I also took my hiatus away from the room to really think about my goals with the layout, the givens and druthers if you will... what I realized as I thought more and more about it is the following: I don't care about "realistic" operation, I'd rather watch trains go in "circles" (silly?!). I care about detailed scenery. I care about having the ability to watch multiple trains run in circles at the same time. I care about trains not jumping off the tracks, in other words, I'd like bigger radiuses if possible.
The last 3 weeks (mostly weekends) have produced the following... I am just starting to lay track while I finalize some of the spots that will hold the sidings and roads/buildings, etc...
Yes, this is quite the change from the original thoughts, but after 3 weeks I am finding myself the most excited I've ever been about building the layout since getting a "train room" added onto the house... I think I was trying too hard to build the "monster layout" with no regard for the real size of the room or the time I actually have to work on it, and maybe my back going out on me was one of those little messages in life that forces you to "reset" and think a lot of things through...
--Rob.
Posts: 1,797
Threads: 81
Joined: Dec 2008
Sorry to hear about your back Rob. Glad to hear though that you are on the road to recovery. Just take it easy and try not to do too much.
Aside from that your bench work looks great. Looking forward to seeing more progress from you.
Posts: 1,229
Threads: 23
Joined: Dec 2008
I don't much care for benchwork either, but yours looks great!
Galen
I may not be a rivet counter, but I sure do like rivets!
Posts: 4,161
Threads: 174
Joined: Dec 2008
 Nicely done!
Ralph
Posts: 1,897
Threads: 40
Joined: Dec 2008
It looks good, Robert. I just noticed a couple of things with the bench work on the upper track. It may just be a camera trick, but the back of the upper track appears to have a "bump" where it looks like two sub roadbed boards are butt joined. The other thing I noticed is the butt joint near the front on the same level. I think you have potential for derailments in both places. I would cut at least a 6-8 inch long splice plate to fit under every butt joint to keep things solid and level where the sub roadbed transitions form one piece of plywood to the next. Clamp and glue or screw and glue the splice plate to both sides of the butt joint to keep everything nice and tight. Getting everything right as you build will eliminate problems with operation down the line. On the butt joint to the front, it looks like the riser may be too close for a good splice plate. An easy fix is to shorten the riser by the thickness of the plywood you are using for the splice and slide the splice plate between the riser and the sub roadbed.
Posts: 5,263
Threads: 195
Joined: Apr 2009
I am impressed by the clean woodwork. That looks very professional.
Reinhard
Posts: 57
Threads: 5
Joined: Dec 2008
Thanks for the comments all...
Russ: wow, you have a good eye! Some of what you pointed out was "camera trick", but after reading your response I had to take a quick walk down to the basement and look at those joints in question and yes, they could use a little clean up! I actually found about 3 on that upper section that weren't quite level with each other, and yeah, I am betting that could cause some problems later on! I have the roadbed and track down on the first level and it runs really smooth (and there are a couple of small gaps on a couple butt joints, but the pieces are level with each other, so I assume that is why I don't see any problem there), and I have the roadbed down and half the track laid on the second level, but looking things over after reading your response it looks like all my "problem children" are on that upper level, something tells me I was getting sick of laying sub roadbed and started to get a little sloppy compared to the other two levels!
The plan right now is to tweak the sub roadbed issues I made note of thanks to Russ' eye and insight and finish laying the roadbed and track and then depending on time get some more feeder wires run (right now I only have 1 run just so I could do my first test) but I am planning on dropping feeder wires every 3 feet or so to the main bus wires... actually I need to do some soldering practice first, my test feeder wires are not a work of soldering art, although they do work, but I want them to be a little cleaner than my first ones for sure!
--Rob.
Posts: 1,897
Threads: 40
Joined: Dec 2008
Rob, even if the butt joints are level right now, you should still install some splice plates below all of the joints to keep them from causing problems later on. Even if you have track already installed, while the bench work is still open framing, it should be easy to install the splice plates under those joints.
Posts: 57
Threads: 5
Joined: Dec 2008
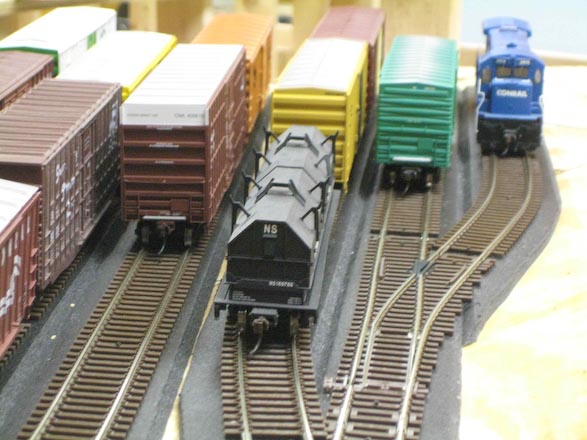
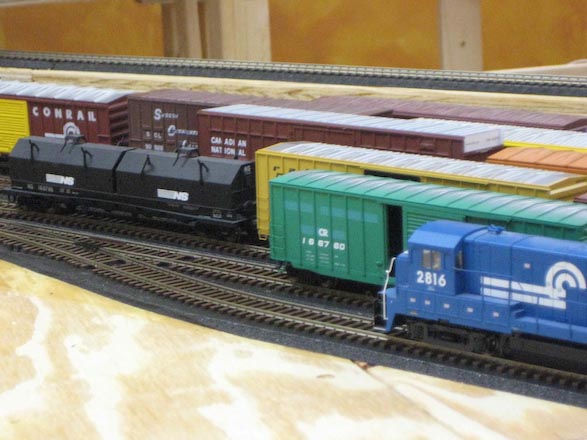
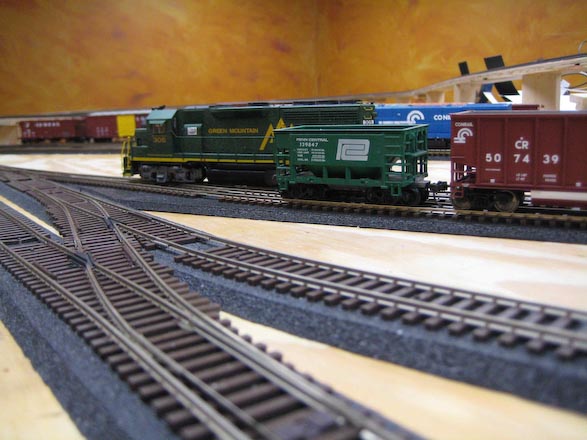
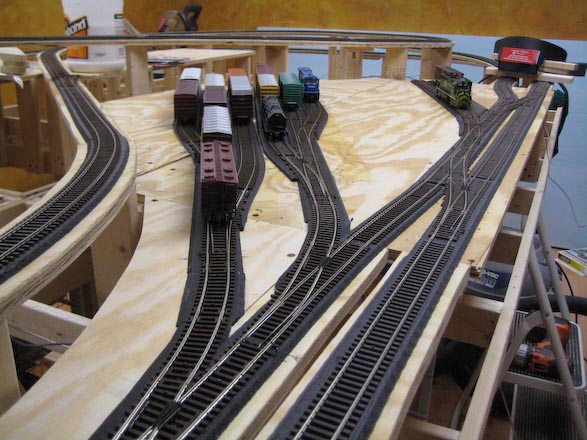
Just wanted to pass along an update and some pictures of the layout as of today...
I finished laying the main runs of track and have been doing some testing of the track itself... all 3 levels are running smooth at low and medium speed and I have yet to tempt fate with a high speed pass... I still want to go over the track with a fine tooth comb and make sure everything is up to snuff before going any further.
I have also run a bus wire around the underside of the layout and have begun dropping feeder wires and soldering them to the tracks at about 3 foot intervals... I am starting to get the hang of this soldering thing, although I am still waiting for the smoke alarm to go off in the train room at some point! Worst part about that is we have detectors in every room of the house (a good thing) but man is it LOUD when they go off (and talk... FIRE FIRE, GET OUT...)...
I have also laid the track for a small "yard"... I think it serves the purpose of "looking like" a yard as well as giving me some staging space.
Anyway, off on vacation next week and will get back at it when I get home... a bunch more feeder wires to solder and 2 sidings to complete...
--Rob.
Posts: 23
Threads: 3
Joined: Jan 2011
Nice benchwork. Just finished ours and to be honest, I can hardly wait to start laying track. Good job!!!!!!!!!!!
Rob - Modeling the B&O & C&O into Chessie System in the Toledo, Ohio area in the late 60's - early 70's
Posts: 4,161
Threads: 174
Joined: Dec 2008
Whoa! Whoa!! Whoa!!!! Tell me about that cool PC ore car! 
Ralph
Posts: 57
Threads: 5
Joined: Dec 2008
Ralph Wrote:Whoa! Whoa!! Whoa!!!! Tell me about that cool PC ore car! 
Ralph
Ralph:
I love that little ore car! I bought that about 25 years ago when I was in high school at a train show (how I remember this stuff is beyond me)... it is an Athearn Blue Box, and it is still in original condition (wish I could say that about a lot of my really old stuff). Only regret is that I didn't buy a whole bunch of them, but at that time I was lucky to have a couple of nickels to rub together never mind enough money to buy a consist of ore cars!
--Rob.
|


 Nicely done!