Posts: 1,475
Threads: 44
Joined: Dec 2008
Greg,
Some else pointed that out to me a few days ago


on the Hobo's camp fire. Thanks for reminding me that there is alwasy a prototype example out there some where

I have the roof glued and the underside as well just need to add the doors and paint it primer grey and letter it M.O.W. . I have one 'set' of parts glued down to a card board mold box and the rubber mold is cureing now. will check on it in the morning it only takes 7 hours to cure but I alwasy give it an over night cure.
Dug out some old molds and tried some tintable resin and the parts came out looking like stained glass

may need more color next time as this was an experiment.
Posts: 1,475
Threads: 44
Joined: Dec 2008
Posts: 1,475
Threads: 44
Joined: Dec 2008
The new mold I made will not work with the tintable or standard resins as the parts are too thin and do not cure right, got in some resin today just for that purpose but the trade off is it takes longer to cure but makes for stronger thin parts

Will try it out Sunday or Monday and see what the results are.
Posts: 70
Threads: 5
Joined: Dec 2012
AF350, that is interesting. I wonder what kind of resin was used for the original kits. Being they are 20 or more yrs old, they look to be in good shape. I've seen old resin kits where they look like a lasagna noodle.
Greg
Posts: 1,475
Threads: 44
Joined: Dec 2008
Greg,
the instructions say that they are styrene. Some of the parts are yellowed with a minimum amout of flash from the injection mold one side had a small crack above the door opening. The small detail parts such as roof walks and ladders are kinda warped will make my own parts for those.
I need to level my work space for casting as the resin is not even in some of the molds

From the last couple test castings I had 3 parts that ate usable.
I am having fun experimenting with the molds.
Posts: 1,475
Threads: 44
Joined: Dec 2008
Here are some pics of the last round of casting.

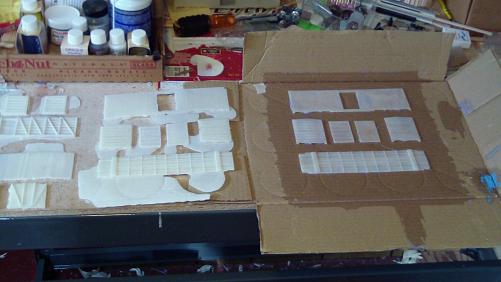
The above pic is of the thin casting resin from micro mark on the left hand side are some castings of another car and used them so as not to waste too much resin.
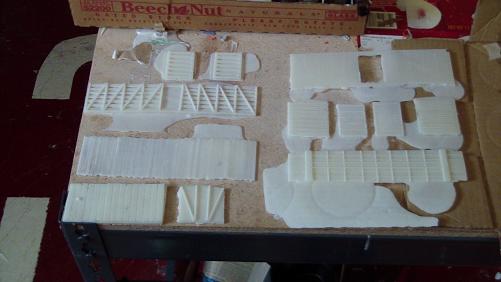
The above pic is a comparison of the castings vs. the original styrene parts.
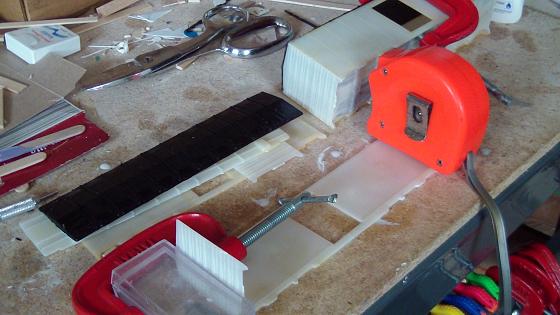
And the last pic is of some castings I just poured in a leveled position with less waste and flash.
Posts: 1,475
Threads: 44
Joined: Dec 2008
Hello all one progress pic of S box cars here we see box 2 and 3 of 6(5 if you do not count the masters)May have to make anew mold as first is not working out quite right.
Posts: 1,475
Threads: 44
Joined: Dec 2008
Hello all.
No pics today but glued up some more S box cars sides and ends.
This S gauge box car project will continue until remaining parts are assembeled and a new mold will be made after some alterations are made to the "master" parts. Also will have to get some more paint and look into getting some custom heralds made in a mono colored scheme probably white.
Posts: 1,475
Threads: 44
Joined: Dec 2008
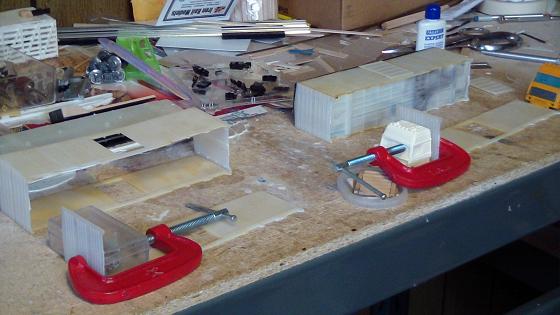
Latest pic of boxcars in S scale
Posts: 1,475
Threads: 44
Joined: Dec 2008
More box car under construction peogress

Posts: 1,475
Threads: 44
Joined: Dec 2008
Yet more boxcar building.

Posts: 1,475
Threads: 44
Joined: Dec 2008
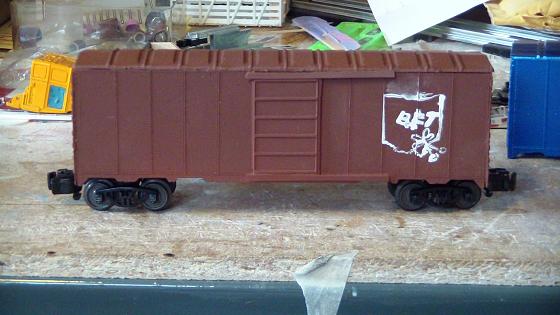
Here is a botched up paint job of the BFT logo

Posts: 4,161
Threads: 174
Joined: Dec 2008
Posts: 1,475
Threads: 44
Joined: Dec 2008
Ralph Wrote:Repaint!  The logo problem notwithstanding, I am so impressed by your whole casting process and creating cars from scratch.


So far I have cast some boxcar parts but have not got the flashing off of them yet and the mold of the box car needs replaced already and I will alter the parts I used as masters to make a better mold. Now I have cast and assembled 1 stock car with S scale Kadee couplers as part of an article I submitted to 1:64 modeler which switched from print to e-zine format and now is folded not sure if he will give it another try or not as far as publishing a train magazine. If I can find my pic of the completed I will post it.
Casting once you get the hang of it not so tuff If keep the design simple and avoid undercuts and use the correct resin for the correct use such as thin parts need a slower setting resin that sets up harder for more strength. The box cars is easy in concept being the design is already there I am just duplicating it for my own use. The stock car was enlarged by way of scanner from HO to 136% which is close to S. I then built the masters right on the photo enlargement like the airplane hobbyists used to do, then I made a mold from the wood master I made. Will be cleaning up the cast parts soon and see how they look then.
As for the logo the state came out decent it is the Buckeye leaf and nuts and the lettering looks like a mess and not centered to boot

I used acrylic paint and a wood skewer to apply the paint with.
I know you like PennCentral but do you like NYC? If so there is a historical society called NYCS and they have a free PDF magazine covering all scales and all things NYC. The free magazine is called NYCModeler not to be confuesed with the other publication for the Historical society members. I found out thru the S-Trains list.
Posts: 4,161
Threads: 174
Joined: Dec 2008
Thanks for the NYCModeler info!


 on the Hobo's camp fire. Thanks for reminding me that there is alwasy a prototype example out there some where
 may need more color next time as this was an experiment.

 on the Hobo's camp fire. Thanks for reminding me that there is alwasy a prototype example out there some where


 The logo problem notwithstanding, I am so impressed by your whole casting process and creating cars from scratch.