Here's an article I wrote for my local club newsletter some time ago. Helped me to get going on scenery on my (now defunct) 4x8 layout.
<!-- m --><a class="postlink" href="http://ovar.ca/Articles/BatchelorDiorama/small_diorama_kick.htm">http://ovar.ca/Articles/BatchelorDioram ... a_kick.htm</a><!-- m -->
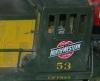
Here is Tender I built, I think it is a B& O prototype. All I remember was seeing the plans & a picture of it in a MR magazine & I fell in love with it! The prototype had barber freight truck on it , I put on freight trucks when I first built it & it looked SILLY. Kinda like King Kong on a set of Barbies legs!! So I know it has the wrong trucks but I don't care.
To make matters worse I built this to put behind an Arbour 2-6-6-6 kit that I salvaged from a garbage can! It had no tender but was mostly there , boy what a POS kit it was !! I built a new pilot deck & had to scratch about half the valve gear because it was very poor & fragile pot metal.
The main tank of this is a piece of Copper water pipe, With .004 sheet copper soldered as an overlay, thats why the big hole you can see inside the coal bunker-- every time it hit it with the torch to solder it, it blew the ends off till I put the hole in it! Durn thing weighs a ton!
On the front view , see the two water delivery pipes coming out ? Notice the "Ball" shape on them , the pipes are insulated from the rest of the tender & the wheel pickups feed them & they hook into the loco by a modified split gold bead on the power transfer wire to the motor, it "snaps over the ball. Works real slick & no wire to try to hide! The wire looks like a water transfer line.
Heres a trick I used to form the ends of the tank. I got 2 of the old "concave or Flat" type freeze plugs for engine blocks, soldered a piece of brass ( on what would be the inside surface) to one freeze plug, put the other over the brass & squeezed them together in a vise ,then heated it enough with a propane torch for the brass to take a set, when they cooled, I trimed & filed the end cap perfectly round using the freeze plug as a pattern.
I have also used much the same procedure on styrene for concave or convex ends.
For the past few years, I've been on the lookout for an optical aid to assist in model building. The problem was, I have always gotten by without one, and on a limited budget, I could never justify the expense. A few days ago, I noticed this Chicago Electric Magnifying Lamp on sale at Harbor Freight Tools for less than $20. i had seen a few other magnifiers at Harbor Freight in the past, but the optics were always poor or distorted, and the focal length didn't seem to be adequate for my needs. They had an example on display at the store, and I tested it by putting my hand underneath the glass at about the distance I would plan on placing a model, and placing my eyes above the glass to a comfortable distance. The optics of the lens seemed good, so I bought one.
this magnifier is on the end of an arm that has a pivot at each end. In addition, the lens can swivel, allowing the lens to be positioned at a height and angle to assist in many situations. There is a circular fluorescent light surrounding the lens to illuminate your project. It plugs into a standard 120 volt outlet.
I got the chance to test it out on two projects tonight. One was an object I am painting, another a hopper car that I am scratchbuilding. For 20 bucks, i am extremely pleased. The light is an especially nice feature, as it illuminates my project perfectly. As with any optical aid, it takes a little getting used to in order to utilize it effectively. I found myself experimenting on different angles and distances to place the lens, but once I got the hang of it, this became an extremely useful tool. Adding details to a hopper car instantly became 10 times easier, and much less of a strain on my eyes. It made my model building experience much more enjoyable, and the quality of my work was much improved.
This is the only magnifier I have ever used for model building, but for 20 bucks I am extremely satisfied.
for posting.
Could somebody please tell me what determines "file size" as far as pictures are concerned? I have just finished re-sizing about 300 pictures, all to the required 800x600 size, only to find that the "file size is too large" when I attempted to place them in my Gallery album.
Forums such as this, in my opinion, live (or die) by their pictures. I'm not sure about Big Blue, but I'm just about ready for life-support, 'cause I'm turnin' blue.
So you guys want to call the new railroad Big Blue, but there's not a sign of Conrail around. Conrail was the railroad known as "Big Blue" and yet there's not a sign of it on the forums. What's worse, there's a vaguely Rock Island-esque train on the new logo and, in it's later years, the Rock's paint scheme was known as "bankruptcy blue." That's not the message you guys want to convey, is it?
Ok I'll try a whole new thread & see what happens , perhaps it was just the 40 ford thread that was messed up for me.
If this works here is a picture of the V12 motor I built for the 34 Packard. No wait this is the Hudson, just in case it was the Packard picture that was contaminated or something.