Posts: 3,683
Threads: 118
Joined: Jan 2009
That is most impressive, E-paw. I don't know how my bridge crew would do on something like that, it looks pretty technical. My guys mostly just pour concrete piers and set concrete segments and girders in place. They're not used to putting in all them rivets!
Again, great work!
Three Foot Rule In Effect At All Times
Posts: 120
Threads: 4
Joined: Dec 2008
Your bridge looks great, can't wait to see the finished product!

Posts: 2,724
Threads: 160
Joined: Dec 2008
Thanks everyone..in order to get the mains ready for Christmas, I built a temporary bridge to stand in until DH draw is completed. When The glue sets I'll get some power to it and get some more trains running.

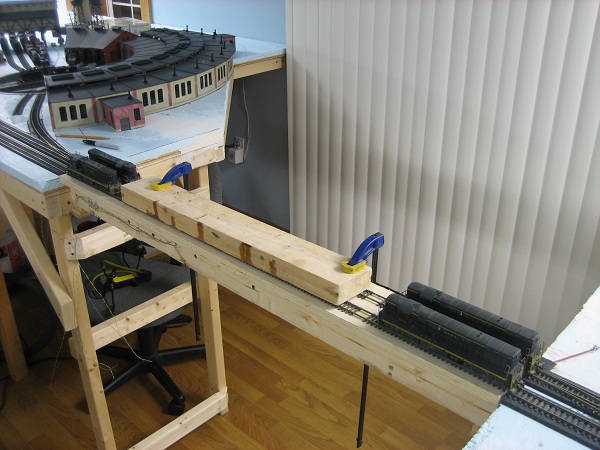
Also a big thanks to Tomustang for the casters... Saylors junction Is now Mobile.

My other car is a locomotive, ARHS restoration crew
Posts: 3,683
Threads: 118
Joined: Jan 2009
I like the movable section in the last photo! It looks great. Hey, how about you do a scenery tutorial?
Three Foot Rule In Effect At All Times
Posts: 454
Threads: 18
Joined: Sep 2010
Innovative use of Trainmasters for weights there

--Randy
Posts: 2,724
Threads: 160
Joined: Dec 2008
quick vid. cameras acting up so it's short. <!-- m --><a class="postlink" href="http://s840.photobucket.com/albums/zz328/gronku2/?action=view¤t=018-1.mp4">http://s840.photobucket.com/albums/zz32 ... =018-1.mp4</a><!-- m -->
It didn't film the hole thing so I'll try again latter.
My other car is a locomotive, ARHS restoration crew
Posts: 2,724
Threads: 160
Joined: Dec 2008
A little better version of the same Vid. to celebrate the completed mainlines. A west bound train of 54 empties headed for the coal fields.and a mixed freight going east about to cross the temp bridge at DH draw.<!-- m --><a class="postlink" href="http://s840.photobucket.com/albums/zz328/gronku2/?action=view¤t=20101121155231.mp4">http://s840.photobucket.com/albums/zz32 ... 155231.mp4</a><!-- m -->
My other car is a locomotive, ARHS restoration crew
Posts: 1,817
Threads: 27
Joined: Dec 2009
Yo! E-Paw!
I was just reviewing the amazing progress that you've made since I arrived here almost a year ago (Geez! I can't belive I've been spending my free time here for almost a year ... but I digress ...) and for the first time I just noticed the red box on the wall next to the vertical blinds beyond the roundhouse ...
... what is that ... a Fire Call Box?
biL
Lehigh Susquehanna & Western
"America will never be destroyed from the outside. If we falter and lose our freedoms, it will be because we destroyed ourselves." ~~Abraham Lincoln
Posts: 2,724
Threads: 160
Joined: Dec 2008
That's an emergency phone box from the Hudson and Manhattan Railway, now the Path system.
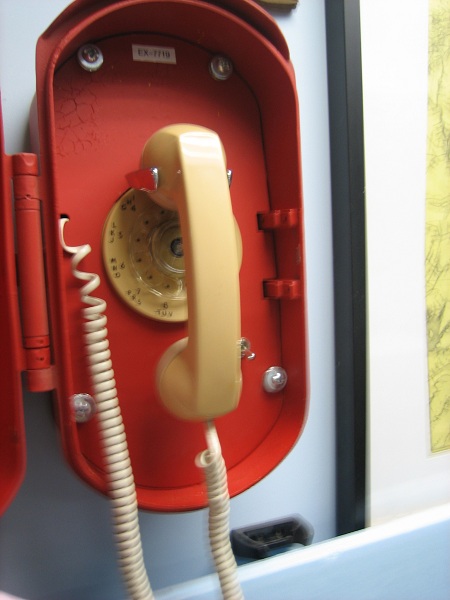
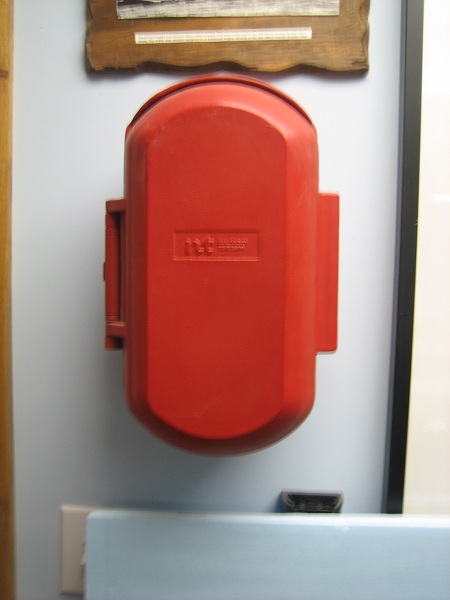
I changed out the guts some years ago to make it a working phone.
My other car is a locomotive, ARHS restoration crew
Posts: 1,817
Threads: 27
Joined: Dec 2009
biL
Lehigh Susquehanna & Western
"America will never be destroyed from the outside. If we falter and lose our freedoms, it will be because we destroyed ourselves." ~~Abraham Lincoln
Posts: 1,215
Threads: 89
Joined: Dec 2008
Ill have to make some long distance calls on that thing while I'm up there

Kick butt on the videos, and damn you even detailed the mobile junction

Tom
Model Conrail
PM me to get a hold of me.
Posts: 2,724
Threads: 160
Joined: Dec 2008
I can't really work on the bridge until after new years " when I can take over the dinning room table again ". So until then I will keep my self occupied with a few other things that need attention. I will soon need to build a LOT of #4 switches, in order to mass produce them a little easier I built a jig for cutting and spacing the ties. I used the fast tracks jigs to make the armatures for the switches so my jigs are built around there dimensions.

It's pretty simple. just some strip wood glued to a scrap of plywood. I painted it so that it would show up better for the photos.
The top section is for sizing and marking the length of each tie, each step is also marked with a number that indicates how many to cut at each length.
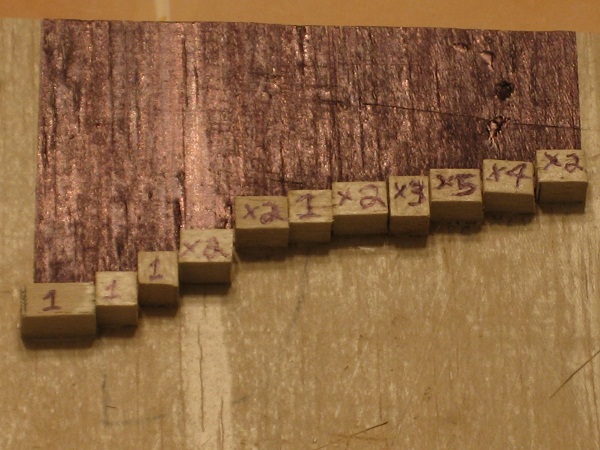
If I ever make another I will make sure that each step will hold the proper amount of ties for each length. It was something that I didn't think of until I used it for the first time.

My other car is a locomotive, ARHS restoration crew
Posts: 2,724
Threads: 160
Joined: Dec 2008
With the ties cut they are loaded into the jig.
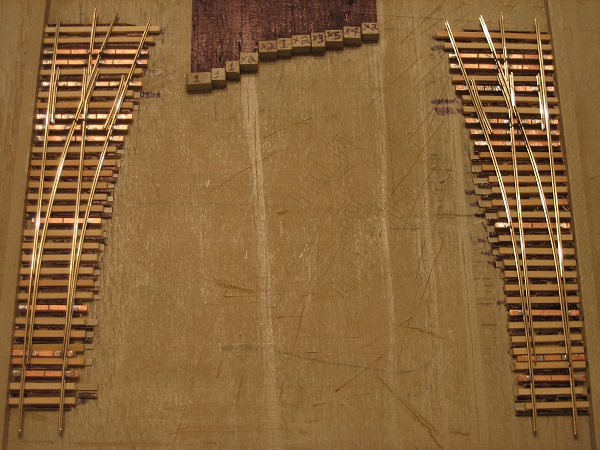
Some glue is applied to the bottom of the rail,

just try to avoid the moving parts of the turnout

, and place it over the cut ties and let the assembly dry.

I did have to add some thin plastic shims in the grove where the ties sit so there is enough clearance so that the switch doesn't get glued to the jig.
The jig was built with the idea of building a Left and Right set at once with a work space in the middle.

It's a pretty handy set up that works well for me...
My other car is a locomotive, ARHS restoration crew
Posts: 3,683
Threads: 118
Joined: Jan 2009
Brilliant! I am slowly learning that the time spent in building a jig is well worth it, and actually makes this hobby more enjoyable, because it makes repetitive tasks just whiz by, and with accuracy too. Geez E=Paw, you are making me wish I had taken the leap and hand-built my turn-outs.
Posts: 161
Threads: 6
Joined: Dec 2010
Saved both pictures on my computer. Neat idea

Jens


 just try to avoid the moving parts of the turnout