02-01-2015, 07:22 PM
You remember my CN woodchip gondola prototype I ordered last summer from Shapeway? Well, I decided to rework it as a useable model on the layout.
Let's face it, the white strong material is a horrible material to work with. Not only it has the same texture as a Teddy Bear, but it can hardly be sanded and is porous as hell.
![[Image: IMG_6020b_zpsdqxkn8z7.jpg]](http://i603.photobucket.com/albums/tt111/sailormatlac/Hedley%20Junction/IMG_6020b_zpsdqxkn8z7.jpg)
I had some time last evening, so while Louis-Marie was painting the new drawers, I sanded the shell. When I was satisfied, I spray automotive primer/putty on it in hope it would fill some holes in the process. Then followed another round of sanding. The result wasn't that bad, but far to be perfect and the shell was still sucking paint like a sponge.
Another problem with this material is that you can't really get sharp edges. When sanding, you always make some particles "blur" the edges. Very annoying. And it's not like plastic flashes on model kits. Forget you hobby knife, it won't do nothing.
![[Image: IMG_6017b_zpsl1pe1tpn.jpg]](http://i603.photobucket.com/albums/tt111/sailormatlac/Hedley%20Junction/IMG_6017b_zpsl1pe1tpn.jpg)
Anyway, this morning, I decided to seal the model by brushing Future Floor Finish on it. My hope was to seal, once for all, the holes. It kind of worked, but made the surface a little bit bumpy. Thus, I sanded the model for a third time. At least, the model was now kind of smooth.
At this point, I used some Tichy freight car left over parts and detailed the gondola. The brake apparatus is a mix of various parts and makes more or less sense to me but it should be enough at this point. Wire grabirons and A-Line stirrups complete the car. Lead weights were added, bringing the completed car to 9.9 onces.
![[Image: IMG_6021b_zpsain12obd.jpg]](http://i603.photobucket.com/albums/tt111/sailormatlac/Hedley%20Junction/IMG_6021b_zpsain12obd.jpg)
I primed the model with Krylon Red Primer, which is almost a good alternative for Boxcar Red. For once, the paint evenly coated the model, meaning holes were now sealed.
![[Image: IMG_6022b_zpsyx7byk3r.jpg]](http://i603.photobucket.com/albums/tt111/sailormatlac/Hedley%20Junction/IMG_6022b_zpsyx7byk3r.jpg)
A few hours later, I airbrushed a coat of Model Master Boxcar Red thinned with Future Floor Finish. The mix ratio - 25% Future/75% Paint - worked wonders. My only mistake was to clean the airbrush with Windex! The paint turned automatically in the proverbial goo and clogged everything. Fortunately, my newer Iwata airbrush is easier to clean than my old Badger 150.
![[Image: IMG_6023b_zpsq2wuodev.jpg]](http://i603.photobucket.com/albums/tt111/sailormatlac/Hedley%20Junction/IMG_6023b_zpsq2wuodev.jpg)
The car will need a second coat of paint, but at this point, I have a good idea of the final result. It won't be a great car, finish will still be a little bit bumpy, but with some dullcoat, it should be that bothering to the naked eye. Considering this prototype was quite costly, I feel I kind of recovered a part of my investment.
The only problem now is finding "CN Rail" decals. In the worst case, I'll have to order custom decals. So far, I didn't see any manufacturer offer a "CN RAIL" set of decal for these gondolas. Ordering custom decals seems a little bit over priced for one car. I'm a little bit at lost since, in fact, I only need the "CN RAIL" logo... Any idea?
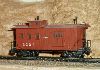
BTW, here's a few pictures of the roofless boxcars with a coat of boxcar red:
![[Image: IMG_6027b_zps01m8j7vi.jpg]](http://i603.photobucket.com/albums/tt111/sailormatlac/Hedley%20Junction/IMG_6027b_zps01m8j7vi.jpg)
![[Image: IMG_6025b_zpsitxk1wrl.jpg]](http://i603.photobucket.com/albums/tt111/sailormatlac/Hedley%20Junction/IMG_6025b_zpsitxk1wrl.jpg)
Matt
Let's face it, the white strong material is a horrible material to work with. Not only it has the same texture as a Teddy Bear, but it can hardly be sanded and is porous as hell.
I had some time last evening, so while Louis-Marie was painting the new drawers, I sanded the shell. When I was satisfied, I spray automotive primer/putty on it in hope it would fill some holes in the process. Then followed another round of sanding. The result wasn't that bad, but far to be perfect and the shell was still sucking paint like a sponge.
Another problem with this material is that you can't really get sharp edges. When sanding, you always make some particles "blur" the edges. Very annoying. And it's not like plastic flashes on model kits. Forget you hobby knife, it won't do nothing.
Anyway, this morning, I decided to seal the model by brushing Future Floor Finish on it. My hope was to seal, once for all, the holes. It kind of worked, but made the surface a little bit bumpy. Thus, I sanded the model for a third time. At least, the model was now kind of smooth.
At this point, I used some Tichy freight car left over parts and detailed the gondola. The brake apparatus is a mix of various parts and makes more or less sense to me but it should be enough at this point. Wire grabirons and A-Line stirrups complete the car. Lead weights were added, bringing the completed car to 9.9 onces.
I primed the model with Krylon Red Primer, which is almost a good alternative for Boxcar Red. For once, the paint evenly coated the model, meaning holes were now sealed.
A few hours later, I airbrushed a coat of Model Master Boxcar Red thinned with Future Floor Finish. The mix ratio - 25% Future/75% Paint - worked wonders. My only mistake was to clean the airbrush with Windex! The paint turned automatically in the proverbial goo and clogged everything. Fortunately, my newer Iwata airbrush is easier to clean than my old Badger 150.
The car will need a second coat of paint, but at this point, I have a good idea of the final result. It won't be a great car, finish will still be a little bit bumpy, but with some dullcoat, it should be that bothering to the naked eye. Considering this prototype was quite costly, I feel I kind of recovered a part of my investment.
The only problem now is finding "CN Rail" decals. In the worst case, I'll have to order custom decals. So far, I didn't see any manufacturer offer a "CN RAIL" set of decal for these gondolas. Ordering custom decals seems a little bit over priced for one car. I'm a little bit at lost since, in fact, I only need the "CN RAIL" logo... Any idea?
BTW, here's a few pictures of the roofless boxcars with a coat of boxcar red:
Matt
Proudly modelling Quebec Railway Light & Power Company since 1997.
Hedley-Junction Club Layout: http://www.hedley-junction.blogspot.com/
Erie 149th Street Harlem Station http://www.harlem-station.blogspot.com/
Hedley-Junction Club Layout: http://www.hedley-junction.blogspot.com/
Erie 149th Street Harlem Station http://www.harlem-station.blogspot.com/

![[Image: IMG_6053b_zpskgafbelg.jpg]](http://i603.photobucket.com/albums/tt111/sailormatlac/Hedley%20Junction/IMG_6053b_zpskgafbelg.jpg)
![[Image: IMG_20150214_193045b_zpscem87ldd.jpg]](http://i603.photobucket.com/albums/tt111/sailormatlac/Hedley%20Junction/IMG_20150214_193045b_zpscem87ldd.jpg)
![[Image: IMG_6054b_zpsk7pjjuxz.jpg]](http://i603.photobucket.com/albums/tt111/sailormatlac/Hedley%20Junction/IMG_6054b_zpsk7pjjuxz.jpg)
![[Image: IMG_20150214_193201b_zpsxz7fejza.jpg]](http://i603.photobucket.com/albums/tt111/sailormatlac/Hedley%20Junction/IMG_20150214_193201b_zpsxz7fejza.jpg)
![[Image: IMG_20150216_232344b_zpsqjbodpz8.jpg]](http://i603.photobucket.com/albums/tt111/sailormatlac/Hedley%20Junction/IMG_20150216_232344b_zpsqjbodpz8.jpg)
![[Image: IMG_6056b_zps7uwx7jer.jpg]](http://i603.photobucket.com/albums/tt111/sailormatlac/Hedley%20Junction/IMG_6056b_zps7uwx7jer.jpg)
![[Image: IMG_6057b_zpsthsvpydp.jpg]](http://i603.photobucket.com/albums/tt111/sailormatlac/Hedley%20Junction/IMG_6057b_zpsthsvpydp.jpg)
![[Image: IMG_20150215_215023b_zpsp6xk7ayk.jpg]](http://i603.photobucket.com/albums/tt111/sailormatlac/Hedley%20Junction/IMG_20150215_215023b_zpsp6xk7ayk.jpg)
![[Image: IMG_6055b_zpsz4vgkxoh.jpg]](http://i603.photobucket.com/albums/tt111/sailormatlac/Hedley%20Junction/IMG_6055b_zpsz4vgkxoh.jpg)


![[Image: IMG_20150225_230622b_zpsyrxxpoul.jpg]](http://i603.photobucket.com/albums/tt111/sailormatlac/Hedley%20Junction/IMG_20150225_230622b_zpsyrxxpoul.jpg)