Posts: 410
Threads: 17
Joined: Dec 2008
Wow! I am speechless. I have always wanted a Western Pacific 4-6-0 (#94) painted to look like she does now, in her as delivered paint scheme, restored by WP in the 1950's. Problem is, they are old Pacific Fast Mail models with a motor that makes a Tyco look like a Kato, and it needs a new pilot and headlight to back date it to its current appearance. Problem is, I don't know jack about brass steam (or ANY model steam for that matter) being primarily a diesel modeler. So you guys who can do this sort of work, especially of this caliber, amazes me to no end.
I can't wait to see this model finished and will be checking daily!
Thanks for sharing.
Tom Carter
Railroad Training Services
Railroad Trainers & Consultants
Stockton, CA
<!-- m --><a class="postlink" href="http://www.railroadtrainingservices.com">http://www.railroadtrainingservices.com</a><!-- m -->
<!-- e --><a href="mailto:tomwcarter@railroadtrainingservices.com">tomwcarter@railroadtrainingservices.com</a><!-- e -->
![[Image: gaugetraingifsigUP.gif]](http://i79.photobucket.com/albums/j137/wprm/gaugetraingifsigUP.gif)
Posts: 629
Threads: 15
Joined: Dec 2008
That is one sweet lokie now finished off with a tsunami , I have several steamers with tsunamis installed and although I've heard if you fine tune them they are even better but I find the stock settings very good as well.
Nice job.
Lynn
New Adventure <!-- l --><a class="postlink-local" href="http://bigbluetrains.com/forum/viewtopic.php?f=46&t=9245">viewtopic.php?f=46&t=9245</a><!-- l -->
Great White North
Ontario,Canada
Posts: 1,229
Threads: 23
Joined: Dec 2008
When I first read the post about using the circuit board as a solder pad in the tender I was uncertain how that would work (or why you'd go to the extra step of splicing in that board). I was dead set on getting micro mini connectors for my current project.
HOWEVER, after having reread your thread in its new setting, I am beginning to like the idea. I seem to recall seeing that somewhere else...ah yes, in a detailing article in RMC, installed inside a 70 tonner.
PLUS, I have had a devil of a time trying to track down micro mini connectors at a decent price or without knowing electronics codes to decipher some of these mega-electronics sites. I bought some from All Electronics, a more user-friendly outfit, but alas, they were too large. 
So it seems that hard wiring is the way I will go, and making up a little circuit board solder pad suddenly makes perfect sense. Now if I can just figure out how I'm going to mount my reverse linkage to the existing valve gear...(mumbles as he trudges back to the workbench)
All that said, if you can include a picture of your circuit board in place and wired, I'd appreciate it, just to see how it comes out. And, as I think I had mentioned in that other place, great work!
Galen
I may not be a rivet counter, but I sure do like rivets!
Posts: 330
Threads: 38
Joined: Dec 2008
WOW !! What a fantastic job of rebuilding a loco ,Dr. wayne . 
With the kind of skill you have , next you will be scratching one, I can hardly wait.
Instant glue ? ---- SOLDER ---- NOW THATS INSTANT!
Posts: 5,859
Threads: 175
Joined: Dec 2008
Thanks, Dave. I found this to be a particularly easy re-build, especially since all I had to do was sit here and read about it.  This fine re-build is by Wayne Reid, who has done a really nice job on it. 
I will be bringing my "Beeg Boy" engine re-building thread over here, though, and hope, eventually, to add a few new ones, too.
Wayne
Posts: 118
Threads: 9
Joined: Dec 2008
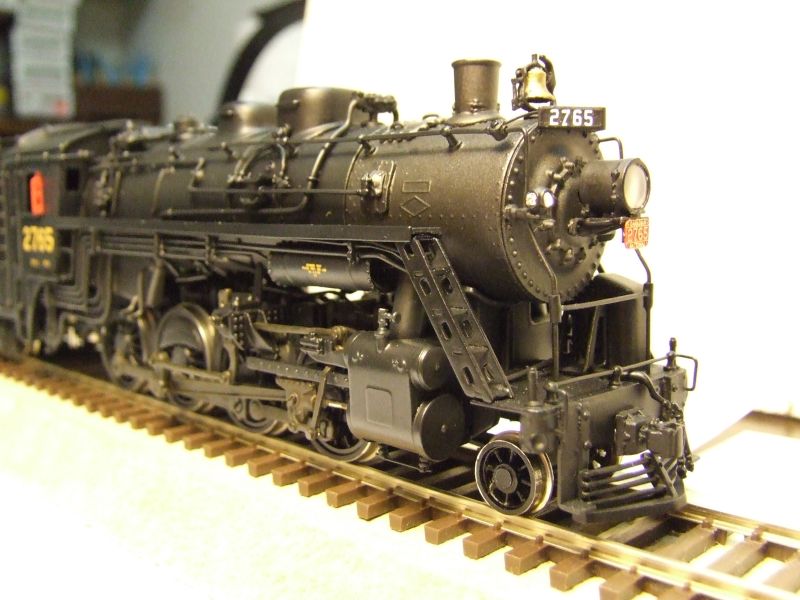
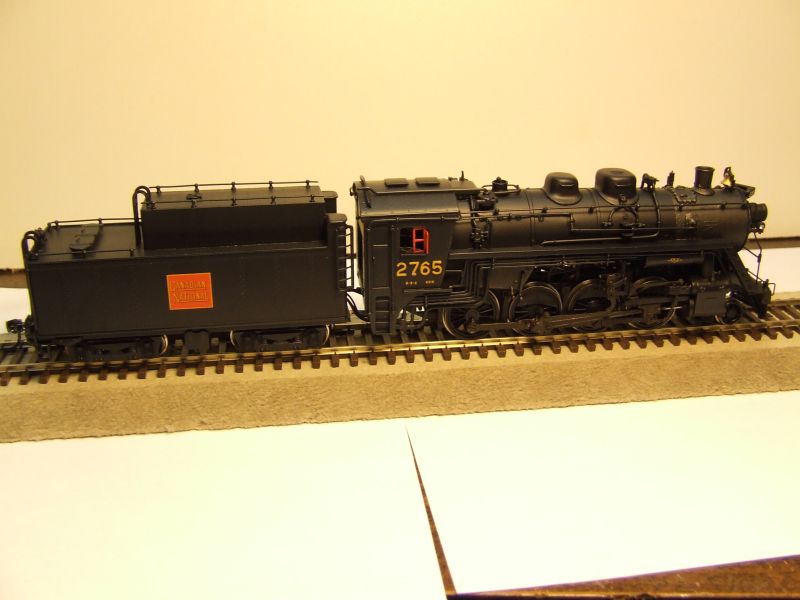
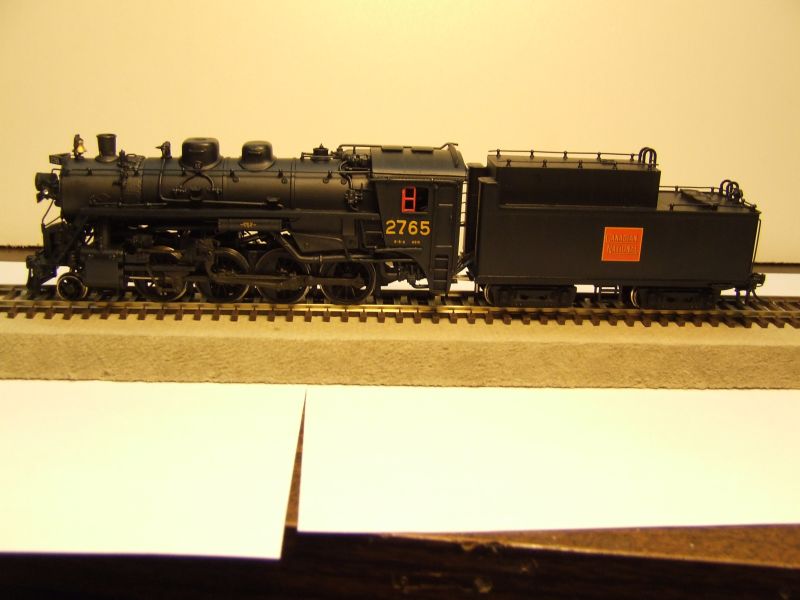
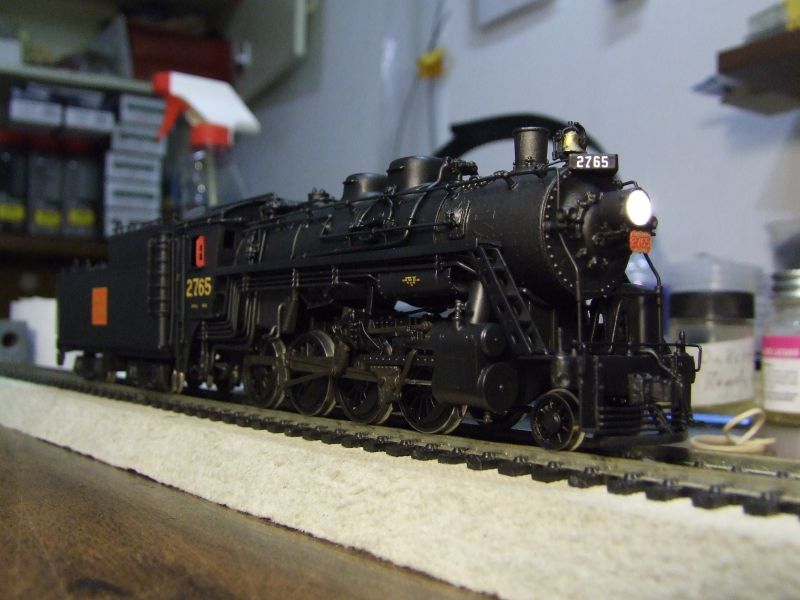
Well I finally have some finished pictures of my N-5-d project. Bear with me if some are a little bit out od focus or a little too dark. I got a new camera for Xmas and I am still trying to learn all the bells & whistles as well as adjust the white blance for my room lighting. 
For the most part the locomotive is finished. I just need two more clear jewels for the front marker lights. I managed to loose two in the carpet will installing them.  I have also yet to add any weathering. I am modeling 1956-57 and CNR steam was on the way out then so they were not too well kept. I need to decide if it will get moderate weathering or heavy weathering. I am also waiting to I have a few more things to weather.
So without further delay here are some pictures of the shiny new locomotive and tender. 
Wayne Reid
Posts: 118
Threads: 9
Joined: Dec 2008
Posts: 118
Threads: 9
Joined: Dec 2008
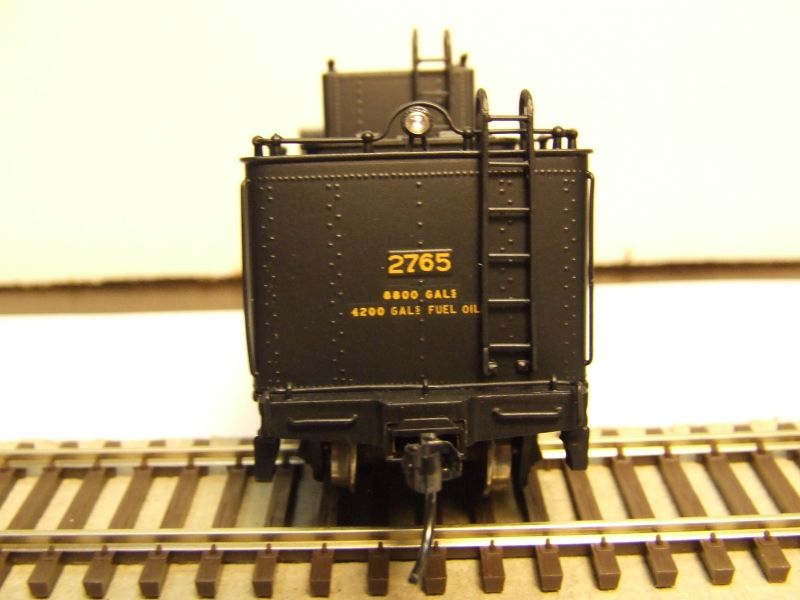
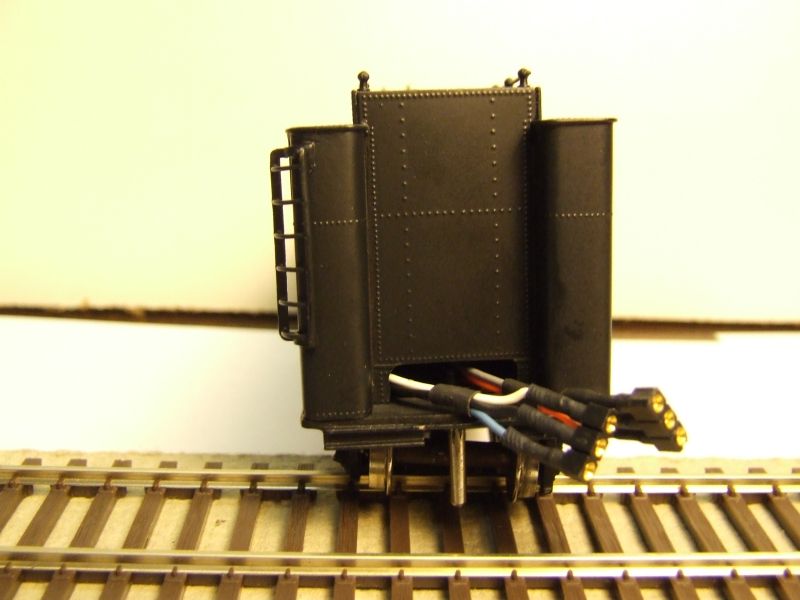
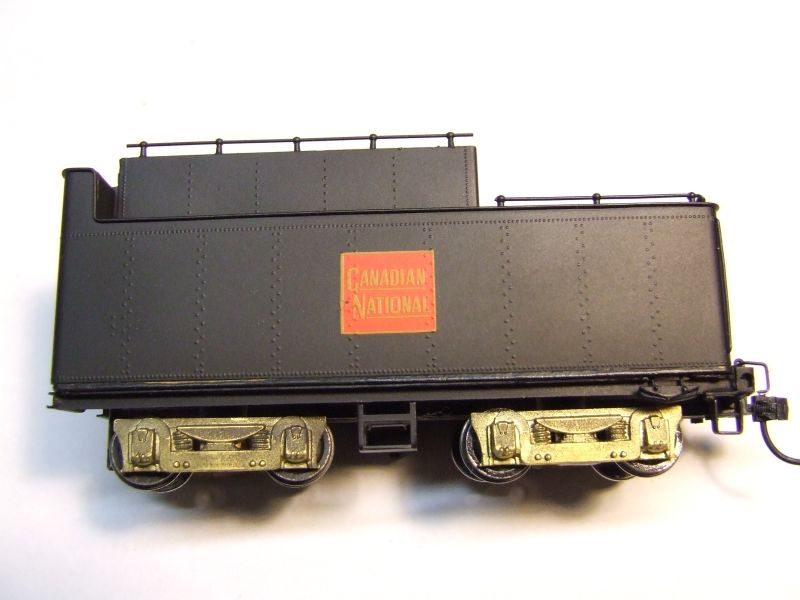
A few more shots of the tender. Front and back. I decided to change my wiring setup from the locomotive to the tender. I made a small opening in the front of the tender shell as the pictures show. This way it is easier to seperate the tender form the locomotive when needed.
WR
Posts: 118
Threads: 9
Joined: Dec 2008
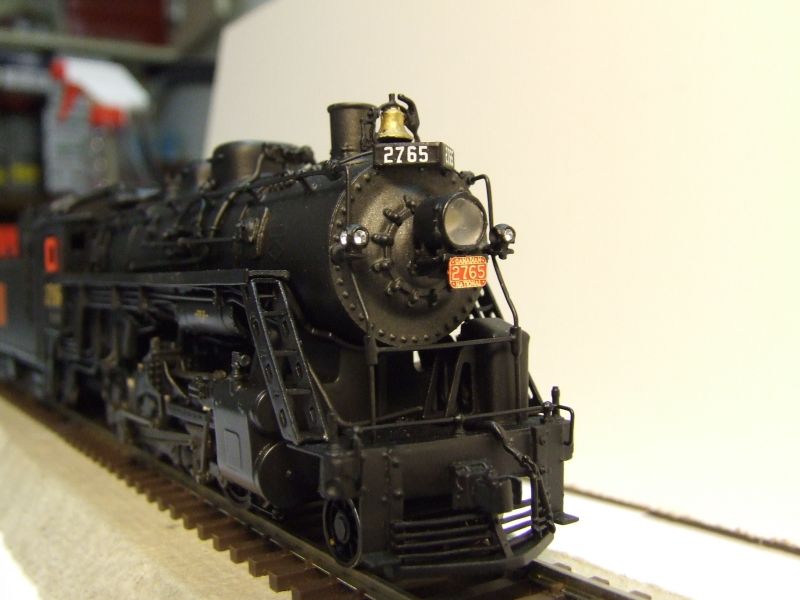
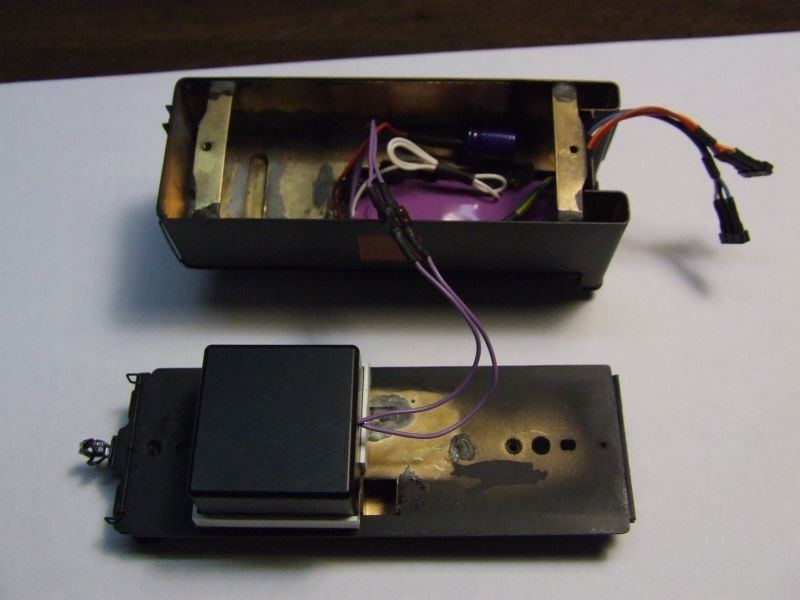
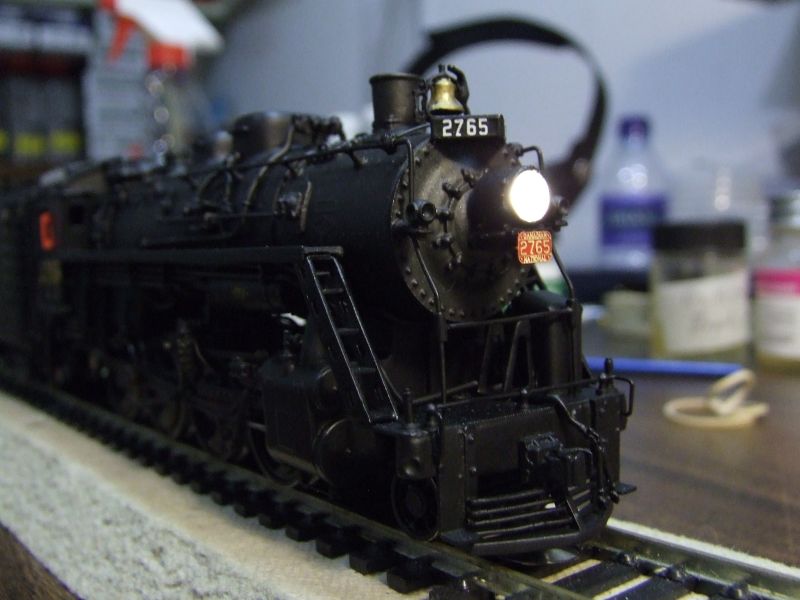
The next couple of pictures show the very bright headlight I installed as well as the Soundtraxx tsunami sound decoder setup in the tender. The headlight is a micro golden white LED. It actually fits inside the brass headlight casting. I have added a clear lens over it. The headlight is very bright with the lights out. Bright enough to make you see spots if you stare at it too long. I may add a bigger resistor and dim it down a bit. I did not install a working backup light as the brass casting is way to small and the wires would show.
The sound turned out real well. The locomotive runs real well on DCC and sounds great.  I just need to do some adjustements to some of the sounds and turn down the volume for fireman Fred shoveling coal. :mrgreen: No coal needed on this loco as it is an oil burner. 
Wayne Reid
Posts: 410
Threads: 17
Joined: Dec 2008
Simply STUNNING. I am in awe of your work, you have a real beuty there. 
Tom Carter
Railroad Training Services
Railroad Trainers & Consultants
Stockton, CA
<!-- m --><a class="postlink" href="http://www.railroadtrainingservices.com">http://www.railroadtrainingservices.com</a><!-- m -->
<!-- e --><a href="mailto:tomwcarter@railroadtrainingservices.com">tomwcarter@railroadtrainingservices.com</a><!-- e -->
![[Image: gaugetraingifsigUP.gif]](http://i79.photobucket.com/albums/j137/wprm/gaugetraingifsigUP.gif)
Posts: 5,859
Threads: 175
Joined: Dec 2008
That's a great-looking paint job, Wayne, and a fitting finish for the great job which you did on the re-build.
I notice in all but the last two pictures which you posted that you have the lenses installed in the class lights, so I'm assuming that you either found the lost ones or got new ones. (Incidentally, a good way to recover small parts lost in a carpet is with the use of a shop vac or vacuum cleaner with a hose attachment. Before fitting the crevice or carpet tool to the end of the hose, fit a piece of nylon stocking material over the end that slips into the hose. This allows the suction to pick up the parts and dirt, while leaving them easily accessible to check through for the missing parts - simply dump the accumulation onto some newspaper and sort through it. My first true shop for modelling was in a converted playroom, with shag  carpeting on the floor. Whenever I ran out of detail parts for a particular project, a thorough vacuuming was sure to re-stock my parts supply.)  
If you don't need working class lights, an easy way to duplicate the appearance of unlit ones is to paint the depressions in the casting grey, then fill them with drops of clear five-minute epoxy - I apply it with the tip of a #11 X-acto blade. Its surface tension nicely duplicates globular shape of the lenses of the prototype, although you have to ensure that the loco is positioned so that the lense is facing up until it hardens. That means three distinct applications: two with the loco lying on one side to do the lense on the opposite side, then standing on its cab for the two front lenses.
[album]318[/album]
For diesels, slice off the cast-on lenses, then drill #65 holes to accept .035" fibre optics. Cut short lengths of the fibre (1/4" is plenty, unless you want to make working lights - in that case, cut to suit your particular application) after first heating the end over a hot soldering iron. Don't allow the plastic to touch the iron, and keep the cut end perpendicular to the heat - it will form a nice, enlarged lense. You may have to make several attempts to get two the same size, though.
[album]319[/album]
Wayne
Posts: 118
Threads: 9
Joined: Dec 2008
Wayne
Actually the two missing jewels are the ones facing in towards the headlight. As I was installing the jewels I did the easy ones first. Good thing I did as the ones missing jewels are the ones that do not show so easy. The good news is I tried your trick with the vacuum cleaner I had recovered the missing jewels. They will be installed later this evening.
I never thought about the paint and epoxy trick. I remember reading about it somewhere else as well. It actually may be better as the jewels can be hard to get at times and I find they shine to brightly with even a little bit of light making them look to new for a working locomotive. The fiber optic idea sound great as well. I have some here and will have to remember to try it on the next diesel I do.
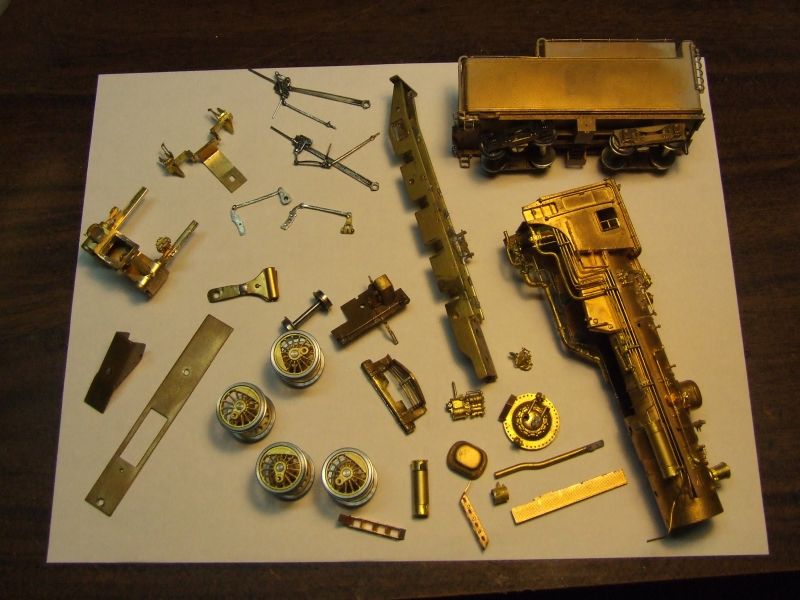
Now that I have the first one done I can start thinking about rebuilding #2. As the picture below shows it needs a lot more work. The picture shows most of the parts for it including the four new drivers. The only thing I need to find for it is a headlight bracket.
Sadly the original owner tried to make a N-2 out of it and cut a section out of the left side running board. I have the small piece so I sould be able to reattach the front half of the running board and fix the gap. I also need to fix a few solder joints as well and reattach a number of small parts.
I have another oil tender for this one but I also made a trade for a J-4-e tender. It is very similar to the coal tenders the N-5-d class had before their conversion to oil. So the second one may get a coal tender.
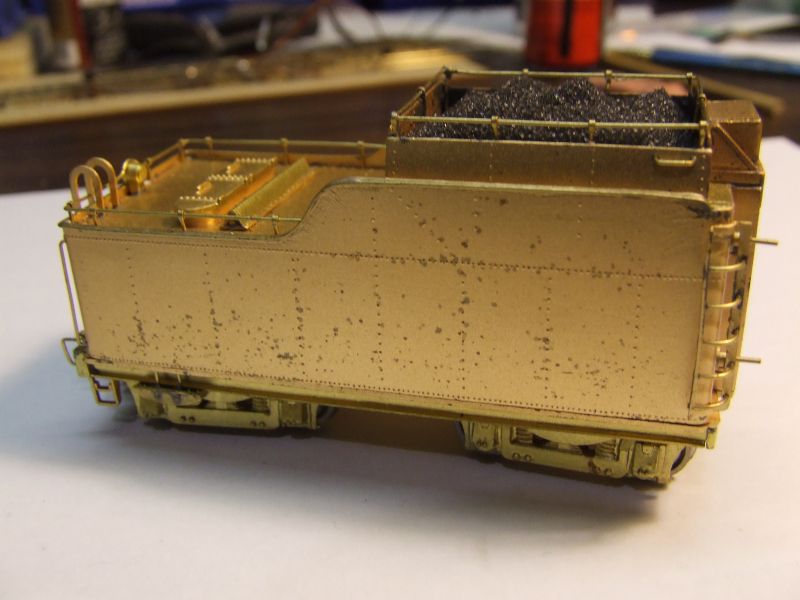
I am also thinking of using the J-4-e tender for another project. A Bowser NYC K-11 conversion to a CNR pacific. The K-11 has the correct size drivers and the boiler and valve gear are a close match. Maybe a future kitbashing topic. :o 
I also got some new black paint today. It is the new True Line Trains warm black. Polly Scale produces it for them. The warm black is supposed to be a near black designed for indoor viewing and to show details better under indoor lighting. I took my repaired N-5-d tender and used it for a test paint. I also added a decals and gave it a shot of Testors dullcote. It was a quick job to see how the warm black would look. I like it so it may just be the paint for the second N-5-d and the rest of my steam projects.
Wayne Reid
Posts: 2,458
Threads: 57
Joined: Dec 2008
WoW Wayne...!!!....That turned out superbly....!!! Nothing like turning the ugly duckling into the beauty of the flock..!! 
If it runs half as good as she looks...it'll be a great runner...  
Gus (LC&P).
Posts: 118
Threads: 9
Joined: Dec 2008
So far it runs very well. I only have a 8 foot test track with a few sidings right now but after an hour of doing some switching it has preformed very good. With the sound off all you hear is the wheels on the rails. The new can motor, NWSL gearbox and tweaks to the running gear have sure made a locomotive that sounded like a coffee grinder run a lot better. I am also very happy with the sound. I have a Proto Heritage 0-8-0 as well as an 0-6-0 with Tsunami sound and the brass 2-8-0 sounds a little better than they do. Now I just need to finish planning the new layout and get it built so I can really enjoy running them all.
Wayne Reid
Posts: 12
Threads: 2
Joined: Jun 2012
Hello Wayne
I mhave a Van Hobbies N5-d with OFM, but it runsand s=is painted nicely, so all I am doing is the lettering, I have the decal set so this should be nice.
The loco has only a jewel for the haedlight.
I have some other brass locos needing paint, but i would like to fit them with working headlights before paint. What I would like to know is how to fit a light without destroying the gap between the back of the headlight and the front of the smokebox. The electronic circuitry is no problem, but the length of the GOW bulbs or the LED pigtails baffle me. I have magnet wire so can make the wiring unobtrusive, but i am not game to start drilling without knowing what I am doing. As your N5-d project seems to have solved this, could you let me know the type of LED you used and how you wired it so it didn't short to the brass in loco.
Paul
|
![[Image: gaugetraingifsigUP.gif]](http://i79.photobucket.com/albums/j137/wprm/gaugetraingifsigUP.gif)
![[Image: gaugetraingifsigUP.gif]](http://i79.photobucket.com/albums/j137/wprm/gaugetraingifsigUP.gif)


 This fine re-build is by Wayne Reid, who has done a really nice job on it.

 I have also yet to add any weathering. I am modeling 1956-57 and CNR steam was on the way out then so they were not too well kept. I need to decide if it will get moderate weathering or heavy weathering. I am also waiting to I have a few more things to weather.


