Posts: 4,553
Threads: 100
Joined: Dec 2008
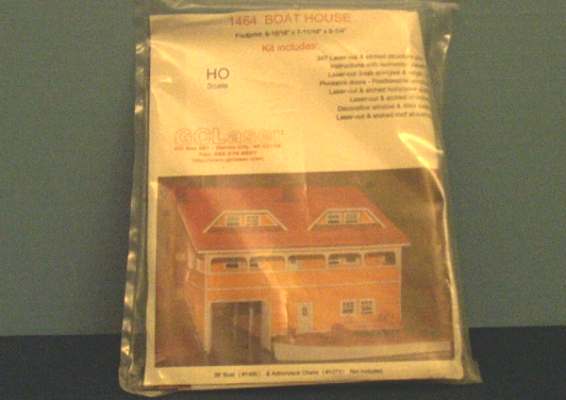
I haven't changed my mind, the GCLaser Boathouse kit is going to be built for this challenge. It is one of the kits I designed for the company, but I had a completely different look in mind originally. The Boathouse will get the cedar shingle roof and siding, That I had first pictured in my mind's eye, when I sat down to do the design..... and each shingle will be hand cut and fit.
We always learn far more from our own mistakes, than we will ever learn from another's advice.
The greatest place to live life, is on the sharp leading edge of a learning curve.
Lead me not into temptation.....I can find it myself!
Posts: 4,553
Threads: 100
Joined: Dec 2008
So !, It is official, the boathouse is the kit.

I finished unpacking from my "trip", and did a little work on the new modules......things are glued and clamped, and waiting for the glue to set. The boathouse has a "reserved spot" on the middle module, so what better time to start, than for the summer challenge.
We always learn far more from our own mistakes, than we will ever learn from another's advice.
The greatest place to live life, is on the sharp leading edge of a learning curve.
Lead me not into temptation.....I can find it myself!
Posts: 4,553
Threads: 100
Joined: Dec 2008
Maybe it's time to post some sort of progress pic's....
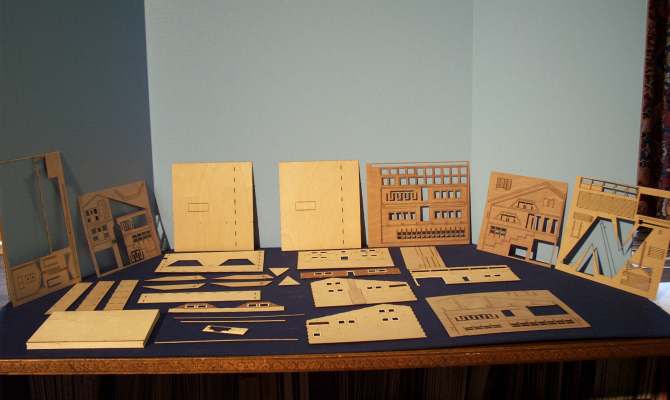
This first shot is of the parts sheets for the kit.
This will be the third time I've built this kit....
First, was the "alpha build", that was done to find any problems with the Autocad drawing. I had no instructions for that build.
Second, was the painted version used for the cover art of the kit. I followed the instructions to the letter here, to verify the order of procedure.
This time, I have to take things out of sequence because I'm applying shingles to roof and sides, and much of the kit's trim pieces won't be used. it also effects how the model will go together. Yes, there are a few parts. 

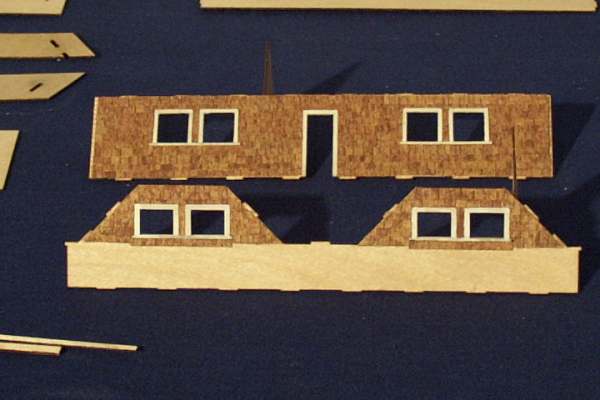
This second shot, is of two of the "sides" parts that have window casings,and shingles on. between the two, there's approximately 800 individually cut, and applied shingles.

I'll get most of the shingling done before any real assembly begins. ( this is the "period of mind blowing boredom" where not much happens except " pick a shingle, put it in place.......over, and over, and over ) ( insert "lunatic smilie" here )
We always learn far more from our own mistakes, than we will ever learn from another's advice.
The greatest place to live life, is on the sharp leading edge of a learning curve.
Lead me not into temptation.....I can find it myself!
Posts: 4,553
Threads: 100
Joined: Dec 2008
Still cutting and glueing shingles. It is the nature of this kit, that once the outer walls are put together, adding interior detail becomes almost impossible, so I'll have to do that detail before the whole thing comes together. For now ?, cut, pick, glue- cut, pick glue-................next picture will be just before major assembly begins.
We always learn far more from our own mistakes, than we will ever learn from another's advice.
The greatest place to live life, is on the sharp leading edge of a learning curve.
Lead me not into temptation.....I can find it myself!
Posts: 3,683
Threads: 118
Joined: Jan 2009
I am impressed that you designed that kit. And I am equally impressed with your fortitude at applying one shingle at a time. Keep up the good work!
Three Foot Rule In Effect At All Times
Posts: 5,859
Threads: 175
Joined: Dec 2008
Sumpter250 Wrote:Still cutting and glueing shingles. It is the nature of this kit, that once the outer walls are put together, adding interior detail becomes almost impossible, so I'll have to do that detail before the whole thing comes together. For now ?, cut, pick, glue- cut, pick glue-................next picture will be just before major assembly begins.
What? No tiny nails? Model railroading as a hobby is surely doomed if folks continue to use these new-fangled shortcuts.  
Wayne
Posts: 4,553
Threads: 100
Joined: Dec 2008
We always learn far more from our own mistakes, than we will ever learn from another's advice.
The greatest place to live life, is on the sharp leading edge of a learning curve.
Lead me not into temptation.....I can find it myself!
Posts: 2,458
Threads: 57
Joined: Dec 2008
Sumpter....Now that you've let the cat out of the bag.....I have a whole box-full of tiny nails...I stopped using them when the cat ate the tiny hammer... 
Gus (LC&P).
Posts: 1,229
Threads: 23
Joined: Dec 2008
Tiny nails, indeed! I've never heard of such lunacy. Now if you'll excuse me, I've got to go thread some 1" pipe for the steam lines on my shifter project. 1" HO scale, that is! Threading the pipe isn't the hard part. Tightening the little pipe couplings is the tricky job. 
But seriously, keep on keeping on. Shingling is mind-rotting, soul-numbing stuff. You're a good man for taking it on in pursuit of a better model.
Galen
I may not be a rivet counter, but I sure do like rivets!
Posts: 4,553
Threads: 100
Joined: Dec 2008
ocalicreek Wrote:But seriously, keep on keeping on. Shingling is mind-rotting, soul-numbing stuff. You're a good man for taking it on in pursuit of a better model.
Galen
If my signature has any truth in it, and I've done the shingles before, then I guess it's not a mistake, and thanks, I do think it will make a significant difference in the appearance of the finished model.
We always learn far more from our own mistakes, than we will ever learn from another's advice.
The greatest place to live life, is on the sharp leading edge of a learning curve.
Lead me not into temptation.....I can find it myself!
Posts: 4,553
Threads: 100
Joined: Dec 2008
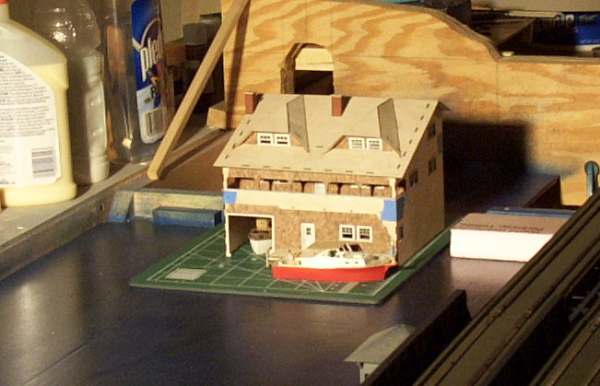
I have most of the major "sub-assemblies" built, and temporarily put together. This shot shows where the finished project will end up on the new modules. The boat inside, is the GCLaser 38' boat kit. The one in front is a modified ( shortened ) Athearn boat ( flat car load/ 4 to a box ).

Yes, there's a lot of shingles yet to be attached, which is why it's "temporarily put together". 
We always learn far more from our own mistakes, than we will ever learn from another's advice.
The greatest place to live life, is on the sharp leading edge of a learning curve.
Lead me not into temptation.....I can find it myself!
Posts: 2,724
Threads: 160
Joined: Dec 2008
so far so good, keep it up.
My other car is a locomotive, ARHS restoration crew
Posts: 4,553
Threads: 100
Joined: Dec 2008
I'm putting shingles on, while the surfaces are still flat, and easy to work on. The corners will get finished once the sides and roof are assembled. I did a quick "count", and there will be 72 shingles/square inch.....approximately.......which means "approximately" 7,500 shingles have to be cut and applied, of which, approximately 2,650 are now done.( just a touch over one third )
DO NOT ATTEMPT THIS AT HOME
I am a " certifiable amateur", and knew what I was getting into before I started.  
We always learn far more from our own mistakes, than we will ever learn from another's advice.
The greatest place to live life, is on the sharp leading edge of a learning curve.
Lead me not into temptation.....I can find it myself!
Posts: 5,859
Threads: 175
Joined: Dec 2008
I think that the word "certifiable" is the key one, but if you're not now, you probably will be by the time you get finished.   
Wayne
Posts: 3,021
Threads: 160
Joined: Dec 2008
--
Kevin
Check out my Shapeways creations!
3-d printed items in HO/HOn3 and more!
<!-- m --><a class="postlink" href="https://www.shapeways.com/shops/kevin-s-model-train-detail-parts">https://www.shapeways.com/shops/kevin-s ... tail-parts</a><!-- m -->
|


