Posts: 4,553
Threads: 100
Joined: Dec 2008
With all the work I had, getting the New Modules ready for the last Trainfest, there were some other model projects that got set aside......again!
With most of the module work done now, I'm bringing a different project back to the work bench. Because it is not a railroad, or layout related project, I'll not be part of the "competition", but thought it might be a pleasant "diversion" to see it posted here.
That said: New York Pilot Schooner "Phantom", in 1:96 scale ( 1/8"= 1' )
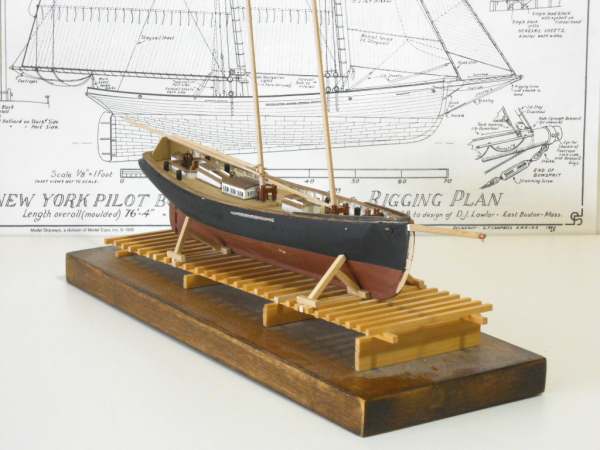
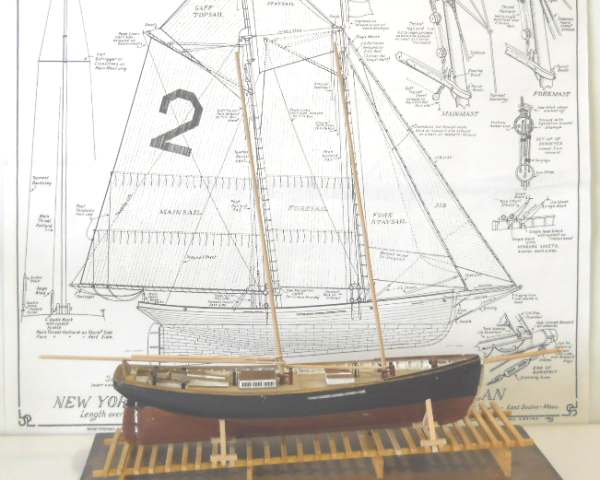
The goal of this "challenge" will be to make, and install all the on-deck, mast, hull, and spar, "ironwork", and if possible, maybe even a little rigging. ( yeah, that is dust on the display base )
We always learn far more from our own mistakes, than we will ever learn from another's advice.
The greatest place to live life, is on the sharp leading edge of a learning curve.
Lead me not into temptation.....I can find it myself!
Posts: 3,732
Threads: 44
Joined: Dec 2008
Good looking boat Pete!
Mike
Sent from my pocket calculator using two tin cans and a string
Posts: 4,553
Threads: 100
Joined: Dec 2008
This is a sample of what I'm going to be doing:
The bow sprit cap, with eyes for the bow sprit guys ( P & S ), and the bobstay ( bottom of cap )
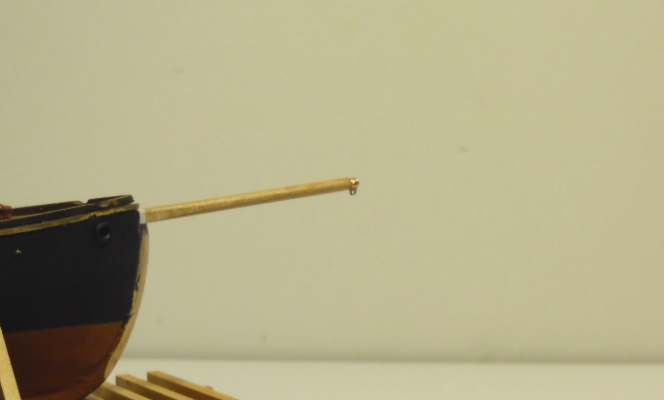
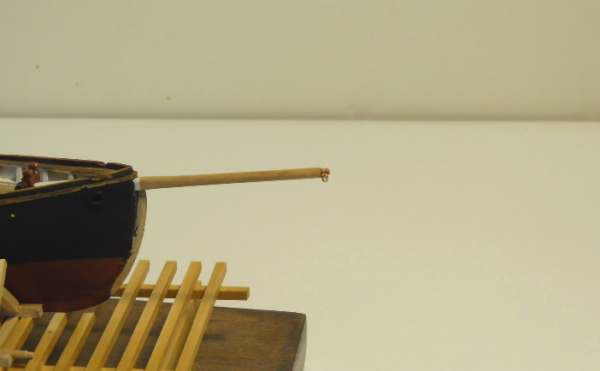
Yeah, most of this is going to be tiny details like that. Next up a couple of "stretching screws" AKA turnbuckles.
We always learn far more from our own mistakes, than we will ever learn from another's advice.
The greatest place to live life, is on the sharp leading edge of a learning curve.
Lead me not into temptation.....I can find it myself!
Posts: 4,553
Threads: 100
Joined: Dec 2008
The "Stretching Screws" AKA turnbuckles, are in place, port and starboard.
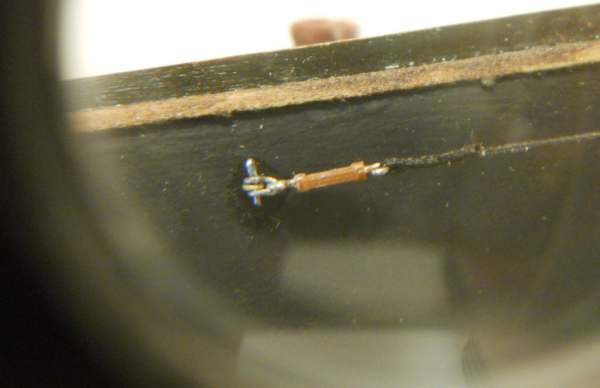
I had to shoot the picture through a magnifying glass so it could be seen, the photo is about 6 times the actual size of the turnbuckle. The line leading forward from the turnbuckle, is approximately 0.008" dia. . The model is about 10 % smaller than an HO model of the same ship.
The "ironwork" on this model is small, the original kit instructions lead to some bulky, unconvincing , fittings.
And........this is just the beginning. 
We always learn far more from our own mistakes, than we will ever learn from another's advice.
The greatest place to live life, is on the sharp leading edge of a learning curve.
Lead me not into temptation.....I can find it myself!
Posts: 3,732
Threads: 44
Joined: Dec 2008
Wow,  that thing makes my N scale stuff look huge. If you can deal with things that small we need to see what you can do in Zn3! 
Mike
Sent from my pocket calculator using two tin cans and a string
Posts: 4,553
Threads: 100
Joined: Dec 2008
We always learn far more from our own mistakes, than we will ever learn from another's advice.
The greatest place to live life, is on the sharp leading edge of a learning curve.
Lead me not into temptation.....I can find it myself!
Posts: 4,553
Threads: 100
Joined: Dec 2008
I got the chainplates done, installed on the hull, made strops for, and attached the lower deadeyes, for the fore, and main shrouds.
Finished and set the bowsprit, completed the rigging of the bowsprit guys.
Made up two fairleads, from styrene, and attached them to the transom rail
Put a coat of paint on the installed ironwork, and the repaired stem.
I still need two deck mounted bilge pumps, to complete the inventory of deck ironwork, and I have to fashion the gammon iron, ( the piece that secures the bowsprit to the top of the stem ) and get that installed. Then, it's on the mast and spar ironwork.
Once all that is done, I can begin rigging......this is the point where all the spiders in the house stop what they are doing and stare in amazement ---- rigging a ship model, makes spinning a web look easy !
The sparred length ( tip of bowsprit to end of main boom ) is 13-3/8", or 107' in 1/96 scale ( 97' in HO scale)
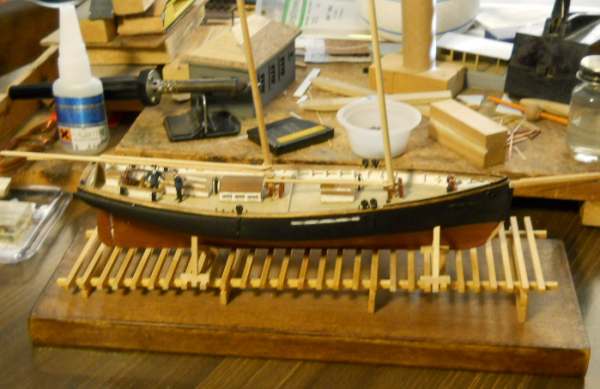
This slightly closer shot shows a bit more of the detail
The two figures stand 5'-9" in HO, so are a little tall in 1/96, but close enough for a rough comparison.
The deck "furniture" ( the cabins, cockpit, and steering box ), were all scratchbuilt as part of the restoration process.
For this project, I had purchased an assembled model ( masts, and rigging were severely damaged ) from a hobby shop that had it as a display model. A lot of the original model work left "too much room for improvement", so only the kit's hull, and castings were re-used. ( yeah, I didn't have to "shape" the hull, but I did have to re-lay the deck boards )
I also have to sit down and make scale drawings of all the mast and spar ironwork before I can start fabricating it. The kit plans are a bit "lacking in measurements", and are primarily isometric drawings ( more fun ).
Studying the kit drawings, I realized that the original builder, had missed the true run of the waterline. Fortunately, it was too low, so all I have to do is mask from the correct waterline,up, and re-shoot the copper below it. ( detail,details  hock: )
We always learn far more from our own mistakes, than we will ever learn from another's advice.
The greatest place to live life, is on the sharp leading edge of a learning curve.
Lead me not into temptation.....I can find it myself!
Posts: 4,553
Threads: 100
Joined: Dec 2008
Spent the better part of yesterday "Hobby Shopping", looking for replacement castings for the on deck bilge pumps.
 couldn't find any, so had to scratch build two. They're painted and installed. ( each about the size of a BB, about 1/8", too small for a clear picture, but has five separate parts )
After posting this, decided to get the waterline done, before I get too far ahead. The hull looks much better with the waterline leveled, and at the right distance from the deck.
We always learn far more from our own mistakes, than we will ever learn from another's advice.
The greatest place to live life, is on the sharp leading edge of a learning curve.
Lead me not into temptation.....I can find it myself!
Posts: 4,553
Threads: 100
Joined: Dec 2008
Ironwork.....this will be an ongoing "drudgery" for a while....there's a lot of it to be made, and added to the model.
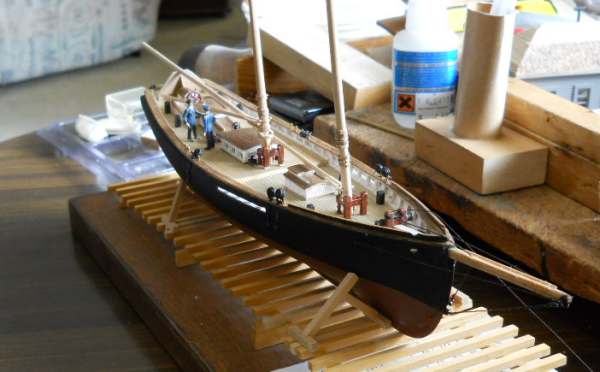
The first picture clearly shows the bowsprit, with the wood sail cleats mounted along the top, and the iron fittings on the stem, at the waterline. The bottom fitting has two eyes, the lower for the bobstay ( rigged ), and the upper one for the jib stay ( shackle in place ) The upper fitting, has a single eye for the Fore Stay ( shackle in place ), and a temporary line rigged to hold the shackle in the proper position .
The second picture, you can just see the bowsprit guys ( leading from the cap, to fittings on the hull, just below the rail ), and the bobstay ( leading from the cap, to the lower eye of the fitting on the stem )
I also made up some of the mast hoops, used to attach the sails to the masts, these can be seen in both shots,on the masts, just above the pinrails ( on deck, at the foot of each mast ).
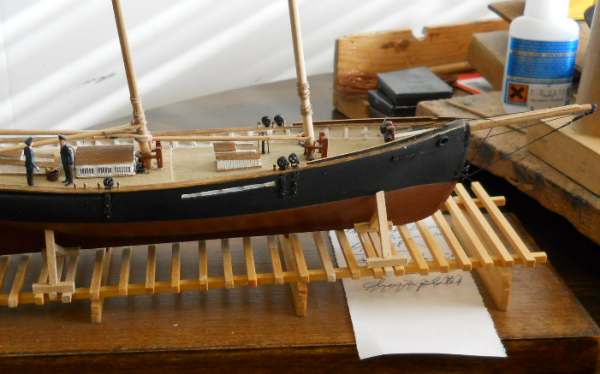
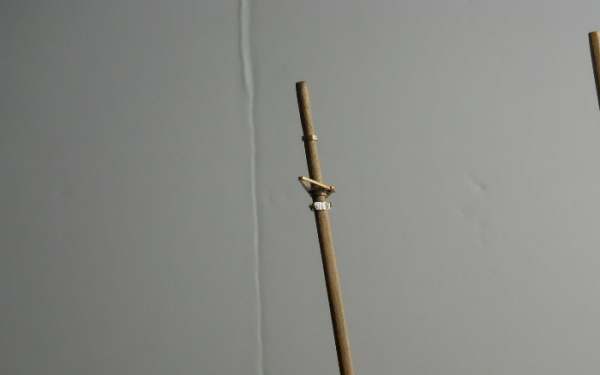
In this third picture, the top of the main mast. from the top, a mast collar, that will have a "crane" where the Peak Halliard, that is used to raise the outer end of the gaff , will have its upper block attached.
Below that, is a "spreader", for the Main Topmast Backstays, with a mortice for the tenon at the base of the topmast, in the forward 'extension'.
Below that, is another mast collar, that will have a "crane" where the Throat halliard, that is used to raise the gaff and sail at the gaff jaws, will have its upper block attached, and, on each side, over the attaching bolts, where the upper ends of the Main Shrouds are attached. The mast, at this point is 7/64"or, 2.778 mm, in diameter.
The very top of the mast will be squared off, and the Main cap ( when built ) will be mounted there. This fitting ( the next piece I have to build ) will also be the upper support for the topmast, and on the after end, the attachment point for the Topping lift block. ( The Topping lift holds the outer end of the Main Boom up, when the Mainsail is lowered, and furled, as it will be on the model ).
If I get a bit "Verbose" in describing things, please forgive me. This is a model railroad forum, and I have no idea how many here are familiar with the names and uses of all the bits, pieces, and fittings that go into a sailing vessel, so I'm trying to clarify each, to the best of my ability.
We always learn far more from our own mistakes, than we will ever learn from another's advice.
The greatest place to live life, is on the sharp leading edge of a learning curve.
Lead me not into temptation.....I can find it myself!
Posts: 3,732
Threads: 44
Joined: Dec 2008
It's coming along nicely Pete. I know you have a harbor scene on your layout, is this going to find it's way onto the layout?
Mike
Sent from my pocket calculator using two tin cans and a string
Posts: 4,553
Threads: 100
Joined: Dec 2008
Tyson Rayles Wrote:It's coming along nicely Pete. I know you have a harbor scene on your layout, is this going to find it's way onto the layout?
No, this one is meant to be a gift, a promise fulfilled.
I do have a newer issue of the kit, and just might build it as a waterline model for use on the modules, possibly as private yacht, with a slightly different cabin arrangement.
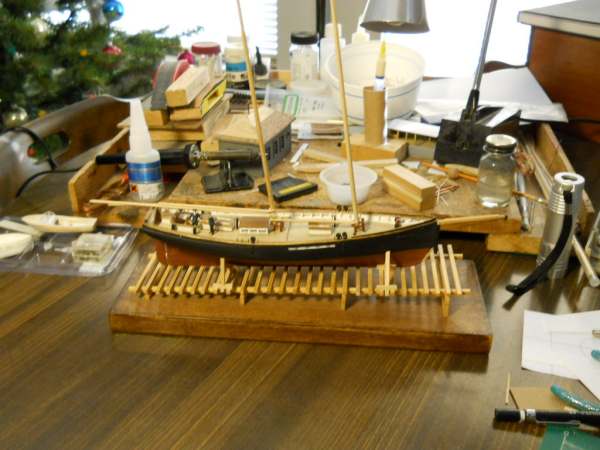
Here's Phantom, and the schooner from the modules:
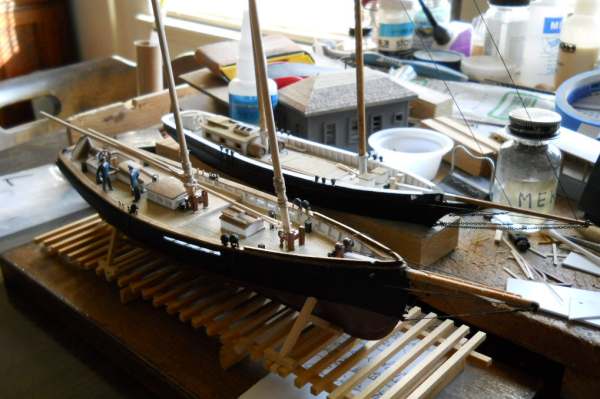
Construction on the smaller ( hull is approx. 8' shorter, but sparred length is only 3' less ) is on hold while Phantom gets done.
We always learn far more from our own mistakes, than we will ever learn from another's advice.
The greatest place to live life, is on the sharp leading edge of a learning curve.
Lead me not into temptation.....I can find it myself!
Posts: 5,859
Threads: 175
Joined: Dec 2008
Sumpter250 Wrote:......If I get a bit "Verbose" in describing things, please forgive me. This is a model railroad forum, and I have no idea how many here are familiar with the names and uses of all the bits, pieces, and fittings that go into a sailing vessel, so I'm trying to clarify each, to the best of my ability.
Well, I'm familiar with almost none of the terms, but nevertheless find it interesting. I have another model railroading friend who was evidently an avid sailor, and the three of us could probably have quite the conversation - my contribution would be limited to "What the heck are you two talking about now?" 
I'm all for voting that your project be allowed as part of the Challenge, too - even if it's not railroading, it most certainly is modelling.
Wayne
Posts: 4,553
Threads: 100
Joined: Dec 2008
One of my primary reasons for not asking to be part of the "competition", is that, unlike most every part of model railroading, model ship building only has common ground in that "model building" is going on, and it is unfamiliar territory.
If the others in the challenge want to include it, then so be it, and fall on.
There hasn't been much progress the last week, I've been "distracted". Should be back at it Wednesday, with yet more ironwork to do. Yeah, there are a lot of bits, pieces, and fittings to make.
We always learn far more from our own mistakes, than we will ever learn from another's advice.
The greatest place to live life, is on the sharp leading edge of a learning curve.
Lead me not into temptation.....I can find it myself!
Posts: 5,859
Threads: 175
Joined: Dec 2008
Well, I think that anyone who builds models, even if it's detailing commercially-available ones, has an appreciation for the skill and effort which is involved. Unless the time constraint is too limiting for what you wish to accomplish, I'm going to consider you "in" and will vote accordingly. 
Wayne
Posts: 921
Threads: 33
Joined: Dec 2008
If you "waterlined" the hull, it is almost close enough to HO scale to be placed in a harbor on an HO layout. For me, that is reason enough to allow it into the competition.
BTW, outstanding modelling! 
-Dave
|


 that thing makes my N scale stuff look huge. If you can deal with things that small we need to see what you can do in Zn3!

 hock: )
 couldn't find any, so had to scratch build two. They're painted and installed. ( each about the size of a BB, about 1/8", too small for a clear picture, but has five separate parts )

